
LT1 DIY Turbo Progress pics!

Thread Starter
Registered User
Joined: Nov 2005
Posts: 840
From: Nashville, TN
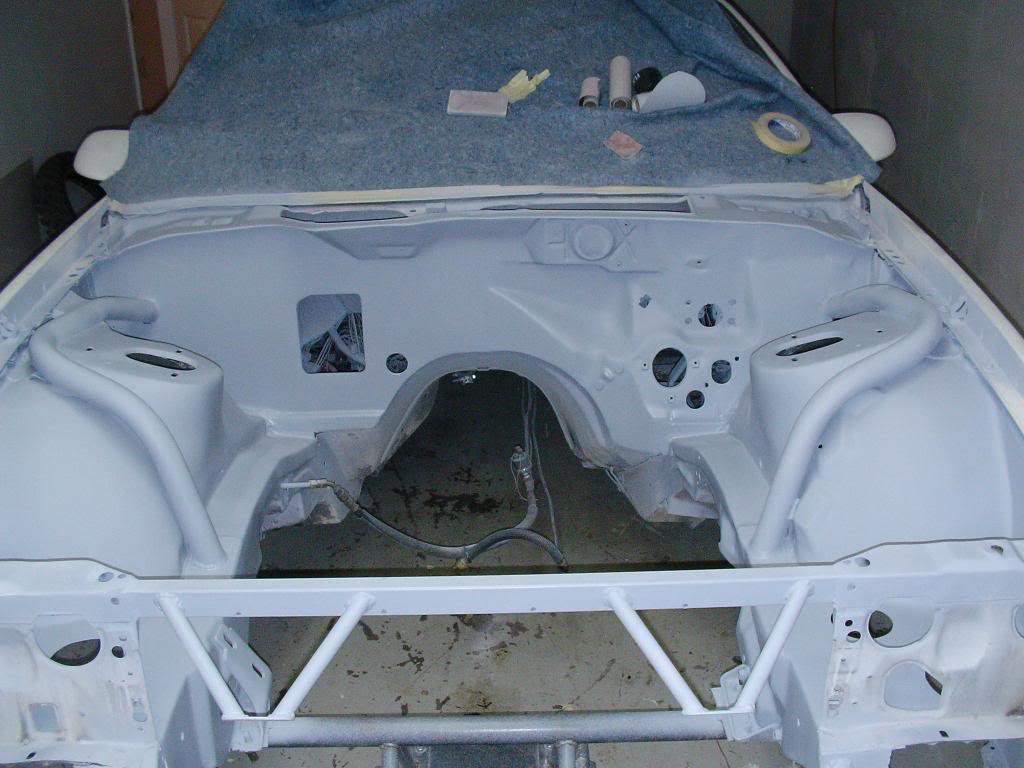
Well again Ive neglected to update this thread... my car keeps getting put on the back burner... The economy hasnt helped either... I musta been smoking crack in my last post thinking I would be bolting it all back together! hahaha Oh ya and I upgraded the turbo again... Traded the TC78 for a PT88!!
http://s88.photobucket.com/albums/k1...otank1127/Car/

http://s88.photobucket.com/albums/k1...otank1127/Car/

Thread Starter
Registered User
Joined: Nov 2005
Posts: 840
From: Nashville, TN
You will still finish yours before mine! lol what is this you 4th build since we started!? Ive got an excuse tho  ive been building this car to!
ive been building this car to!
Last edited by Tricked-Out-Toy; Jan 14, 2010 at 12:15 PM.


Thread Starter
Registered User
Joined: Nov 2005
Posts: 840
From: Nashville, TN
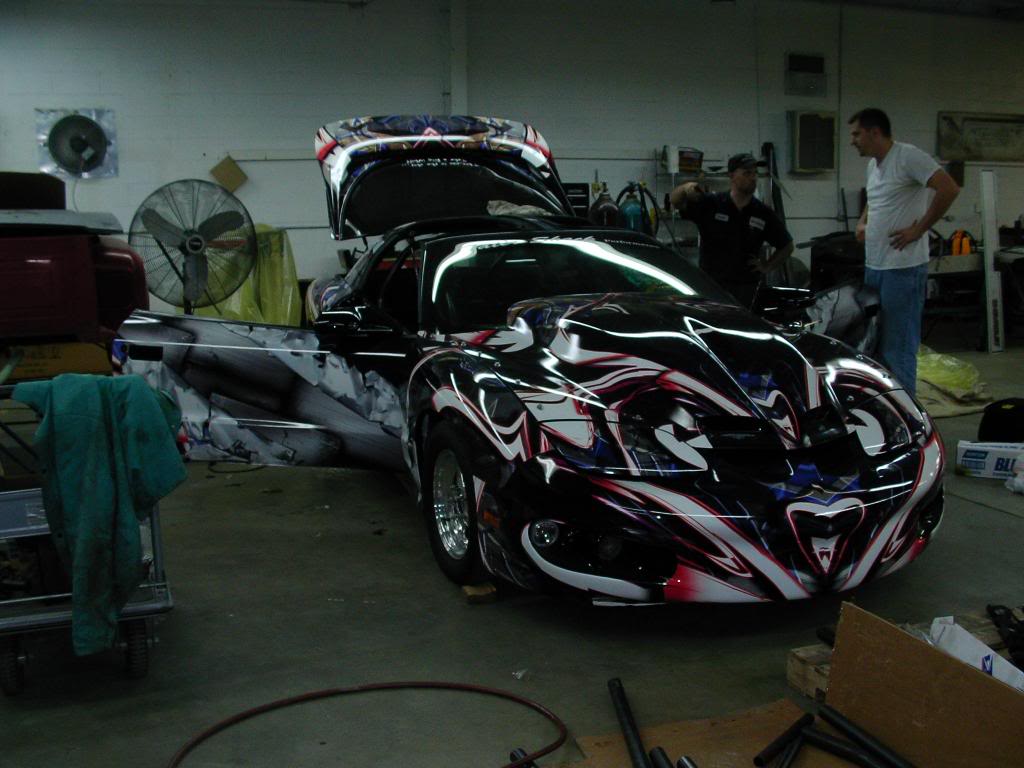
Its pretty much the only want to have cool graphics on a race car, paints way to expensive and you worry about hurting it.
Thread Starter
Registered User
Joined: Nov 2005
Posts: 840
From: Nashville, TN
Not to much of an Update but a few things have been purchased and im working on the Motor plate, it should be pretty Fin pimp when Im done!
Purchased
LS1 wiring harness
LSx Delphi Truck ignition coils.
New 44MM Waste gate
95lb/hr TFX injectors
Another 255 Walbro (twins baby!)
Took all that cardboard info as well as alternator and PS pump info and dropped it into autocad this morning to get a better idea on Fitment... Its a REAL quick cad drawing so its not that detailed but it takes care of all the big fitment issues..
Thread Starter
Registered User
Joined: Nov 2005
Posts: 840
From: Nashville, TN
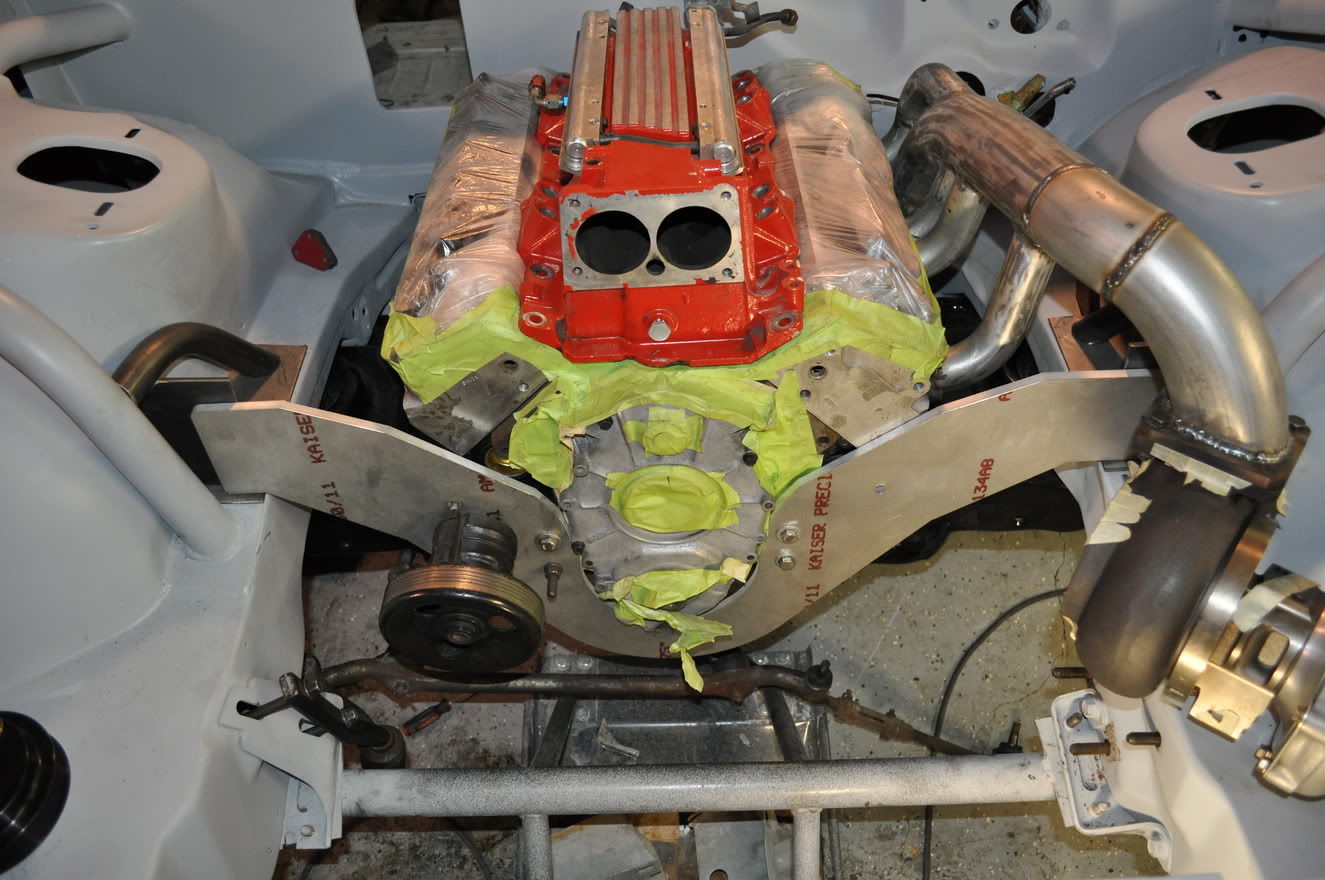
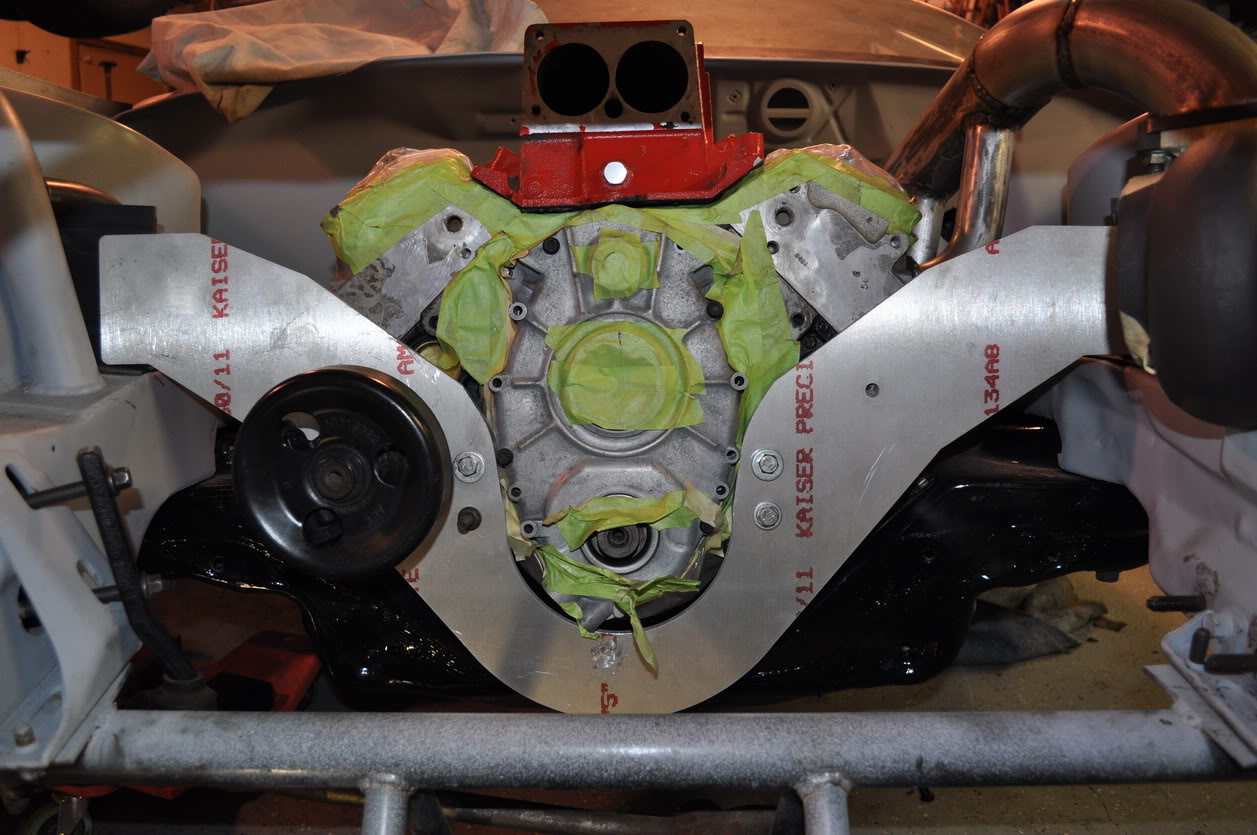
UPDATE! Ive been busy ordering more parts and I recieved the Motor plate from AEI on wends so Ive been mocking that up!
Parts ordered
EFI connection Cam and Crank sensors and brakcets. (after selling my opti I have $475 total in my LSx PCM conversion)
12 curcuit EZ wiring harness (completely ditched ALL the factory wiring)
ACR Flat touch digital switch panel (google videos of it! its friggin badass!)
ALL AN fittings and hose for the fuel system.
Super sweet carbon fiber valve covers!
AN Fittings and hose for the breather tank and coolant over flow.
CSR Electric LT1 Water pump.
Acura Legend Alternator, (its much smaller than factory GM alternators and should fit perfectly down low on the pass side of the motor plate)
Heres the mock up pics and one of the valve covers I know the aluminum look isnt as good as the blue and pink but its the best they could do....


Parts ordered
EFI connection Cam and Crank sensors and brakcets. (after selling my opti I have $475 total in my LSx PCM conversion)
12 curcuit EZ wiring harness (completely ditched ALL the factory wiring)
ACR Flat touch digital switch panel (google videos of it! its friggin badass!)
ALL AN fittings and hose for the fuel system.
Super sweet carbon fiber valve covers!
AN Fittings and hose for the breather tank and coolant over flow.
CSR Electric LT1 Water pump.
Acura Legend Alternator, (its much smaller than factory GM alternators and should fit perfectly down low on the pass side of the motor plate)
Heres the mock up pics and one of the valve covers
I know the aluminum look isnt as good as the blue and pink but its the best they could do....
Last edited by Tricked-Out-Toy; Feb 5, 2010 at 09:23 AM.
Thread Starter
Registered User
Joined: Nov 2005
Posts: 840
From: Nashville, TN
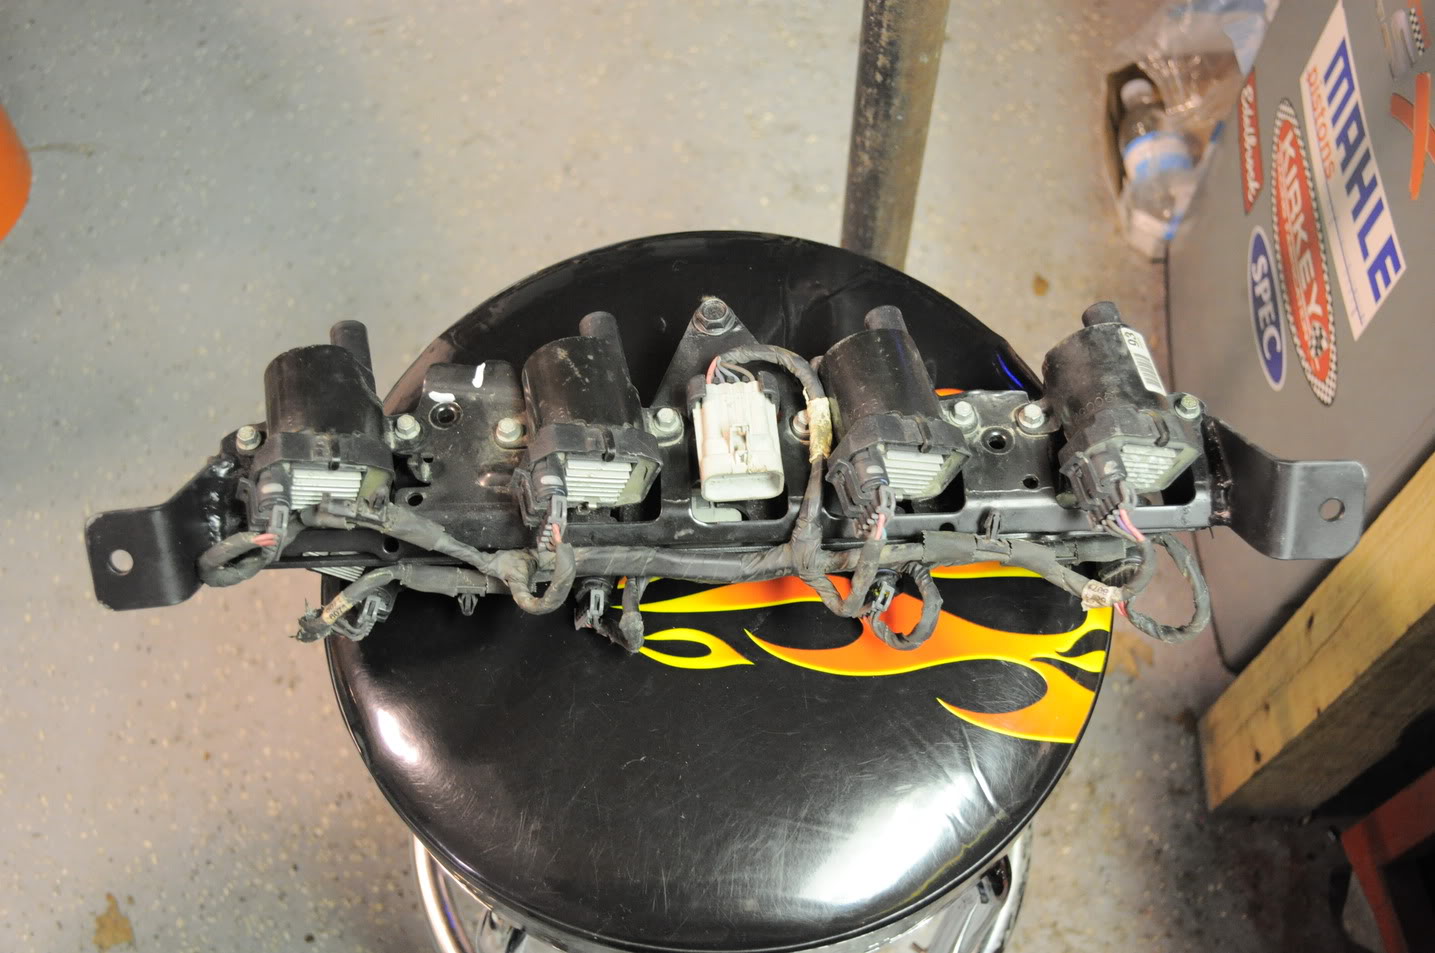
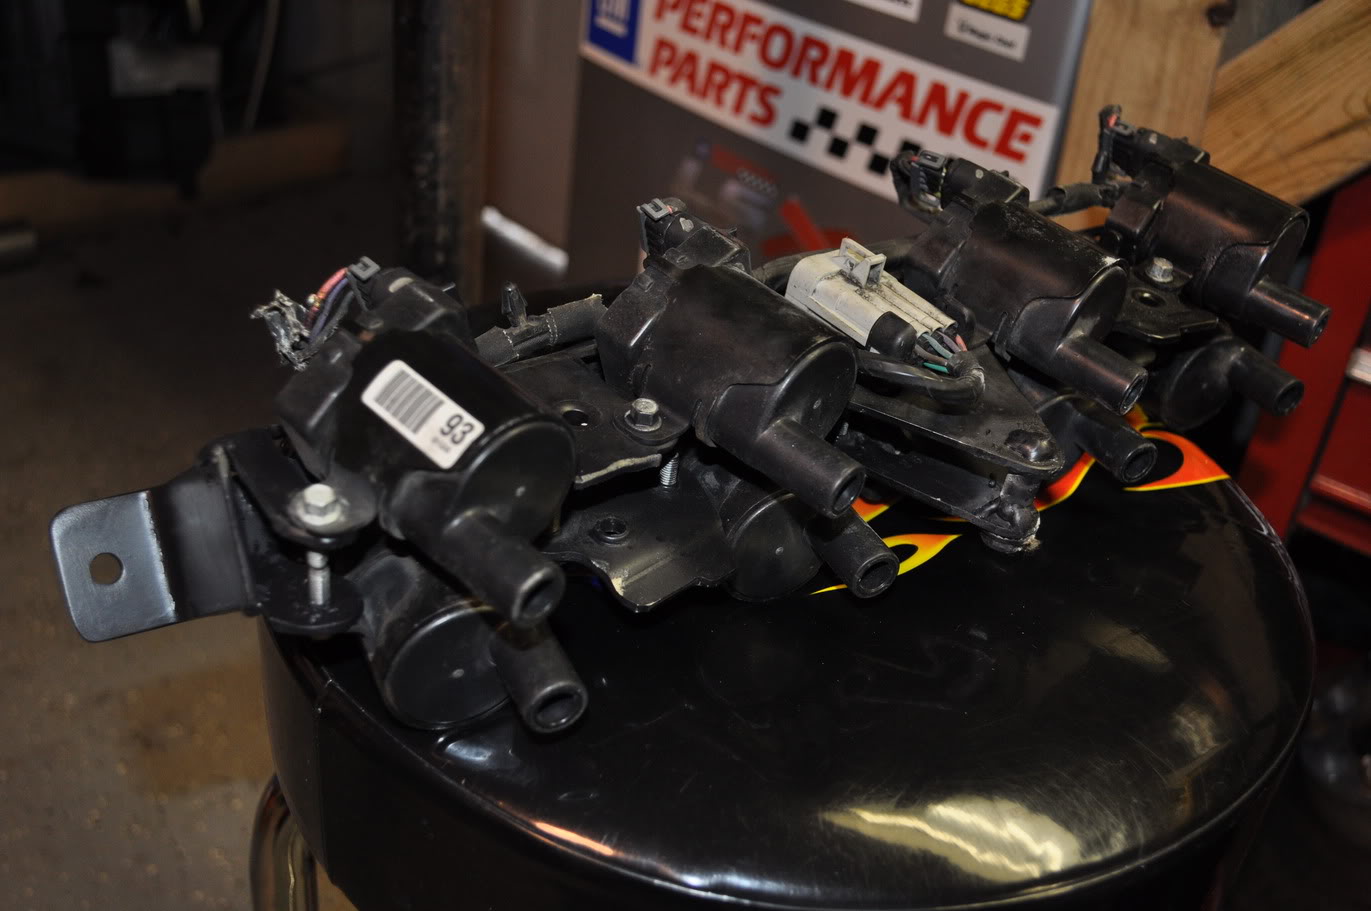
Got the coils mounted, used half of the truck coil bracketry added a couple ear and welded it all together so that while its under the dash each bank points toward its appropriate side.


Super Moderator
Joined: Feb 2000
Posts: 2,026
From: Japan
From my experience, you will have a hard time with the radiator at an angle leaned back like that. I had a giant Griffin radiator set similar to that and the car couldn't get cooled sufficiently, even with a good fan setup. I'd suggest getting the radiator more upright and plan on using all the factory plastic pieces (or sheet metal replacement) stuff that will get the most air up and through the radiator. Just my opinion.
Thread Starter
Registered User
Joined: Nov 2005
Posts: 840
From: Nashville, TN
From my experience, you will have a hard time with the radiator at an angle leaned back like that. I had a giant Griffin radiator set similar to that and the car couldn't get cooled sufficiently, even with a good fan setup. I'd suggest getting the radiator more upright and plan on using all the factory plastic pieces (or sheet metal replacement) stuff that will get the most air up and through the radiator. Just my opinion.
Super Moderator
Joined: Feb 2000
Posts: 2,026
From: Japan
Angle has no affect on the radiators ability to cool. Proper fan shrouds and air flow are whats important... Ill have two fans in shrouds on the back side and the radiator will be shrouded to the intercooler with a third pusher fan. This setup works great on C5's whos radiator is mounted at a more extreme angle. cooling is one of the biggest concerns and feel that ive covered all my bases.
How do you think air will flow through the radiators when you're driving down the road? Keep in mind how the system worked when it was stock.
Good luck!

Thread Starter
Registered User
Joined: Nov 2005
Posts: 840
From: Nashville, TN
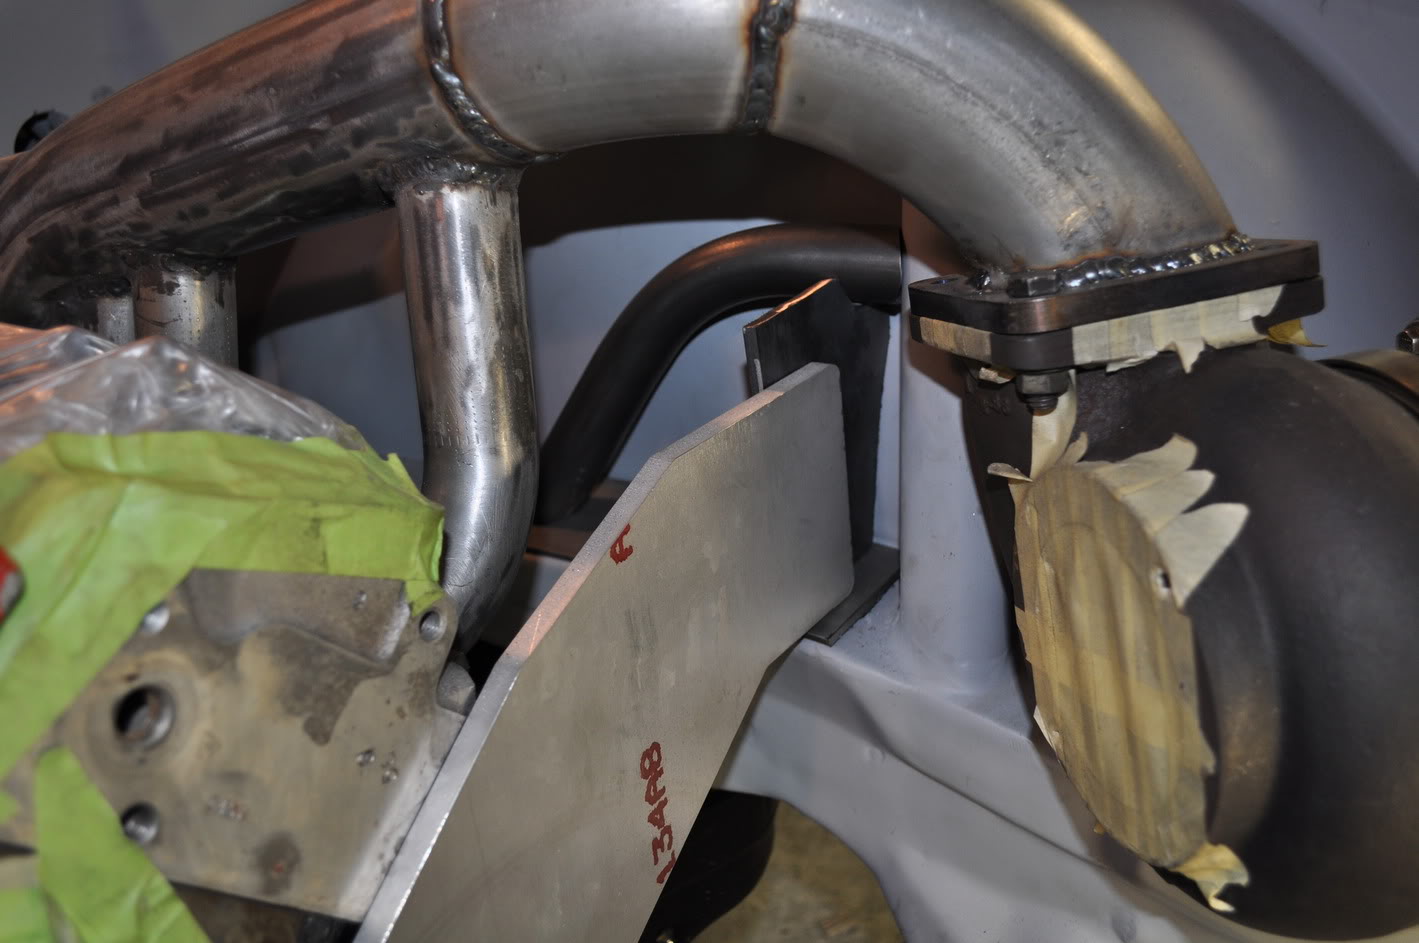
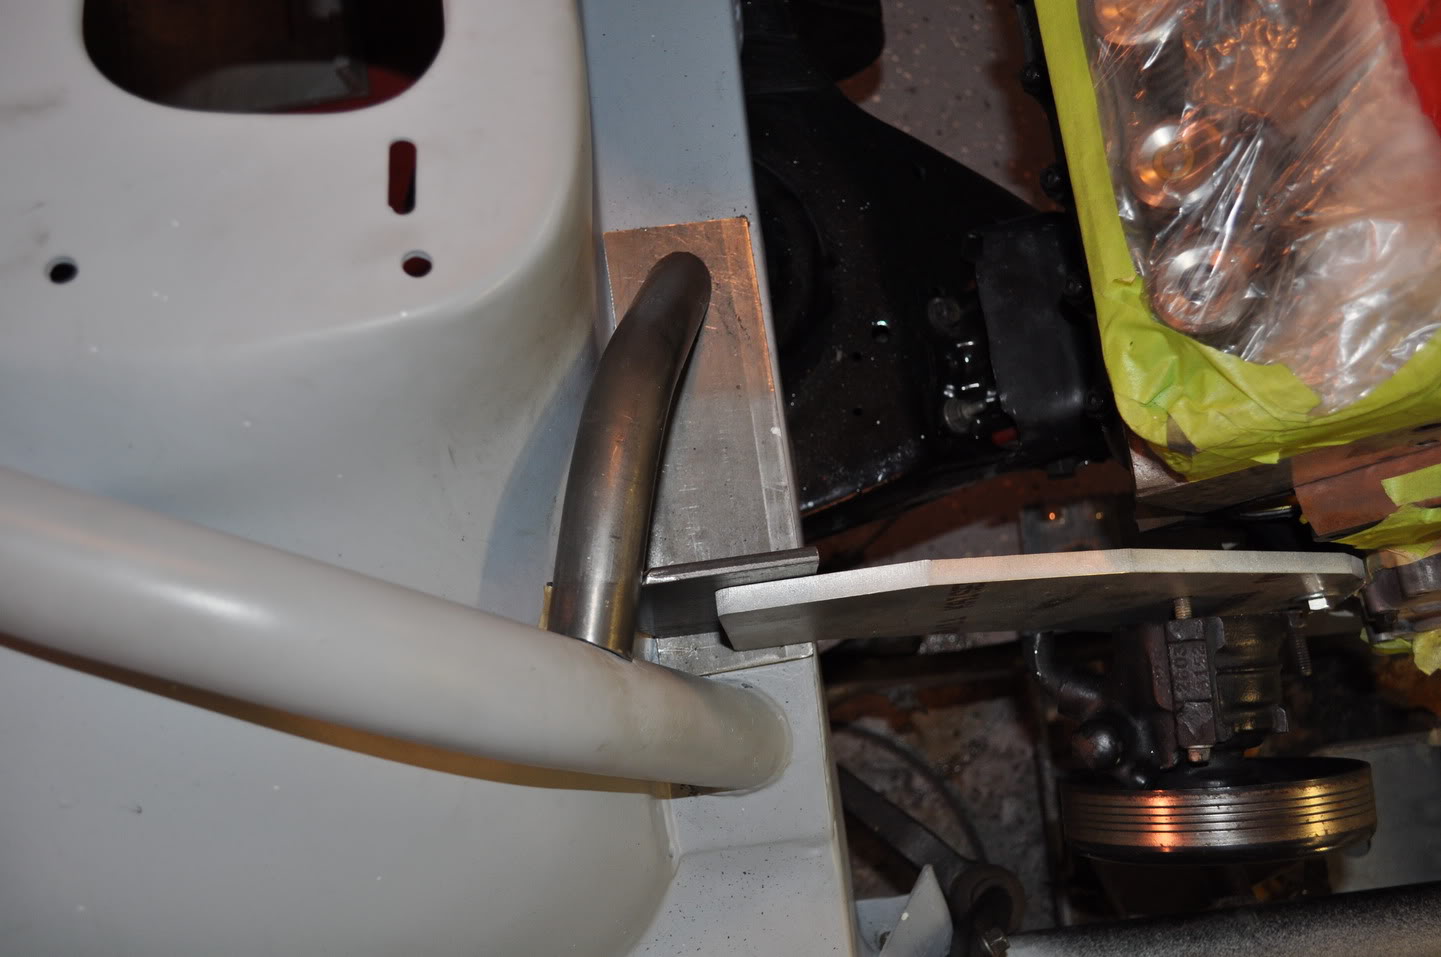
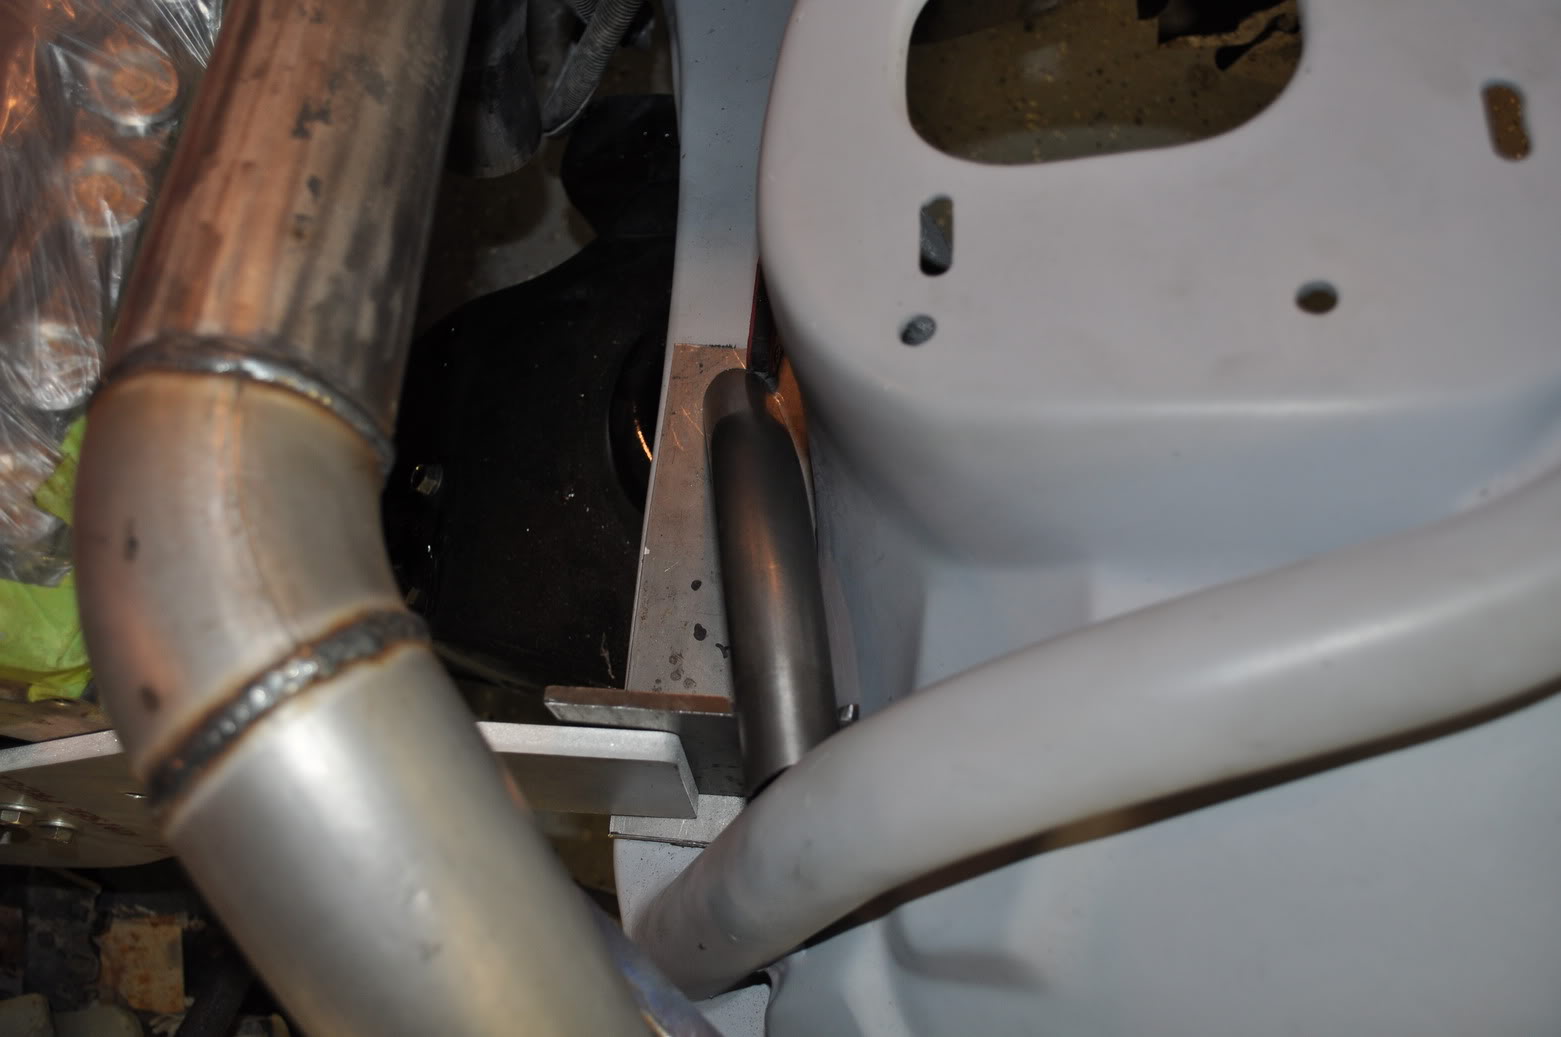
Thats the goal! I made some good progress this weekend, the motor plate is completely mounted, I need to fab up the travel limiter. I also nothed and reinforced the frame to fit the alternator down low on the pass side. I also notched the frame on the driver side to fit the oil drain fitting. I also welded up holes I dont need on the water pump and intake, I added a AN bung to the intake to pull vacuum out of the engine through the valley instead of the valve covers. Im also having my buddy machine a new alternator pulley.....
I still have a TON of work, the main body wiring harness needs to be laid out and the fuse box mounted, also need to repin the LTx hanress with the LSx harness. Window nets need to be installed, the rest of the cage needs to be painted, 4th gen door panels need to be modified..... the list goes on and on lol I dont know if ill be able to get it painted before the shoot out but its looking pretty good that it will be running!
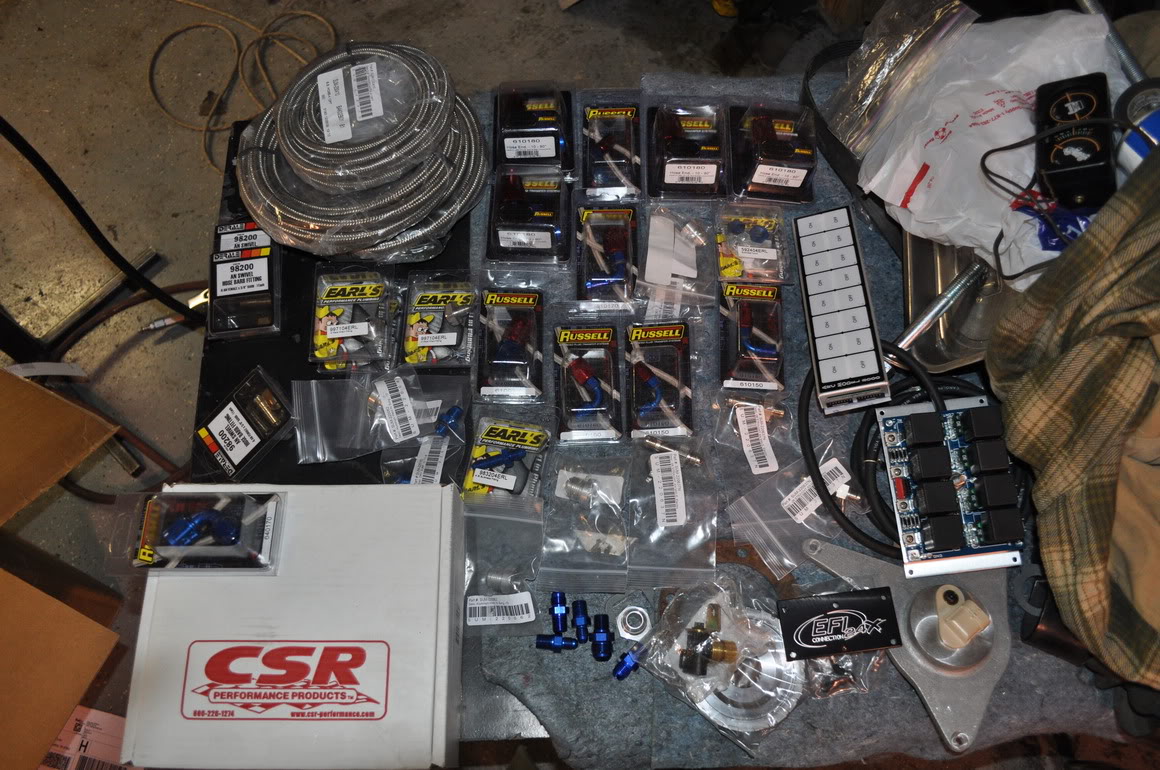
lot of parts came in last week!
I still have a TON of work, the main body wiring harness needs to be laid out and the fuse box mounted, also need to repin the LTx hanress with the LSx harness. Window nets need to be installed, the rest of the cage needs to be painted, 4th gen door panels need to be modified..... the list goes on and on lol I dont know if ill be able to get it painted before the shoot out but its looking pretty good that it will be running!
lot of parts came in last week!
