
How to replace the front seal & pull/install hub


Thread Starter
Registered User
Joined: Oct 2006
Posts: 273
From: Santa Barbara, Ca
How to replace the front seal & pull/install hub
Originally on the Impala SS forum :
http://www.impalasuperstore.com/nais...TOPIC_ID=42495
In tribute to my wifes fallen '95 Camaro Z28 I am reposting the whole
thread here on the CamaroZ28 forum. Hopefully this helps out a few :
Today I finished up replacing the front seal on my wifes '95 Camaro Z28.
With 180,000 on the clock, its on its second front seal - a GM part. I
was not very happy with the fit of the seal (too loose in the cover) &
and started leaking about a week after it was installed. Its made a
bit of a mess over the last year - my attention is spread over a couple
cars, so sometimes they have to wait. I bought the Chicago Rawhide
from Kragen part number 17286. Fits nice, its the same one I have in
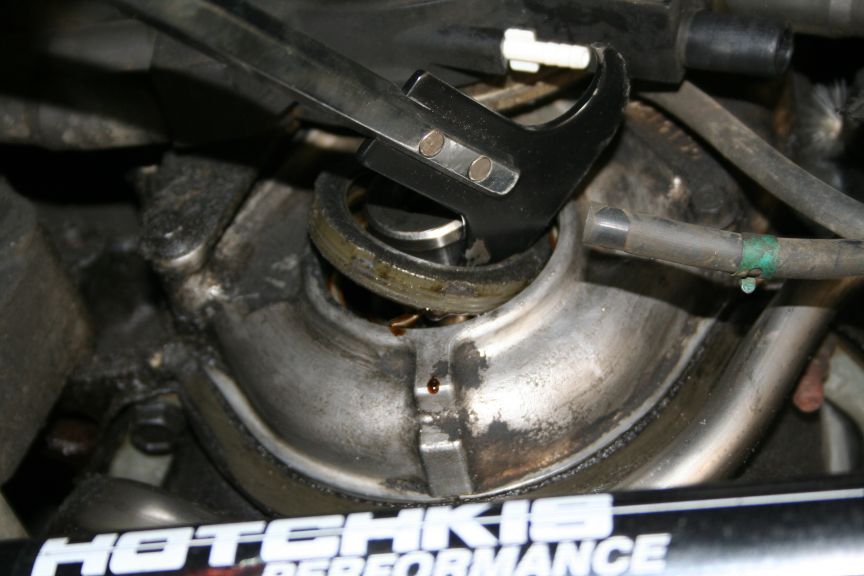
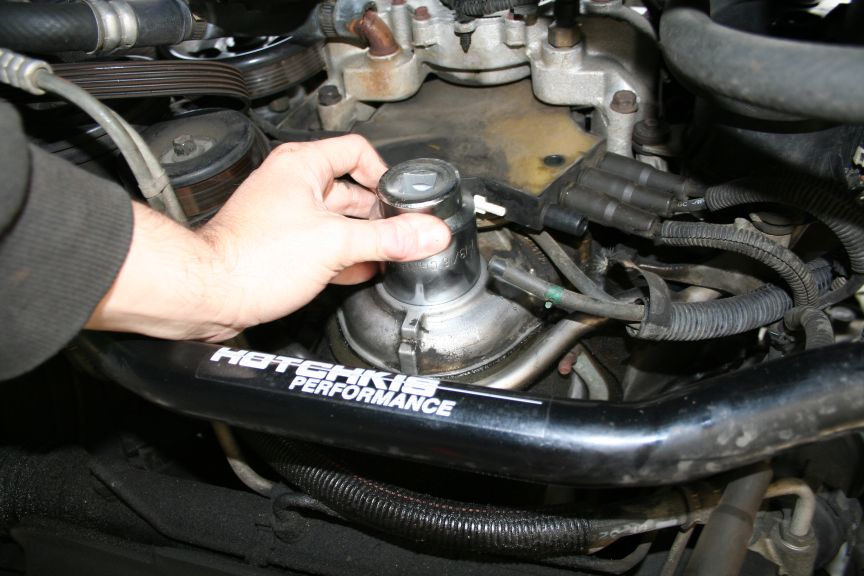
the Impala clone. If the front of your engine looks like this .....
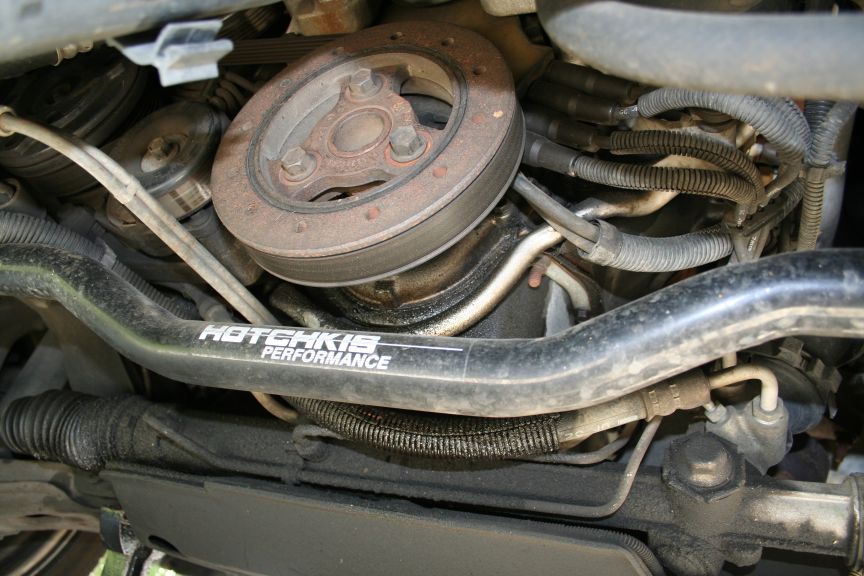
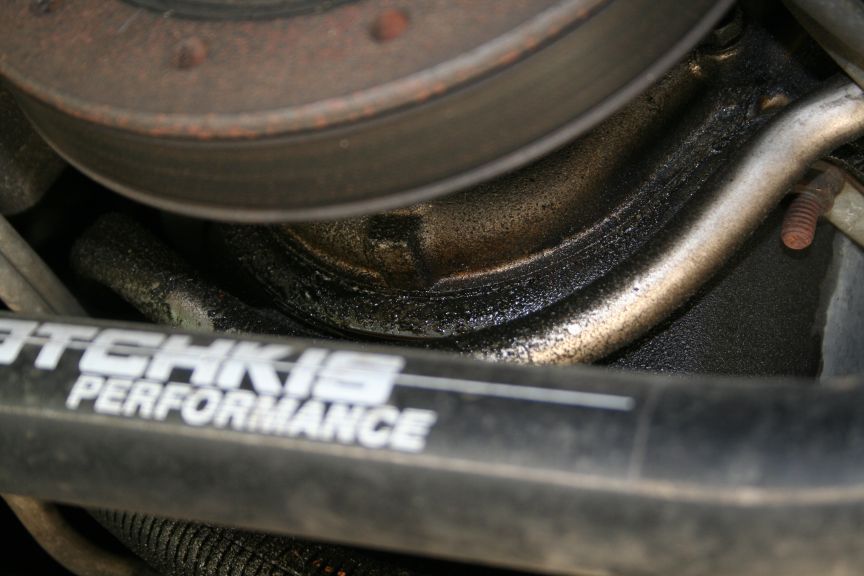
.... then it might be time to do this, make sure you check the intake
manifold bolts first, as they loosen with age, and can allow the intake
to leak down the front and back of the engine. This will look like the
front and rear seals have failed. Retorqing my Impala clone's intake
a couple years ago - all but completely stopped the leaking!
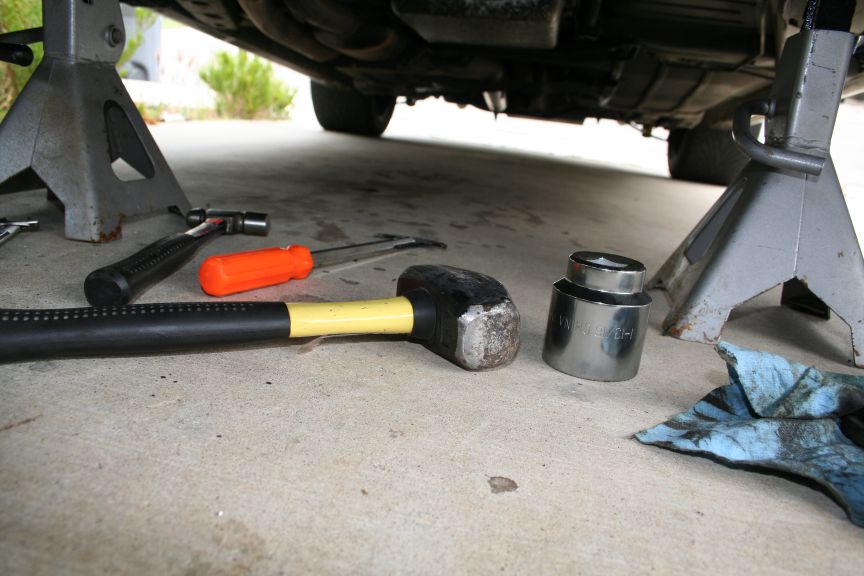
Read all the steps first, and have all the tools (special ones) made
before starting the fun. First you start by removing the belt :
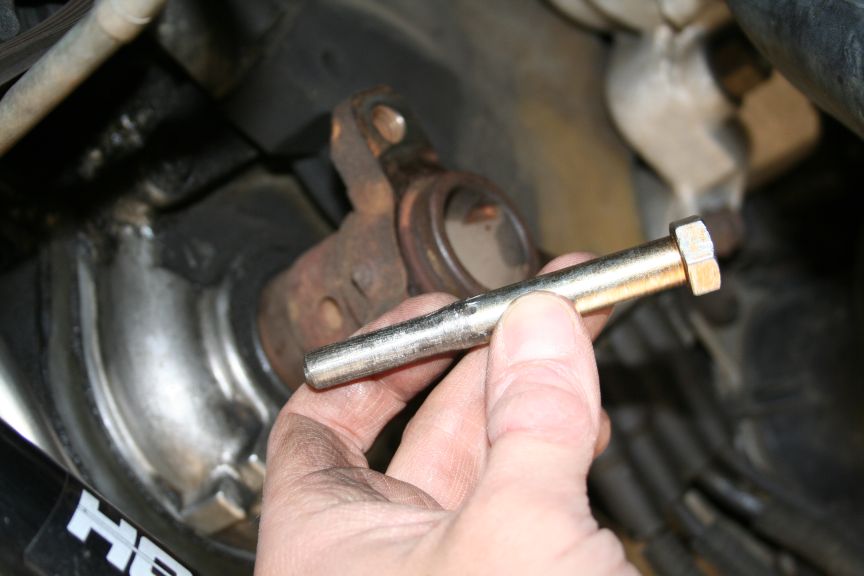
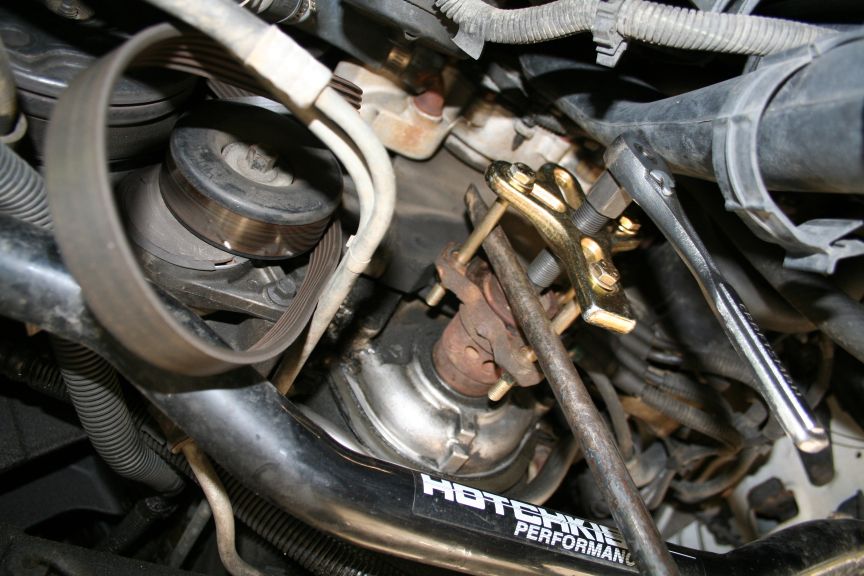
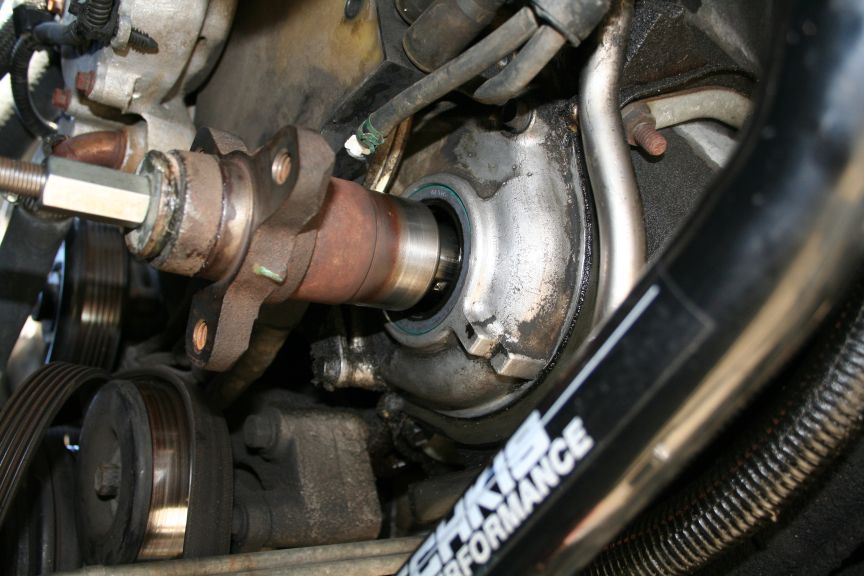
I took a grade 8, 7/16-20 bolt and ground the threads off. This you
need to reach into the crank, and bottom in the threaded hole. There
is a 1/2 hole in the crank hub, which does NOT allow the use of that
common puller everyone has. I also drilled a shallow hole in the head
to give the puller something to center on.
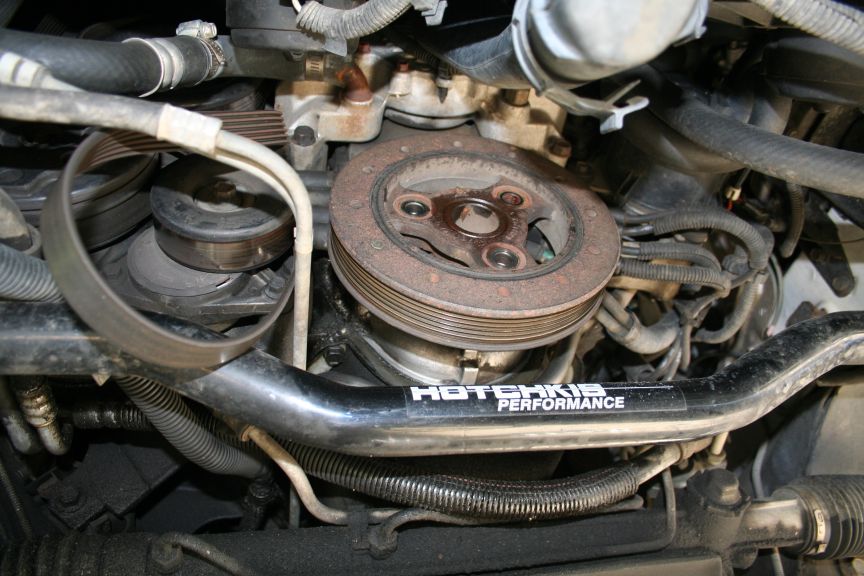
Remove the crank hub bolt, and then remove the three bolts that hold
the pulley on the hub. You dont really need a puller to remove it, it
should come off by working it around a little, and some PB Blaster. In
goes the modified bolt shown above, and then the common puller. There
is not much room in the Camaro compartment, so I used a shorter puller
bolt from a tierod remover I have.
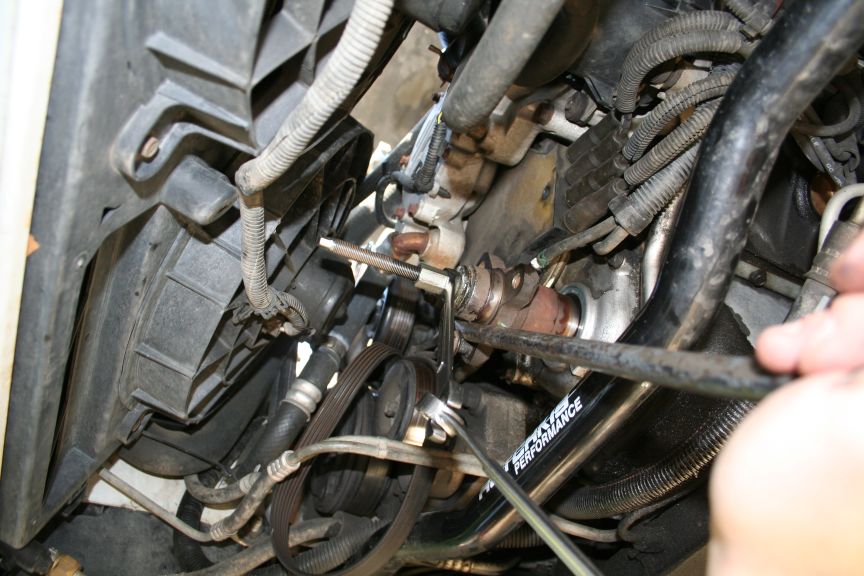
Its off ...
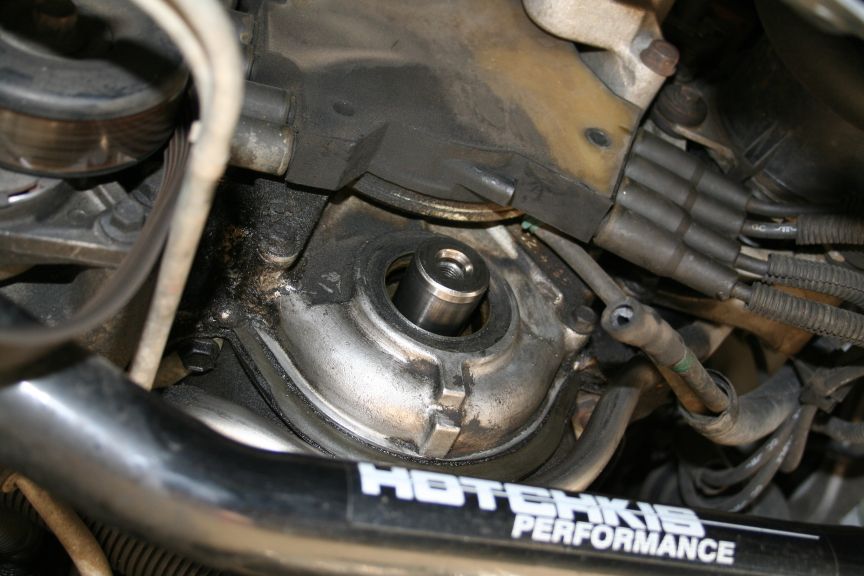
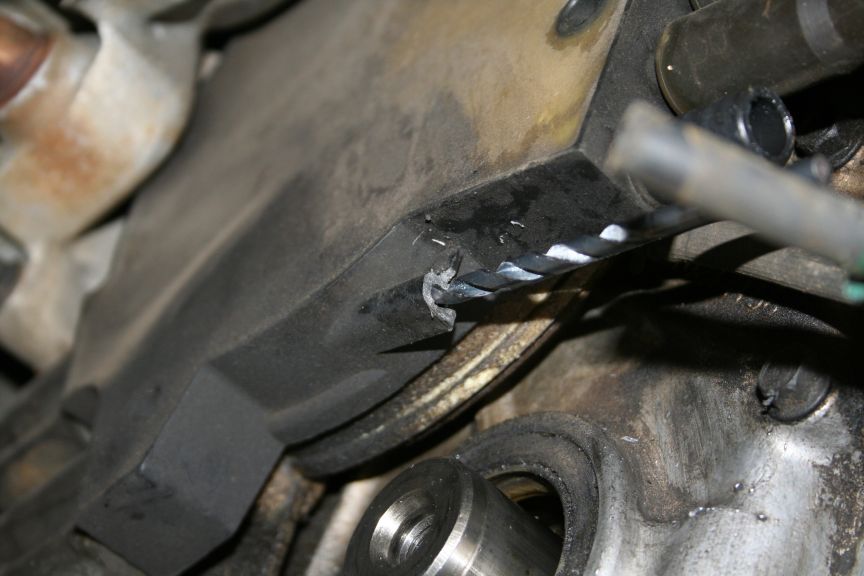
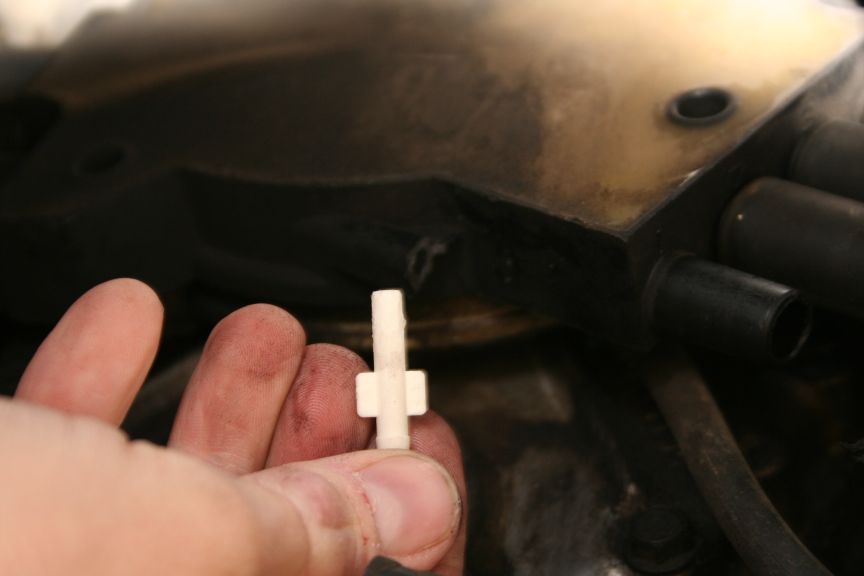
Now this was unfortunate, and something to watch out for. During that
removal process, the hub turned and broke the lower vacuum bibb off of
the opti-spark - lovely huh?
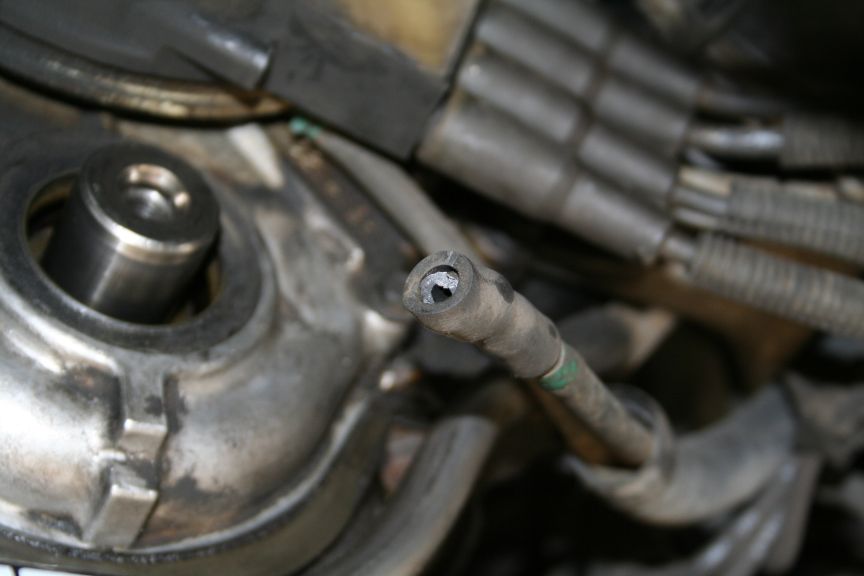
So I used a 3/16 drill bit by hand to open up the hole ...
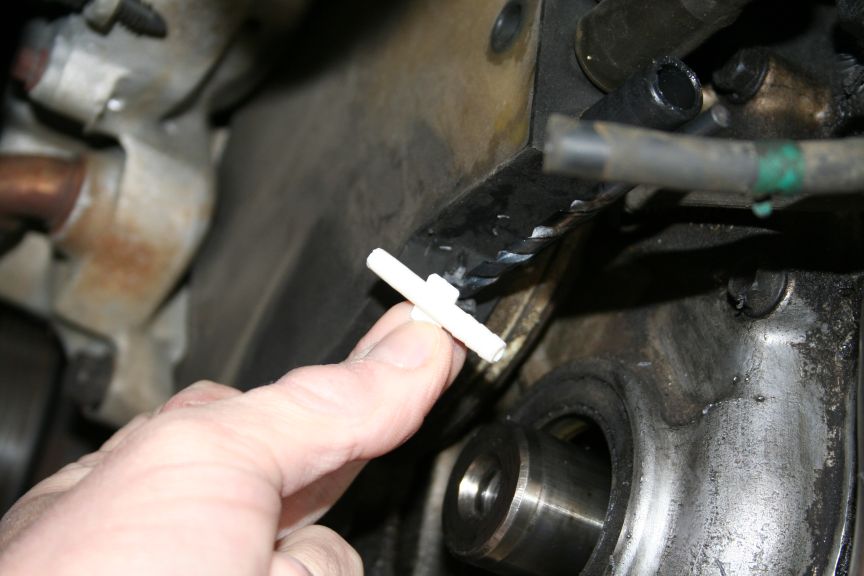
Bought part number 47303 Vacuum Connector, it comes with two - just in
case. I carefully shaved the bumps off one side, to more easily fit in
to the hole opened up in the opti .....
Tom
http://www.impalasuperstore.com/nais...TOPIC_ID=42495
In tribute to my wifes fallen '95 Camaro Z28 I am reposting the whole
thread here on the CamaroZ28 forum. Hopefully this helps out a few :
Today I finished up replacing the front seal on my wifes '95 Camaro Z28.
With 180,000 on the clock, its on its second front seal - a GM part. I
was not very happy with the fit of the seal (too loose in the cover) &
and started leaking about a week after it was installed. Its made a
bit of a mess over the last year - my attention is spread over a couple
cars, so sometimes they have to wait. I bought the Chicago Rawhide
from Kragen part number 17286. Fits nice, its the same one I have in
the Impala clone. If the front of your engine looks like this .....
.... then it might be time to do this, make sure you check the intake
manifold bolts first, as they loosen with age, and can allow the intake
to leak down the front and back of the engine. This will look like the
front and rear seals have failed. Retorqing my Impala clone's intake
a couple years ago - all but completely stopped the leaking!
Read all the steps first, and have all the tools (special ones) made
before starting the fun. First you start by removing the belt :
I took a grade 8, 7/16-20 bolt and ground the threads off. This you
need to reach into the crank, and bottom in the threaded hole. There
is a 1/2 hole in the crank hub, which does NOT allow the use of that
common puller everyone has. I also drilled a shallow hole in the head
to give the puller something to center on.
Remove the crank hub bolt, and then remove the three bolts that hold
the pulley on the hub. You dont really need a puller to remove it, it
should come off by working it around a little, and some PB Blaster. In
goes the modified bolt shown above, and then the common puller. There
is not much room in the Camaro compartment, so I used a shorter puller
bolt from a tierod remover I have.
Its off ...
Now this was unfortunate, and something to watch out for. During that
removal process, the hub turned and broke the lower vacuum bibb off of
the opti-spark - lovely huh?
So I used a 3/16 drill bit by hand to open up the hole ...
Bought part number 47303 Vacuum Connector, it comes with two - just in
case. I carefully shaved the bumps off one side, to more easily fit in
to the hole opened up in the opti .....
Tom
Last edited by sbca96; Feb 1, 2009 at 10:14 PM. Reason: Picture relocation
Thread Starter
Registered User
Joined: Oct 2006
Posts: 273
From: Santa Barbara, Ca
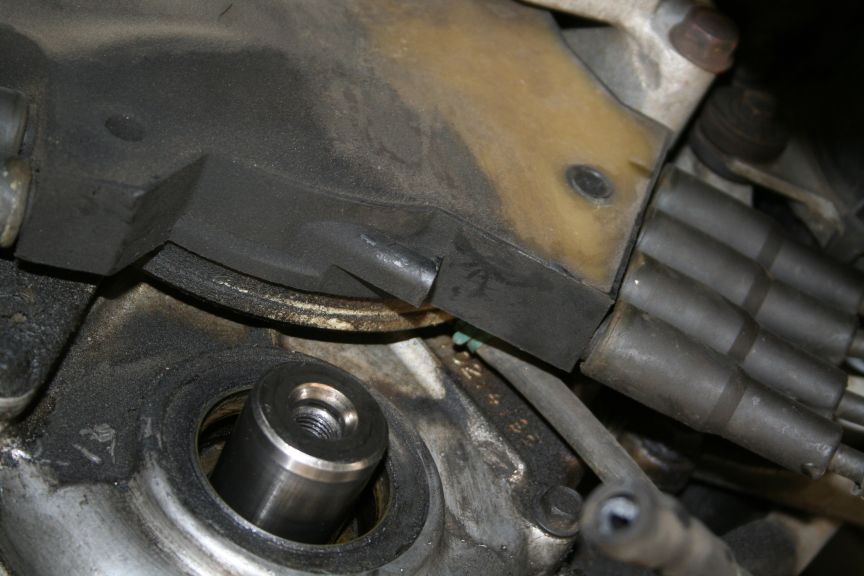
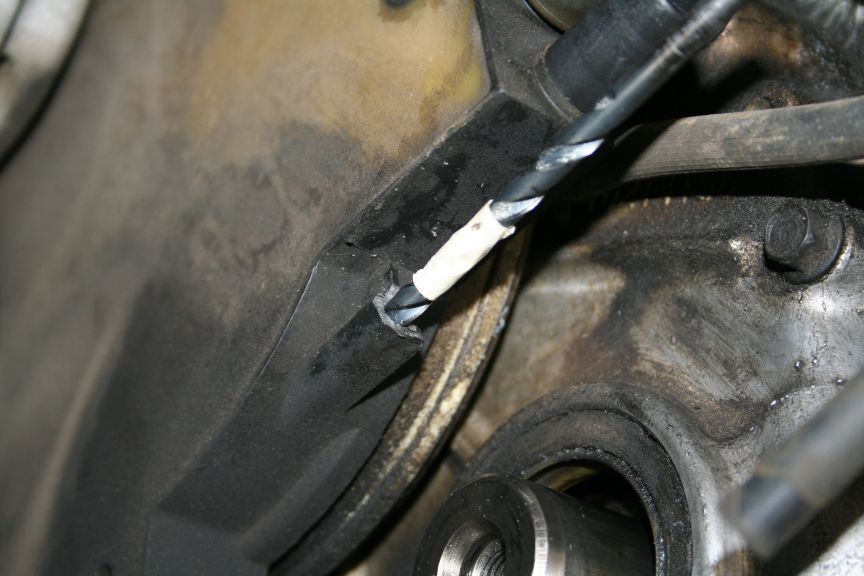
Then the next size up drill to about 75% of the length of the vacuum
connector I got from Kragen. Used some tape to guide depth.
Then some super glue gel ..
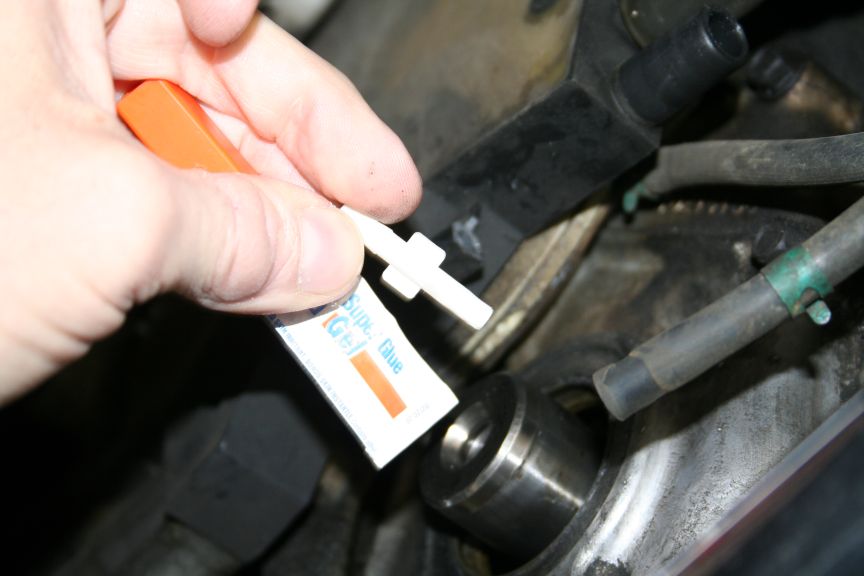
Then pushed it into the hole.
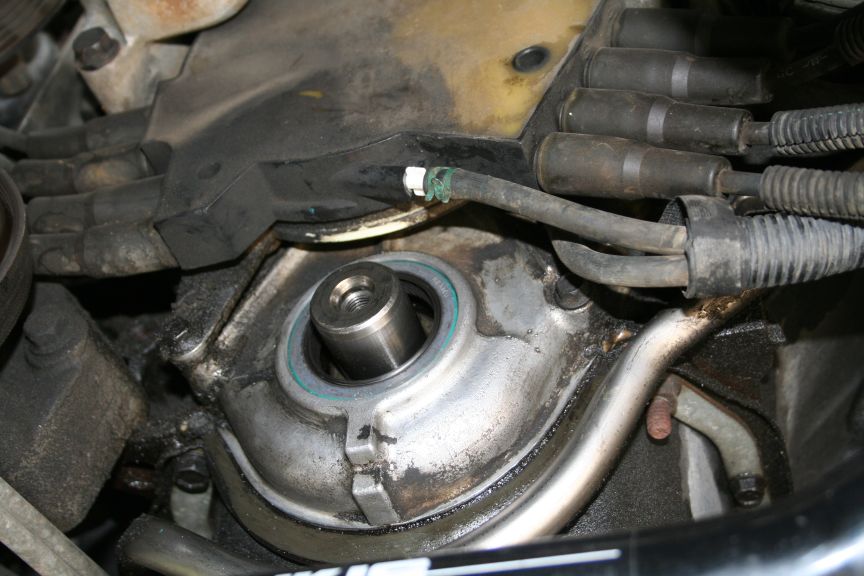
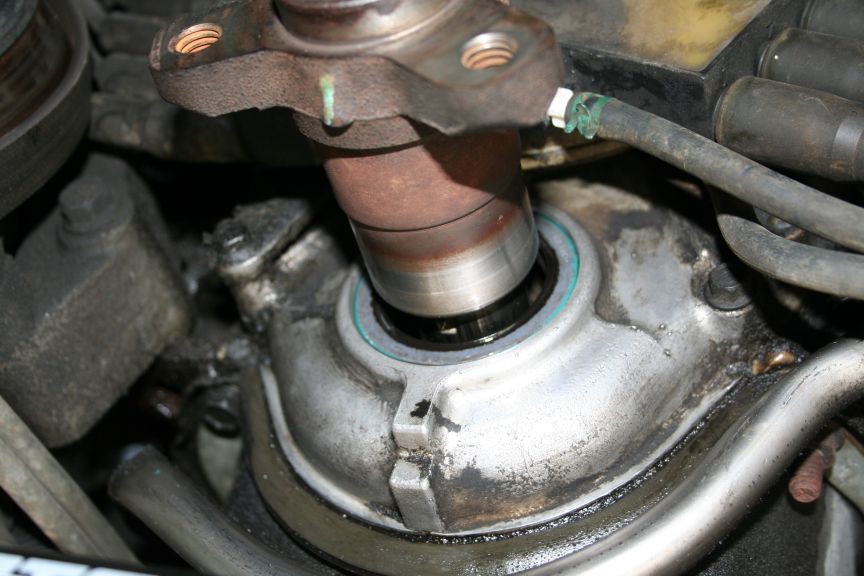
Once that emergency was repaired, I used the seal puller & popped out
the old seal.
Here is the Chicago Rawhide and the GM seal.
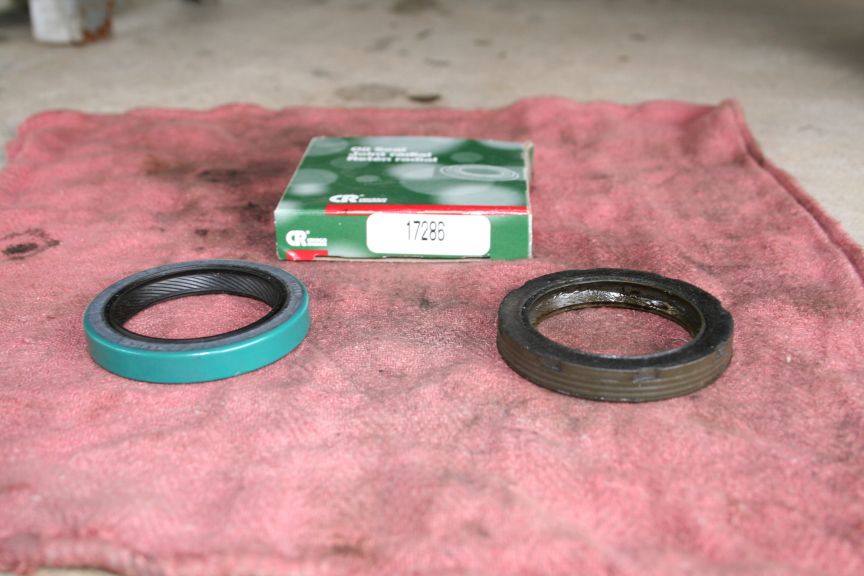
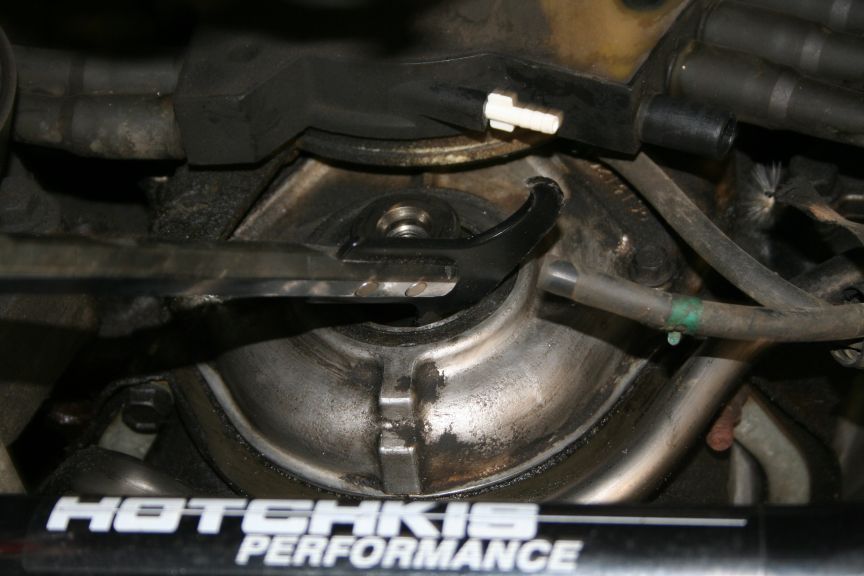
Used a 1-13/16 socket to drive the seal in.
But I found I needed to remove the silencer tube hanging down from the
intake, so off came the intake elbow.
Tom
connector I got from Kragen. Used some tape to guide depth.
Then some super glue gel ..
Then pushed it into the hole.
Once that emergency was repaired, I used the seal puller & popped out
the old seal.
Here is the Chicago Rawhide and the GM seal.
Used a 1-13/16 socket to drive the seal in.
But I found I needed to remove the silencer tube hanging down from the
intake, so off came the intake elbow.
Tom
Thread Starter
Registered User
Joined: Oct 2006
Posts: 273
From: Santa Barbara, Ca
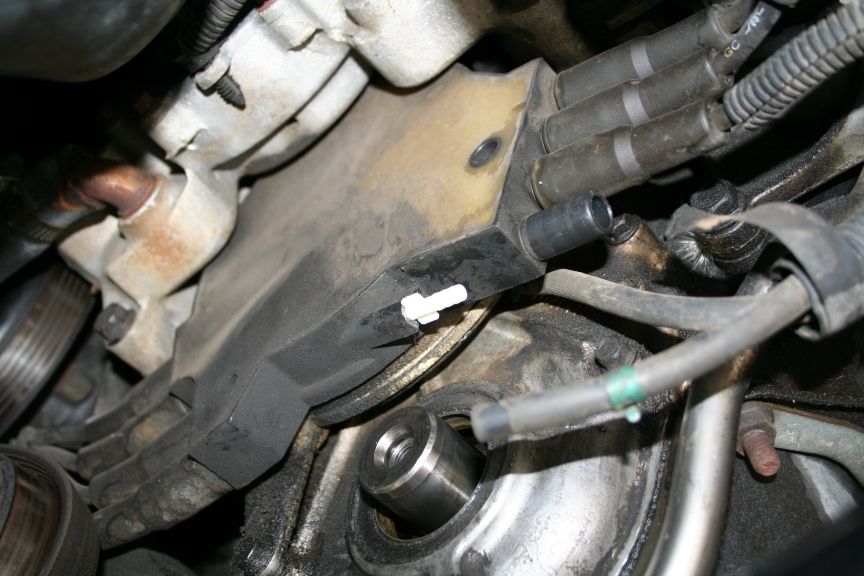
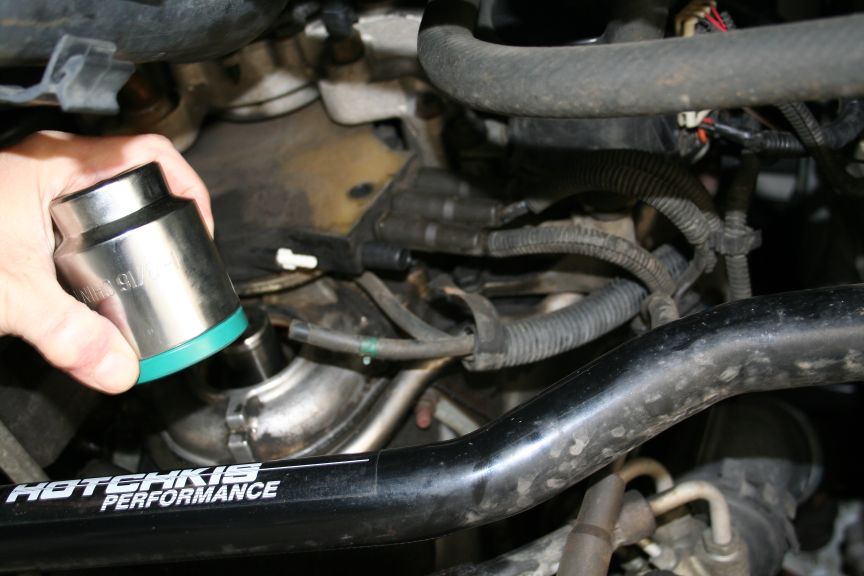
Drove the seal in until it stopped.
My BFH ... the little ball peen wasnt up to the challenge.
Installed seal, and installed vacuum hose.
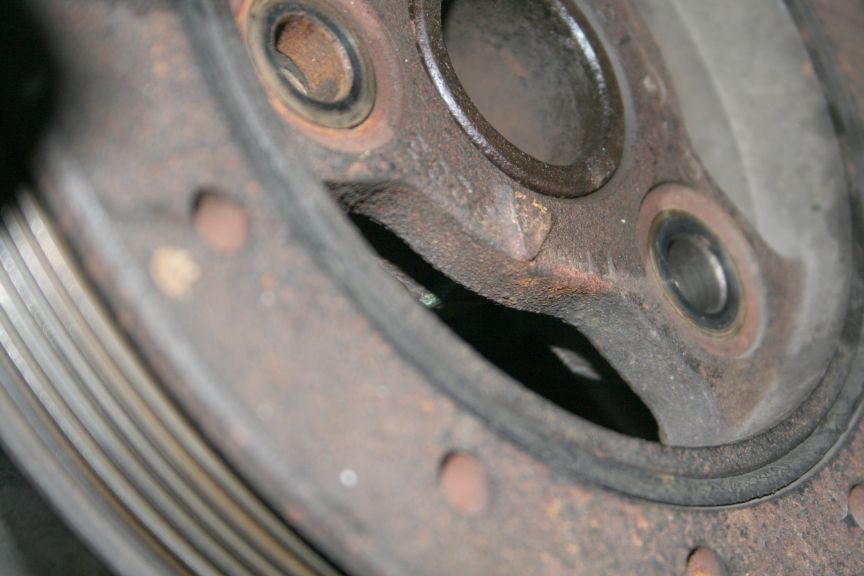
This I found worth sharing. The LT1 has a key, but it's not actually
used. When I disassembled it, I found that the arrow on the hub is in
line with the key slot - that's not used. So I found to reassemble it
easily, rotate the crank so the key is down, and in line with the flat
on the timing cover.
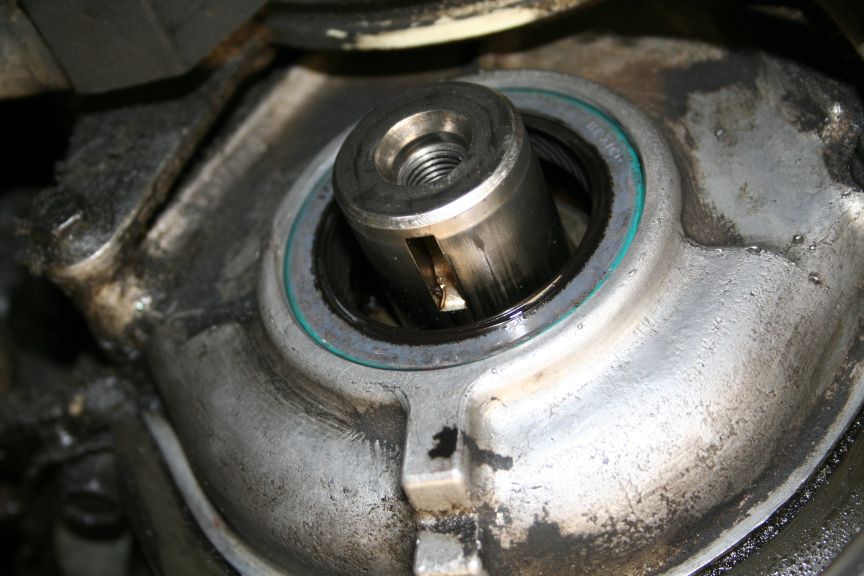
Then line everything up with that flat, the pulley also has a triangle
that lines up with the arrow. Neat huh?
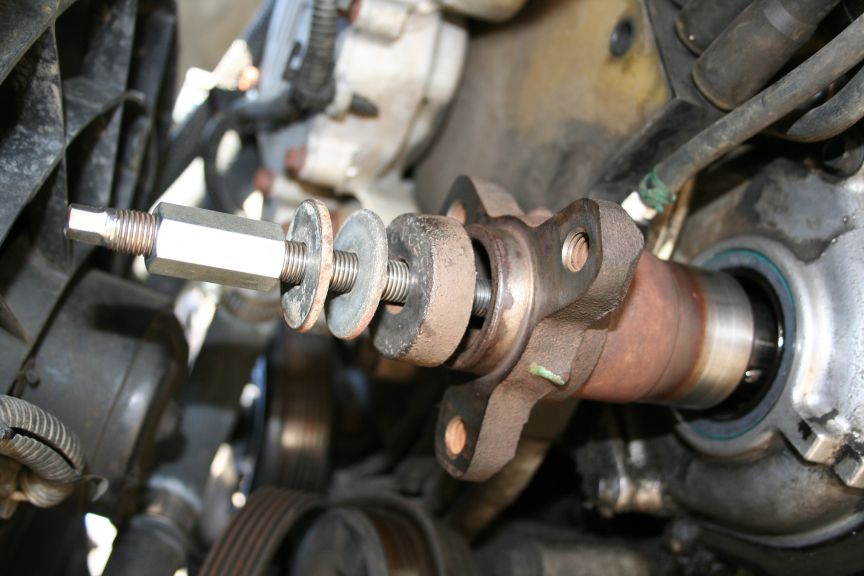
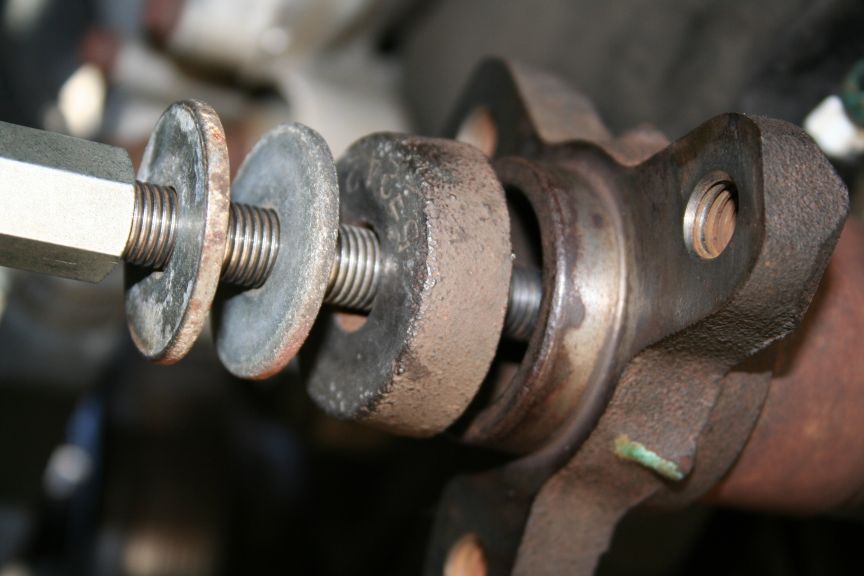
I got a piece of 7/16-20 all thread, about 8 inches long, and filed a
5/16 hex on the end. I got a 7/16-20 coupling nut to spread the load
and some washers. One thing you wont be able to find is that thick
piece of cast iron. Thats the drivers side transmission spacer off an
early 60's Studebaker automatic. You can just use more washers. Make
sure that the hole is big enough in the washers, when its tightened
down the washer will distort and close up the hole! You can use a few
washers that fit INTO the bore in the hub, and use plenty of grease to
let them act as bearings. The coupling nut might be long enough to be
able to still grab with a wrench.
Tom
My BFH ... the little ball peen wasnt up to the challenge.
Installed seal, and installed vacuum hose.
This I found worth sharing. The LT1 has a key, but it's not actually
used. When I disassembled it, I found that the arrow on the hub is in
line with the key slot - that's not used. So I found to reassemble it
easily, rotate the crank so the key is down, and in line with the flat
on the timing cover.
Then line everything up with that flat, the pulley also has a triangle
that lines up with the arrow. Neat huh?
I got a piece of 7/16-20 all thread, about 8 inches long, and filed a
5/16 hex on the end. I got a 7/16-20 coupling nut to spread the load
and some washers. One thing you wont be able to find is that thick
piece of cast iron. Thats the drivers side transmission spacer off an
early 60's Studebaker automatic. You can just use more washers. Make
sure that the hole is big enough in the washers, when its tightened
down the washer will distort and close up the hole! You can use a few
washers that fit INTO the bore in the hub, and use plenty of grease to
let them act as bearings. The coupling nut might be long enough to be
able to still grab with a wrench.
Tom
Thread Starter
Registered User
Joined: Oct 2006
Posts: 273
From: Santa Barbara, Ca
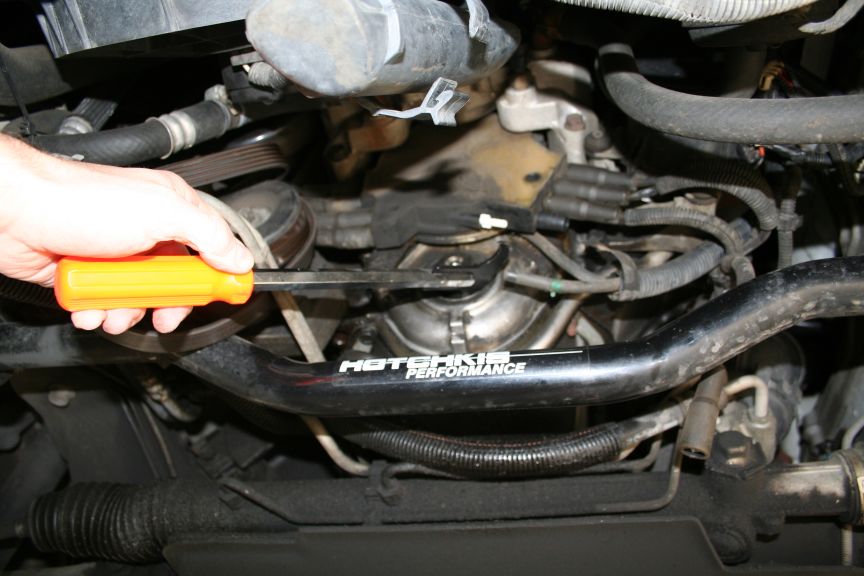
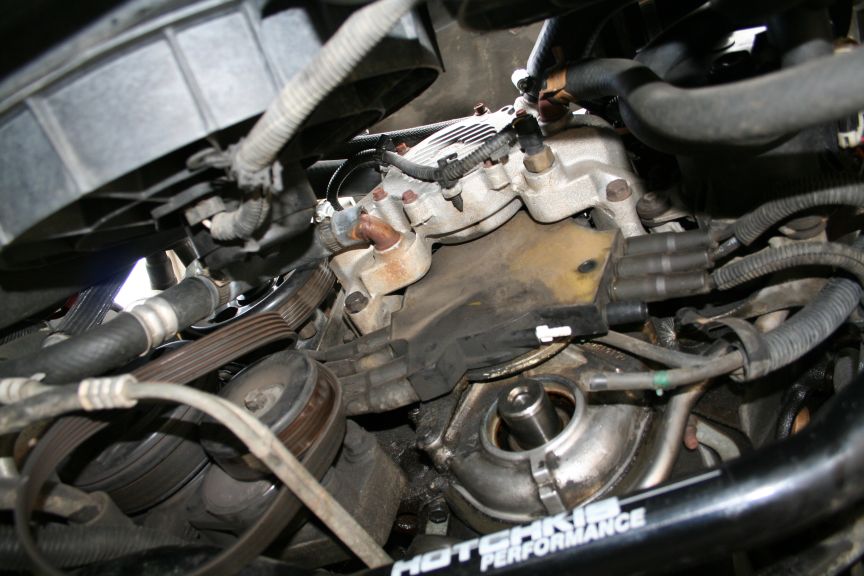
Everything lined up ...
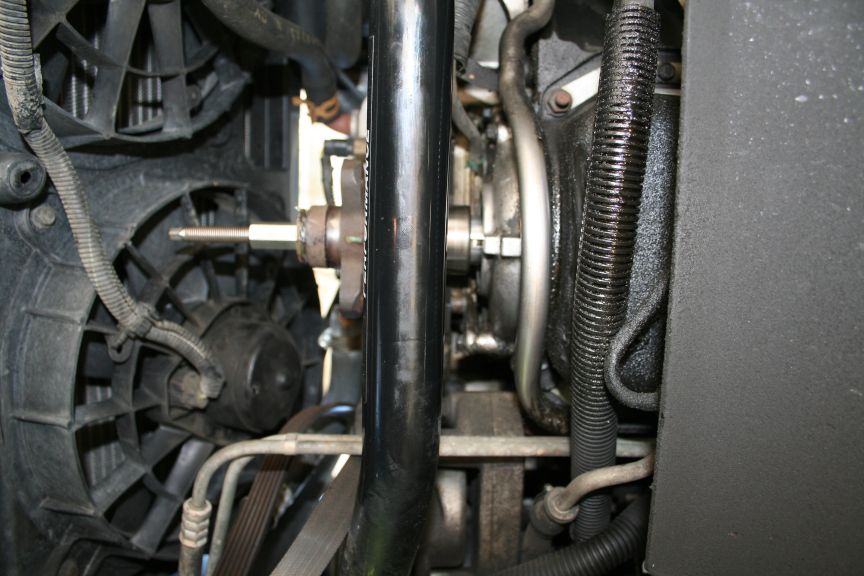
I put a bolt into the hub, and used a piece of steel to hold the hub
from turning, and linked a wrench on the open end of my wrench on the
nut for extra leverage.
Line up the triangle on the pulley with the arrow on the hub.
Put the crank hub bolt in and torque to 74 ft lbs, put the three bolts
for the pulley in and torque to 63 ft lbs.
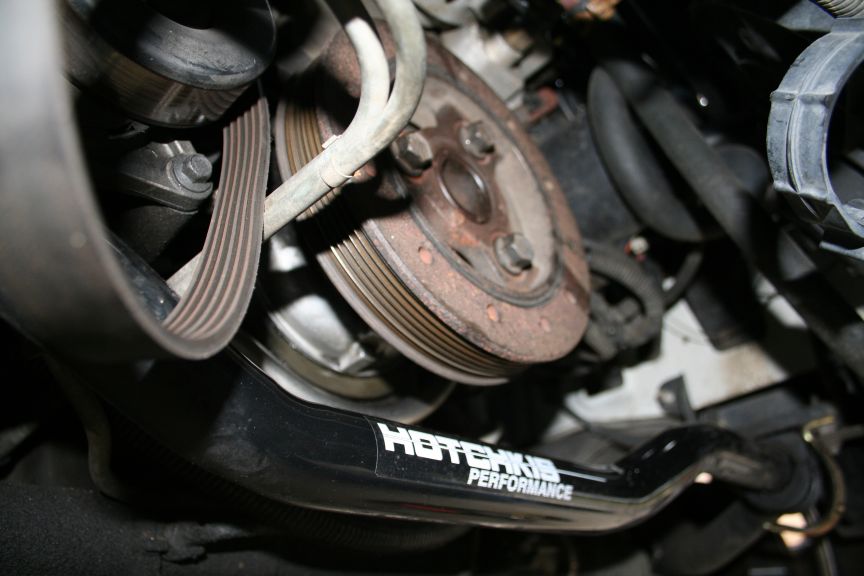
Reinstall the belt and the intake elbow.
Tom
I put a bolt into the hub, and used a piece of steel to hold the hub
from turning, and linked a wrench on the open end of my wrench on the
nut for extra leverage.
Line up the triangle on the pulley with the arrow on the hub.
Put the crank hub bolt in and torque to 74 ft lbs, put the three bolts
for the pulley in and torque to 63 ft lbs.
Reinstall the belt and the intake elbow.
Tom

Thread Starter
Registered User
Joined: Oct 2006
Posts: 273
From: Santa Barbara, Ca
Thanks. I put the effort into it on the Impala SS forum, but somehow my SN
there got screwed up and I can not access it to edit the picture locations. I
had my AOL FTP closed (as did everyone else) so I had to get a new place to
put my pictures. I want the info to be OUT there, so here it is.
Perhaps the MODS here might want to make it a sticky? I will see if I can get
the Impala SS forum to edit the picture locations on the original and move it
from the Archive to a sticky. We shall see.
I also did a BUNCH of tech articles on the Studebaker forum, which I have had
to go back and update thread after thread. Not fun.
Tom

Thread
Thread Starter
Forum
Replies
Last Post
1LEThumper
Forced Induction
40
Jul 14, 2003 12:45 PM