
Metal Widebody, now with 18 by Thirteen-y goodness


Thread Starter
Registered User
Joined: Sep 2009
Posts: 70
From: Enola, Pa
Re: Metal Widebody, now with 18 by Thirteen-y goodness
Thanks, guys..
I know noone asked, but I always like to see how things are done-
These photos show how you can take a straight piece and put a curve to it, and then weld it in.
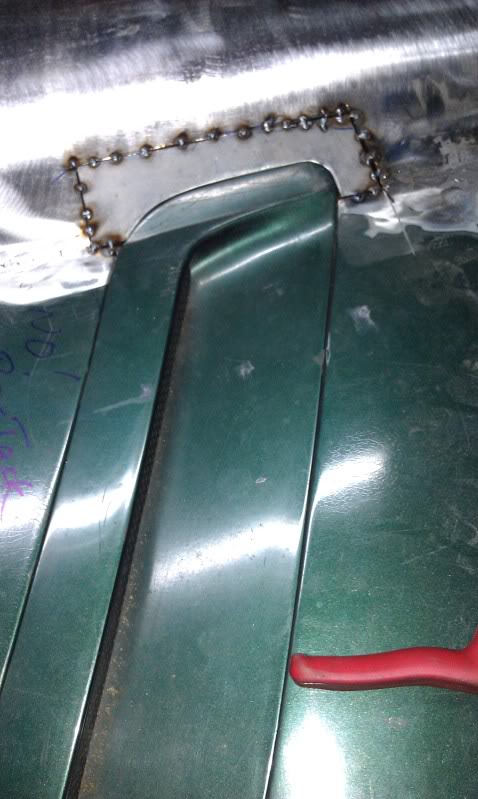
The pic below shows what was a straight piece of "L channel" that I rolled a bead, or a small raised section in it, both for strength and rigidity and for visual purposes- It breaks up the massive wall of curved sheet metal.
The piece is getting the outer edge lengthened in a shrinker/stretcher which is slowly putting curve to the piece.
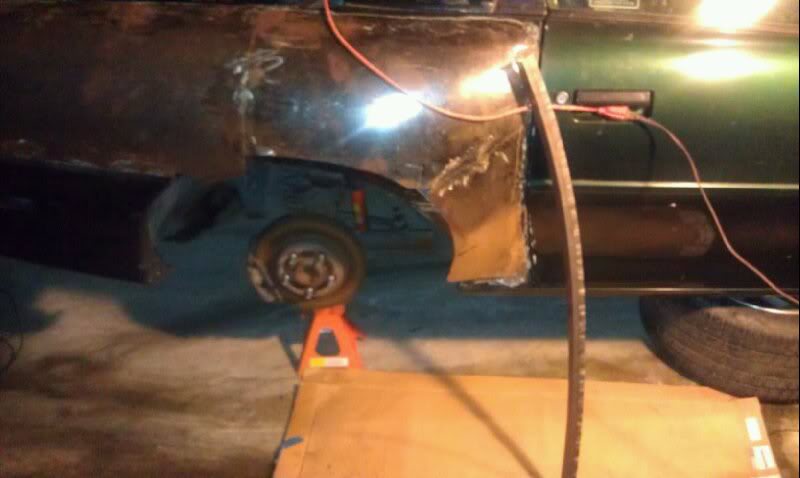
Next, once I have the piece curved, you just clamp it in place, and start making cuts, either to the parent metal, or to the piece being welded in.
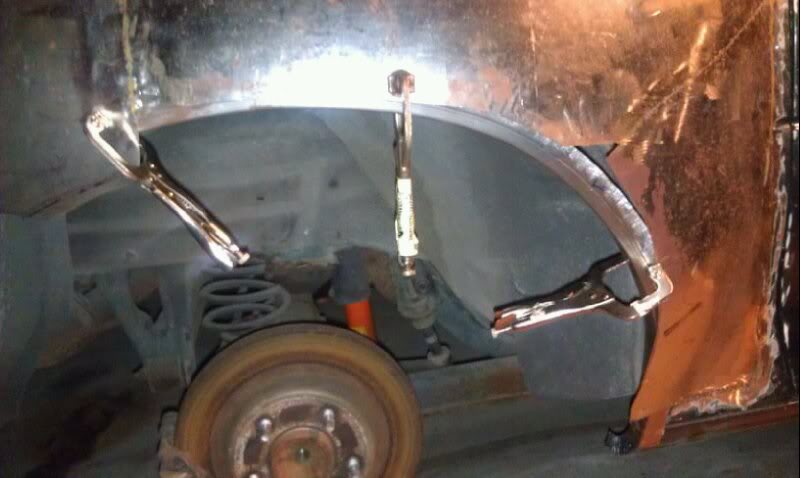
I like to tack at my starting point, and if needed, tack my end point to stop it from "walking" as I weld it in. Heat- Or to be more precise- The process of extreme heat in a small area, and then getting absorbed by the metal around it as it quickly cools, causes it to warp. The smaller the HAZ, or heat affected zone, the better.
This is why I cut as I go. It puts less stress on the metal, as it gets placed and tacked in it's natural state, as it warps slightly along the way. If you pre-cut a piece, you put stress across the piece as one side cools, and pulls, and then the other does the same, more so if you tack it diagonally.
That's not too hard, nor is it as tedious as it sounds.. I can tack in a piece in about ten minutes.
Keep in mind, that the tacking process is just framing your weld line and holding your steel in place.
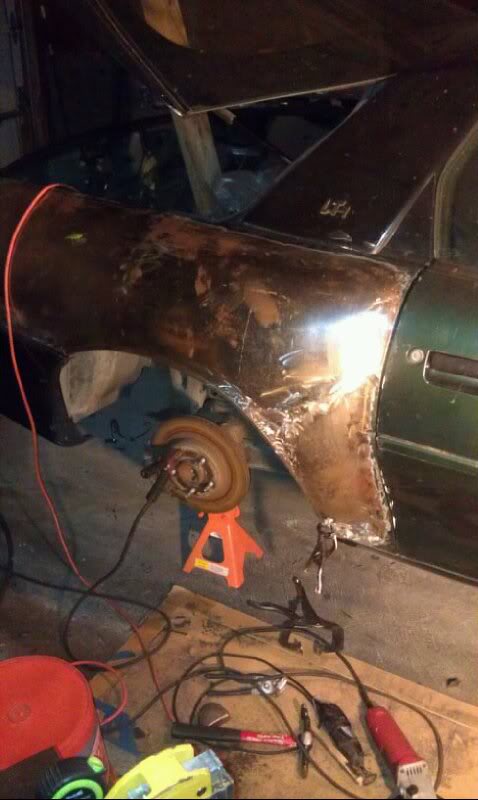
You then begin the tedious process of laying in hundreds of small tacks alternating all over the weld line, so that you keep the heat down. You should make sure that you can lay the back of your hand on the steel to see if it's cool enough. If it's too hot for your hand, it's too hot to weld in that spot. Walk away for a minute and get a drink, or move to a cooler spot on the piece.
Once you make a few passes, you'll need to stop, grind down your welds (I use a 60 or 80 grit flap disk) to almost smooth- And take a hammer and dolly and stretch (smack the crap) out of your weld line. This just stretches out any shrinkage that may be pulling the metal out of line. It should be minimal if you're patient, but it can make the difference between a smooth weld and one that has an undercut next to the bead. (Undercut= a sunken line right next to the bead.) If you get a few small spots like that, crank up the voltage and lower the feed rate on your MIG and lay a quick glob of steel in there like spackle.
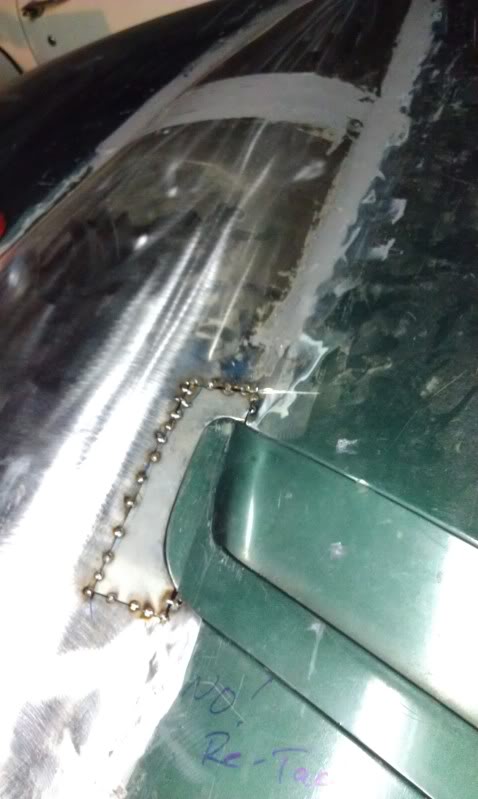
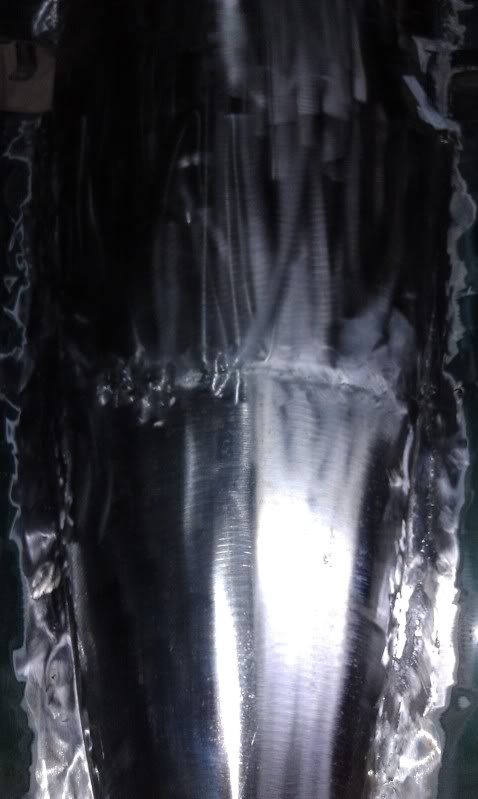
Once you get your welds filled in with a bajillion tacks, grind it, stretch it, and - Take a flashlight, turn of a few lights, and shine a flashlight BEHIND your welds from the inside. Prepare to swear and cuss. You get to see just how porous the welding process is. Take a sharpie, mark the pinholes, and fill and grind again.
Thie pic below looks finished, but it's FULL of pinholes.
I know noone asked, but I always like to see how things are done-
These photos show how you can take a straight piece and put a curve to it, and then weld it in.
The pic below shows what was a straight piece of "L channel" that I rolled a bead, or a small raised section in it, both for strength and rigidity and for visual purposes- It breaks up the massive wall of curved sheet metal.
The piece is getting the outer edge lengthened in a shrinker/stretcher which is slowly putting curve to the piece.
Next, once I have the piece curved, you just clamp it in place, and start making cuts, either to the parent metal, or to the piece being welded in.
I like to tack at my starting point, and if needed, tack my end point to stop it from "walking" as I weld it in. Heat- Or to be more precise- The process of extreme heat in a small area, and then getting absorbed by the metal around it as it quickly cools, causes it to warp. The smaller the HAZ, or heat affected zone, the better.
This is why I cut as I go. It puts less stress on the metal, as it gets placed and tacked in it's natural state, as it warps slightly along the way. If you pre-cut a piece, you put stress across the piece as one side cools, and pulls, and then the other does the same, more so if you tack it diagonally.
That's not too hard, nor is it as tedious as it sounds.. I can tack in a piece in about ten minutes.
Keep in mind, that the tacking process is just framing your weld line and holding your steel in place.
You then begin the tedious process of laying in hundreds of small tacks alternating all over the weld line, so that you keep the heat down. You should make sure that you can lay the back of your hand on the steel to see if it's cool enough. If it's too hot for your hand, it's too hot to weld in that spot. Walk away for a minute and get a drink, or move to a cooler spot on the piece.
Once you make a few passes, you'll need to stop, grind down your welds (I use a 60 or 80 grit flap disk) to almost smooth- And take a hammer and dolly and stretch (smack the crap) out of your weld line. This just stretches out any shrinkage that may be pulling the metal out of line. It should be minimal if you're patient, but it can make the difference between a smooth weld and one that has an undercut next to the bead. (Undercut= a sunken line right next to the bead.) If you get a few small spots like that, crank up the voltage and lower the feed rate on your MIG and lay a quick glob of steel in there like spackle.
Once you get your welds filled in with a bajillion tacks, grind it, stretch it, and - Take a flashlight, turn of a few lights, and shine a flashlight BEHIND your welds from the inside. Prepare to swear and cuss. You get to see just how porous the welding process is. Take a sharpie, mark the pinholes, and fill and grind again.
Thie pic below looks finished, but it's FULL of pinholes.

Registered User
Joined: May 2002
Posts: 5,557
From: Dallas, Texas
Re: Metal Widebody, now with 18 by Thirteen-y goodness
What I've been wondering is if you are going to continue the body line (that little groove that goes down the side of the car) onto the flared quarters. I can imagine how difficult it would be to add that, but I'm just not sure the car will look right without it.
I wanted to say something, just in case you've been so focused on the project, you can't see the bigger picture anymore.
I wanted to say something, just in case you've been so focused on the project, you can't see the bigger picture anymore.
Thread Starter
Registered User
Joined: Sep 2009
Posts: 70
From: Enola, Pa
Re: Metal Widebody, now with 18 by Thirteen-y goodness
What I've been wondering is if you are going to continue the body line (that little groove that goes down the side of the car) onto the flared quarters. I can imagine how difficult it would be to add that, but I'm just not sure the car will look right without it.
I wanted to say something, just in case you've been so focused on the project, you can't see the bigger picture anymore.
I wanted to say something, just in case you've been so focused on the project, you can't see the bigger picture anymore.
Registered User
Joined: Jul 2004
Posts: 571
Thread Starter
Registered User
Joined: Sep 2009
Posts: 70
From: Enola, Pa
Thread Starter
Registered User
Joined: Sep 2009
Posts: 70
From: Enola, Pa
Thread Starter
Registered User
Joined: Sep 2009
Posts: 70
From: Enola, Pa
Re: Metal Widebody, now with 18 by Thirteen-y goodness
Okay, Peeps.. Prepare to be underwhelmed.
The hood is largely done, save for some sanding down of epoxy. It took me longer than I anticipated, mostly because of the measuring and re-measuring needed to make it sit dead center. Finishing welds on an angle is also very difficult. Were I to do it again, I'd make sure there was a flat flange all the way around it.
I will also flatten the curve- a little- at the top of the hood.
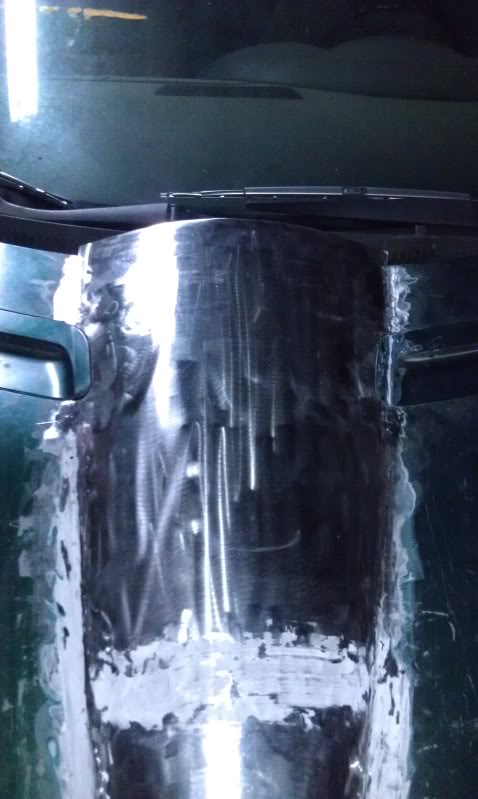
Cutting in and welding the vent cutouts.
Top view.
Next- I laid a thin layer of JBWeld over all the seams. There will be a lot of heat cycles and I'd hate to see cracked welds due to thermal expansion and contraction.
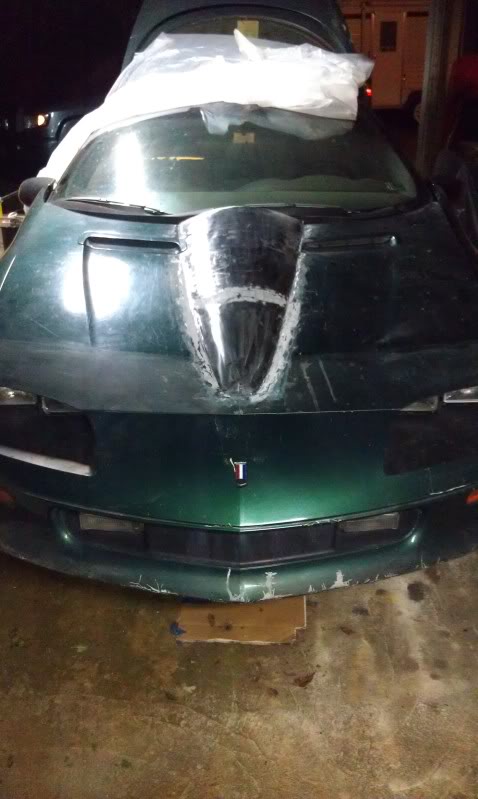
It's hard to gain perspective from these pics, but it does look pretty good. It will look cleaner when I lower the curve at the top of the hood.
The hood is largely done, save for some sanding down of epoxy. It took me longer than I anticipated, mostly because of the measuring and re-measuring needed to make it sit dead center. Finishing welds on an angle is also very difficult. Were I to do it again, I'd make sure there was a flat flange all the way around it.
I will also flatten the curve- a little- at the top of the hood.
Cutting in and welding the vent cutouts.
Top view.
Next- I laid a thin layer of JBWeld over all the seams. There will be a lot of heat cycles and I'd hate to see cracked welds due to thermal expansion and contraction.
It's hard to gain perspective from these pics, but it does look pretty good. It will look cleaner when I lower the curve at the top of the hood.
Registered User
Joined: Dec 2010
Posts: 361
From: Bay area,Ca.
Re: Metal Widebody, now with 18 by Thirteen-y goodness
I SEE it but I'm not "SEEING" it can you get a side shot of the front? how close are you to getting this ready for paint? couple months maybe>?
Thread Starter
Registered User
Joined: Sep 2009
Posts: 70
From: Enola, Pa
Re: Metal Widebody, now with 18 by Thirteen-y goodness
Yeah, I think I can snag a side shot, as soon as the monsoon blows over.. The shop roof leaks like a sieve, so everything is under plastic.
As for paint- I think maybe November at the earliest, January at the latest.
I'm currently looking for a bare LS3 block, or- By some miracle- a bare LS7 block. Plans are for a LS version of a 377 circle track style motor. 4.125 bore, standard 350 stroke.
Why? Because that's what I want. Period. It will also be boosted.
I could put a standard LS3 in it or a 383, but where's the fun in that?
All the motor choices depend upon finding the right parts at the right time, at the right price.
Thread Starter
Registered User
Joined: Sep 2009
Posts: 70
From: Enola, Pa
Re: Metal Widebody, now with 18 by Thirteen-y goodness
Well.. I'm weighing that. I'd like to get 600 HP out of the motor, without stessing every component to it's limit.
To do that, I have two options.
One- Turbo, or better yet- Twin turbo. It's essentially free horsepower.
This means stainless exhaust tubing run everywhere it can possibly go. The most expensive, but easily the most desirable option. I will not use any other option but stainless, because I'm **** once I set my mind. Any other option seems half-***, in my mind. I hate half-***. (I'm not even sure you CAN use any other option because of the heat..)
Two- Supercharger. Much easier and cheaper of the two options, but it does drag on the motor. Roots type most likely won't fit, but I really like them for the way they look and the way they sound. We're not talking about a big 671 sticking through the hood, but a Kenne Bell type twin screw. If I knew more about motors and modifications, I'd look into modding the firewall and the hood just to make it work. The new Vettes and Caddies have them, so maybe I can make it work.
There's also no law that says I have to boost it before I put the motor in. I could do it in stages.
.