Metal Widebody, now with 18 by Thirteen-y goodness

 06-02-2011, 09:07 AM
#17
Registered User

Join Date: Jul 2010
Location: Westminster, CA
Posts: 349
Re: Metal Widebody, now with 18 by Thirteen-y goodness
First time I have come across this thread. Impressively ambitious, looks good, and you kept your sense of humor. Also the best cat name I have ever heard.
 06-02-2011, 11:57 PM
#19
Registered User
Thread Starter
Join Date: Sep 2009
Location: Enola, Pa
Posts: 70
Re: Metal Widebody, now with 18 by Thirteen-y goodness
Thanks!
It's been a huge undertaking, only because I've had to learn as I go. My GF hates me at times for all the noise and scrap and dust I create.
I could have let things just go "as is" several times on the driver's side quarter panel, but I don't want my car to end up in a "epic fail" picture on a board somewhere. It's got to be done right, or I'll have wasted all this energy on junk.
More pics on the scoop to come. I've had to re-do the bends and edges, but to do it right, I had to rig up a tipping wheel on my bead roller.
06-03-2011, 06:31 PM
#21
Registered User
Thread Starter
Join Date: Sep 2009
Location: Enola, Pa
Posts: 70
 06-04-2011, 12:52 AM
#22
Registered User
Thread Starter
Join Date: Sep 2009
Location: Enola, Pa
Posts: 70
Re: Metal Widebody, now with 18 by Thirteen-y goodness
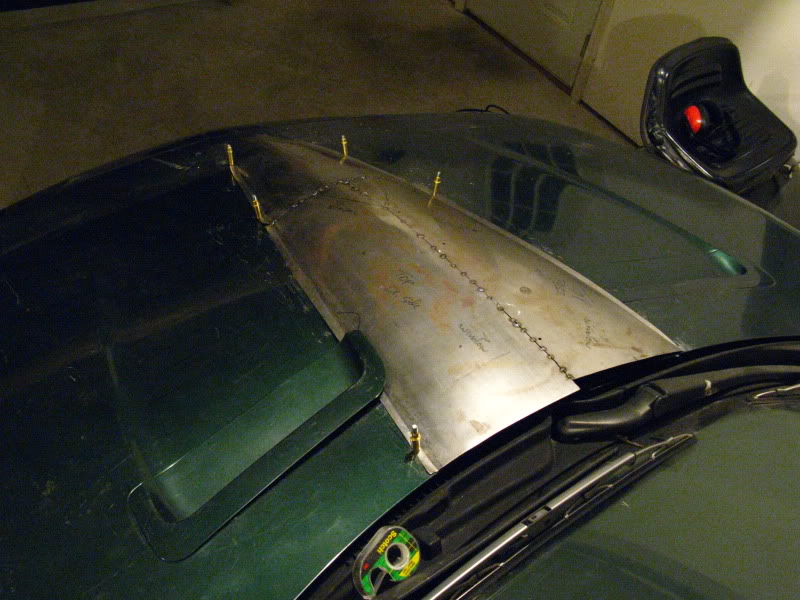
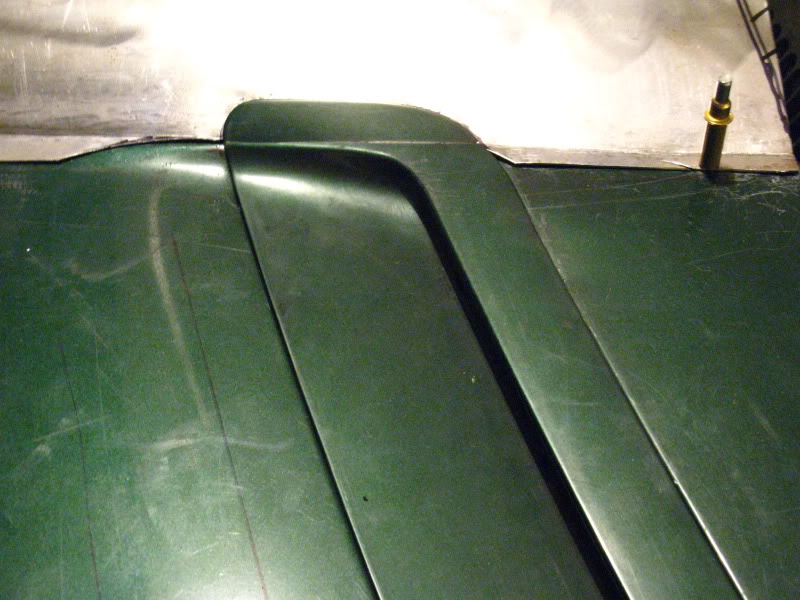
More pics, since the scoop is just about ready to be welded on to the hood.
First off, I'll be integrating the false vents into the scoop.. I though about either filling them in or making new ones that out of metal that will fit the scoop. (We'll call it a scoop since "bulge" sounds a bit too.. um..Festive. ) But- They're plastic, and plastic is pretty forgiving. I took out my dremel, made a cut 3/4ths of the way through, and bent it up along the cut.

I'll need to make an indent in the scoop, but it should be straightforward.
Next, from above you can see the lines are cleaner, and it flows well. I need to fold over the top where it meets the window, with a curve that follows the edge of the hood.
From head on-
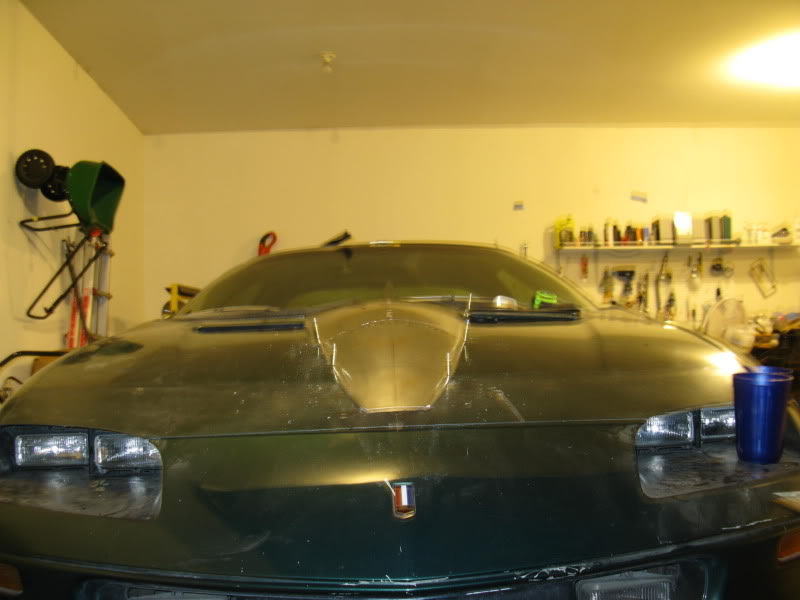
And more yet.
First off, I'll be integrating the false vents into the scoop.. I though about either filling them in or making new ones that out of metal that will fit the scoop. (We'll call it a scoop since "bulge" sounds a bit too.. um..Festive.
) But- They're plastic, and plastic is pretty forgiving. I took out my dremel, made a cut 3/4ths of the way through, and bent it up along the cut. I'll need to make an indent in the scoop, but it should be straightforward.
Next, from above you can see the lines are cleaner, and it flows well. I need to fold over the top where it meets the window, with a curve that follows the edge of the hood.
From head on-
And more yet.
06-07-2011, 12:16 AM
#26
Registered User
Thread Starter
Join Date: Sep 2009
Location: Enola, Pa
Posts: 70
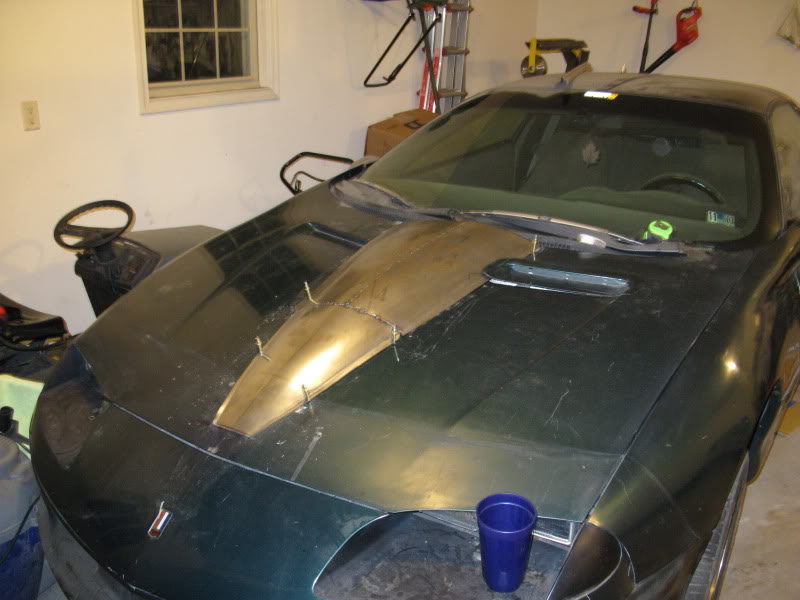
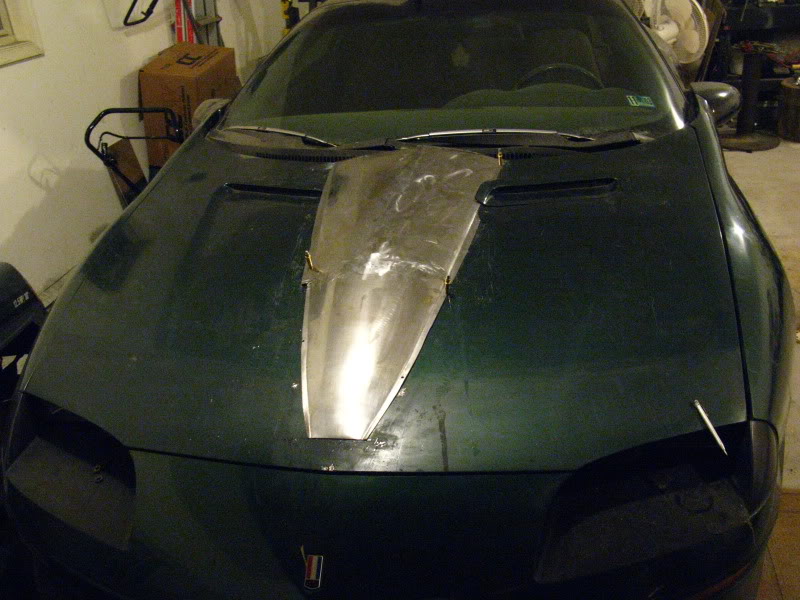
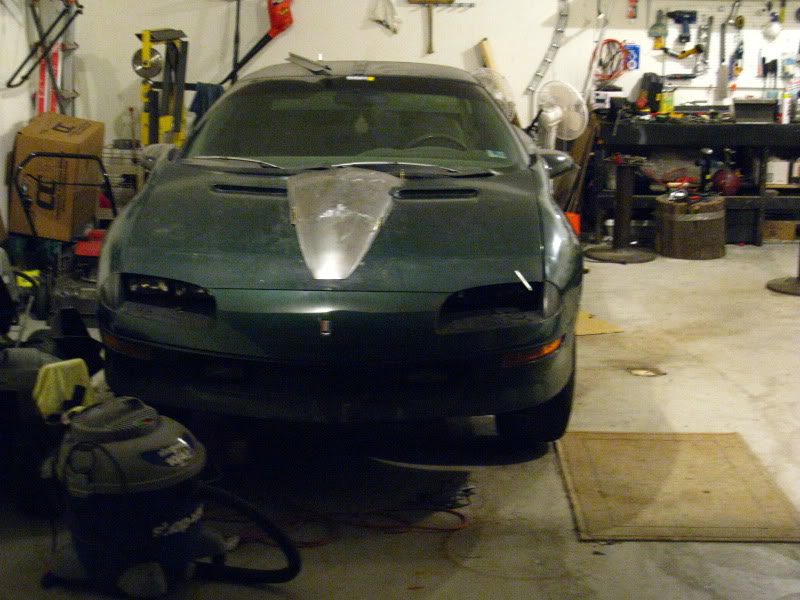
More progress. (Barely)
Hi all..
I managed to weld the pieces together without any major F-ups, and grind it down to a semi-finished state. More finishing will be done once all the curves, bends and folds are completed. Welds are still visible, and more finish work will be needed before I call it suitable.
Here, you can see the small curve leading to the vent, and the vent being fitted before I do any more cutting and bending. I like that little "swoop" that comes off the center side of the vent, so I kept it plainly visible, but integrated into the scoop at the same time.
The vent doesn't sit flush yet, since to make it look.. Well, the idea is to NOT make it look like I did it with a case of PBR and a sawsall. It's going to take a couple of hours just to do some semi-circle bends. I'll have a better idea how to do it faster when I do the passenger side.
Here, you get a better idea of what all of it is starting to look like. Sort of.
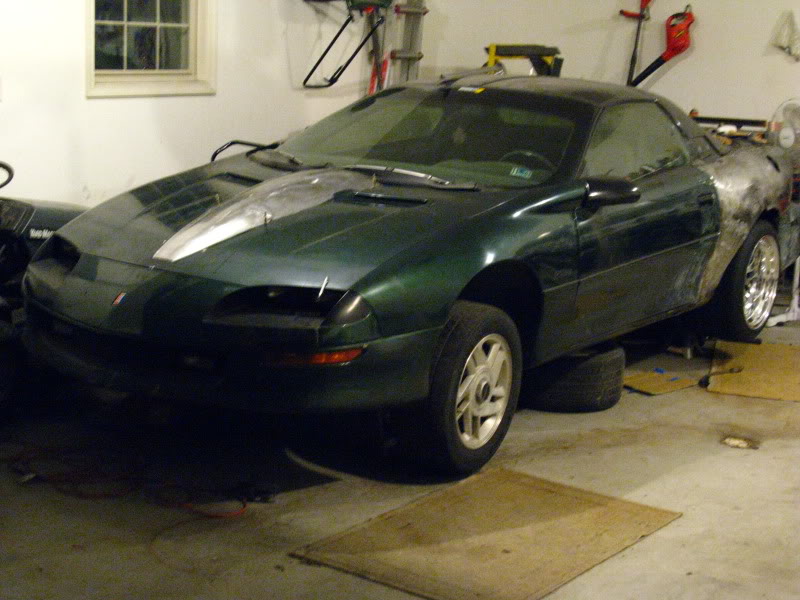
Keep in mind that I took a break from the rear quarters for a bit, just to keep myself from getting sick of it. If I find that I'm just hammering on something just to be done with it, I end up making things over again, because I get impatient and start taking shortcuts.
The idea is to move on to something else, and come back to it as my skill and patience levels have increased.
I managed to weld the pieces together without any major F-ups, and grind it down to a semi-finished state. More finishing will be done once all the curves, bends and folds are completed. Welds are still visible, and more finish work will be needed before I call it suitable.
Here, you can see the small curve leading to the vent, and the vent being fitted before I do any more cutting and bending. I like that little "swoop" that comes off the center side of the vent, so I kept it plainly visible, but integrated into the scoop at the same time.
The vent doesn't sit flush yet, since to make it look.. Well, the idea is to NOT make it look like I did it with a case of PBR and a sawsall.
It's going to take a couple of hours just to do some semi-circle bends. I'll have a better idea how to do it faster when I do the passenger side.Here, you get a better idea of what all of it is starting to look like. Sort of.
Keep in mind that I took a break from the rear quarters for a bit, just to keep myself from getting sick of it. If I find that I'm just hammering on something just to be done with it, I end up making things over again, because I get impatient and start taking shortcuts.
The idea is to move on to something else, and come back to it as my skill and patience levels have increased.
06-07-2011, 09:21 AM
#27
Registered User

Join Date: May 2002
Location: Dallas, Texas
Posts: 5,556
Re: Metal Widebody, now with 18 by Thirteen-y goodness
Hmm, I think if you paint that hump charcoal and pinstripe it in black like the Callaway C16 seems to be, then it might look proper. I don't think I'll like it if it's body color. Interesting project for sure!
06-07-2011, 11:45 AM
#28
Registered User
Thread Starter
Join Date: Sep 2009
Location: Enola, Pa
Posts: 70
Re: Metal Widebody, now with 18 by Thirteen-y goodness
Oh, it's BEGGING to be painted a different color. That was the idea all along, I think. So far, I'm torn- It's either GunMetal metallic with Honda's Black Cherry metallic accents, (Or Scion's Black Cherry) Or- The reverse- Black Cherry with gunmetal accents. Black as a main color, with the other two colors mentioned above would look great as a color combination alone. It might work on a 4th gen -IF- you use restraint. Most F-bodies don't lend themselves well to a multicolor layout.. I've not seen very many that I liked, at least.
06-07-2011, 04:12 PM
#29
Registered User
Join Date: May 2002
Location: Dallas, Texas
Posts: 5,556
Re: Metal Widebody, now with 18 by Thirteen-y goodness
Hmmm, extremely dark reds don't look very good on 4th gens (to me). But maybe that's just my taste. Do you want me to upload some pics so you can decide?
If I were you (and money wasn't a major contraint) I would paint the car gunmetal gray, perhaps Cyber Gray, do the standard black Z28 accents, and paint the hood bulge black. Then, to get the dark red you like into the color mix, I'd get Bordeaux leather seats made.
IMO, dark red is a very hard color to get away with, unless you have a '32 Ford or similar.
I'll upload some pics...
Last edited by Brangeta; 06-07-2011 at 04:16 PM.
06-07-2011, 04:20 PM
#30
Registered User
Join Date: May 2002
Location: Dallas, Texas
Posts: 5,556
Re: Metal Widebody, now with 18 by Thirteen-y goodness
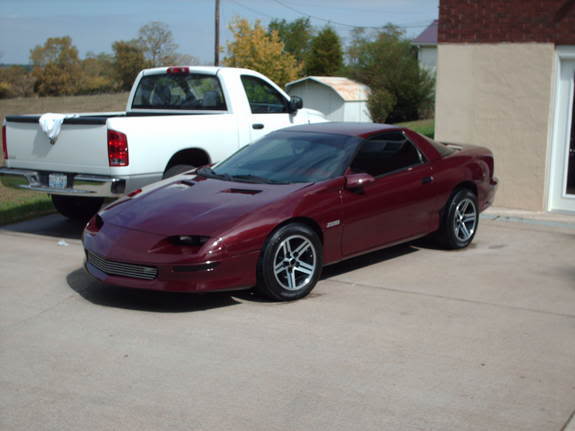
Oddly enough, this is the only black cherry pics I have. This car has red metalflake in the clearcoat. I think this looks pretty decent.

These pics are big, so click the links to see full size.
http://i103.photobucket.com/albums/m...4ab411f9_o.jpg
http://i103.photobucket.com/albums/m...1bf7c3d4_o.jpg
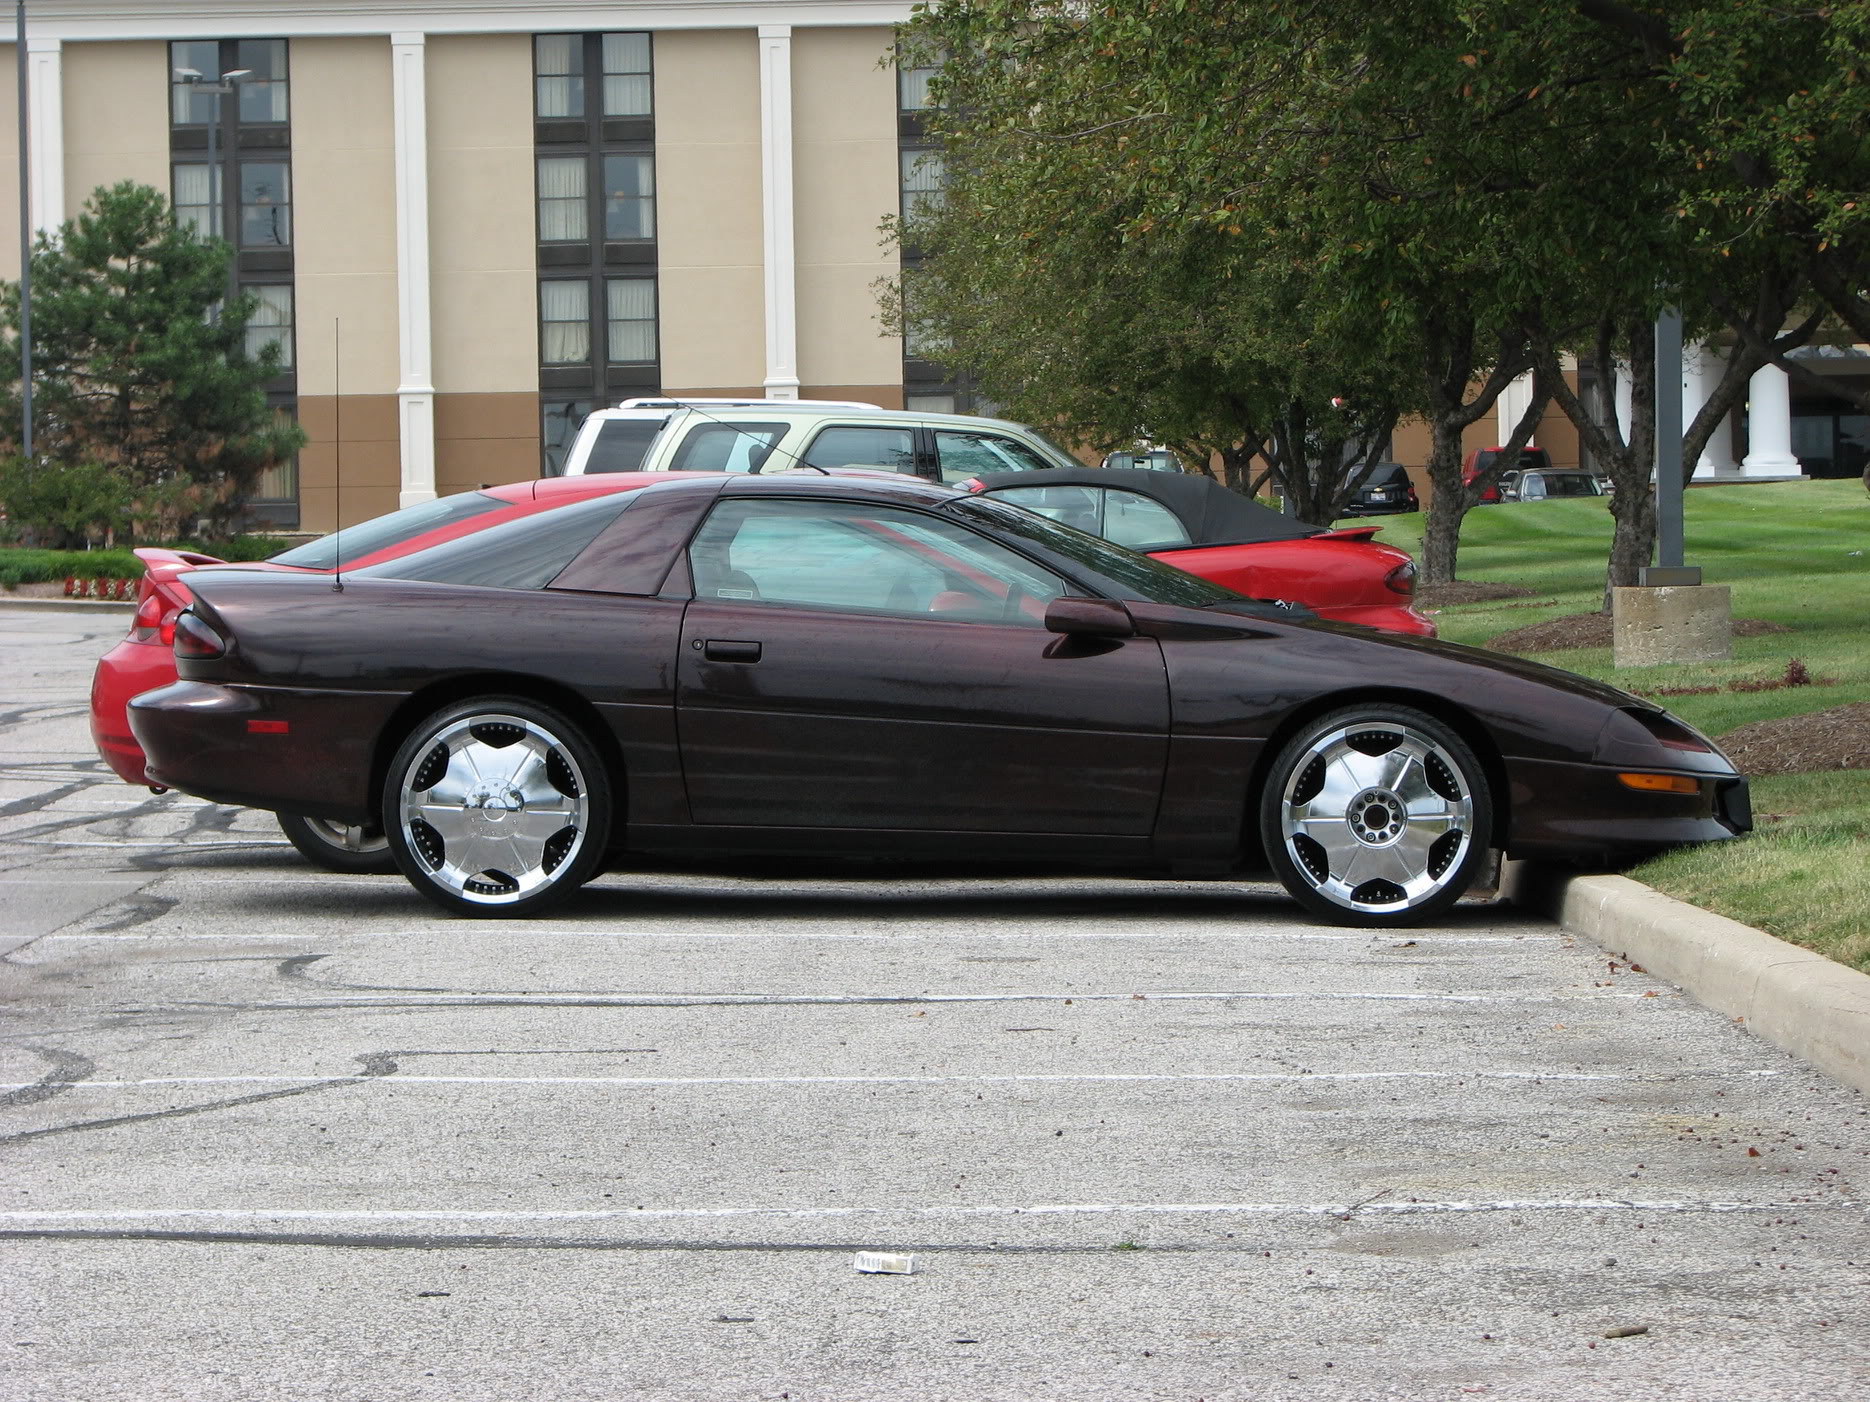
Every other pic I have is just maroon or dark red. I don't like the one below at all.
Ex:

These pics are big, so click the links to see full size.
http://i103.photobucket.com/albums/m...4ab411f9_o.jpg
http://i103.photobucket.com/albums/m...1bf7c3d4_o.jpg
Every other pic I have is just maroon or dark red. I don't like the one below at all.
Ex:
Last edited by Brangeta; 06-07-2011 at 04:24 PM.