
polished aluminum


Thread Starter
Registered User
Joined: Oct 2004
Posts: 1,336
polished aluminum
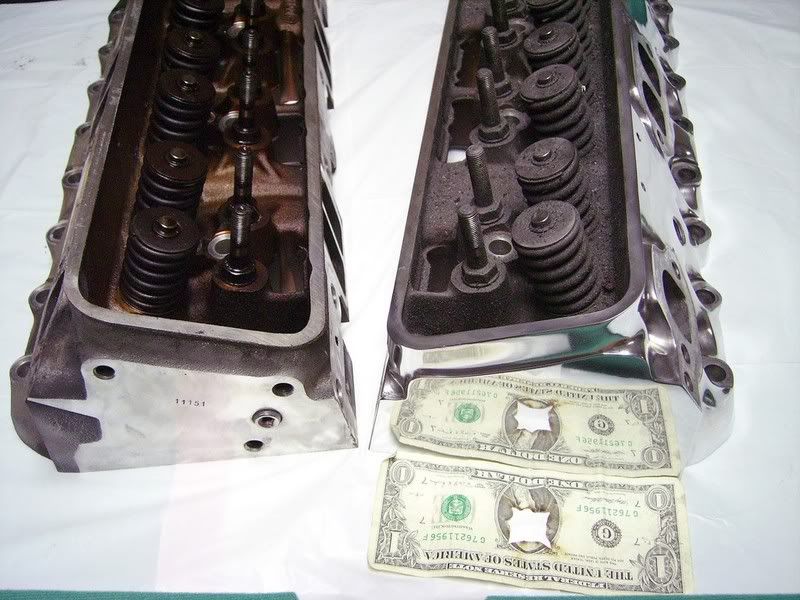
im using a power tool with a wire wheel at the end with a fine sand at the end, and want to keep my parts as shiny or even nicer than it is. what can i do to keep it like that in the engine or how often do i have to use a certain polish or polisher and what do i use?
thank you
thank you

Registered User
Joined: Aug 2005
Posts: 862
From: Columbus, IN
When you say "polish," were you meaning your intentions are to get a mirror finish? By using a wire wheel, all you'll really accomplish is getting the part(s) clean. If just getting the parts clean are your intentions, there are much easier ways. 
Thread Starter
Registered User
Joined: Oct 2004
Posts: 1,336
well it looks slightly polished though haha, but how can i keep that look? and i have some other billet and polished or chrome ones, what can i do to keep them like that without corrosion and all nice?
thanks
thanks
Thread Starter
Registered User
Joined: Oct 2004
Posts: 1,336
have you ever tryed that before? and what do you think of this:
http://cgi.ebay.com/ALUMINUM-POLISHI...QQcmdZViewItem
http://cgi.ebay.com/ALUMINUM-POLISHI...QQcmdZViewItem
Registered User
Joined: Aug 2005
Posts: 862
From: Columbus, IN
Originally Posted by DiabloGT
have you ever tryed that before?
and what do you think of this:
well it looks slightly polished though haha, but how can i keep that look?
Registered User
Joined: Mar 2005
Posts: 676
From: Ft.hood/Ft.worth/Iraq
if you really want the polished look you are going to need a buffing pad that is mounted to something HIGH speed not just a mother power ball on the end of a cordless drill. if you have a air compressor you could get a high speed grinder from harbor freight pretty cheap the find a buffing wheel to attatch. you will also need buffing compound i use some stuff thats in a bar form and after i get that to bling up the part i use blitz to get a lil more shine out of it plus blitz makes a coating on top that helps the shine last.
Registered User
Joined: Aug 2005
Posts: 862
From: Columbus, IN
...since apparently, I don't know what the **** I'm talking about.
Originally Posted by DiabloGT
how can i keep that look?
Originally Posted by DiabloGT
i have some other billet and polished or chrome ones, what can i do to keep them like that without corrosion and all nice?
Registered User
Joined: Mar 2005
Posts: 676
From: Ft.hood/Ft.worth/Iraq
what the **** ever man im sure it took you a while with the power ball that is up there with the god crated LS1..... iv been around this for all my life and i know what im doing. im not saying you cant use a power ball so dont get your panties in a bounch. people like you **** me off b/c if its not your way you get all pissy about it. blow it up your ***.
moving on......
moving on......
Registered User
Joined: Aug 2005
Posts: 862
From: Columbus, IN
Originally Posted by FireChicken1995
people like you **** me off b/c if its not your way you get all pissy about it
Thread Starter
Registered User
Joined: Oct 2004
Posts: 1,336
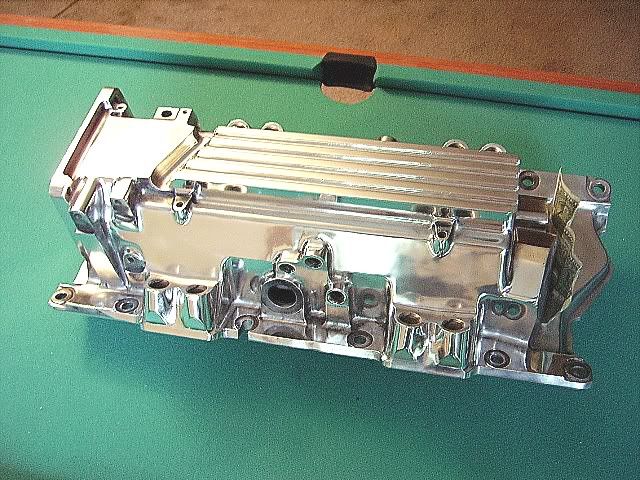
wow how long did it take you for the intake because i want to do that to mine! and would the best way be to buy that kit on ebay then use mothers to maintenance the look, or just keep using the mothers? and what other compounds and buffers besides mothers can you use to get that look? or http://www.eastwoodco.com/shopping/p...iProductID=950
thanks
p.s. sorry i dont have any clue about polishing
thanks
p.s. sorry i dont have any clue about polishing
Last edited by DiabloGT; May 7, 2007 at 09:12 PM.
Registered User
Joined: Aug 2005
Posts: 862
From: Columbus, IN
wow how long did it take you for the intake because i want to do that to mine! and would the best way be to buy that kit on ebay then use mothers to maintenance the look, or just keep using the mothers? and what other compounds and buffers besides mothers can you use to get that look?
thanks
p.s. sorry i dont have any clue about polishing
thanks
p.s. sorry i dont have any clue about polishing
http://www.eastwoodco.com/jump.jsp?i...8&iSubCat=1445
Here's a little writeup I did that shows the tools I use to polish and gives a brief description of the function of each:
http://www.z28.com/forum/showpost.ph...4&postcount=22
The tools in that Ebay link are an example of what you'd use if you were starting off with a rough cast or unpolished part, so they would be necessary for doing something like an LT1 intake. The Mother's Powerball and metal polish are used to maintain the shine on parts that have already been polished, after they get cloudy and oxidized from being exposed to the elements.
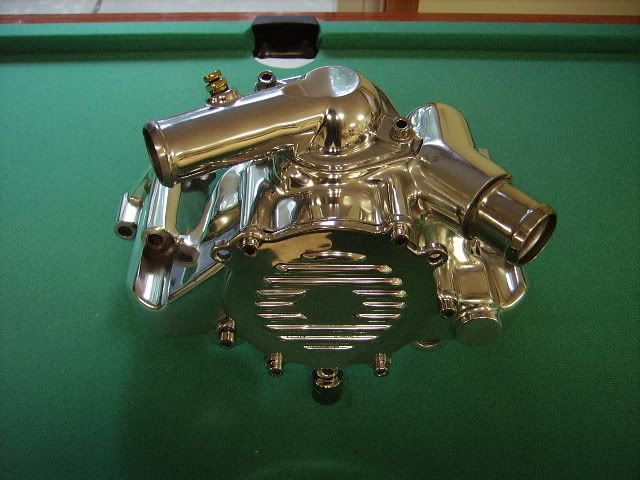
The intake manifold was 40 hours of labor.
Thread Starter
Registered User
Joined: Oct 2004
Posts: 1,336
on the first article it says to fine sand the aluminum to 220 but yours is 600, which one is it, and if i get the whole intake sanded down to that grit then i can bascally just start buffing it correct? and wouldnt i just be able to buy that ebay kit instead of sanding it or it doesnt work that way?
thanks
thanks
Last edited by DiabloGT; May 7, 2007 at 11:07 PM.
Registered User
Joined: Aug 2005
Posts: 862
From: Columbus, IN
"Aluminum and other soft metal surfaces need to have a surface as smooth or smoother than what a 220 grit abrasive would yield."
This statement is kind've misleading. It has to be taken into context with how complex the shape of the part is and what type've buffing wheel/bits will be used. To start buffing at a grit this low, you'd have to use a sisal wheel which is way too aggressive of a wheel to use on something like an LT1 intake because it would mar and deform all the corners and edges. You'd sand to 600 grit so you could use a softer spiral sewn wheel or felt bob which allows you to maintain more precise control over the shape of the part.
General rule:
Less sanding = more buffing
More sanding = less buffing
The trick to this is to get the part as smooth as possible with sanding so that you can get away with the least amount of buffing.
and if i get the whole intake sanded down to that grit then i can bascally just start buffing it correct?
and wouldnt i just be able to buy that ebay kit instead of sanding it?
