Lets see your LT1 Retrofits.. and how the heck do you guys clean em up

Thread Starter
Registered User
Joined: Jul 2008
Posts: 156
From: Mammoth Lakes, CA
Lets see your LT1 Retrofits.. and how the heck do you guys clean em up
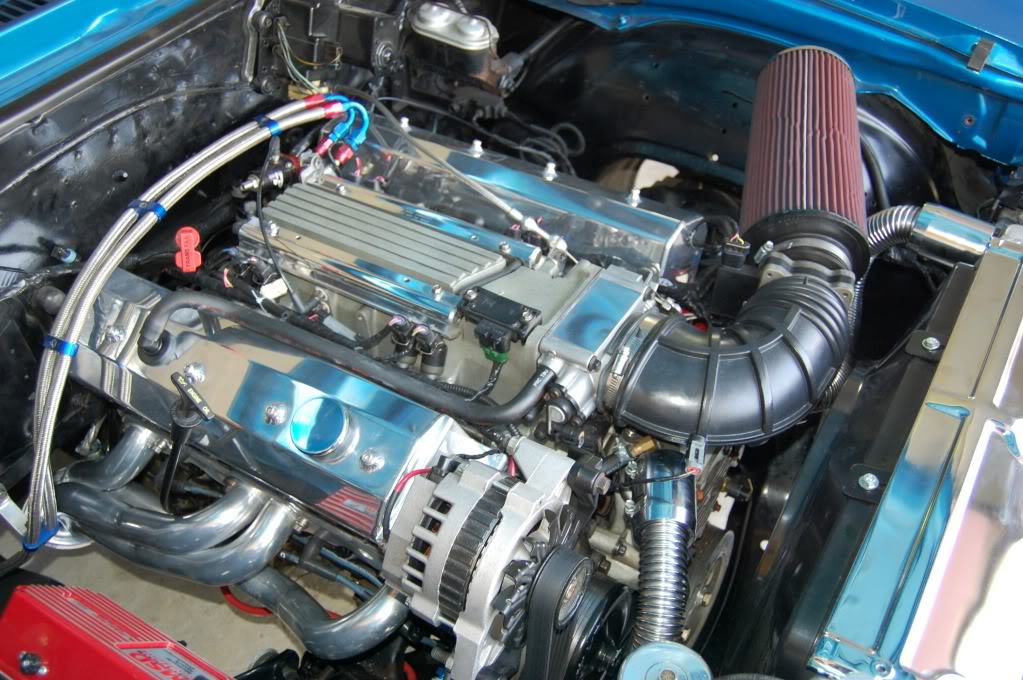
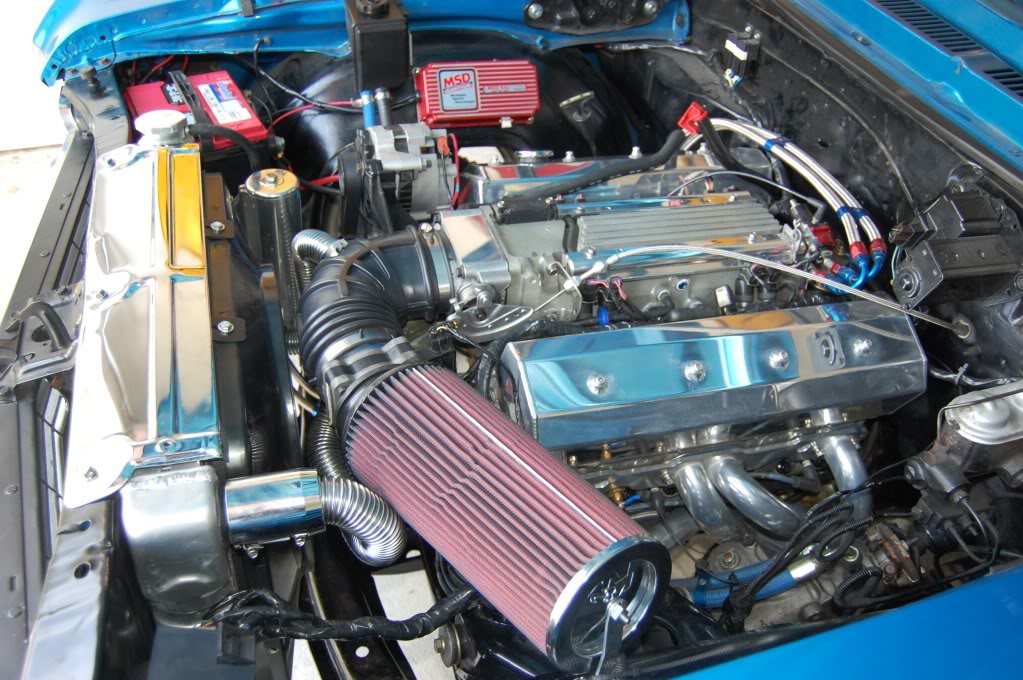
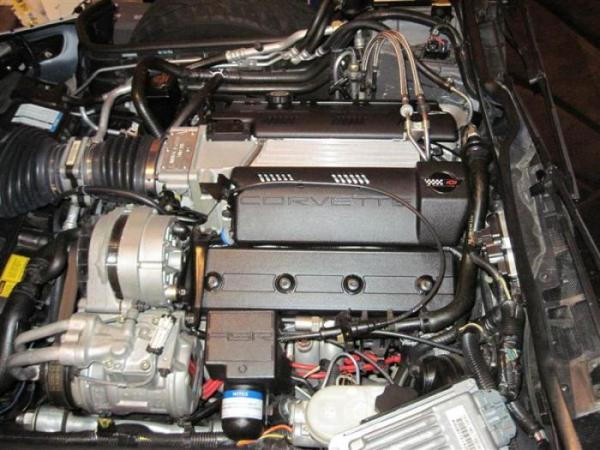
Here is a shot of my engine bay from today on my '69 Camaro Lt1 swap.. and man. .It's a ****ing mess. What are you guys who have done retrofits doing to "clean" things up, and let see some pictures as I'm in need of some inspiration.


Registered User
Joined: Jan 2010
Posts: 220
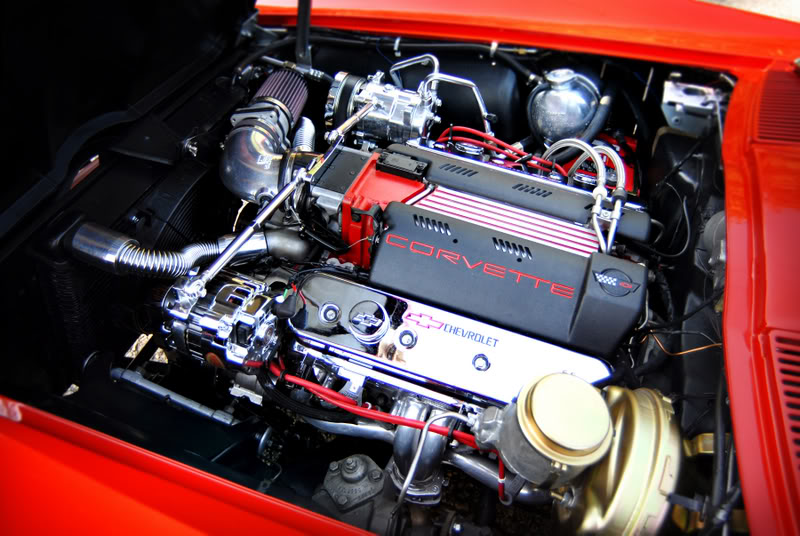
well first thing you can do is get the alternator relocation kit from Speedinc they have one to retain p/s, and one to retain both a/c and p/s, or one that deletes both, this will open up your options for valve covers, you will then be able to run short or tall valve covers center bolt or perimeter style like the 87 and earlier sbc's. Seems like all you need to do is start hiding your n20 and fuel lines, and hide the factory harness


Registered User
Joined: Mar 2001
Posts: 2,667
From: SLC, UT
A lot of it on the ones I've done is just taking time and routing wires and lines very carefully, bundling what you can together.
IE: I see TONS of random wires everywhere, and N20/Fuel lines just lying on top of things. Route all your wires together and bundle it all nicely inside some simple black loom. Clean your hoses with simple green and maybe apply some ArmorAll to them. Re-mount and re-route your N20 somewhere else.
Most of the "nice" engine bays are when people just take their time with what I listed above. Routing the wires, vacuum lines, fuel lines, N20 lines, etc and keeping them neat and tidy.
Registered User
Joined: Jun 2008
Posts: 108
From: Albuquerque, NM
Here is a link for my 1980 swap:
http://www.ls1lt1.com/forum/showthre...t=23532&page=3
I tried to make the most of it look like a factory install, but I did hide the harness for the front lights and as much of the engine harness as possible.
I don't have NOS (dang it!) so I don't have alot of those challenges.
Looks like a fun project, drove it yet?
Thread Starter
Registered User
Joined: Jul 2008
Posts: 156
From: Mammoth Lakes, CA
Thanks all for the responses!
A relocation kit would be great, I wouldn't mind getting the matching valve cover on (the edelbrock one) and that would help a fair bit. I also already have an AC delete but would like to delete my PS as well. The only issue i've run into is alot of the alternator relocation kits hit the crossmember on a first gen camaro but I will check out speedinc's. The N20 I'm not to worries about I have another intake that I'm in the process of plumbing for a direct port kit so thats only temporary. It's all the "other" crap. That just bogs makes everything a mess. Mainly the factory harness, and all the hoses. The way my return/fuel lines are set up there isn't much I can do about the steel braided fuel lines either. It used to be alot cleaner when I had my regulator on the firewall but that's not legal (won't pass tech @ the track) so I had to relocate it.
heh.. ya that defiantly needs to get done.
ya, that's the issue i'm having is the factory harness I have plugs going everywhere I tried to loom up as much as I can but it's just a spaghetti mess.
I would like to try to run some "vette" covers to hide everything, but because because I have AN fittings welded directly onto my fuel rails I'm not sure it will fit without some modification. I've been trying to keep my eye out for a used set for cheap before I destroy a new one. As far as the basic cleaning up stuff ya that needs to get done to. I don't have fender wells so things get dirty fast.
Thanks, ya I've been driving and fixing it for a couple years now. I am finally at a point now where the retrofit is pretty much done everything works except a couple little things that I should hopefully have wrapped up this week. So I'm finally thinking about going back threw the it all to clean it up.
well first thing you can do is get the alternator relocation kit from Speedinc they have one to retain p/s, and one to retain both a/c and p/s, or one that deletes both, this will open up your options for valve covers, you will then be able to run short or tall valve covers center bolt or perimeter style like the 87 and earlier sbc's. Seems like all you need to do is start hiding your n20 and fuel lines, and hide the factory harness
heh.. ya that defiantly needs to get done.
A lot of it on the ones I've done is just taking time and routing wires and lines very carefully, bundling what you can together.
IE: I see TONS of random wires everywhere, and N20/Fuel lines just lying on top of things. Route all your wires together and bundle it all nicely inside some simple black loom. Clean your hoses with simple green and maybe apply some ArmorAll to them. Re-mount and re-route your N20 somewhere else.
Most of the "nice" engine bays are when people just take their time with what I listed above. Routing the wires, vacuum lines, fuel lines, N20 lines, etc and keeping them neat and tidy.
IE: I see TONS of random wires everywhere, and N20/Fuel lines just lying on top of things. Route all your wires together and bundle it all nicely inside some simple black loom. Clean your hoses with simple green and maybe apply some ArmorAll to them. Re-mount and re-route your N20 somewhere else.
Most of the "nice" engine bays are when people just take their time with what I listed above. Routing the wires, vacuum lines, fuel lines, N20 lines, etc and keeping them neat and tidy.
ya, that's the issue i'm having is the factory harness I have plugs going everywhere I tried to loom up as much as I can but it's just a spaghetti mess.
I would like to try to run some "vette" covers to hide everything, but because because I have AN fittings welded directly onto my fuel rails I'm not sure it will fit without some modification. I've been trying to keep my eye out for a used set for cheap before I destroy a new one. As far as the basic cleaning up stuff ya that needs to get done to. I don't have fender wells so things get dirty fast.
Here is a link for my 1980 swap:
http://www.ls1lt1.com/forum/showthre...t=23532&page=3
I tried to make the most of it look like a factory install, but I did hide the harness for the front lights and as much of the engine harness as possible.
I don't have NOS (dang it!) so I don't have alot of those challenges.
Looks like a fun project, drove it yet?
http://www.ls1lt1.com/forum/showthre...t=23532&page=3
I tried to make the most of it look like a factory install, but I did hide the harness for the front lights and as much of the engine harness as possible.
I don't have NOS (dang it!) so I don't have alot of those challenges.
Looks like a fun project, drove it yet?
Registered User
Joined: May 2009
Posts: 61
From: Colorado
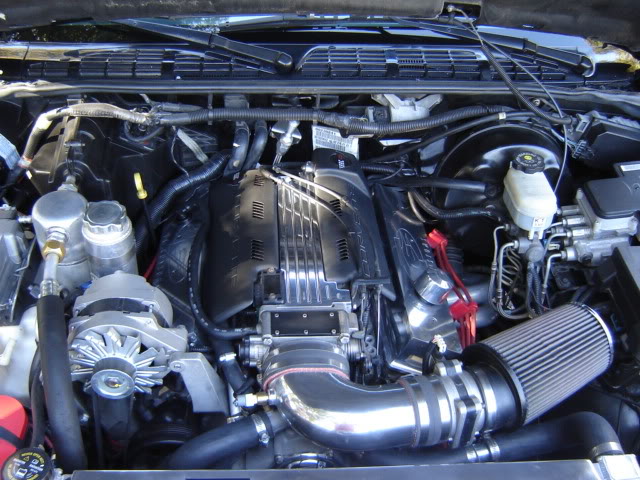
I would agree with everyone, the look is mostly achieved by "cleaning up" as much of the wiring and accessories as possible. Here are some pics of my swap (96' LT1 into 72' C10 P/U) it is not completey finished, but it will give you an idea....


Thread Starter
Registered User
Joined: Jul 2008
Posts: 156
From: Mammoth Lakes, CA
I'll try to snap another pic but my fuel lines run under the fuel rails. Basically at the end of the fuel rail there are an bungs welded directly onto to them.I might be able to go out backwords and above.. hmm I'd have to think about that.

Registered User
Joined: Dec 2005
Posts: 907
Well not to be harsh- but a lot could be cleaned up by not running wires where-ever and take some time to see how you can run in together and in with the factory wiring.
I would also take some time to make a couple brackets for things- zip-ties and electricians tape holding things isn't going to gain any points for a 'clean look.'
The biggest thing that pops out at me is the nitrous stuff. Looks like the nitrous genie just took a dump on top of the motor and thats where the stuff landed. Move your solenoids over to the passenger side where you are going to make a bracket to hold everything-(hint hint). Then take your feed lines run them alongside your radiator hoses inside some tubing and then mount them to the underside of the intake tube with some 90* fittings if you have too. Just doing that alone will do wonders in your engine bay.
Other than that just buy a black loom kit from Summit and start consolidating wiring into some bigger looms. You should be able to get everything into a 3/4" loom on both sides of the intake with the wires entering and exiting where they need to.