
home ported heads{pics}

Thread Starter
Registered User
Joined: Aug 2007
Posts: 746
From: Bennett N.C.
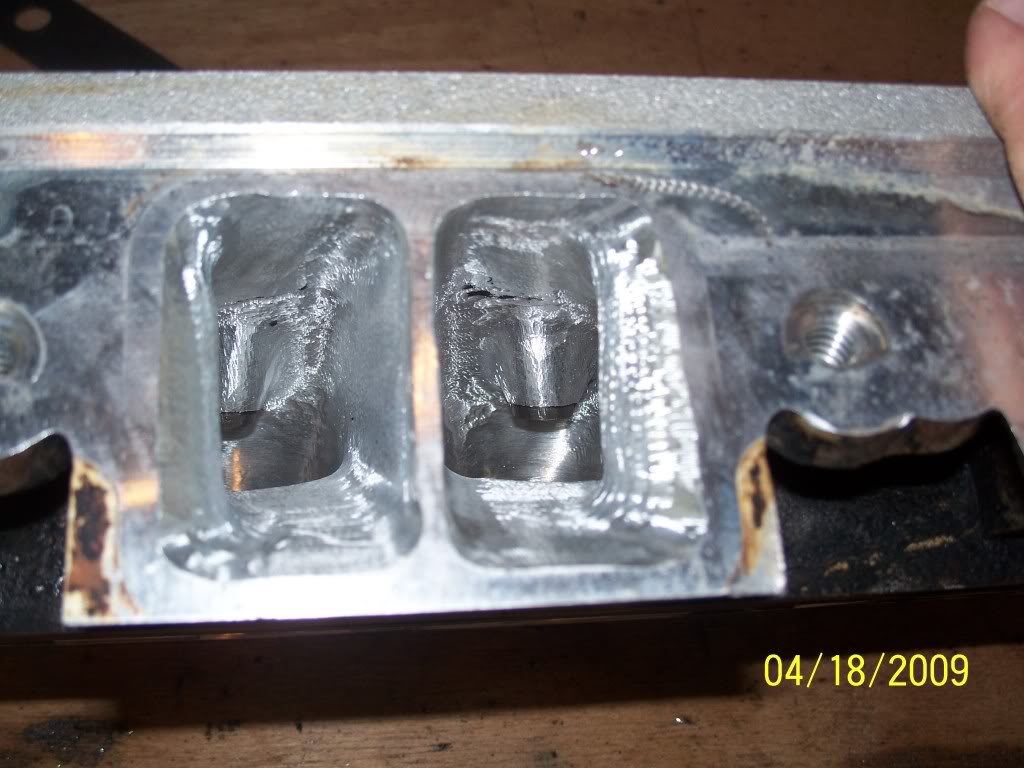
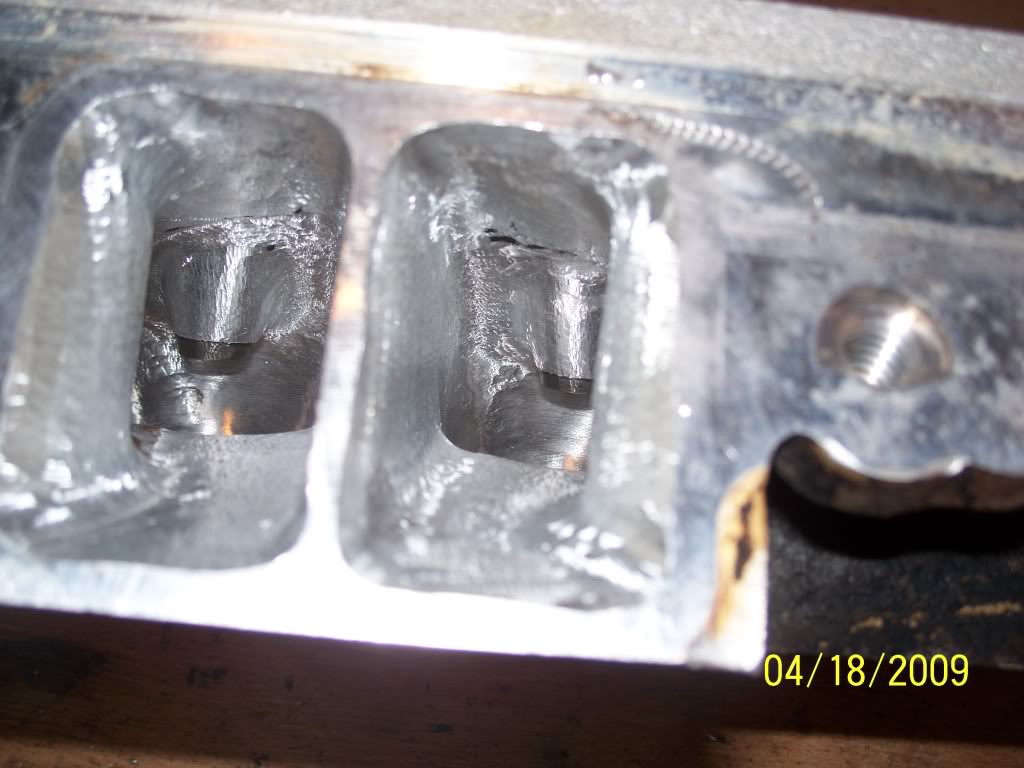
just getting done hogging out one side, haven't bought the cartridge rolls yet
I widened the port near the push rod pinch and opened the intake, side to side and up, still need to straighten the runners
didn't mess with the short radius at all,, other than cleaning it up a little.
got rid of most of the parting lines, smoothed the bowl , tapered the guide a little
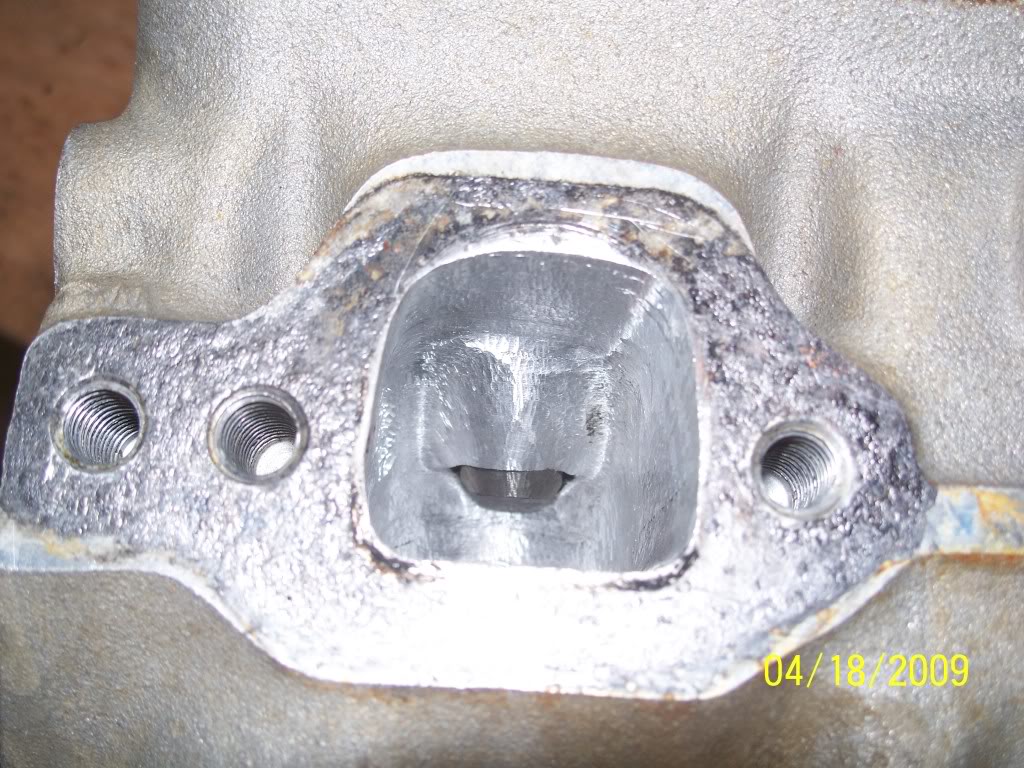
on the exhaust ?? I really didn't know what to do other than raise the roof
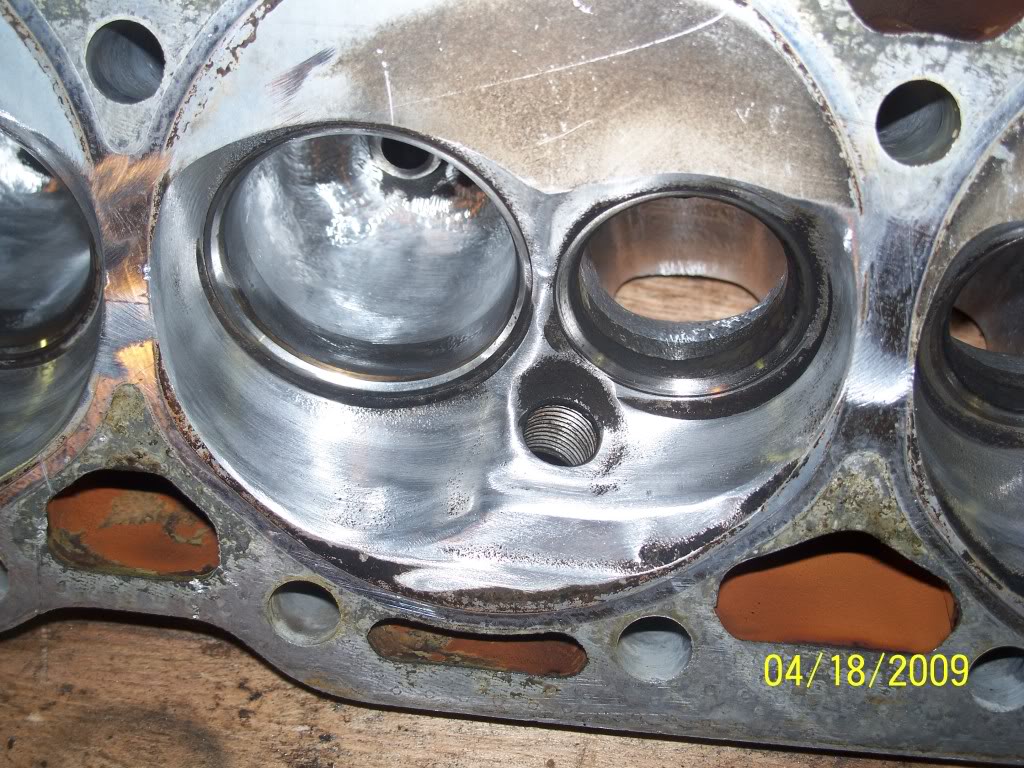
cleaned up the chamber some and got rid of sharp edges


this set of heads I purchased the whole engine from a friend who had it laying around his shop
for 250$ , had a loose rod, complete from intake to oil pan to opti to flywheel.
so if I mess them up I still have 3 sets left
Any pointers?? what could I have done differently? or better or more efficiently?
oh yea money is tight and work is slow so sending them off was not an option, unless their doing them for free
I widened the port near the push rod pinch and opened the intake, side to side and up, still need to straighten the runners
didn't mess with the short radius at all,, other than cleaning it up a little.
got rid of most of the parting lines, smoothed the bowl , tapered the guide a little
on the exhaust ?? I really didn't know what to do other than raise the roof
cleaned up the chamber some and got rid of sharp edges
this set of heads I purchased the whole engine from a friend who had it laying around his shop
for 250$ , had a loose rod, complete from intake to oil pan to opti to flywheel.
so if I mess them up I still have 3 sets left
Any pointers?? what could I have done differently? or better or more efficiently?
oh yea money is tight and work is slow so sending them off was not an option, unless their doing them for free


Registered User
Joined: Oct 2001
Posts: 2,684

Registered User
Joined: Mar 2005
Posts: 152
From: Raleigh, N.C.
It does look a little rough.
Its hard to tell in the pics, but it looks like the roof of the intake side is uneven.
You can probally unshroud the valve stem guide a little more too.
My first set was pretty rough. It took me probally 30 hours of work to get them to look right. I also nicked a valve seat and had to pay a shop to give me a 3 angle valve job.
Registered User
Joined: May 2006
Posts: 1,855
From: Ohio
Registered User
Joined: May 2004
Posts: 2,001
From: Bay Area, CA
I need a picture of the burr you are using to grind - but first off you are not moving the cutter enough as you can see the troughs and peaks in the aluminum, it's really rough. The cutter should never dwell in one place unless until you really know what you're doing - keep it moving in rapid side to side movements to follow the original shape of the port, once you get more practice then you can try changing the shape of the port.
The push rod pinch is not effecting you now, working the bowl will give better gains.
The push rod pinch is not effecting you now, working the bowl will give better gains.
Thread Starter
Registered User
Joined: Aug 2007
Posts: 746
From: Bennett N.C.
I need a picture of the burr you are using to grind - but first off you are not moving the cutter enough as you can see the troughs and peaks in the aluminum, it's really rough. The cutter should never dwell in one place unless until you really know what you're doing - keep it moving in rapid side to side movements to follow the original shape of the port, once you get more practice then you can try changing the shape of the port.
The push rod pinch is not effecting you now, working the bowl will give better gains.
The push rod pinch is not effecting you now, working the bowl will give better gains.
believe it or not these things cut really well, almost too fast for me
I'm hoping that the ports will look a lot better when I get the cartridge rolls
I didn't try to take a lot of material out of the ports just got rid of the rough casting, its actually smother now than before

I was surprised at how good the bowls are compared to older cast iron heads, no real big ridges and humps, just small parting lines
thanks
Registered User
Joined: May 2004
Posts: 2,001
From: Bay Area, CA
Those are really for cast iron and will load up real quick in aluminum - but they will do ok if you keep the work area wet with WD-40. Stay with that large tree shaped burr, personally I use an oval shaped single flute like these:

I'm not talking about finger smooth with a cartridge roll, forget about those until you get the surface level, like I said there's many peaks and valleys where your burr has dug in too much. You need to keep the tool moving and change direction by 45 deg increments to level it out once dug in like that.
I'm not talking about finger smooth with a cartridge roll, forget about those until you get the surface level, like I said there's many peaks and valleys where your burr has dug in too much. You need to keep the tool moving and change direction by 45 deg increments to level it out once dug in like that.

Registered User
Joined: Feb 2004
Posts: 4,800
They make burrs specifically for aluminum too that don't plug up so easily.
The single flute like posted above does work well if lubricated enough.
I have a double cut like the ebay listing and those are awesome on iron.
The single flute like posted above does work well if lubricated enough.
I have a double cut like the ebay listing and those are awesome on iron.
Thread Starter
Registered User
Joined: Aug 2007
Posts: 746
From: Bennett N.C.
I Have some of the aluminum burrs just short ones
I looked at the heads again today and must have taken the picture of the worst port, the others do look better. Ill try to use your technique. I think the cartridge rolls will clean up my mistakes. at least they wont cut in as bad
I use wd40 and these eBay burrs are really good. they don't cut in as quickly as the aluminum burrs do
just a side note I'm using Harbor freight die grinders

Registered User
Joined: Nov 2005
Posts: 455
From: Morton IL
You need some blue dye, a scribe and a machinint's square MachinistOne has some good advice, stick to a single cut for aluminum and just make sure you keep the tooll moving! I always use a foot pedal so I can adjust the speed without bumping my hands around.
MachinistOne has some good advice, stick to a single cut for aluminum and just make sure you keep the tooll moving! I always use a foot pedal so I can adjust the speed without bumping my hands around.

Thread Starter
Registered User
Joined: Aug 2007
Posts: 746
From: Bennett N.C.
I went all the way back to your posts for pictures thanks for leaving them up so long, what did you do for the exhaust?
I did scribe the intakes+went past the scribes a little
I don't know when I will get back to these heads I'M hoping my transmission will be here soon put it in and ride till my *** hurts
I did scribe the intakes+went past the scribes a little
I don't know when I will get back to these heads I'M hoping my transmission will be here soon
put it in and ride till my *** hurts