
build pics, stock k-member vs UMI k-member, +more. 56k no


Thread Starter
Registered User
Joined: Feb 2004
Posts: 948
From: Stroudsburg, PA
build pics, stock k-member vs UMI k-member, +more. 56k no
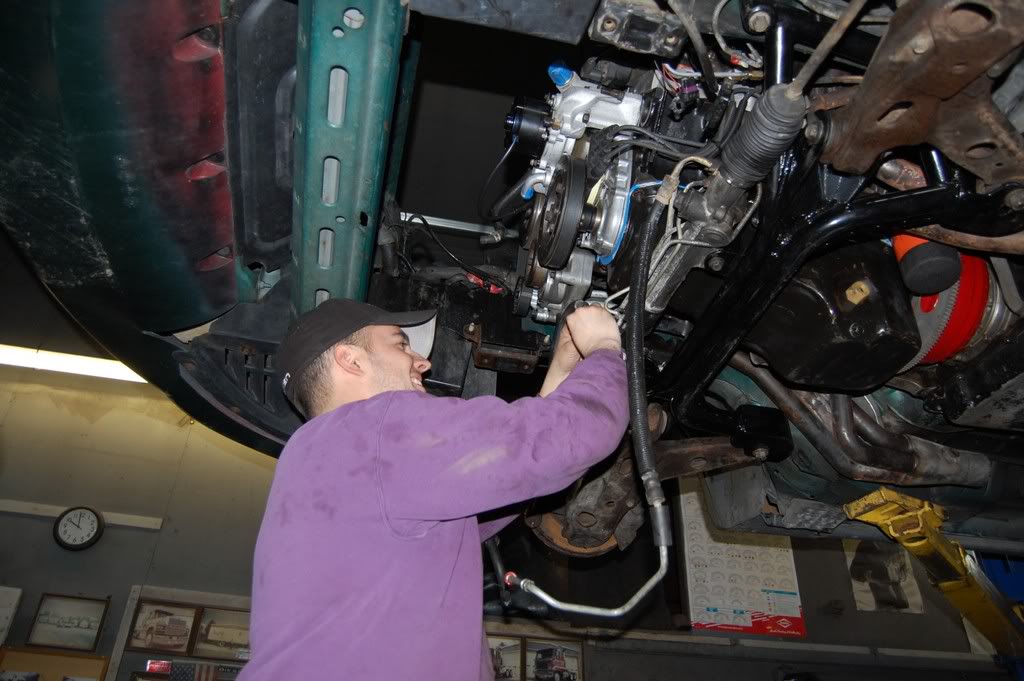
I finally got around to stuffing my new engine in my car last night. I have done it through the top 3 times before but this time I did it through the bottom. if anyone is ever debating about whether or not to do it through the bottom DO IT IF YOU CAN. it is worlds easier. I raised the entire engine up as a completed assembly as opposed to installing all the accessories/headers/etc on the bare long block. on to the pics.
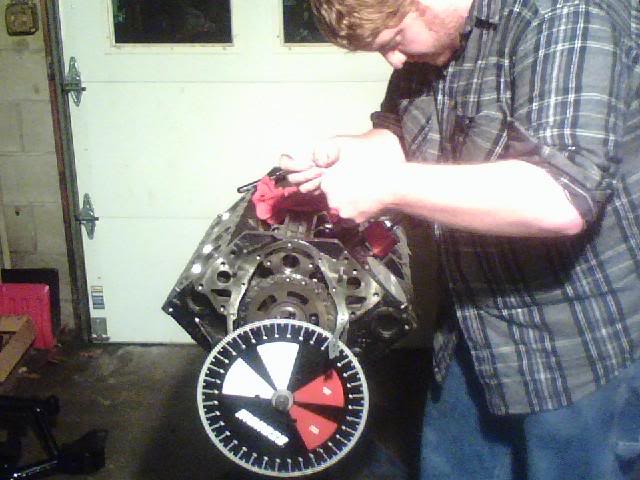
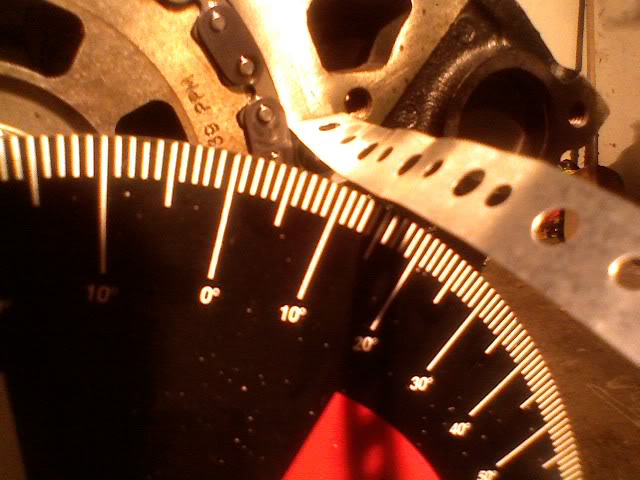
degree the damn camshaft. this was my first time doing it myself (my dad did it before) and I was surprised at how easy it was. stock timing set even had the cam right on the money.
don't be afraid to hack away at stock valvecovers to clearance for roller rockers. I have 1.6:1 comp pro mags and had to do the following to clearance:
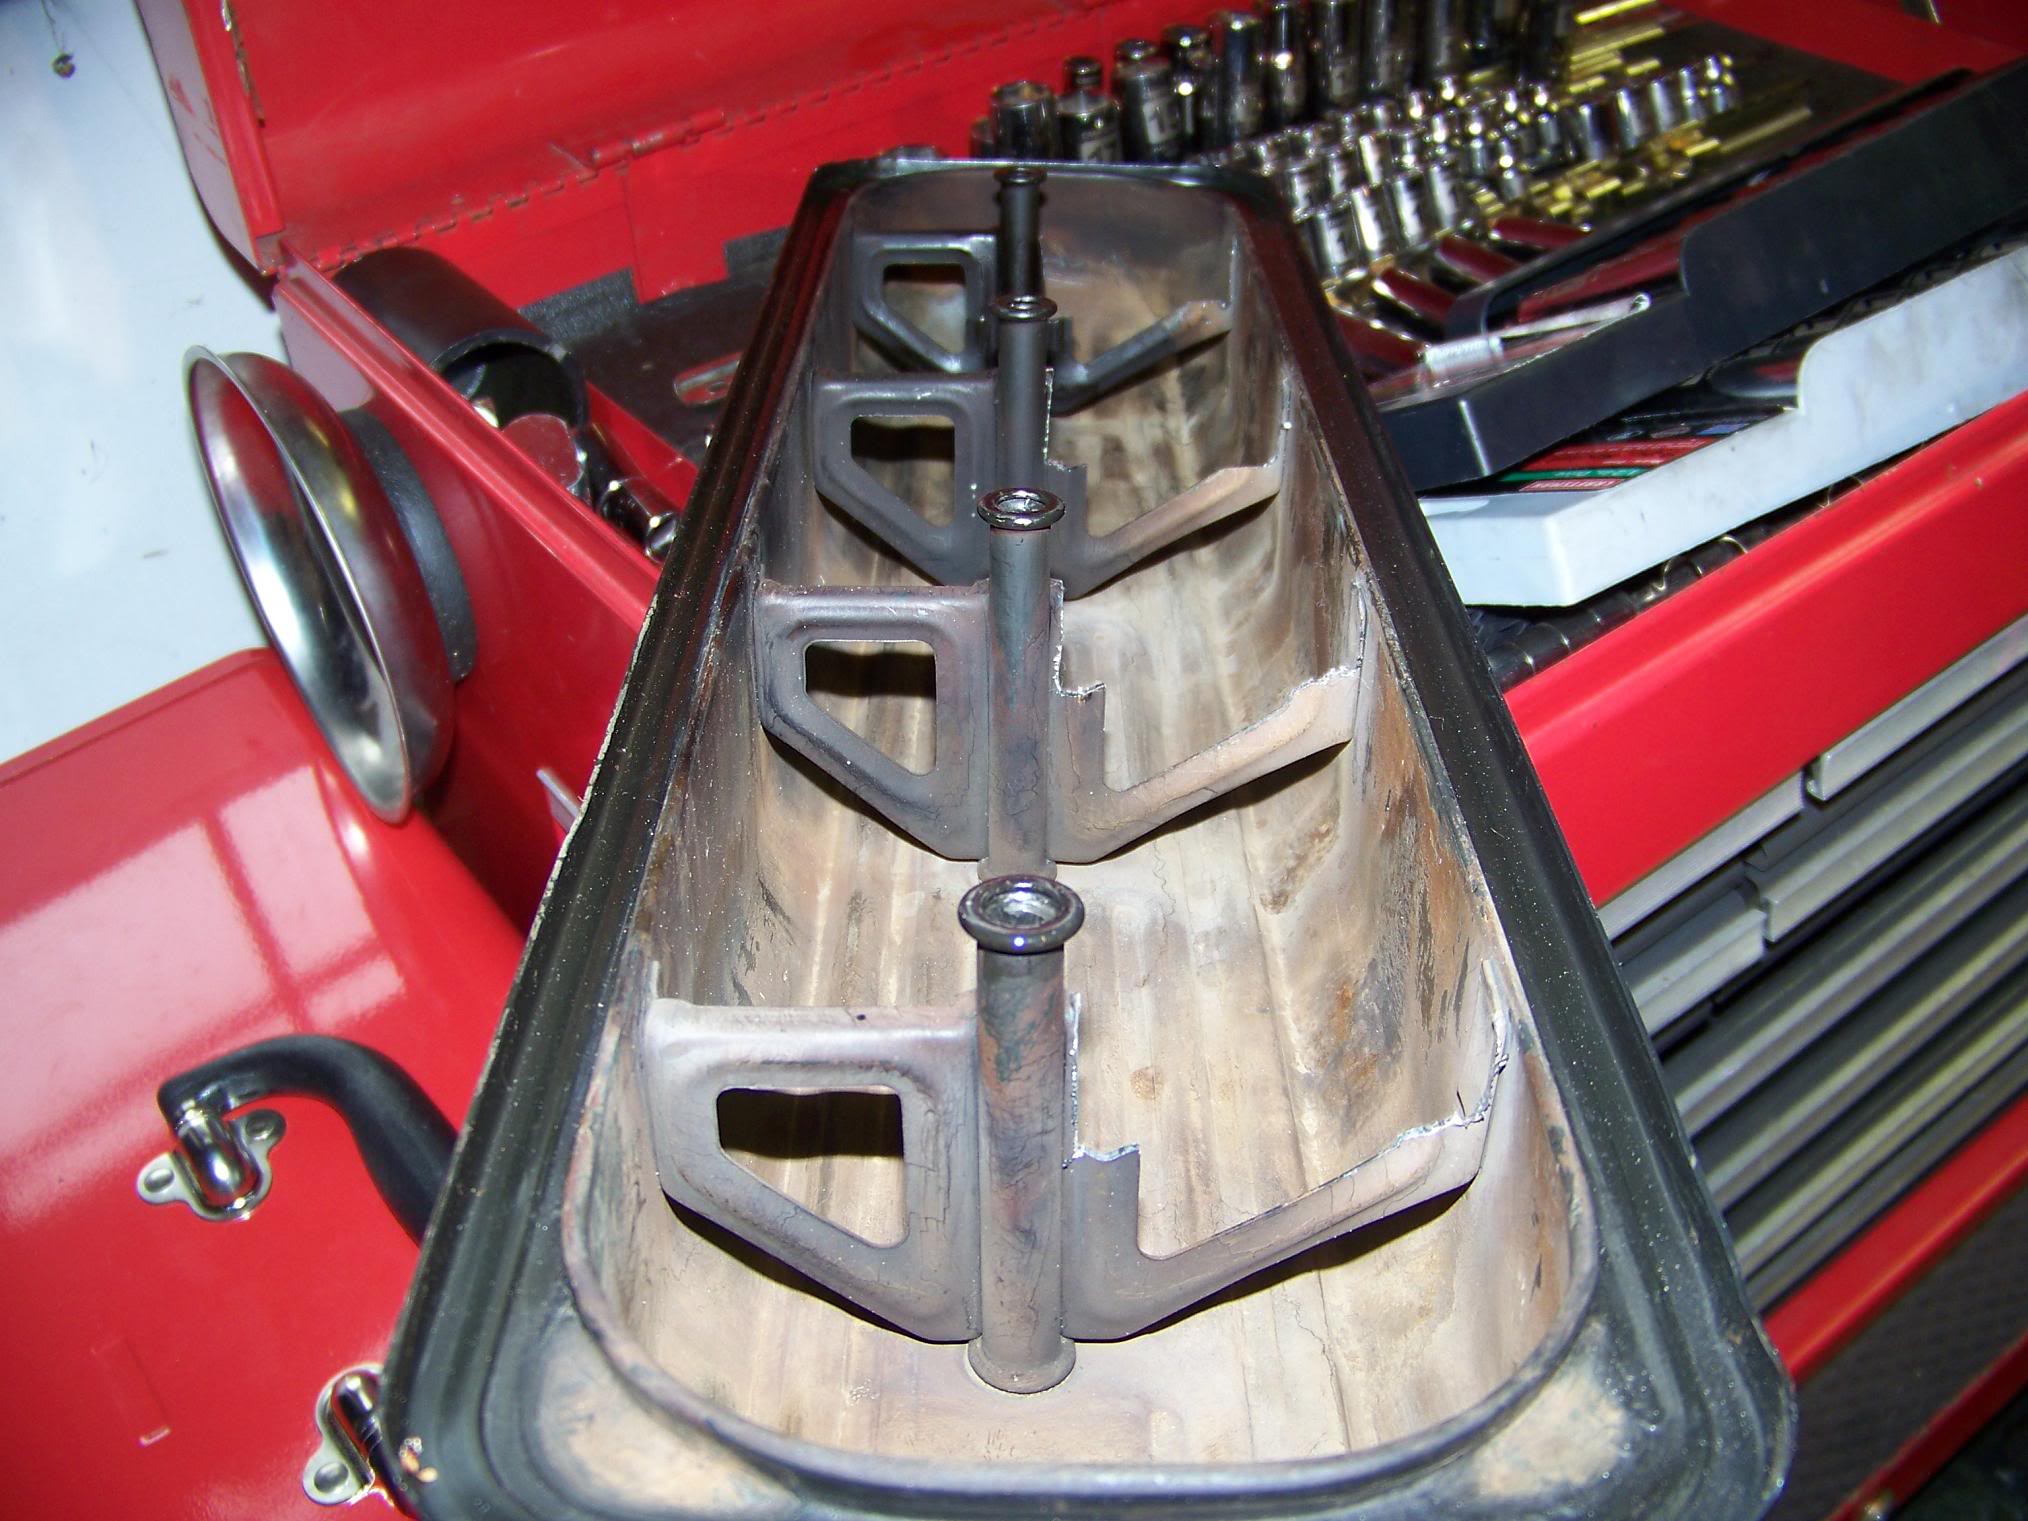
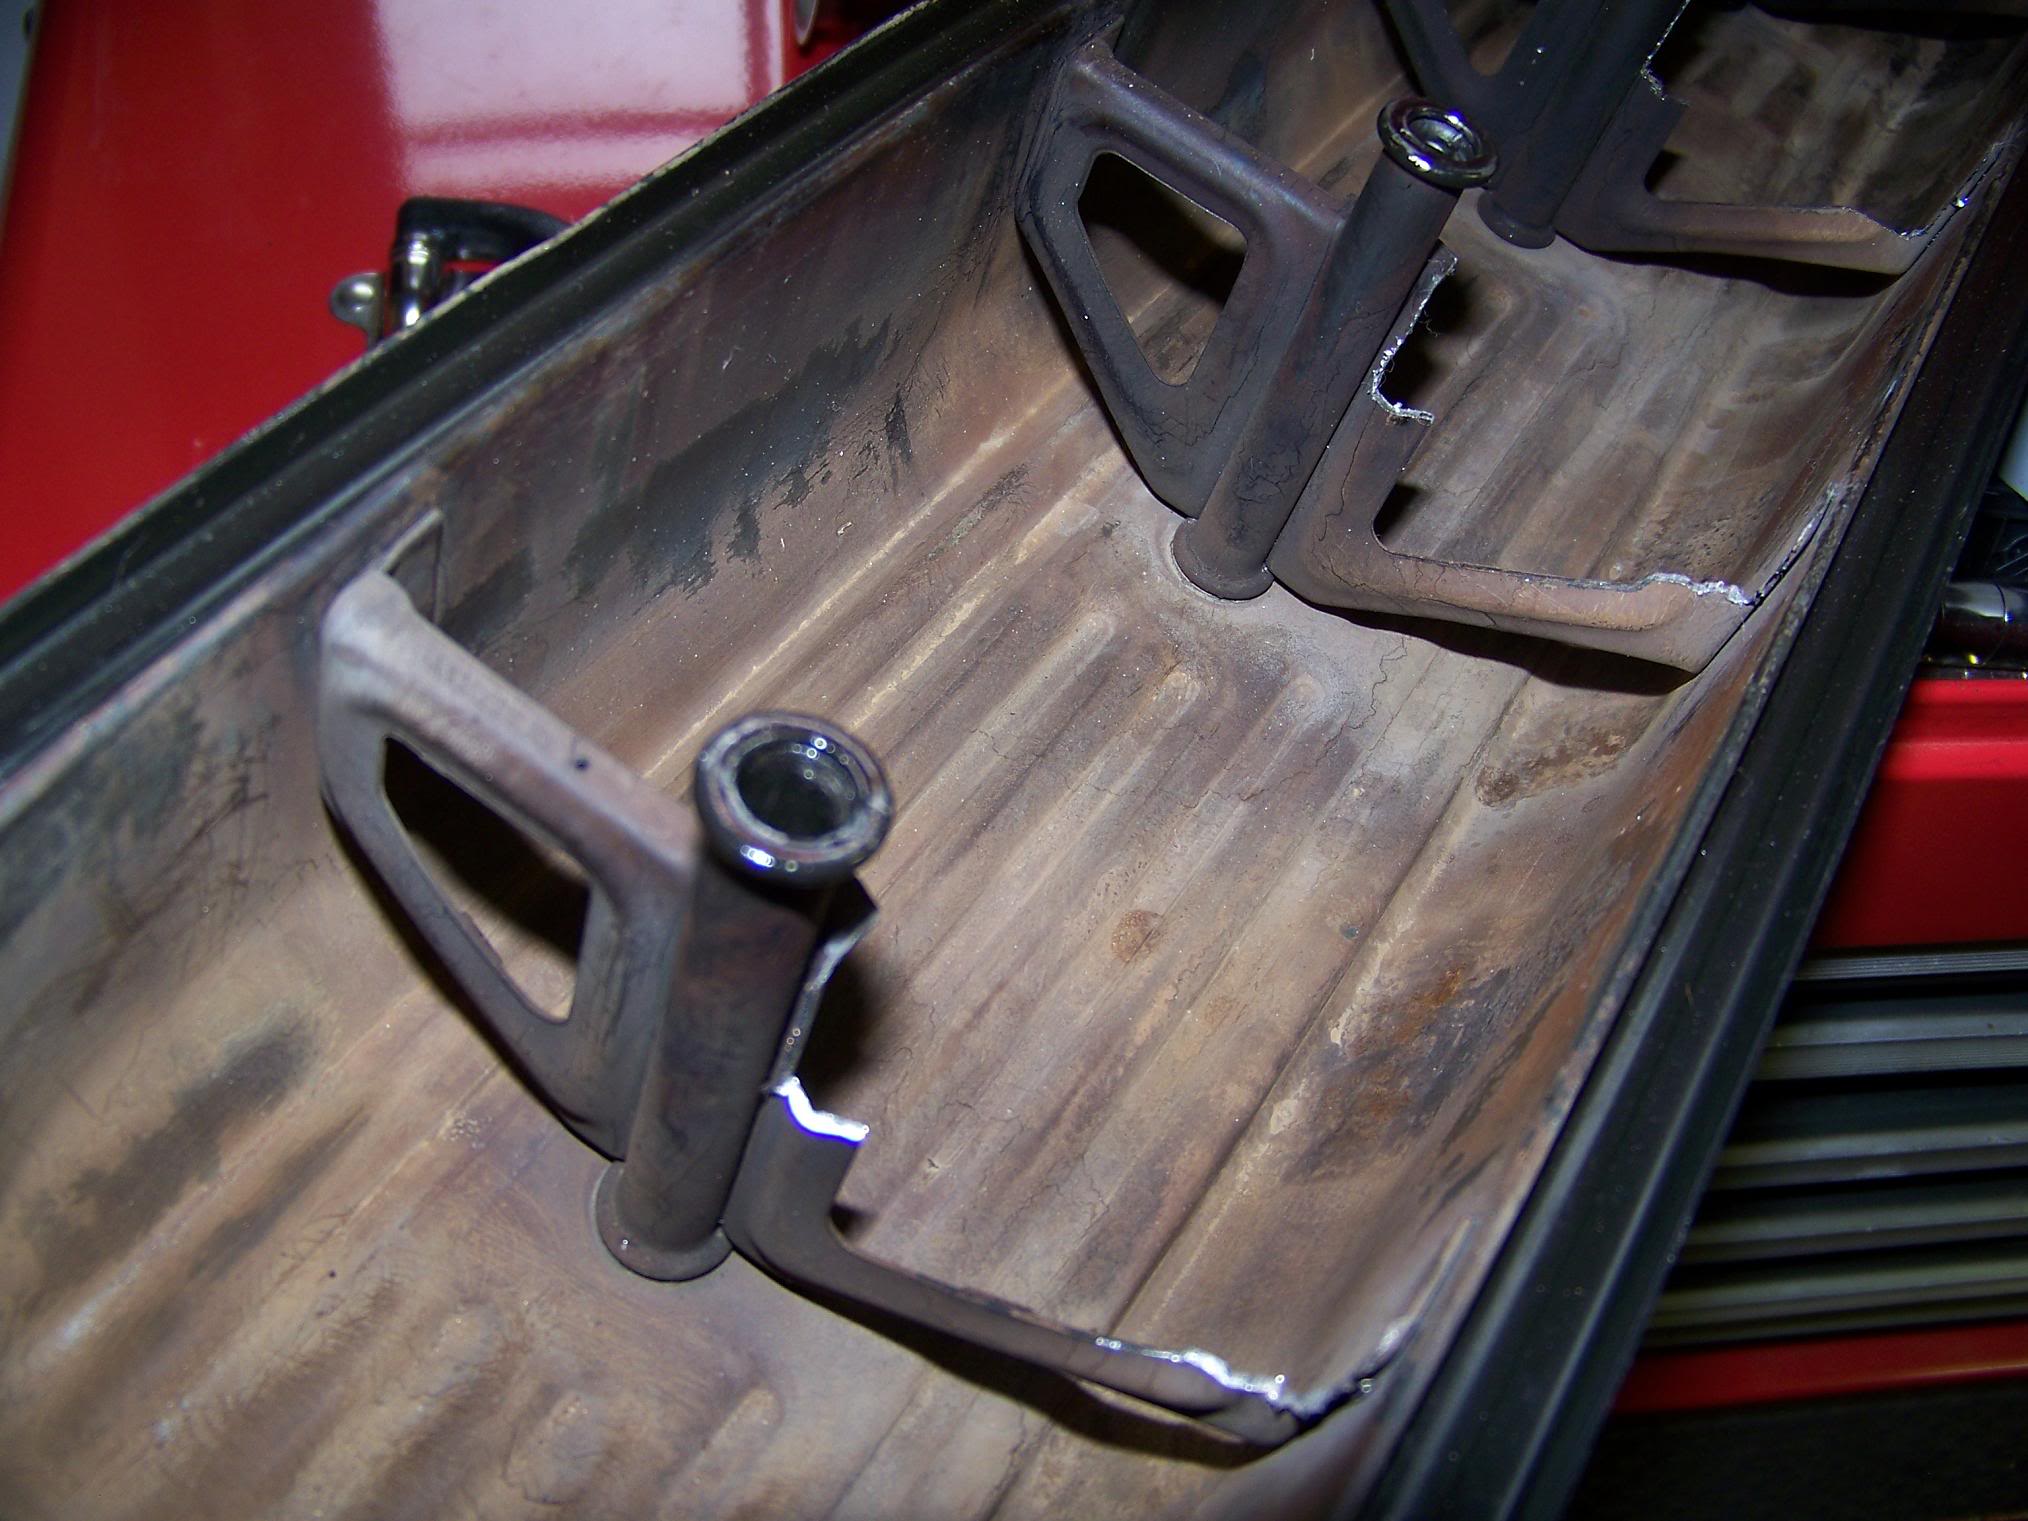
a cutting wheel works wonders and a dremel cleans them up.
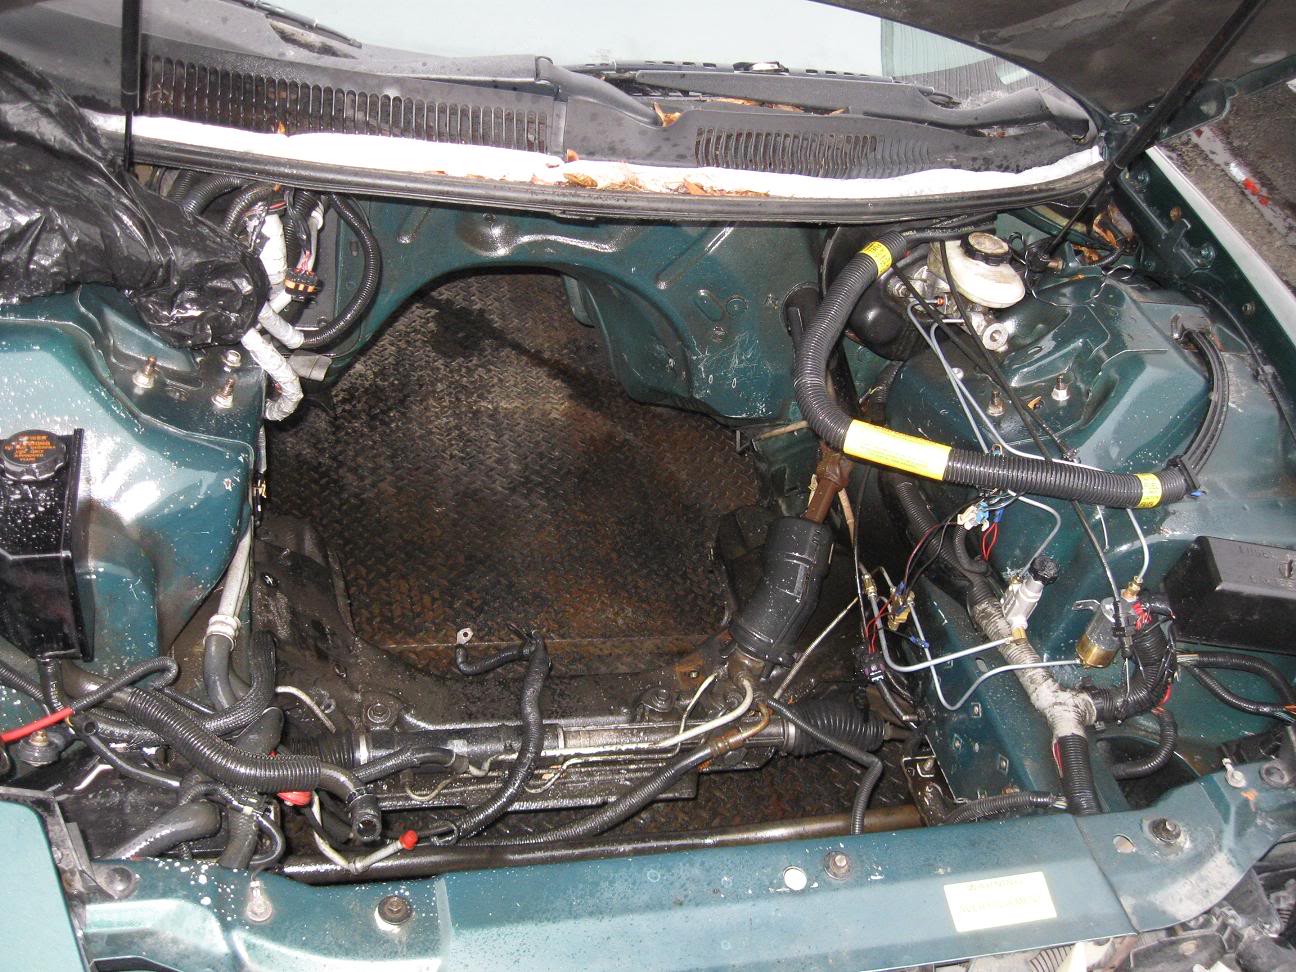
if you have a chance to powerwash your engine bay with the engine out do it. I was amazed by how clean a quick spraying gets it. degreaser works really nice.
before:
after:
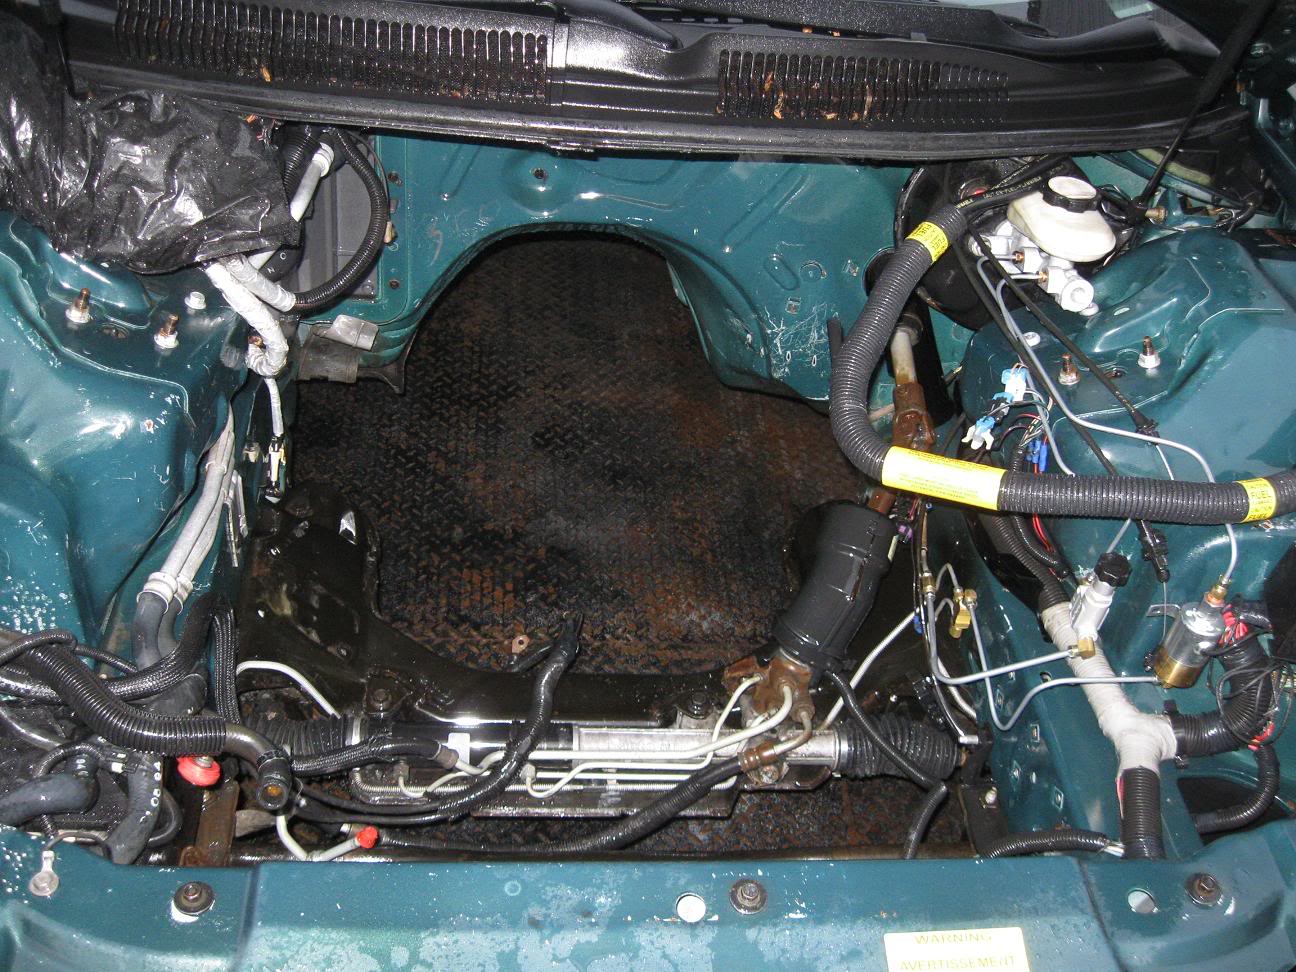
big difference, pictures dont do it justice. disregard all the paint scratches from installing headers and other crap lol.
I didn't have an engine in it when I dropped the original k-member so it made it pretty easy but it isn't much more difficult with an engine/trans on it (did it before with my friend's LS1 car)
there are a bunch of writeups on how to do it so I won't go in to much detail. think of it logically, what has to be disconnected for the whole assembly to drop.
when you do your car looks really bare.
I was even surprised when I got everything down 1) how easy everything came apart and 2) the car isn't that bad for a 15 year old GM lol.
(continued next post)
degree the damn camshaft. this was my first time doing it myself (my dad did it before) and I was surprised at how easy it was. stock timing set even had the cam right on the money.
don't be afraid to hack away at stock valvecovers to clearance for roller rockers. I have 1.6:1 comp pro mags and had to do the following to clearance:
a cutting wheel works wonders and a dremel cleans them up.
if you have a chance to powerwash your engine bay with the engine out do it. I was amazed by how clean a quick spraying gets it. degreaser works really nice.
before:
after:
big difference, pictures dont do it justice. disregard all the paint scratches from installing headers and other crap lol.
I didn't have an engine in it when I dropped the original k-member so it made it pretty easy but it isn't much more difficult with an engine/trans on it (did it before with my friend's LS1 car)
there are a bunch of writeups on how to do it so I won't go in to much detail. think of it logically, what has to be disconnected for the whole assembly to drop.
when you do your car looks really bare.
I was even surprised when I got everything down 1) how easy everything came apart and 2) the car isn't that bad for a 15 year old GM lol.
(continued next post)
Thread Starter
Registered User
Joined: Feb 2004
Posts: 948
From: Stroudsburg, PA
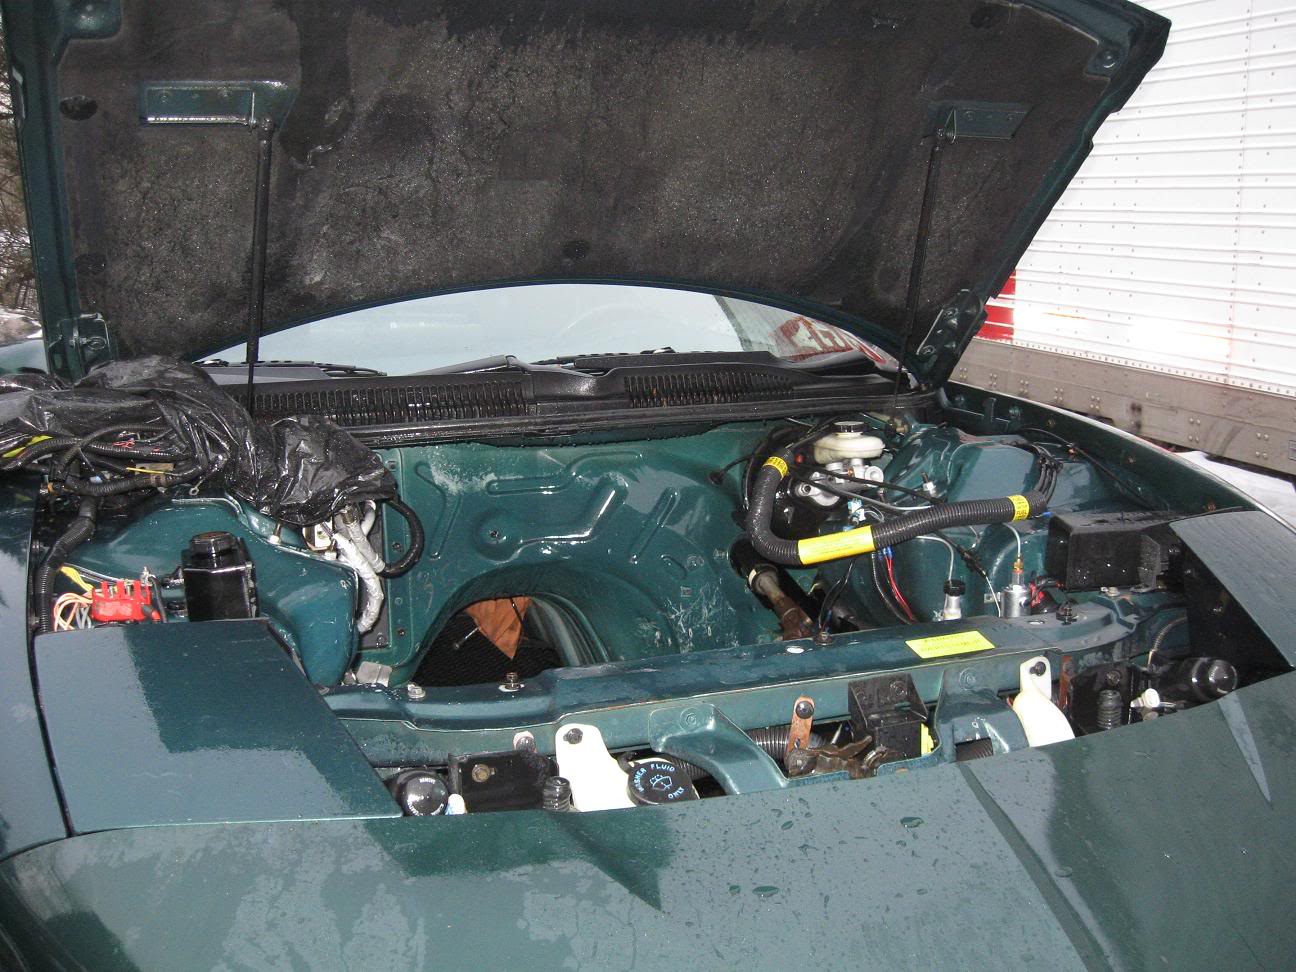
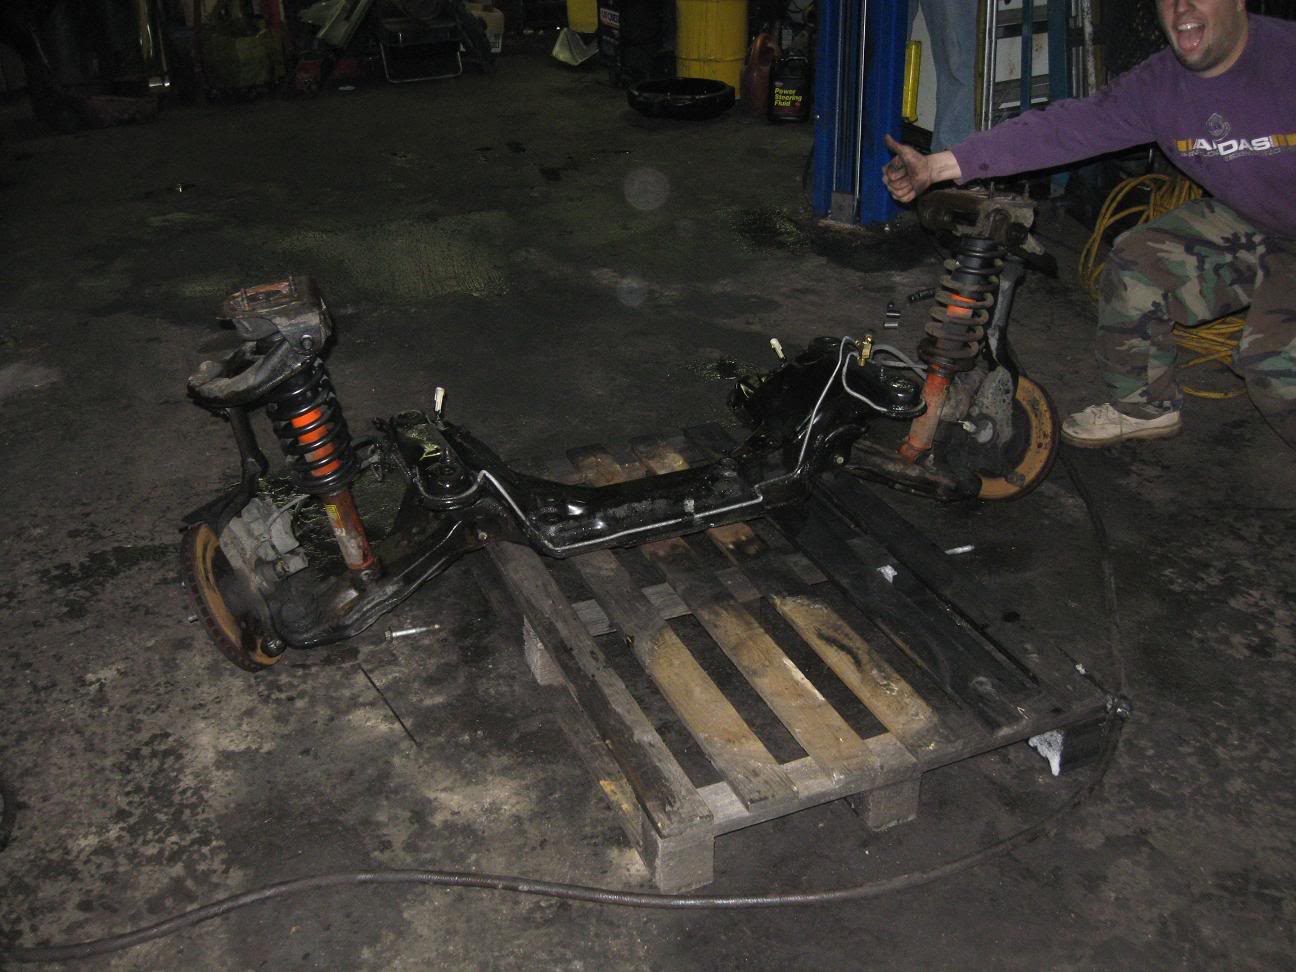
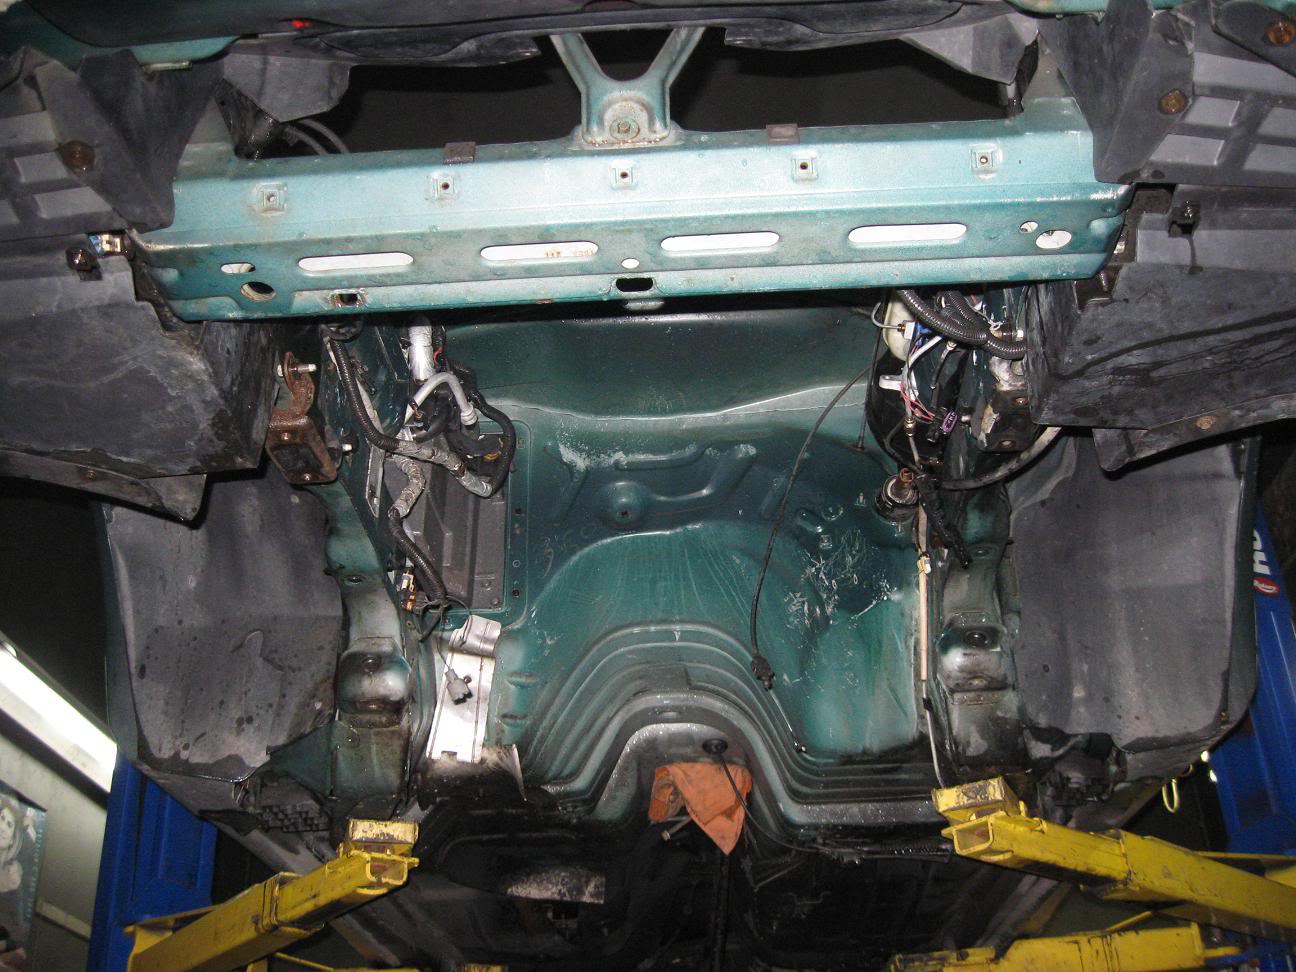
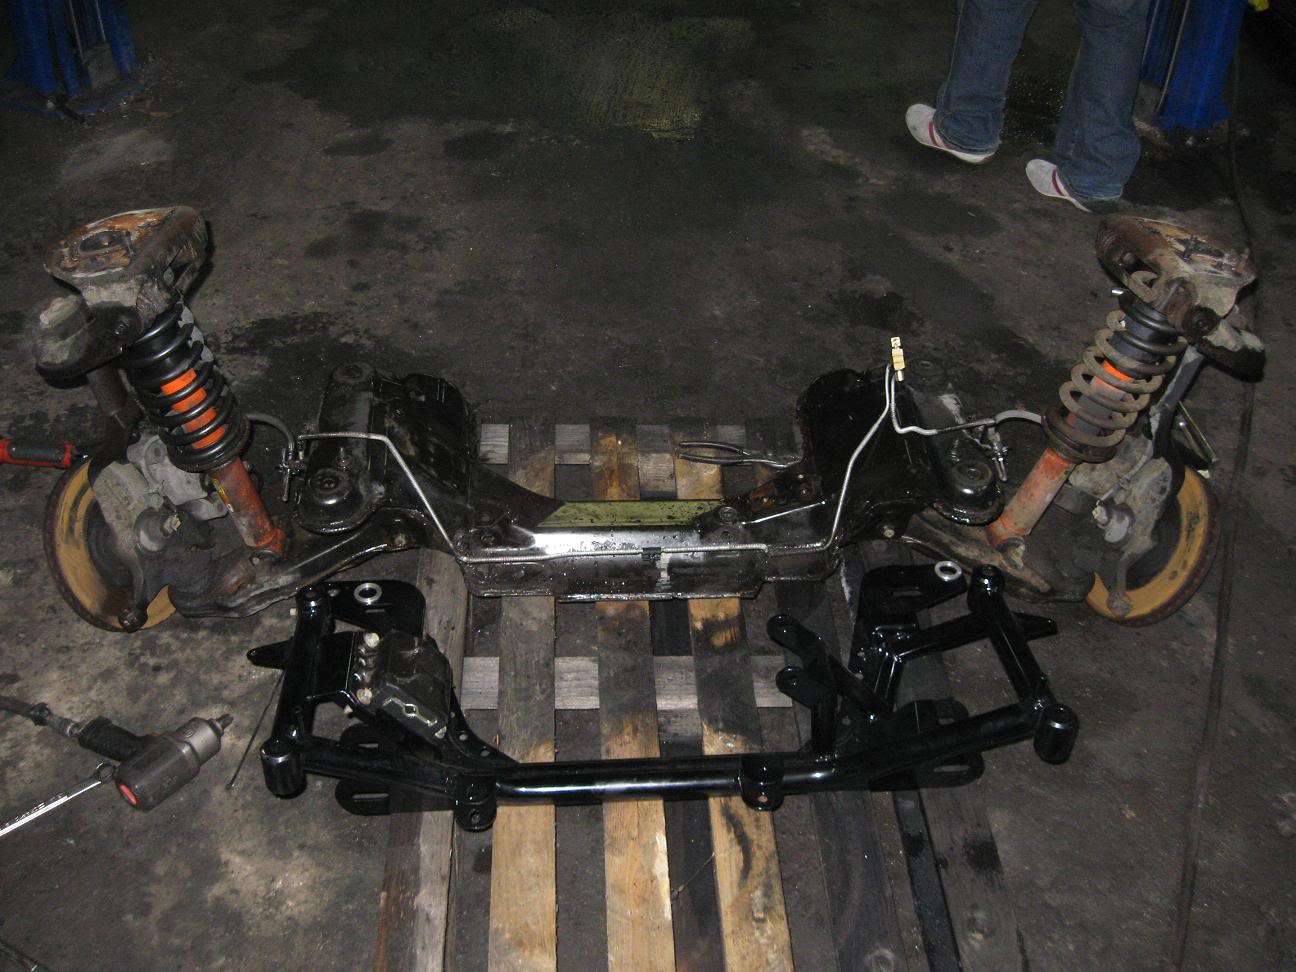
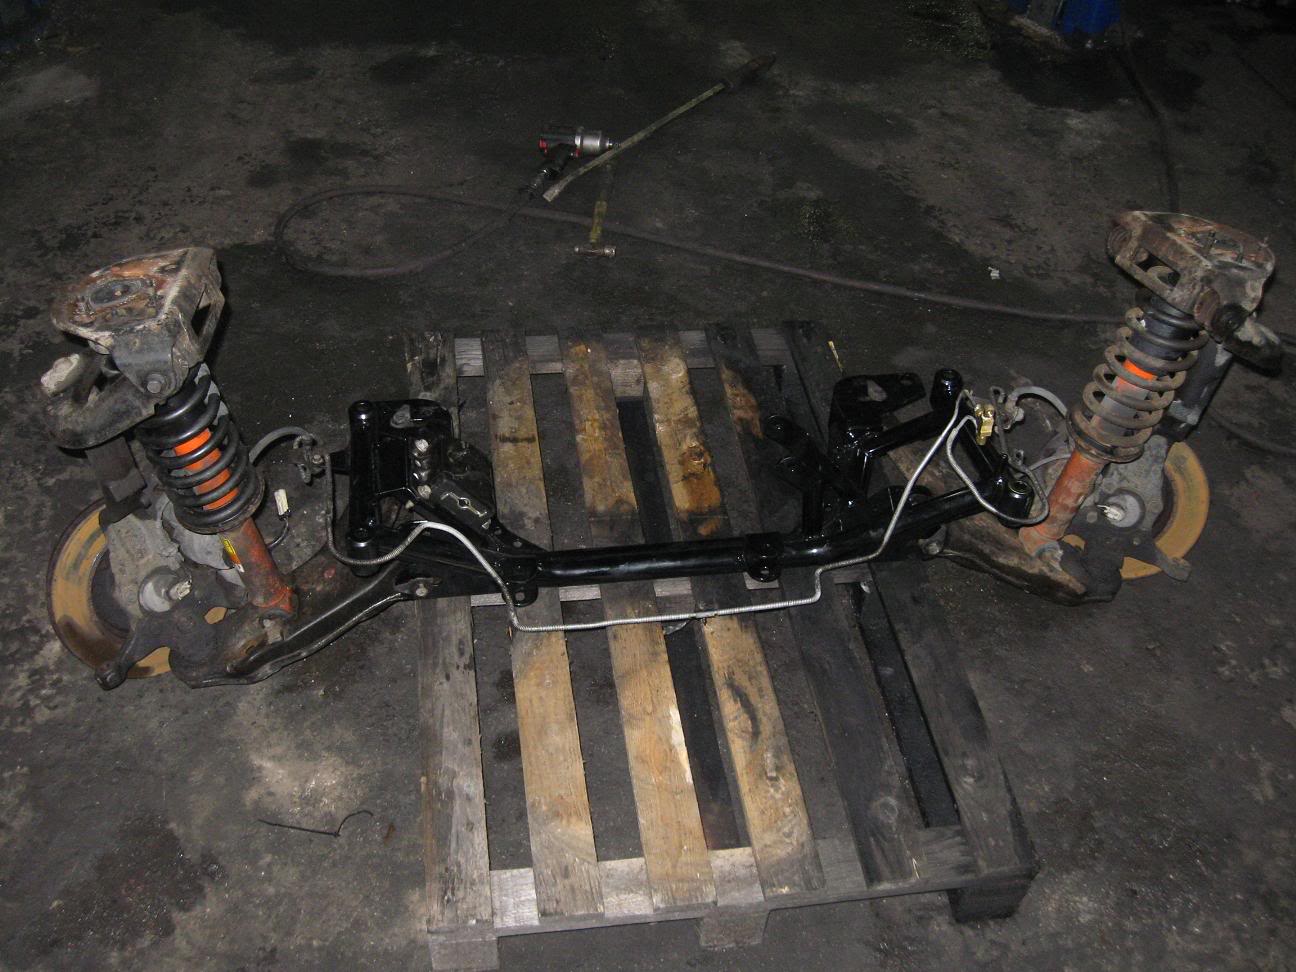
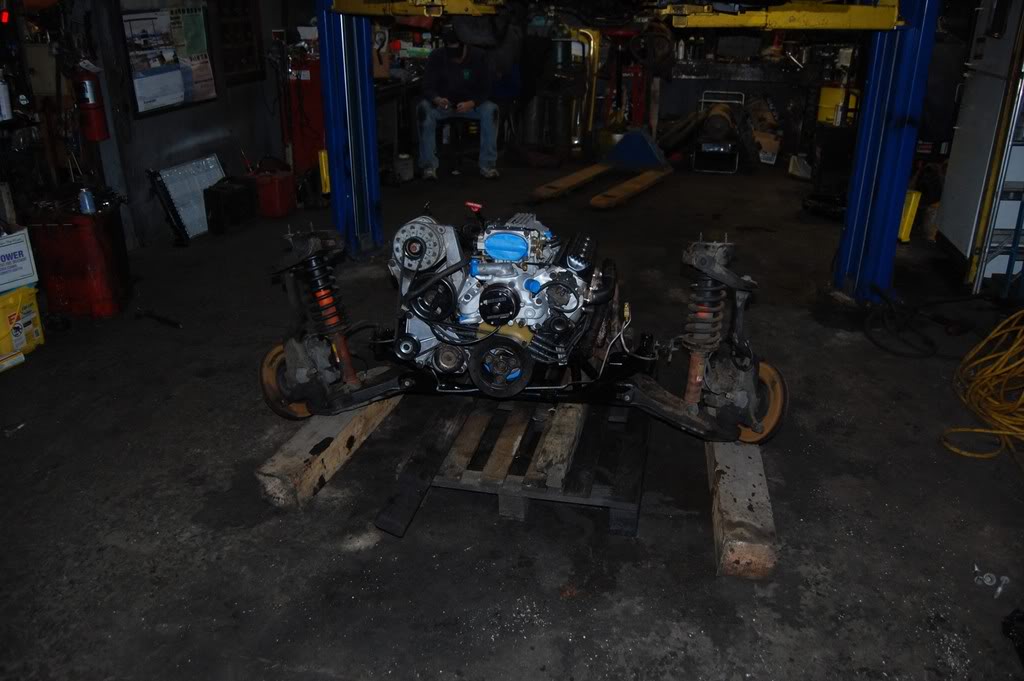
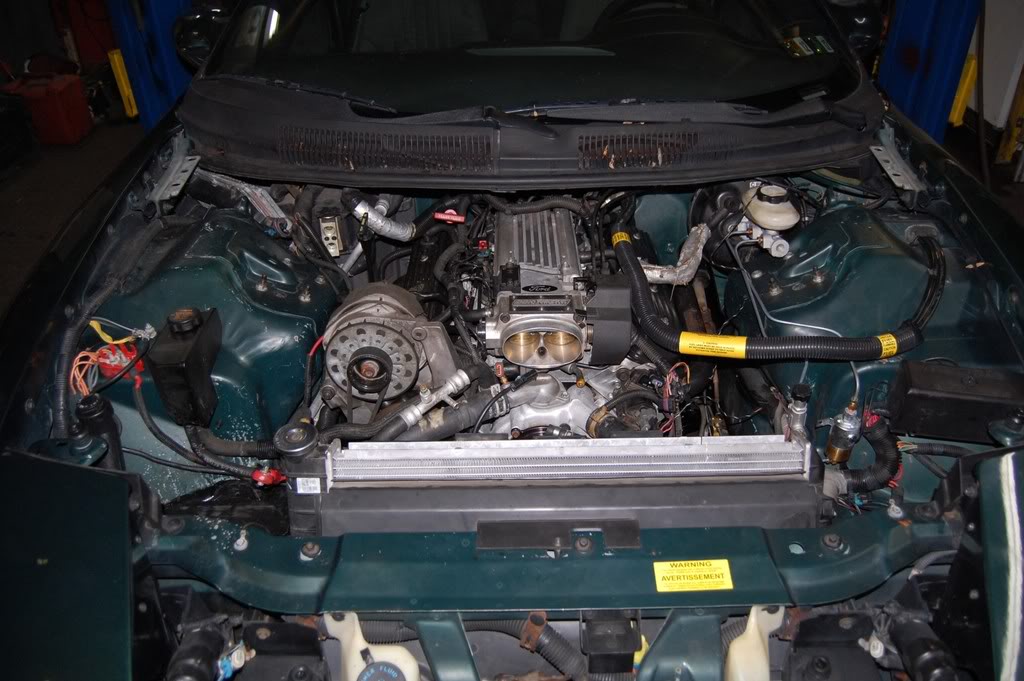
now some k-member pics. the weight reduction for me was NOT 25-30 lbs. I unfortunately did not weigh the difference but in feel it seems to be around 10 lbs difference, maybe 15 lbs tops. the space it opens up is incredible. I didn't think of it at the time but looking at the pictures I may be able to drop the oil pan with the k-member in place.
stock vs UMI:
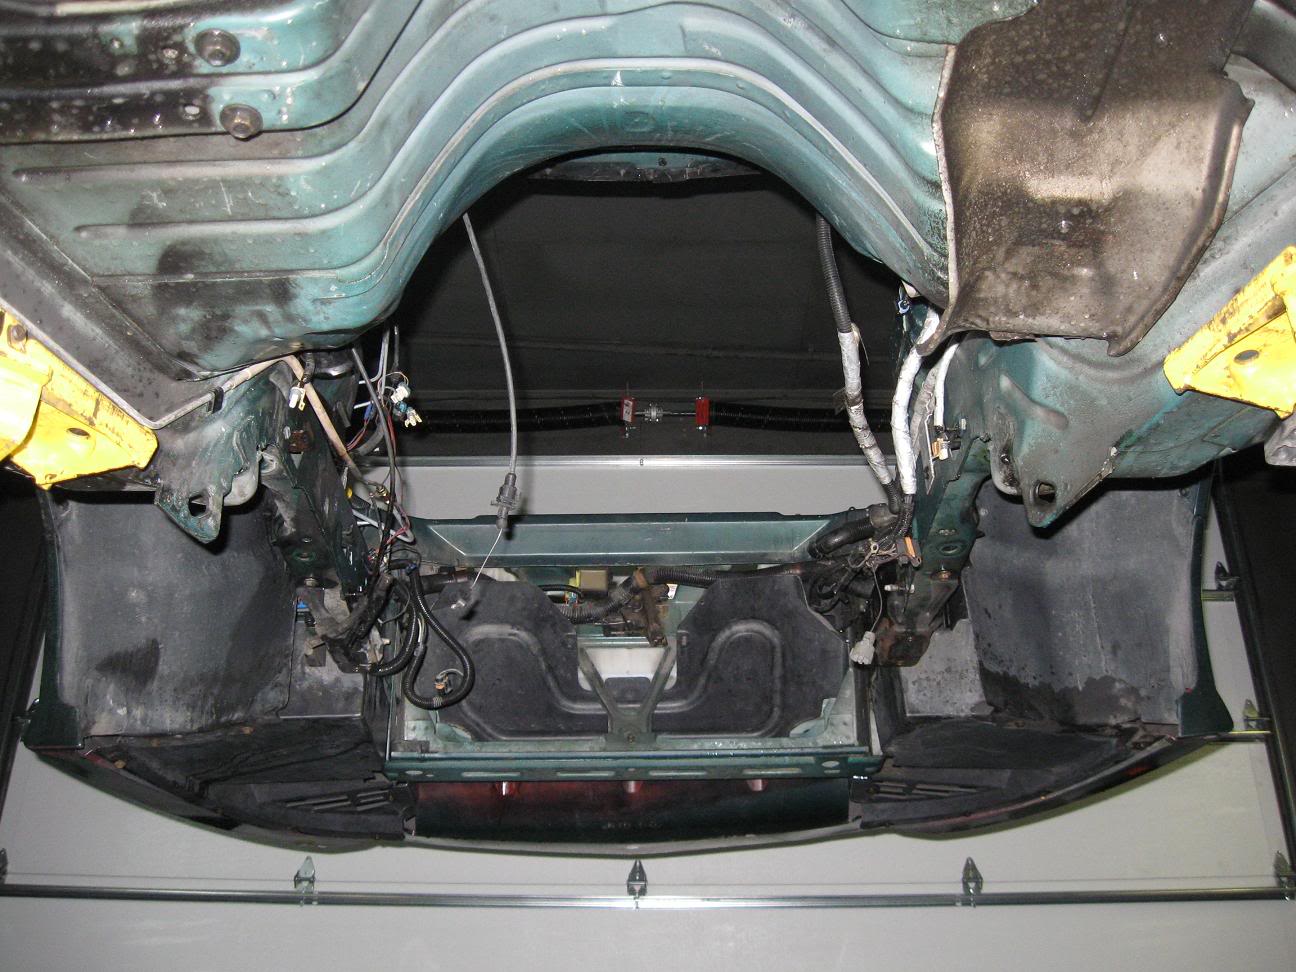
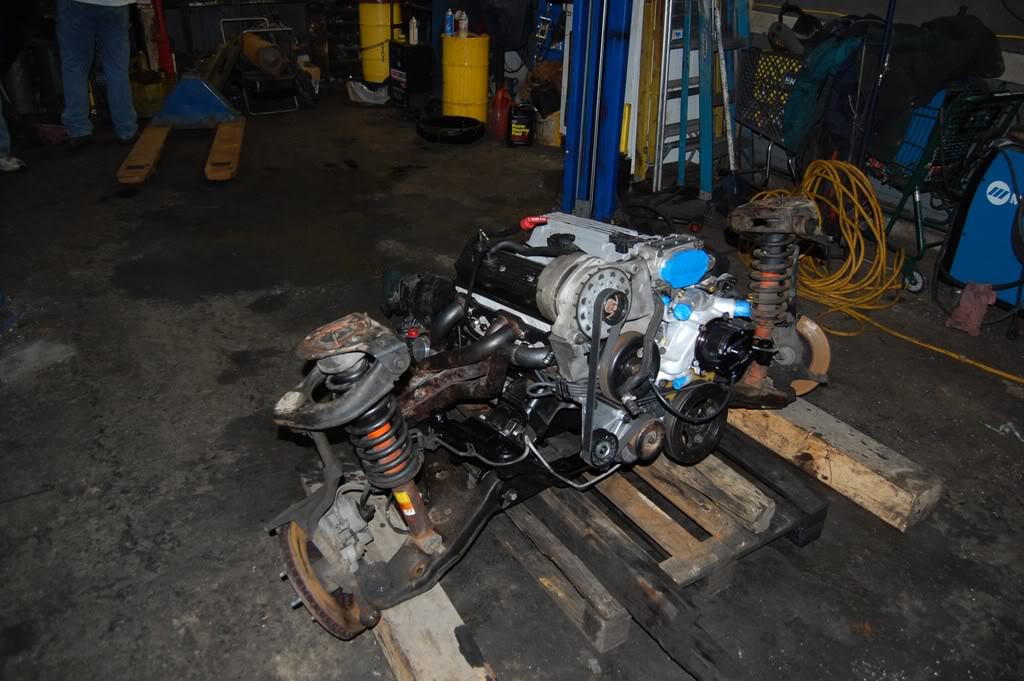
UMI installed:
after this we installed the engine/trans on the k-member
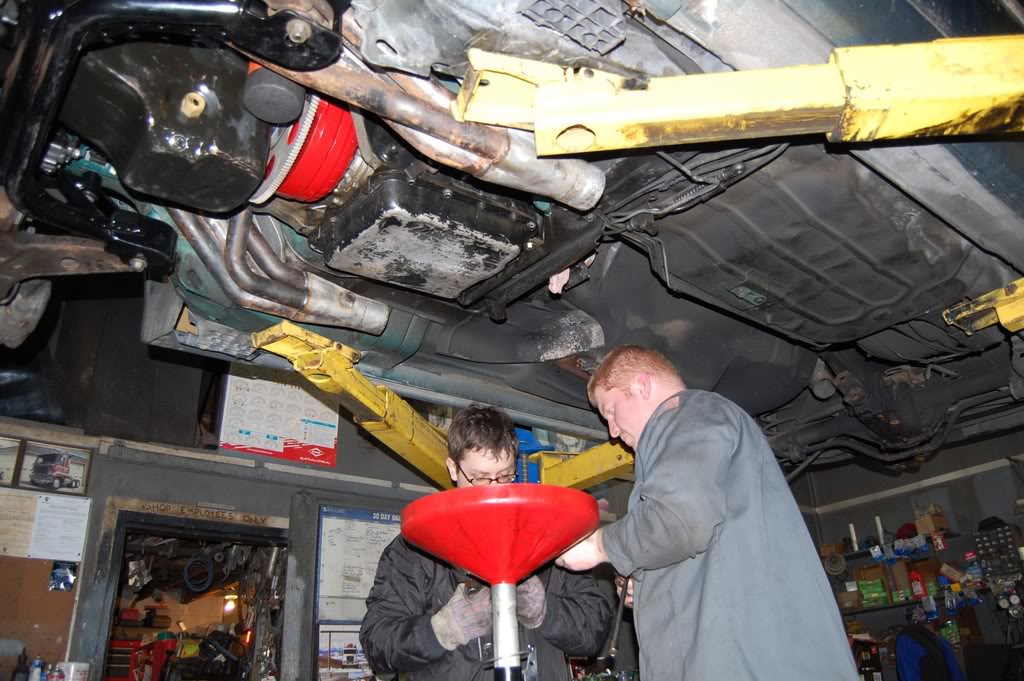
then we lowered the car on to it. just be careful and it helps to have at least 4 guys looking over the car to make sure nothing snags. we got lucky and got it in to place with little problem. its easiest to guide the strut tower studs in to place and then start the 6 k-member bolts. after everything lines up drop it the little bit more then tighten all the bolts.
some pics showing k-member clearance:
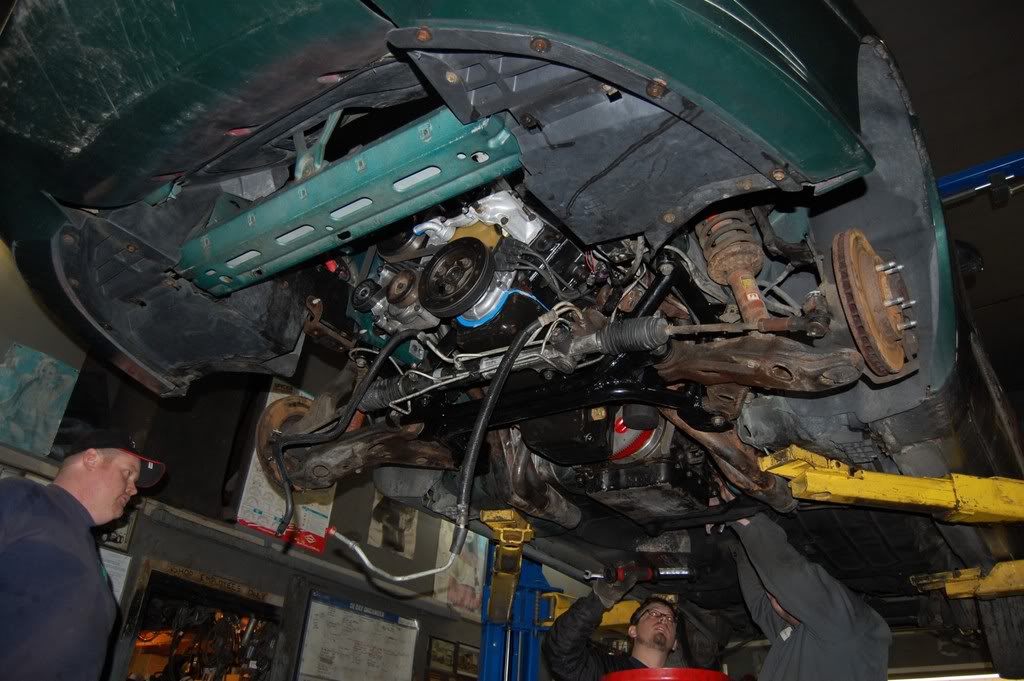
dont be afraid of the wiring harness either. almost everything has its own plug, very hard to get them in the wrong spots. you could label the injectors but even they are pretty obvious when you look at them.
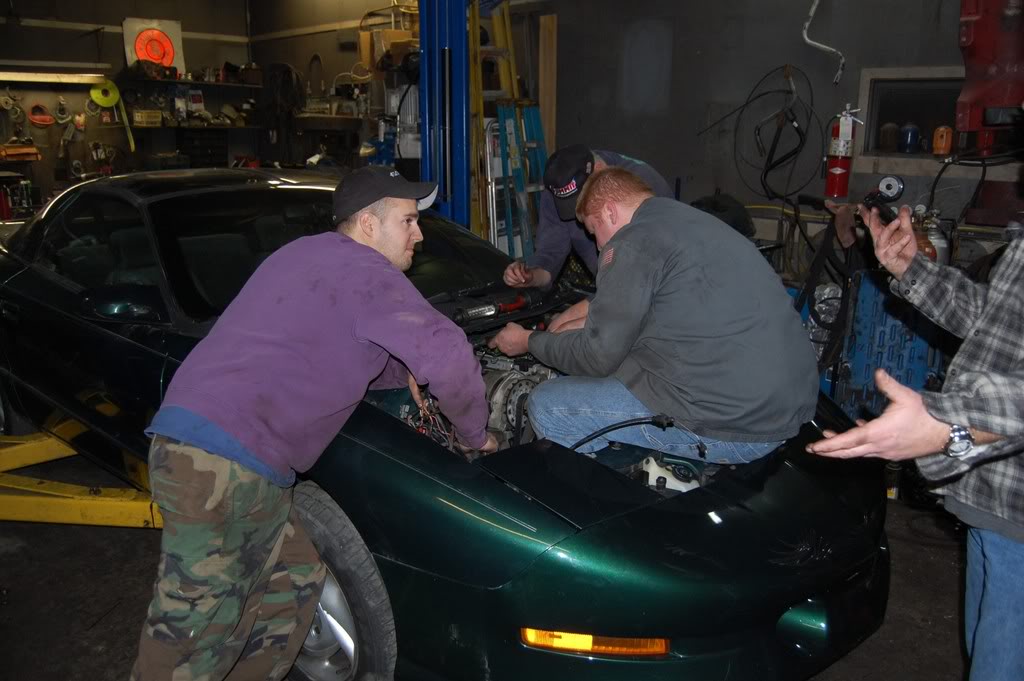
also helps if you can sit in the car and do it
and lastly here is where we ended. it was a little after 1am and we had been working since 5pm. around 8 hours of work and we got the stock k-member dropped, off, and replaced with the new one, put the engine/trans on it, dropped the car on to the new engine/trans/kmember assembly, hooked up wiring harness, radiator, coolant, torque arm, and some other misc stuff.
I really wish we were able to fire it up but we just ran out of time. hopefully we can finish it sunday night so its ready to fire than start it up some time during the week. dont want to wake up the whole neighborhood lol.
stock vs UMI:
UMI installed:
after this we installed the engine/trans on the k-member
then we lowered the car on to it. just be careful and it helps to have at least 4 guys looking over the car to make sure nothing snags. we got lucky and got it in to place with little problem. its easiest to guide the strut tower studs in to place and then start the 6 k-member bolts. after everything lines up drop it the little bit more then tighten all the bolts.
some pics showing k-member clearance:
dont be afraid of the wiring harness either. almost everything has its own plug, very hard to get them in the wrong spots. you could label the injectors but even they are pretty obvious when you look at them.
also helps if you can sit in the car and do it
and lastly here is where we ended. it was a little after 1am and we had been working since 5pm. around 8 hours of work and we got the stock k-member dropped, off, and replaced with the new one, put the engine/trans on it, dropped the car on to the new engine/trans/kmember assembly, hooked up wiring harness, radiator, coolant, torque arm, and some other misc stuff.
I really wish we were able to fire it up but we just ran out of time. hopefully we can finish it sunday night so its ready to fire than start it up some time during the week. dont want to wake up the whole neighborhood lol.
Registered User
Joined: May 2006
Posts: 1,855
From: Ohio
What do you have left to do? Also how long have you been working on it, just today? (installing the engine that is)
It looks like its coming along nicely, I am guessing this is the 94 bird in your sig?
What all is done to it? I am assuming the link in your sig tells us, but its a lot easier for everyone if you just hand it over
It looks like its coming along nicely, I am guessing this is the 94 bird in your sig?
What all is done to it? I am assuming the link in your sig tells us, but its a lot easier for everyone if you just hand it over
Thread Starter
Registered User
Joined: Feb 2004
Posts: 948
From: Stroudsburg, PA
What do you have left to do? Also how long have you been working on it, just today? (installing the engine that is)
It looks like its coming along nicely, I am guessing this is the 94 bird in your sig?
What all is done to it? I am assuming the link in your sig tells us, but its a lot easier for everyone if you just hand it over
It looks like its coming along nicely, I am guessing this is the 94 bird in your sig?
What all is done to it? I am assuming the link in your sig tells us, but its a lot easier for everyone if you just hand it over
-attach the outlet radiator hose on the bottom of the radiator
-cap off the lower drivers side radiator port
-connect the two throttle body hoses to bypass the throttle body
-wire electric water pump
-install radiator shroud
-install O2 sensors
-connect the oil pressure sensor, low oil level sensor, O2 sensors, PCM and battery grounds on pass engine mount, starter wires, transmission sensor, and vehicle speed sensor.
-install transmission shift linkage
-connect transmission lines
-install transmission oil cooler
-install driveshaft
-install driveshaft tunnel brace
-install y-pipe
-bleed brake lines, check for leaks
-top all fluids off
-put battery in
-start
i have been working on the engine off and on for about 2 months. started as just a short block. I have a lot more pics that I could post but theyre pretty boring.
my specs (briefly, im tired and want to go to bed)
350 bottom end balanced with ARP rod bolts
stock heads with some minor bowl work, good valve job, and some port smoothing. nothing major.
stock intake
58mm BBK throttle body
242/250 cam custom specced by ed curtis.
GOOD comp valvetrain components
stock injectors (gonna see if they hold, have some 42 lbers on standby just incase they arent enough)
yank prothruster 4000 stall
built 4L60E
2.73s for now
 gonna put 4.10s in when I save some cash
misc weight reduction.
im shooting for 11s all motor. if I dont hit my goal the car will be set on fire.
Registered User
Joined: May 2006
Posts: 1,855
From: Ohio
as for what I have left to do with it...
-attach the outlet radiator hose on the bottom of the radiator
-cap off the lower drivers side radiator port
-connect the two throttle body hoses to bypass the throttle body
-wire electric water pump
-install radiator shroud
-install O2 sensors
-connect the oil pressure sensor, low oil level sensor, O2 sensors, PCM and battery grounds on pass engine mount, starter wires, transmission sensor, and vehicle speed sensor.
-install transmission shift linkage
-connect transmission lines
-install transmission oil cooler
-install driveshaft
-install driveshaft tunnel brace
-install y-pipe
-bleed brake lines, check for leaks
-top all fluids off
-put battery in
-start
i have been working on the engine off and on for about 2 months. started as just a short block. I have a lot more pics that I could post but theyre pretty boring.
the harness is pretty easy to install either way, I didnt feel like disconnecting it from the car.
my specs (briefly, im tired and want to go to bed)
350 bottom end balanced with ARP rod bolts
stock heads with some minor bowl work, good valve job, and some port smoothing. nothing major.
stock intake
58mm BBK throttle body
242/250 cam custom specced by ed curtis.
GOOD comp valvetrain components
stock injectors (gonna see if they hold, have some 42 lbers on standby just incase they arent enough)
yank prothruster 4000 stall
built 4L60E
2.73s for now gonna put 4.10s in when I save some cash
misc weight reduction.
im shooting for 11s all motor. if I dont hit my goal the car will be set on fire.
-attach the outlet radiator hose on the bottom of the radiator
-cap off the lower drivers side radiator port
-connect the two throttle body hoses to bypass the throttle body
-wire electric water pump
-install radiator shroud
-install O2 sensors
-connect the oil pressure sensor, low oil level sensor, O2 sensors, PCM and battery grounds on pass engine mount, starter wires, transmission sensor, and vehicle speed sensor.
-install transmission shift linkage
-connect transmission lines
-install transmission oil cooler
-install driveshaft
-install driveshaft tunnel brace
-install y-pipe
-bleed brake lines, check for leaks
-top all fluids off
-put battery in
-start
i have been working on the engine off and on for about 2 months. started as just a short block. I have a lot more pics that I could post but theyre pretty boring.
the harness is pretty easy to install either way, I didnt feel like disconnecting it from the car.
my specs (briefly, im tired and want to go to bed)
350 bottom end balanced with ARP rod bolts
stock heads with some minor bowl work, good valve job, and some port smoothing. nothing major.
stock intake
58mm BBK throttle body
242/250 cam custom specced by ed curtis.
GOOD comp valvetrain components
stock injectors (gonna see if they hold, have some 42 lbers on standby just incase they arent enough)
yank prothruster 4000 stall
built 4L60E
2.73s for now
gonna put 4.10s in when I save some cashmisc weight reduction.
im shooting for 11s all motor. if I dont hit my goal the car will be set on fire.


Registered User
Joined: Mar 2005
Posts: 360
From: Eagle River, Alaska
Registered User
Joined: Aug 2008
Posts: 496
From: Central, PA
Thread Starter
Registered User
Joined: Feb 2004
Posts: 948
From: Stroudsburg, PA
mismatched how?
I have got a cam that is gonna pull from 4000 to 7000, a bottom end to handle it, a PT4000 stall and soon to be 4.10s. my goal is 11s all day all motor. I purposely overcammed it so that I was able to rev it. if I would have had the heads done I would have had a smaller cam.
edit: the car will be street driven. I dont mind cam surge, bucking, poor fuel mileage, and all that crap. the car is not a daily driver. when I talked to ed curtis about the cam specs I told him to disregard driveability, I don't care. my old 383 had a TCI 3500 that stalled closer to 4000 and a 242/248 106lsa cam that made very little idle vacuum. I loved driving it. ragged edge is perfect for me
Last edited by Zigroid; Jan 25, 2009 at 09:47 PM.

Registered User
Joined: Nov 2002
Posts: 2,000
From: Richmond B.C.
it says in your sig links you went a best of a 12.7@112 with an LE2 heads cam intake 383, now you are using almost stock heads and a bigger cam in a 350 and are looking for 11's? on basically stock chassis? isnt that a little optimistic?
