
View Poll Results: What should the box/surrounding area be finished in?
- carpet


2
50.00%
- vinyl


2
50.00%
Voters: 4. You may not vote on this poll
12" sub box INSTALL -- progress PICS (partial rear well box)


Thread Starter
Registered User
Joined: Aug 2003
Posts: 1,397
From: Chicagoland, IL
12" sub box INSTALL -- progress PICS (partial rear well box)
(click here for final product thread)
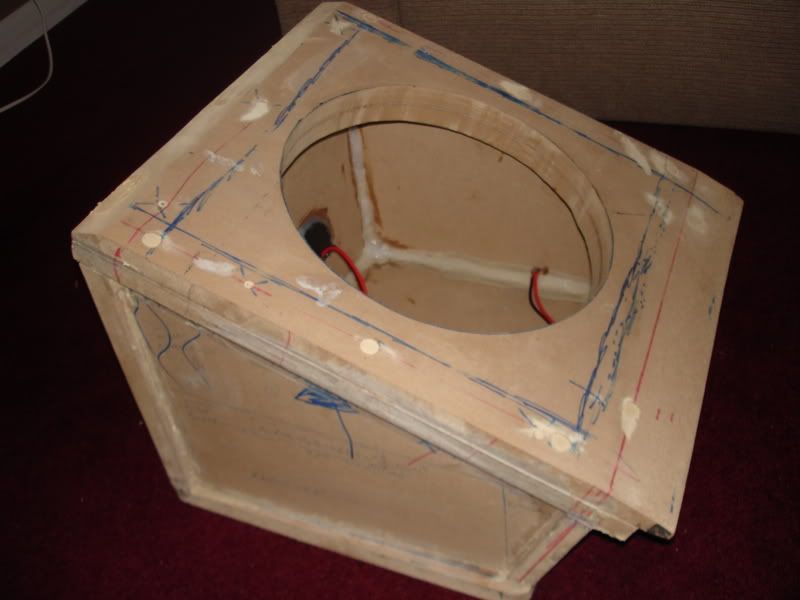
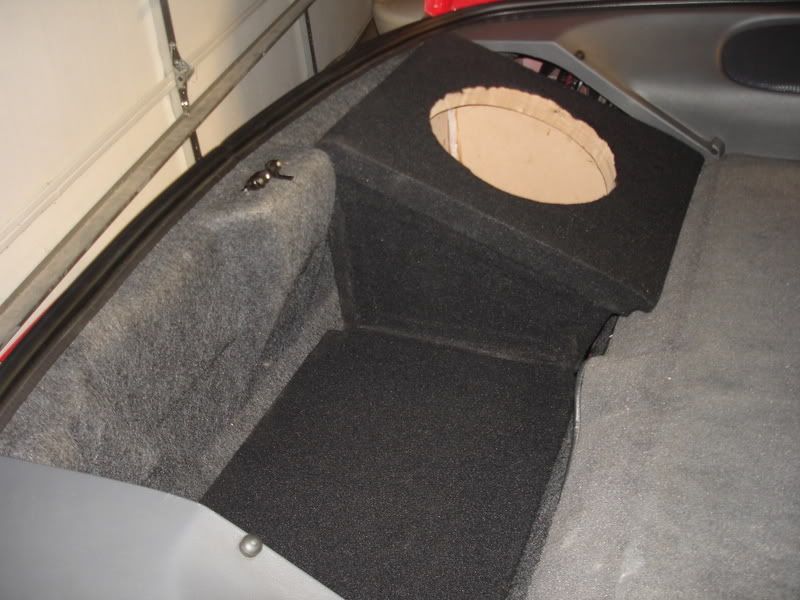
Alright - here are some progress pics of the box (it's my first box, so criticism is welcome):
3/4" MDF used
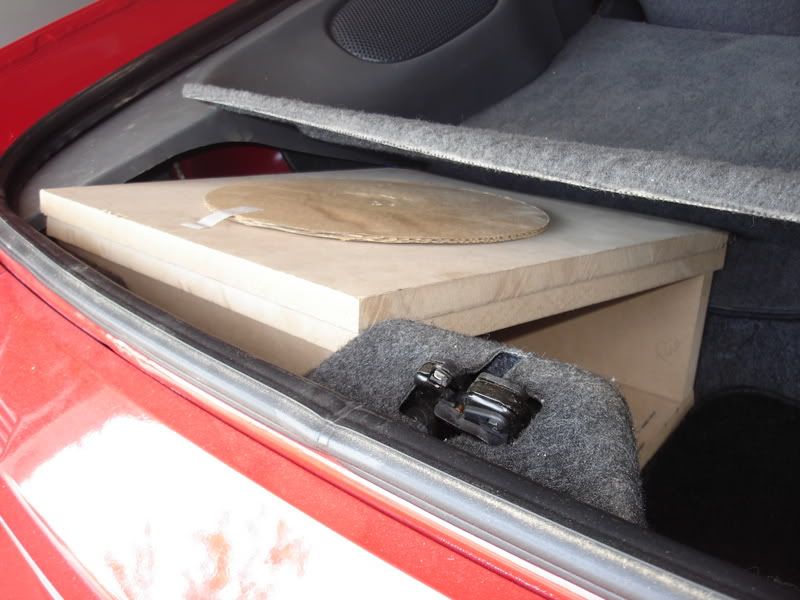
The box works like the subthump boxes sorta I believe -- it rests on two rails I have running from one side of the well to the other -- the box is not suspended in air or anything like that..
-bracing will be added along the back bottom and front bottom
-the top rear corner will be leveled off with respect to the plastic of the car
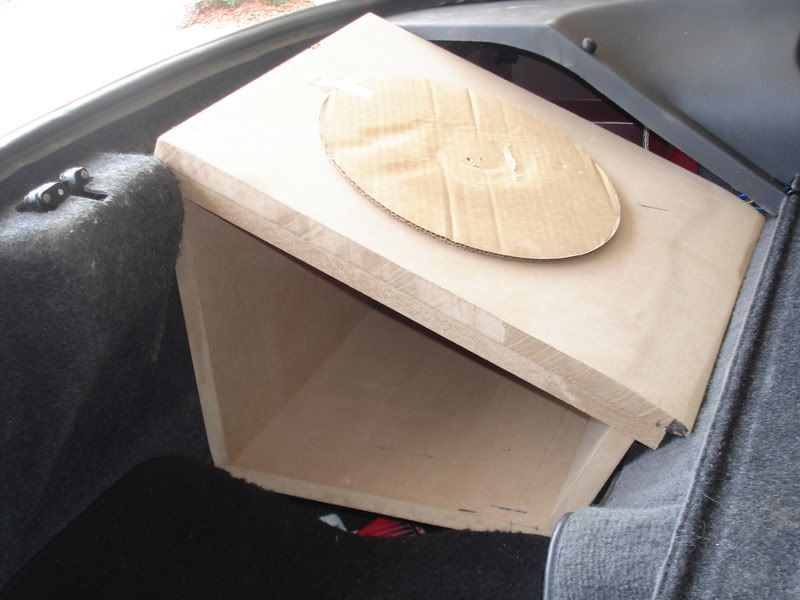
front will be shaped and rounded nicer...won't be able to tell and sanding imperfections once carpeted anyway
The pass side (where the box is not) will have a carpeted board filling in that space where I temporarily have floor mats, and an amp will rest on that (or I'll make a rack for the rear well wall) -- this will all be able to be easily raised to access trunk storage underneath the sub box and the amp rack -- my other smaller amp for front components will go where "stealth" boxes go on a board I have for there.
For now, I just need to glue it all together -- crap...just realized I didn't take pics with the sides in.....I'll get some of those later. Surrounding areas will be filled in with carpet, etc so it will look more "complete" that way as well.
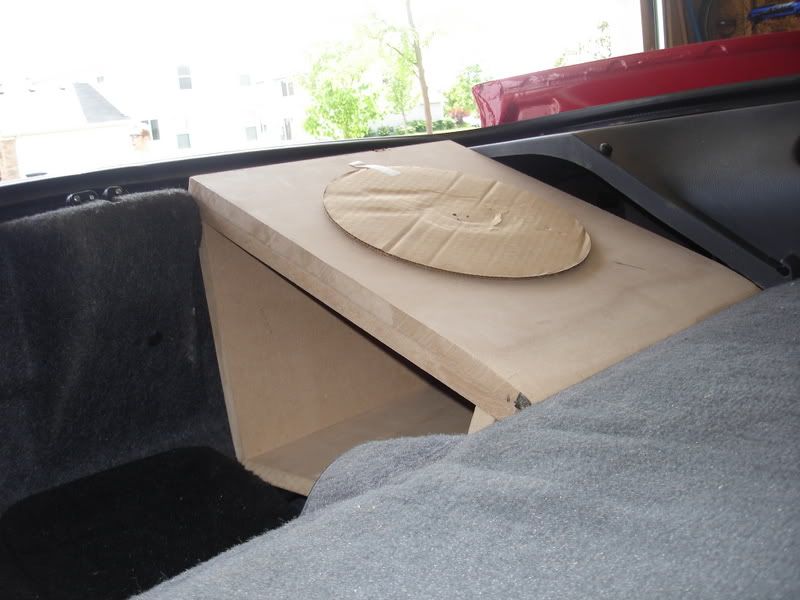
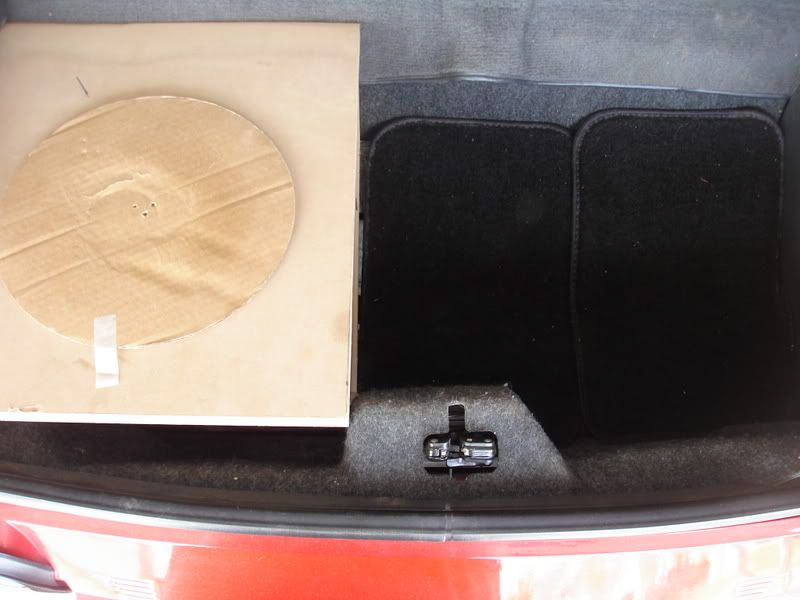
as far back and level as I could get it
--When I had all my specs, I was a little over 1 cu. ft. -- which is what I wanted -- however getting everything to line up just right and changing some of the angles may have brought that number down slightly -- can always polyfill I guess.
----------------------------
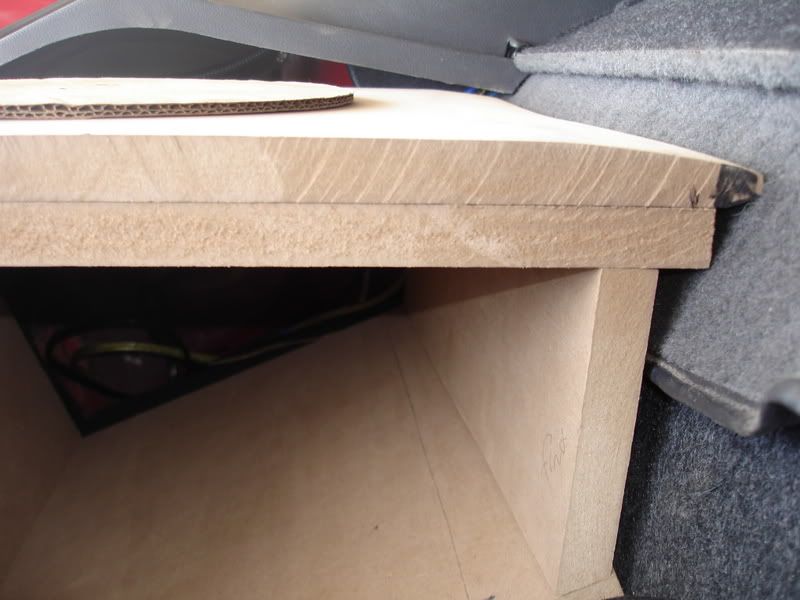
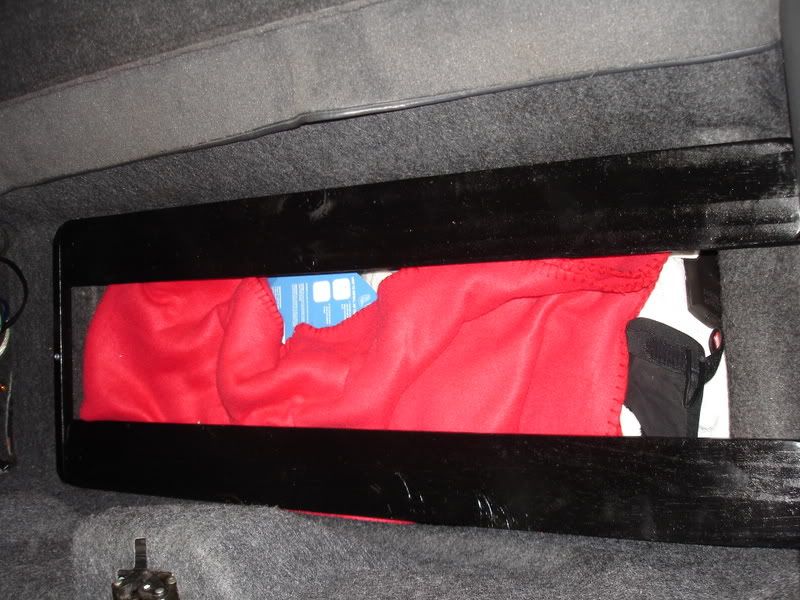
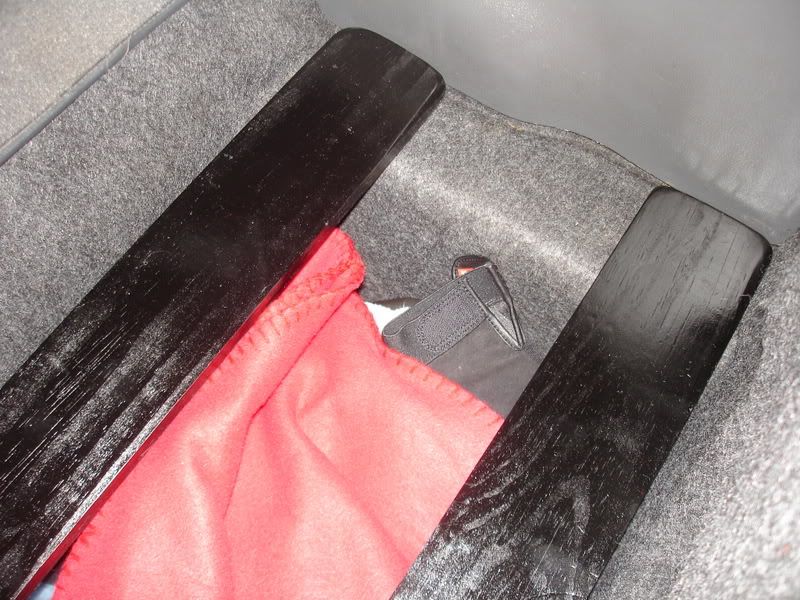
EDIT: here are some pics I have from earlier that show the rails the sub is resting on -- just two pieces of wood I painted black -- they are NOT screwed in...they cannot move due to the small support beam I did screw in on the other side. Reason for this is so that I can easily unplug the sub/box, take that out -- then just be able to lift the boards without any tools and have use of my full trunk again.
Alright - here are some progress pics of the box (it's my first box, so criticism is welcome):
3/4" MDF used
The box works like the subthump boxes sorta I believe -- it rests on two rails I have running from one side of the well to the other -- the box is not suspended in air or anything like that..
-bracing will be added along the back bottom and front bottom
-the top rear corner will be leveled off with respect to the plastic of the car
front will be shaped and rounded nicer...won't be able to tell and sanding imperfections once carpeted anyway
The pass side (where the box is not) will have a carpeted board filling in that space where I temporarily have floor mats, and an amp will rest on that (or I'll make a rack for the rear well wall) -- this will all be able to be easily raised to access trunk storage underneath the sub box and the amp rack -- my other smaller amp for front components will go where "stealth" boxes go on a board I have for there.
For now, I just need to glue it all together -- crap...just realized I didn't take pics with the sides in.....I'll get some of those later. Surrounding areas will be filled in with carpet, etc so it will look more "complete" that way as well.
as far back and level as I could get it
--When I had all my specs, I was a little over 1 cu. ft. -- which is what I wanted -- however getting everything to line up just right and changing some of the angles may have brought that number down slightly -- can always polyfill I guess.
----------------------------
EDIT: here are some pics I have from earlier that show the rails the sub is resting on -- just two pieces of wood I painted black -- they are NOT screwed in...they cannot move due to the small support beam I did screw in on the other side. Reason for this is so that I can easily unplug the sub/box, take that out -- then just be able to lift the boards without any tools and have use of my full trunk again.
Last edited by fredmr39; Jun 17, 2007 at 01:19 PM.

Thread Starter
Registered User
Joined: Aug 2003
Posts: 1,397
From: Chicagoland, IL
sorry -- will get dimensions up tomorrow -- however if you were to use them for any reason, I would recommend just looking where my box is and following the idea because it's pretty hard to cut awkward angles like that and have it all line up perfectly -- much easier to craft it as you go along, IMO.
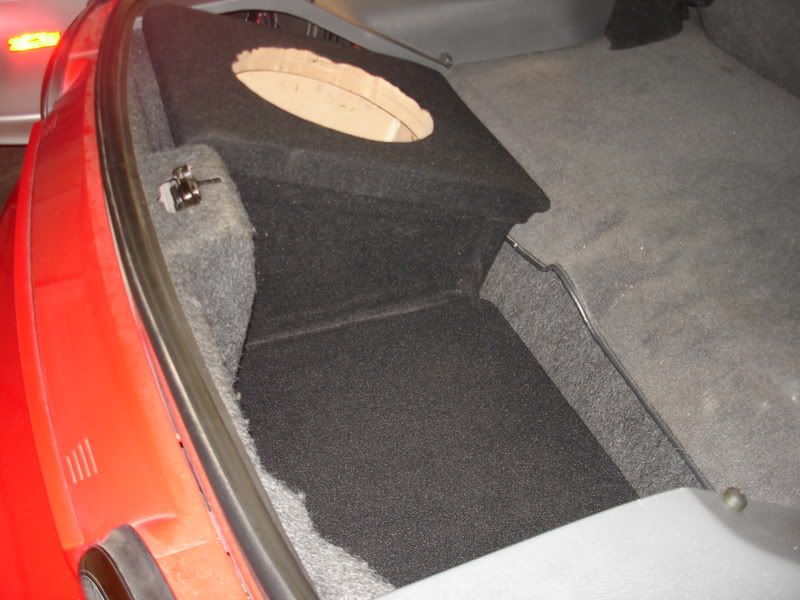
here's the final version, just in need of some minor sanding and carpeting:
here's the final version, just in need of some minor sanding and carpeting:

Registered User
Joined: Aug 2006
Posts: 649
From: Fayetteville, GA
dang that looks nice. have you decided on what you're wrapping it with yet?
you could do fiberglass and paint it if its worth that much effort.
I really with I made my box for 10's so I could match the exact conture and angle of the two plastic pieces on each side of the well. I wanted to do it with the 12's but the front peice wouldn't be big enough.
you're box is looking good though. get some pics up after you wrap it
Thread Starter
Registered User
Joined: Aug 2003
Posts: 1,397
From: Chicagoland, IL
yea I thought about just going with a 10" as well -- wasn't too concerned about matching contour exactly (especially since I only did half the well) -- but you can see from where my box stops (not even halfway point) that it only has .75 cu. ft. plus the volume of the MDP cylinder the sub sits in... box will be stuffed with between .5 and 1 lb of fiberglass (prob .75 lbs)... but the two subs I was considering should do a very nice job in that size even. (Elemental Designs 13Ov.2 or TC Sounds 12" T-9)
Fiberglassing the outside and painting it would look nice -- and be easier than vinyl probably.....but sadly, it will just all be in black carpet so that if matches my amp board right next to it better as well. I wish I had the time or experience to do more like you did with your box (which is awesome) -- maybe I'll build another larger box with my extra MDF and then work on that more while still having a box to use.
Fiberglassing the outside and painting it would look nice -- and be easier than vinyl probably.....but sadly, it will just all be in black carpet so that if matches my amp board right next to it better as well. I wish I had the time or experience to do more like you did with your box (which is awesome) -- maybe I'll build another larger box with my extra MDF and then work on that more while still having a box to use.
Registered User
Joined: Aug 2006
Posts: 649
From: Fayetteville, GA
im sure it will come out looking really clean.im not that experienced though. thats the first box I made completey by myself. if you wrap it in black carpet, you could put vinyl over the top of that for a nice feeling and smooth look. Thats what I did and it really wasn't difficult to work the vinyl. I used aresol spray adhesive for crafts when I was wrapping.
Thread Starter
Registered User
Joined: Aug 2003
Posts: 1,397
From: Chicagoland, IL
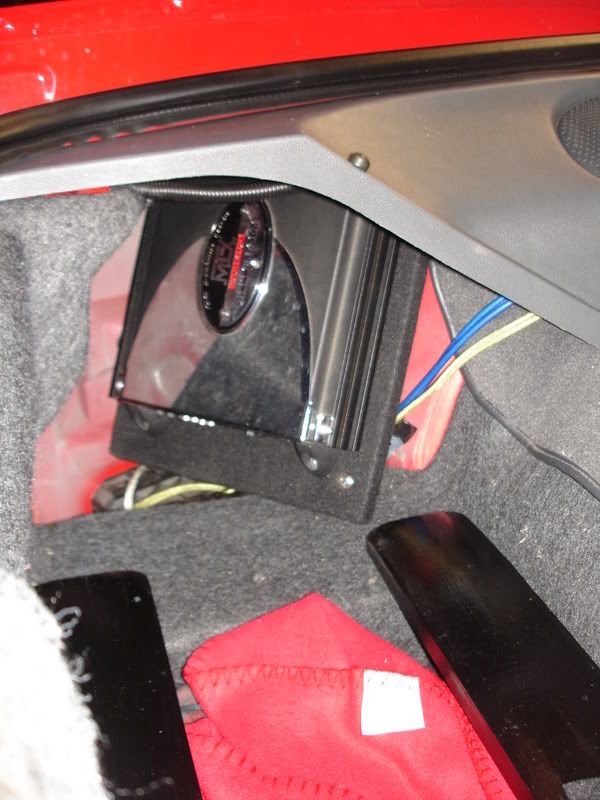
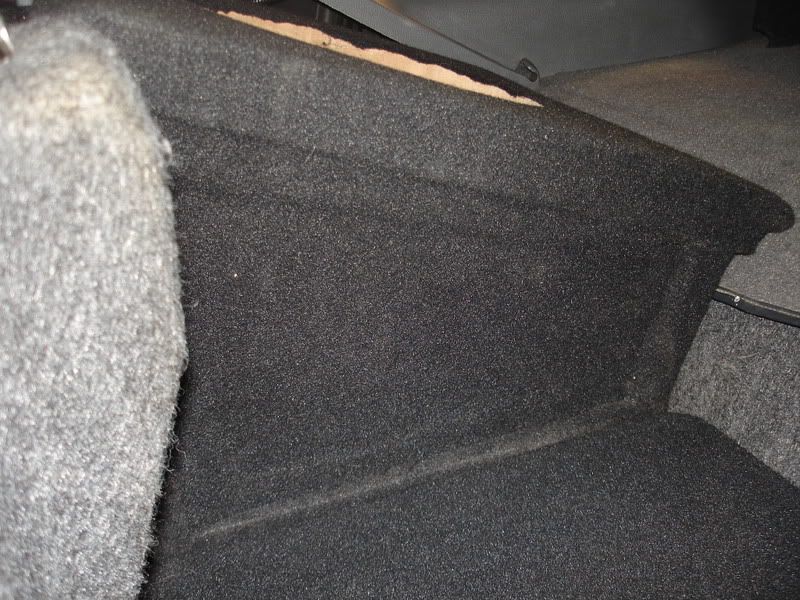
Finally carpeted -- sub mounted tomorrow -- however...I only have my 2ch amp that runs 300wRMS at 4 ohms bridged and my sub will be a DVC 4 ohm.....so it's not even worth hooking up since best I can do is 75 watts per VC... so hopefully they decide to finally ship my amp soon.
anyways, here are some progress pics -- keep in mind I was not trying to make it look factory, etc -- just decent enough to make my idea work (when amp does come it will fill the space right next to the sub box on the board there -- the amp for front components is mounted where stealth boxes go in the cubby secured withe galvanized steel wrap and bolts).
and yes I realize that the top part of the box by the plastic isn't level.....but the other side is level with the carpeted hatch release point which I found more important...and I wasn't about to make the top of the box uneven (can always just raise the plastic more also).
Thread Starter
Registered User
Joined: Aug 2003
Posts: 1,397
From: Chicagoland, IL
EDIT: eh.....decided I'll just try giving it 150wRMS at 8 ohms with VCs on the DVC 4 ohm sub in series until my new amp comes (750-800wRMS after that) -- better than nothing for now, and I'd rather run the VCs at simultaneously just because..
Last edited by fredmr39; Jun 16, 2007 at 10:57 AM.
Thread Starter
Registered User
Joined: Aug 2003
Posts: 1,397
From: Chicagoland, IL
So as long as you are within the power of that VC, you are fine (I've read of installers doing this for years with zero failures) -- and best part is if that VC blows, you still have another. I think it would actually be a good idea if you only want 300wRMS at 2 ohms to pay more for a D2 600wRMS sub and only run one VC and have the other as a backup.
Anyways.......tried my sub I just got at 8 ohms, and 150wRMS wasn't even enough to begin moving the sub... I turned the gain up pretty high briefly to maybe around 80-90% and heard it pop quietly once.....but that was it -- didn't try much else since the amp would most likely be clipping if it eventually did start after messing with it some more.