
DIY - Install BFxenon HID Fog Light kit - RS and non-RS models

Thread Starter
Registered User
Joined: May 2009
Posts: 46
DIY - Install BFxenon HID Fog Light kit - RS and non-RS models
How-To: Install BFxenon HID Fog Lights
When installing BFxenon HID lights, for your safety, please remember to remove the battery terminal / positive lead to the battery before connecting any high voltage parts.
Step 1: Twist and pull to remove factory bulbs from the factory housing
*Step 2 and 3 are for the RS package equipped cars.
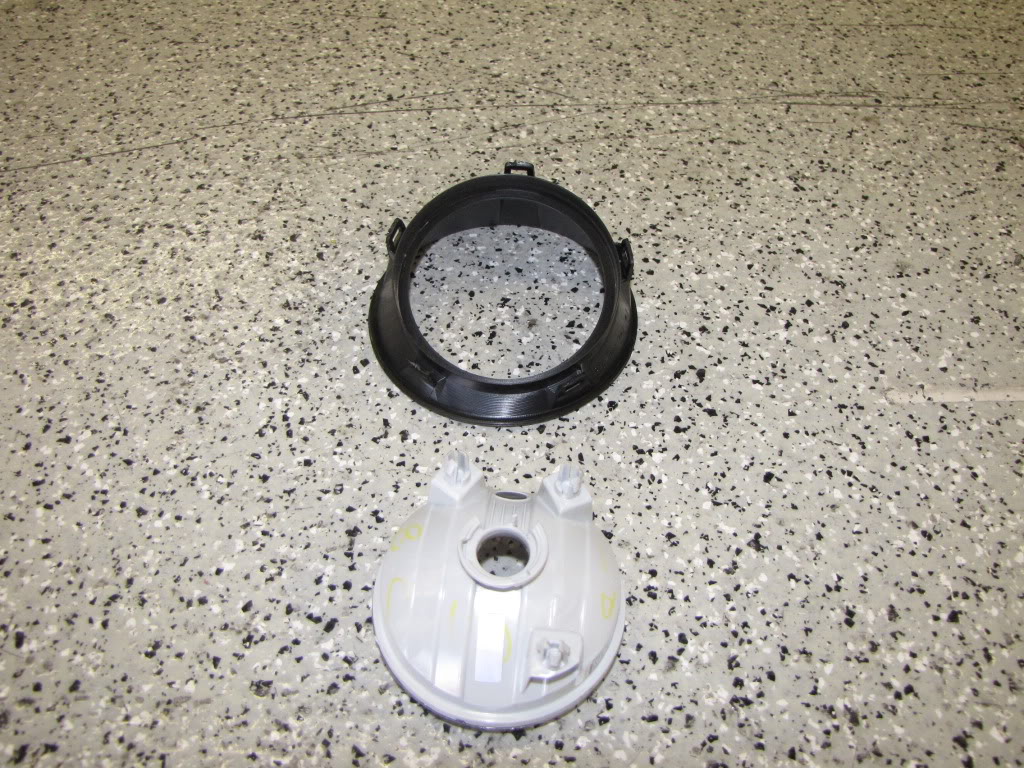
Step 2: Remove the black plastic surround, with a flat head screwdriver, by lifting up on plastic tabs.
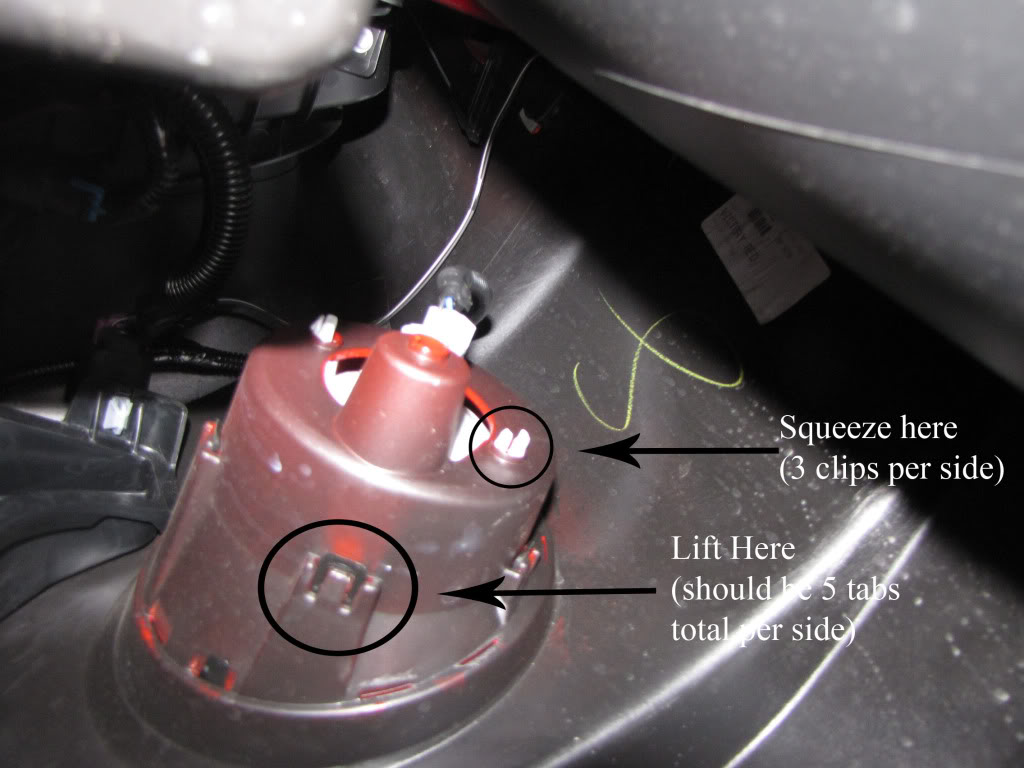
Step 3: Remove the fog light housing from the bumper by squeezing the tabs and pushing them through the hole that secures them.
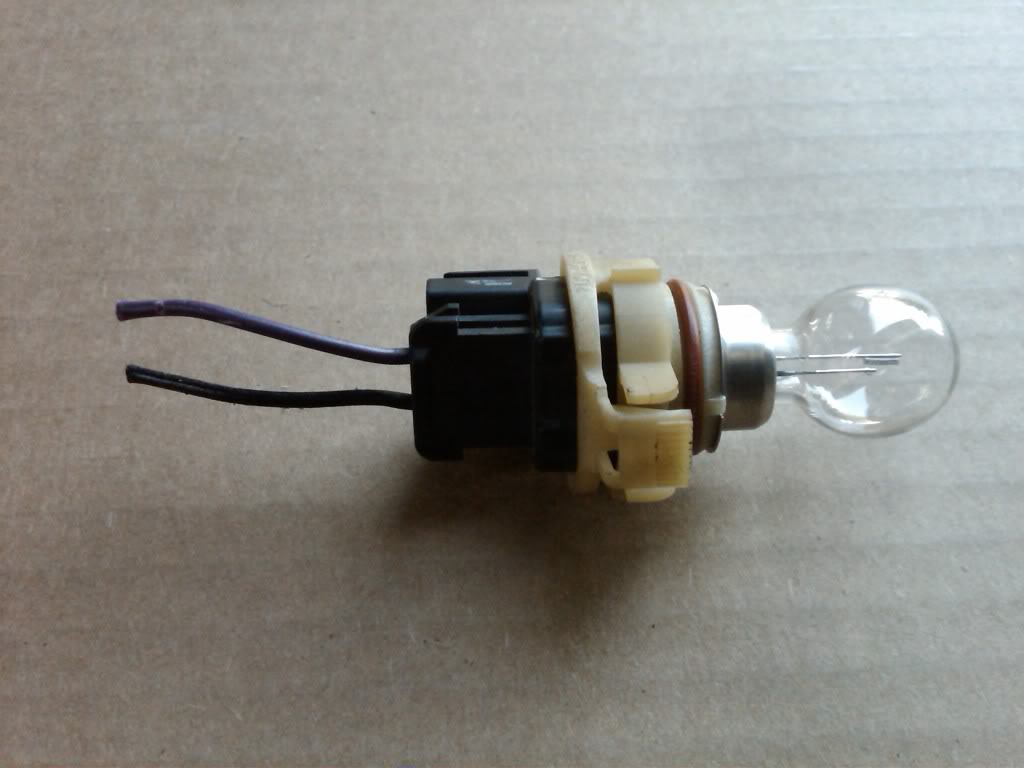
Step 4: Insert 5202 BFxenon HID bulbs directly into the housings (housings supplied in RS-Package kits) and secure them in place with the clips on the bulb. Make sure both sides clamp down
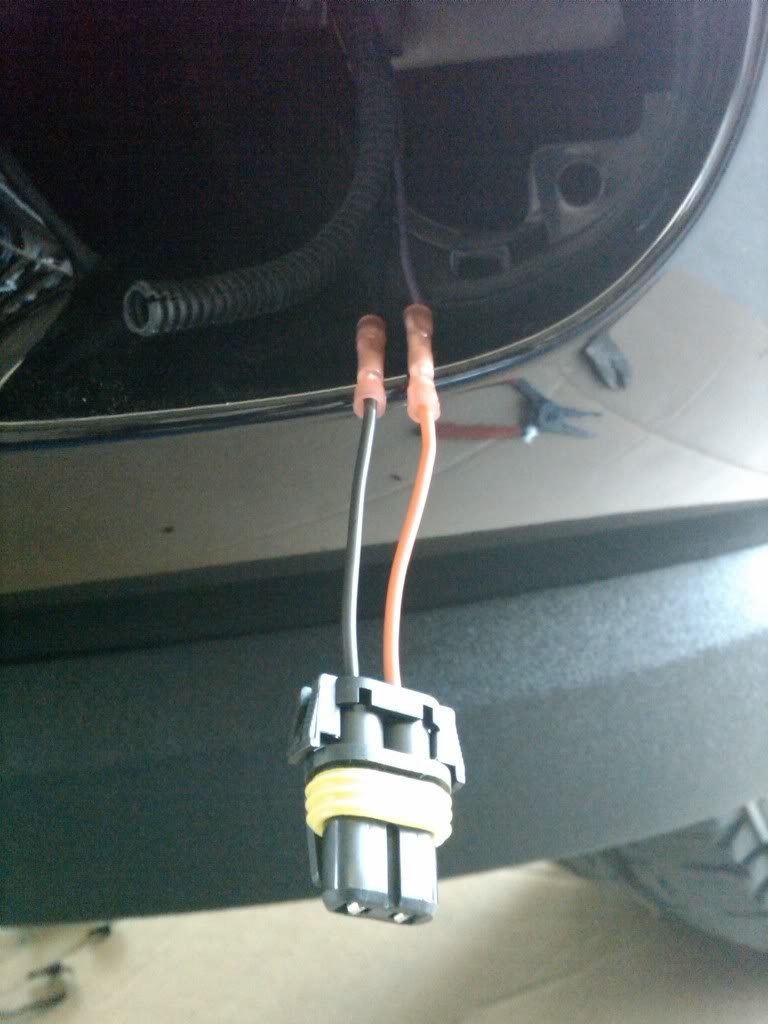
Step 5: Remove factory connection and attach the new lead provided
Step 6: Insert new lead into the ballast and connect the two leads on the ballast with the 5202 HID bulb
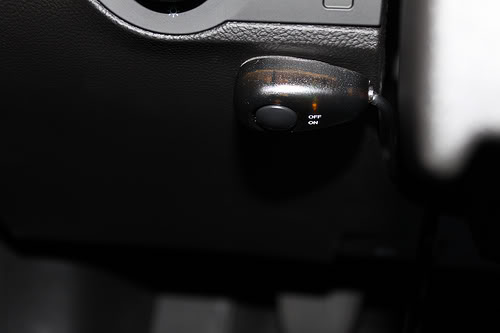
Step 7: Run the fog light switch into the cab.
*We ran the switch through the fender well and into the wire loom through the door. We had to add about 2� of wire to accommodate the necessary length.
*You could also run it directly through the firewall by the brake master cylinder.
Step 8: Re-attach the positive battery connection and turn everything on. This is just to ensure everything lights up properly before you secure the ballasts and wires.
Step 9: Secure the HID ballast within the range of the connections so there is no stress on the bulb. Some recommended locations are; firewall, radiator mounting brace, front bumper brace, etc. (Some of these may not be the best option for every vehicle)
Step 10: Secure all the loose wiring away from any moving parts and out of the way of extreme heat.
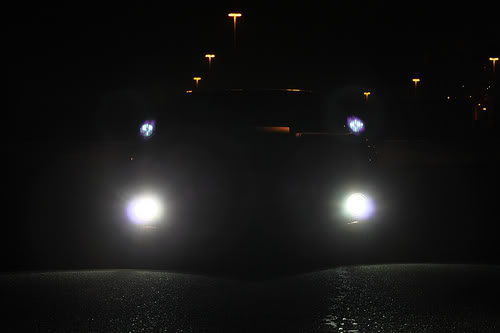
Step 11: Enjoy your BFxenon HID headlights!
For more information or suggestions on how to make these instructions better, please contact: Sales@BFxenon.com
When installing BFxenon HID lights, for your safety, please remember to remove the battery terminal / positive lead to the battery before connecting any high voltage parts.
Step 1: Twist and pull to remove factory bulbs from the factory housing
*Step 2 and 3 are for the RS package equipped cars.
Step 2: Remove the black plastic surround, with a flat head screwdriver, by lifting up on plastic tabs.
Step 3: Remove the fog light housing from the bumper by squeezing the tabs and pushing them through the hole that secures them.
Step 4: Insert 5202 BFxenon HID bulbs directly into the housings (housings supplied in RS-Package kits) and secure them in place with the clips on the bulb. Make sure both sides clamp down
Step 5: Remove factory connection and attach the new lead provided
Step 6: Insert new lead into the ballast and connect the two leads on the ballast with the 5202 HID bulb
Step 7: Run the fog light switch into the cab.
*We ran the switch through the fender well and into the wire loom through the door. We had to add about 2� of wire to accommodate the necessary length.
*You could also run it directly through the firewall by the brake master cylinder.
Step 8: Re-attach the positive battery connection and turn everything on. This is just to ensure everything lights up properly before you secure the ballasts and wires.
Step 9: Secure the HID ballast within the range of the connections so there is no stress on the bulb. Some recommended locations are; firewall, radiator mounting brace, front bumper brace, etc. (Some of these may not be the best option for every vehicle)
Step 10: Secure all the loose wiring away from any moving parts and out of the way of extreme heat.
Step 11: Enjoy your BFxenon HID headlights!
For more information or suggestions on how to make these instructions better, please contact: Sales@BFxenon.com
Admin Emeritus
Joined: Dec 1997
Posts: 11,157
From: Nashville, TN area
Is this for your 5th Generation Camaro RS package Fog Light Kit?
Thread Starter
Registered User
Joined: May 2009
Posts: 46
yes, for the RS, LS, LT packages... whether you have no fog lights or DRL only.
Let me know if you have any questions! Thanks Jason
Let me know if you have any questions! Thanks Jason
Is this for your 5th Generation Camaro RS package Fog Light Kit?

Thread
Thread Starter
Forum
Replies
Last Post
Brake_L8
Cars For Sale
0
Jan 20, 2015 09:44 AM
30thZ286speed
Car Audio and Electronics
1
Aug 3, 2002 04:54 AM