Metal Widebody, now with 18 by Thirteen-y goodness
 05-17-2011, 09:34 PM
#1
Registered User
Thread Starter
Join Date: Sep 2009
Location: Enola, Pa
Posts: 70
It's been a while since I updated anything on the project from hell, but I haven't given up.

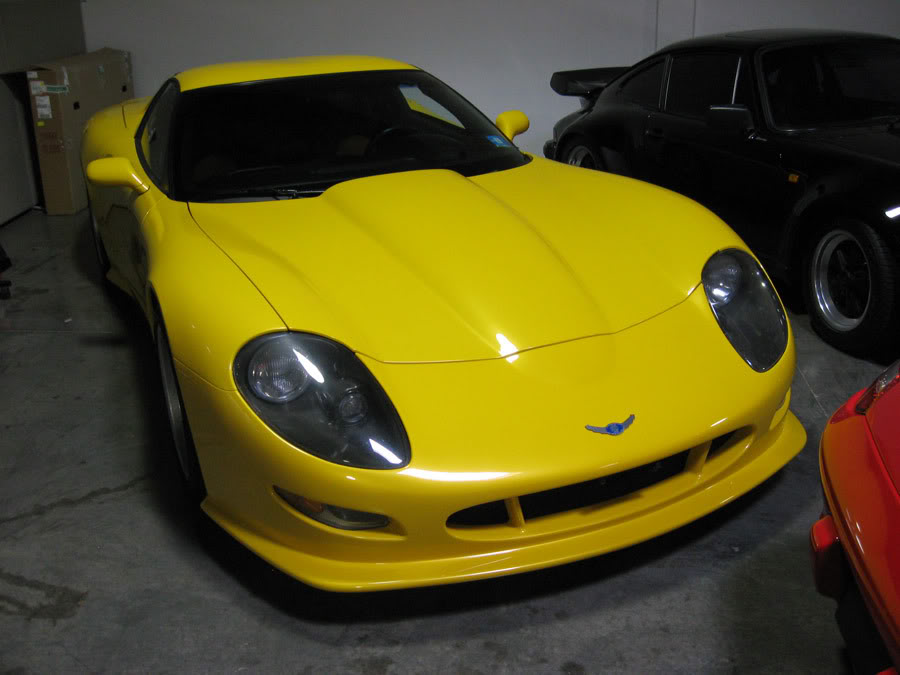
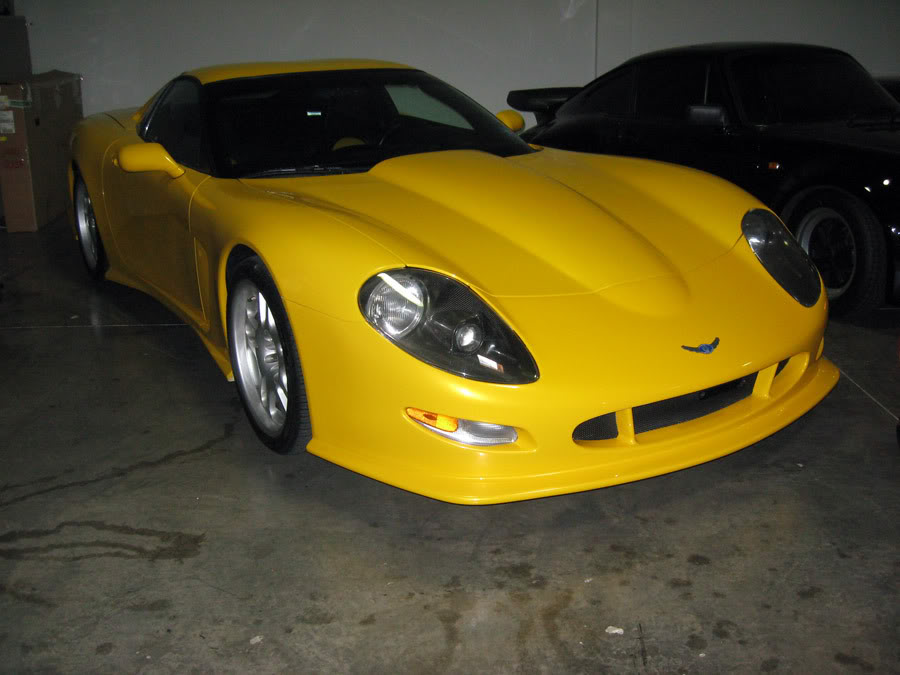
The rear quarters are 90 percent done, minus a little fender stretching to make it flow better. I built it without wheels, having kept an image in my mind of what I wanted- It's coming out pretty close. It's still too high, sitting stock springs, but the jacks are under the axle so it's pretty close to ride height. Wheel well lip is a mock-up.
From the side, they don't look that big, which is good- From down low, you can see how well they fit under the car.


They don't rub, either.

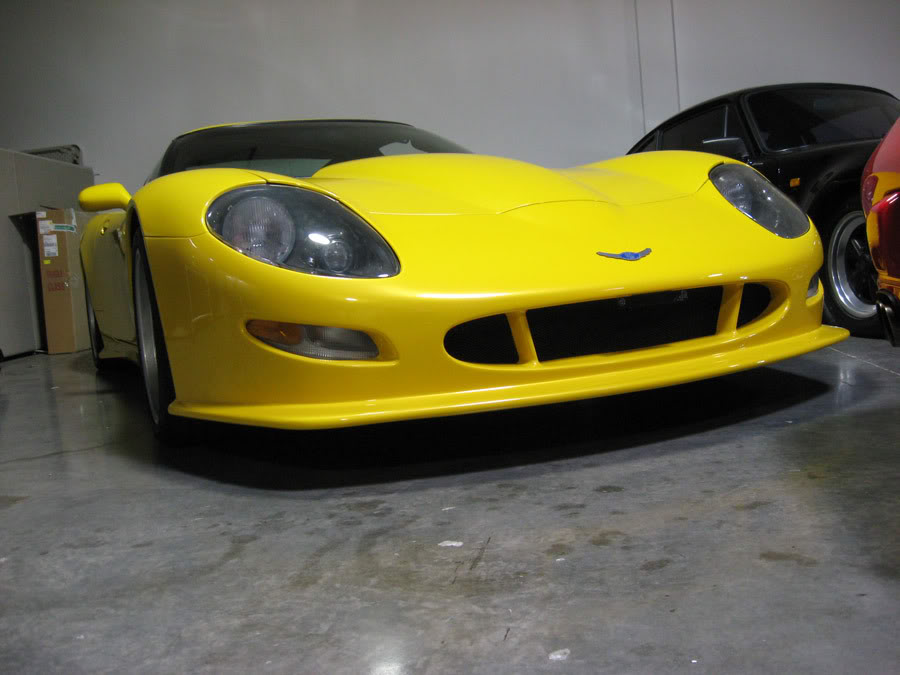
I wasted a lot of time trying to find a donor door jamb because I was afraid of trying to fabricate one. I finally got sick of prowling junkyards and false promises, so I made one. It's more complex than it looks. It does need some final tweaking to clean up the door gap, but- It's not bad as a rough draft and won't be seen too many people.

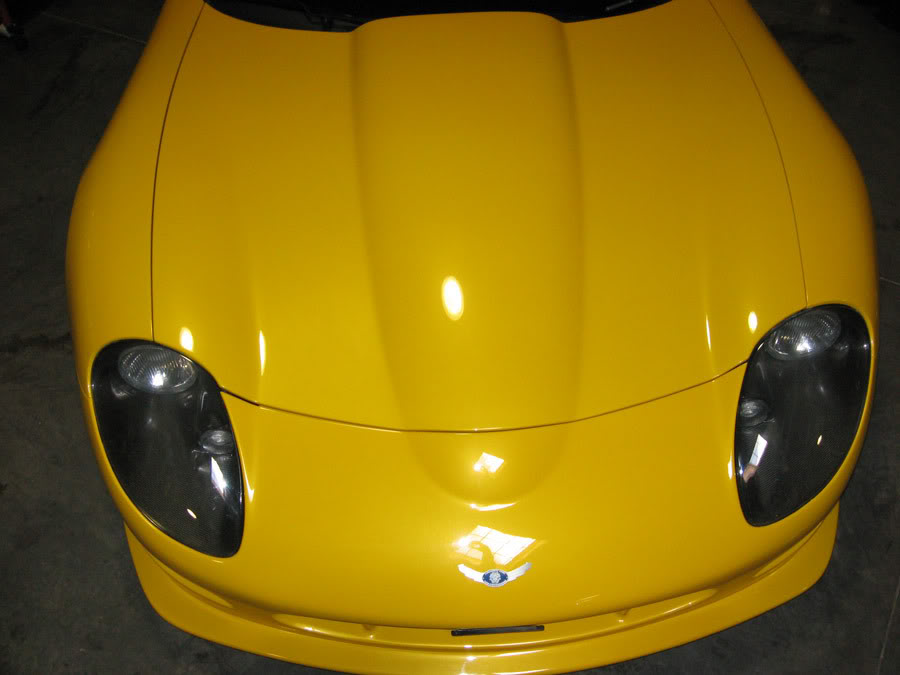
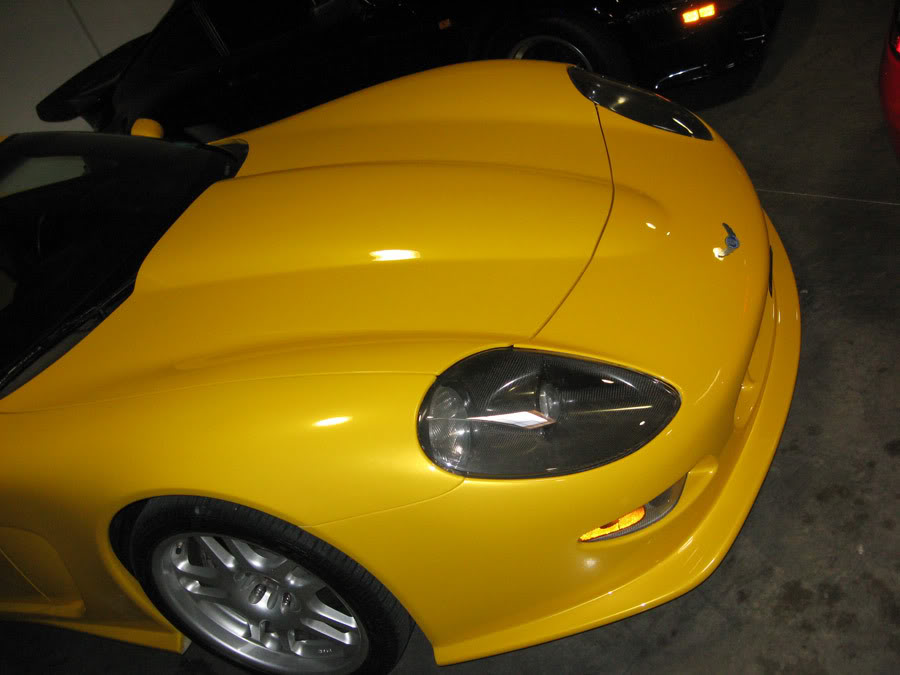
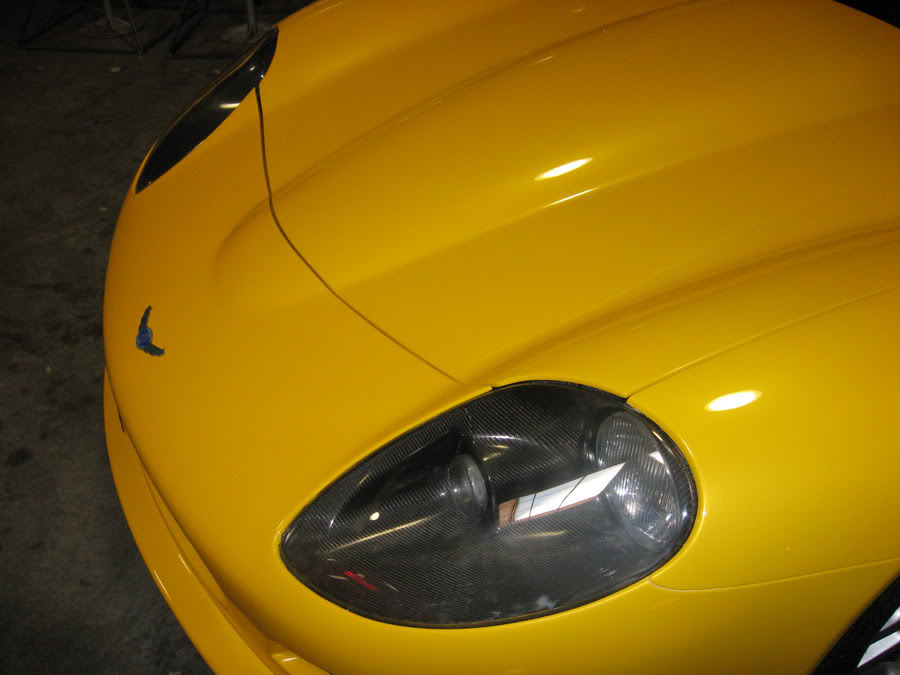
Laying out the shape for the hood sccop. Think Jaguar E-type, 50's era Ferrari's, with a lot of C6 Vette thrown in. I always thought Chevelle type hoods looked out of place on such a curvy car. The wire is just to get the shape and flow down- From there, I'll make a pattern and start beating metal and rolling it on the English Wheel.

Thanks for looking!
The rear quarters are 90 percent done, minus a little fender stretching to make it flow better. I built it without wheels, having kept an image in my mind of what I wanted- It's coming out pretty close. It's still too high, sitting stock springs, but the jacks are under the axle so it's pretty close to ride height. Wheel well lip is a mock-up.
From the side, they don't look that big, which is good- From down low, you can see how well they fit under the car.
They don't rub, either.
I wasted a lot of time trying to find a donor door jamb because I was afraid of trying to fabricate one. I finally got sick of prowling junkyards and false promises, so I made one. It's more complex than it looks. It does need some final tweaking to clean up the door gap, but- It's not bad as a rough draft and won't be seen too many people.
Laying out the shape for the hood sccop. Think Jaguar E-type, 50's era Ferrari's, with a lot of C6 Vette thrown in. I always thought Chevelle type hoods looked out of place on such a curvy car. The wire is just to get the shape and flow down- From there, I'll make a pattern and start beating metal and rolling it on the English Wheel.
Thanks for looking!


 05-18-2011, 11:20 AM
#5
Registered User

Join Date: May 2002
Location: Dallas, Texas
Posts: 5,556
Re: Metal Widebody, now with 18 by Thirteen-y goodness
I wondered if you were still working on this project. Such a difficult thing to try to do!
For the hood, use the Callaway C12 as inspiration. Don't do it as a pointed thing like you have now, I think it will look dumb. Round it out.

For the hood, use the Callaway C12 as inspiration. Don't do it as a pointed thing like you have now, I think it will look dumb. Round it out.
05-18-2011, 01:09 PM
#6
Registered User
Thread Starter
Join Date: Sep 2009
Location: Enola, Pa
Posts: 70
Re: Metal Widebody, now with 18 by Thirteen-y goodness
Thanks! A buttload.. 98% of the work has been on the drivers' side, undoing mistakes. Up until this, I have never really worked on a car, unless you count starters, opti's and a water pump. You can imagine how fugly my welds were at first, and how much I had to learn about shaping metal.
Case in point: Passenger side total time spent making and installing quarterpanel- 2 weeks. Driver's side- a year and a half.
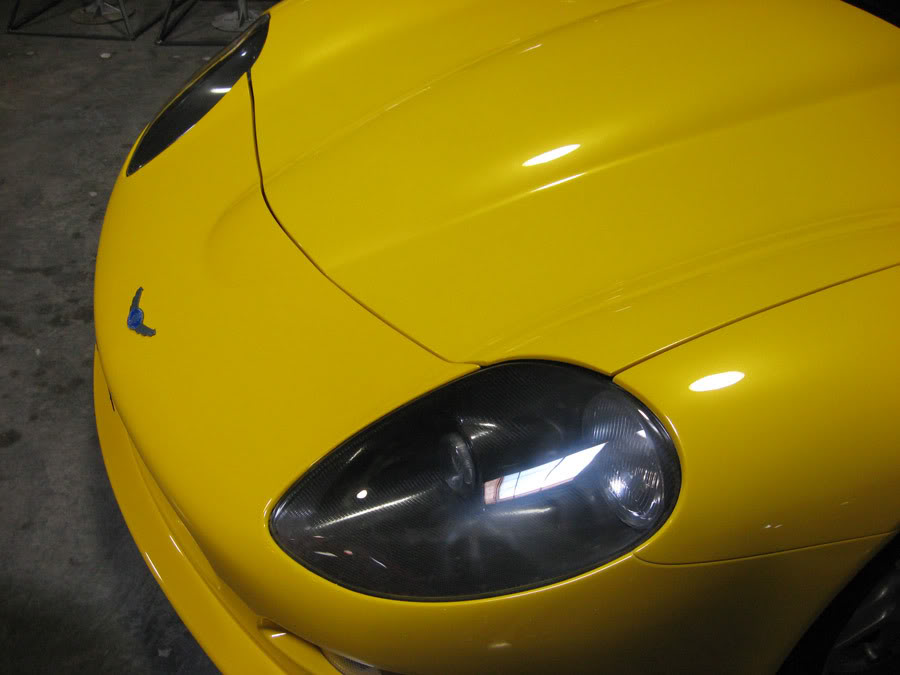
Those are 335/30's, standard offset. (I think..) Everything has been pushed to the outside, opposite of what you normally do on a 4th gen. Hence, the child-bearing hips on the car.
Case in point: Passenger side total time spent making and installing quarterpanel- 2 weeks. Driver's side- a year and a half.
Those are 335/30's, standard offset. (I think..) Everything has been pushed to the outside, opposite of what you normally do on a 4th gen. Hence, the child-bearing hips on the car.
05-18-2011, 01:17 PM
#7
Registered User
Thread Starter
Join Date: Sep 2009
Location: Enola, Pa
Posts: 70
Re: Metal Widebody, now with 18 by Thirteen-y goodness
[QUOTE=Brangeta;6693433]I wondered if you were still working on this project. Such a difficult thing to try to do!
For the hood, use the Callaway C12 as inspiration. Don't do it as a pointed thing like you have now, I think it will look dumb. Round it out.
I think I might split the difference as I get closer to the pointy end.. The one on this vette looks a little like a viper hood to me.. Buuut- the way I have mine laid out, it may end up looking like a large, 3-d pontiac emblem. The wire mock-up will give me a better idea as I go along.
For the hood, use the Callaway C12 as inspiration. Don't do it as a pointed thing like you have now, I think it will look dumb. Round it out.
I think I might split the difference as I get closer to the pointy end.. The one on this vette looks a little like a viper hood to me.. Buuut- the way I have mine laid out, it may end up looking like a large, 3-d pontiac emblem.
The wire mock-up will give me a better idea as I go along.
 06-01-2011, 12:33 AM
#12
Registered User
Thread Starter
Join Date: Sep 2009
Location: Enola, Pa
Posts: 70
Re: Metal Widebody, now with 18 by Thirteen-y goodness
Yep. Brangeta was right, in that a pointy shape would look dumb. I think I was seeing the shape AND a paint scheme combined when I laid it out.
Anyhoo..
I laid out the wire "buck" or mock-up, took a pattern from that hand hammered and wheeled out a basic shape. I did it in three parts, splitting the upper section longitudinally, and did the lower section in one piece.
The upper section halves cleco'ed together, overlapping. This will be trimmed to meet, although not necessarily in the middle. The wire frame is still under there to check my shape and fit.

Also, we gave the lower section cleco'ed onto the upper halves. There are no welds yet- I'm just checking for the right curvature and flow. I am laying out the outline with baling wire here- In other words, I am using tension to hold a straight line where I need it, by pulling it tight, and where it starts to curve, I tape it to the metal and use the wire to bend a graceful curve. I hope.
Brangeta nailed it when he said putting a point on it will look dumb. I've marked off what I want to flatten out or cut off, and have started to make bends where I want the metal to rise away from the hood.
The upper halves have been trimmed and tacked, slightly off center. The peak is centered, but the welds aren't. This way, I can wheel it to put more "rise" in it if I need to and not beat the welds up too much.

Tacking it together as one unit. This may be split up, but for now I can work it as one piece.


The biggest problem I'm having at the moment is a result of a lack of table space to work. I can't get a clean, sharp bend on it. I'm having to prop it, clamp a piece of angle iron to it and try to make the bends straight and sharp. I can get one or the other, but not both, trying to balance it on my lap and tap out the blemishes and follow the outline.
Stay tuned..
Anyhoo..
I laid out the wire "buck" or mock-up, took a pattern from that hand hammered and wheeled out a basic shape. I did it in three parts, splitting the upper section longitudinally, and did the lower section in one piece.
The upper section halves cleco'ed together, overlapping. This will be trimmed to meet, although not necessarily in the middle. The wire frame is still under there to check my shape and fit.
Also, we gave the lower section cleco'ed onto the upper halves. There are no welds yet- I'm just checking for the right curvature and flow. I am laying out the outline with baling wire here- In other words, I am using tension to hold a straight line where I need it, by pulling it tight, and where it starts to curve, I tape it to the metal and use the wire to bend a graceful curve. I hope.
Brangeta nailed it when he said putting a point on it will look dumb. I've marked off what I want to flatten out or cut off, and have started to make bends where I want the metal to rise away from the hood.
The upper halves have been trimmed and tacked, slightly off center. The peak is centered, but the welds aren't. This way, I can wheel it to put more "rise" in it if I need to and not beat the welds up too much.
Tacking it together as one unit. This may be split up, but for now I can work it as one piece.
The biggest problem I'm having at the moment is a result of a lack of table space to work. I can't get a clean, sharp bend on it. I'm having to prop it, clamp a piece of angle iron to it and try to make the bends straight and sharp. I can get one or the other, but not both, trying to balance it on my lap and tap out the blemishes and follow the outline.
Stay tuned..
Last edited by SumTingWong; 06-01-2011 at 11:02 PM. Reason: Pics not showing
06-01-2011, 10:49 PM
#15
Registered User
Thread Starter
Join Date: Sep 2009
Location: Enola, Pa
Posts: 70