Rod to Cam Clearance for 383
 11-21-2009, 09:16 PM
#1
Registered User
Thread Starter

Join Date: Jul 2003
Posts: 37
Rod to Cam Clearance for 383
I am building a late model roller block based 383 for my Camaro.
I am going through the initial mockup before sending it off to be balanced.
Bottom end will be a Scat Crank, Scat 3/8" capscrew rods, and Speed Pro Hypereutectic pistons. The cam will be a 224/230 @.050 cam from Comp. It is currently a standard cam, not a small base circle. I had hoped that with the Scat Rods I would be OK with it.
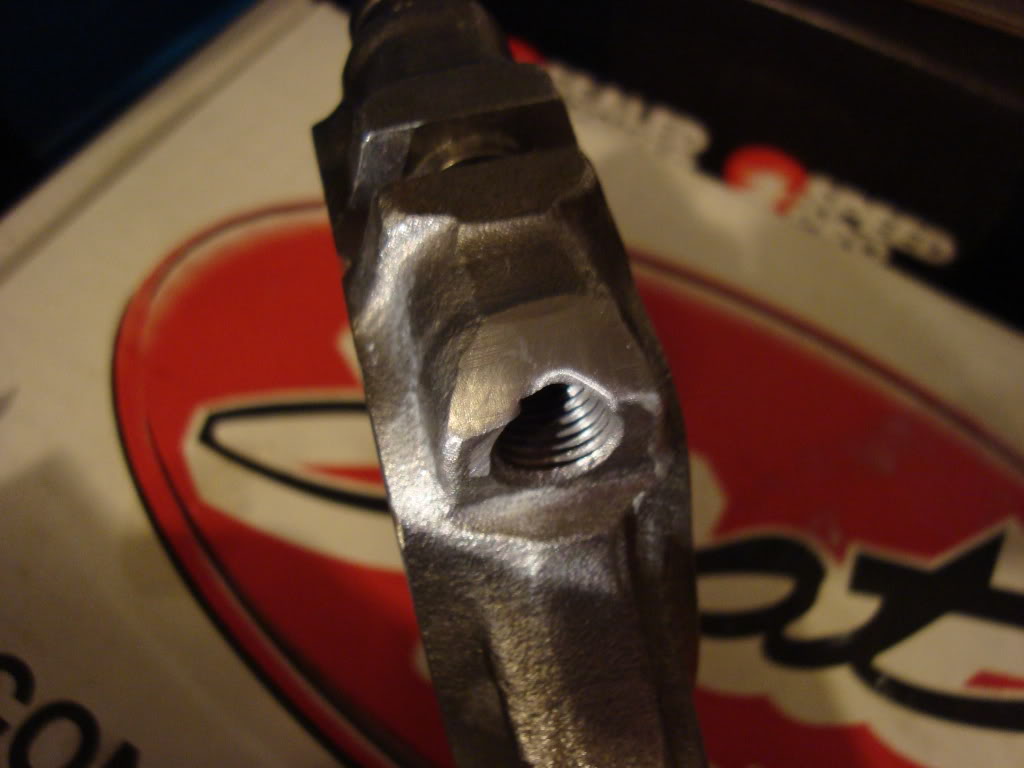
I started working on clearancing and did the 1/2 rod first. This is what it looks like after grinding...
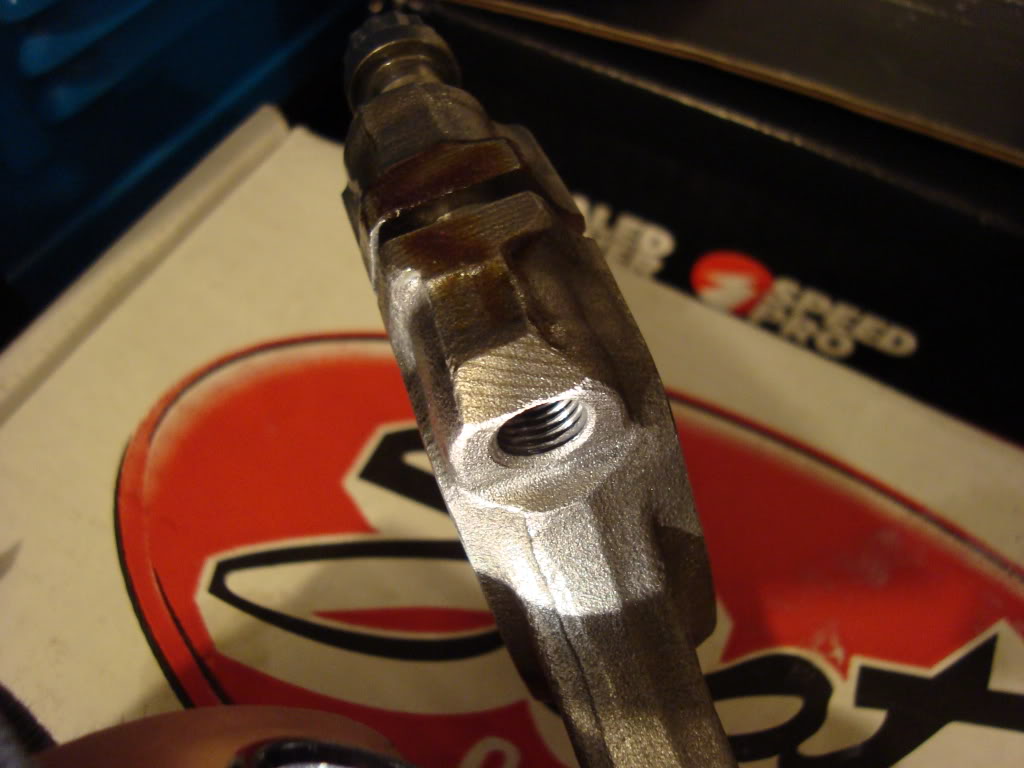
Here is what it looks like from the Scat w/o Grinding...
Did I grind too much? Near as I could tell, that got me between .050 and .060 clearance to the lobe on the cam. I am grinding the #2 rod right now for clearance and it is taking what seems like a bit more than that...but probably not much. The engine spun over fine before I started grinding...but had less than .030 clearance...I'm guessing I'm grinding .020 or .030 off of it.
Thoughts? Do I need to just drop back and tradfe in my cam for a small base circle? The semi scary thing is the bottom of the rod capscrew is barely the .050 from the cam I think...I can't grind that!!
Thanks
Greg
I am going through the initial mockup before sending it off to be balanced.
Bottom end will be a Scat Crank, Scat 3/8" capscrew rods, and Speed Pro Hypereutectic pistons. The cam will be a 224/230 @.050 cam from Comp. It is currently a standard cam, not a small base circle. I had hoped that with the Scat Rods I would be OK with it.
I started working on clearancing and did the 1/2 rod first. This is what it looks like after grinding...
Here is what it looks like from the Scat w/o Grinding...
Did I grind too much? Near as I could tell, that got me between .050 and .060 clearance to the lobe on the cam. I am grinding the #2 rod right now for clearance and it is taking what seems like a bit more than that...but probably not much. The engine spun over fine before I started grinding...but had less than .030 clearance...I'm guessing I'm grinding .020 or .030 off of it.
Thoughts? Do I need to just drop back and tradfe in my cam for a small base circle? The semi scary thing is the bottom of the rod capscrew is barely the .050 from the cam I think...I can't grind that!!
Thanks
Greg
 11-23-2009, 12:24 PM
#2
Registered User
Join Date: Dec 1998
Location: Haslett, Michigan
Posts: 2,161
Why can't you bevel the capscrew? If I recall correctly, I beveled the edge of my capscrews. Just dont let them get hot when you grind on them. Torque them to spec, mark them with paint, then grind the paint off. It only takes a little flat to make it clear. You have the 12-point ARP fasteners, right?
...and I don't think you ground too much off. As a really general rule of thumb, You want 1D - 2D worth of thread engagement, so a 3/8 cap screw should have 3/8 to 3/4 inches of thread engagement. Any more engagement is redundant.
IIRC, I also have .050" to .060" clearance. Remember, if the rod is swinging .050" farther out, enough to smack the cam, then you've already got a bad, bad bearing problem.
11-24-2009, 06:56 AM
#3
Registered User
Thread Starter
Join Date: Jul 2003
Posts: 37
I didn't think I'd want to grind the capscrew, but I have since been corrected on that on another forum.
I'm going to get a rod stretch gauge and then do the grinding on the bolt.
I was using a .053-.060 tie wrap for clearancing....so I should be OK I think.
Yep, ARP 8740 12 pt capscrews.
I was checking the clearance to the block(I bought a Summit Pre-Machined 383 block) and looks like it might behoove me to take a bit more off the bottom of the cylinder right by the Cam area...I saw one that was VERY close to the .050 mark...might have been less. I'm going to hit it with a grinding wheel a bit just to be sure.
11-24-2009, 01:11 PM
#4
Registered User
Join Date: Dec 1998
Location: Haslett, Michigan
Posts: 2,161
You know Greg,
For the first summer you'll be paranoid about oil pressure, and any little tick you hear from the engine, sure those rods are going to bang into something. I was too, and that first lap at Memphis in 2005, with only 17 miles on the engine, Dave Tittermary said "O2 is perfect, you are good to go", and we opened it up for the first time. It was unbelieveable!
Shortly the next day, I was seeing 6600 RPM in the final straight of the autocross course. I've since put 10,000 miles or so onto the motor without any failures whatsoever, and probably 1500 of those miles were on a track, at speed. So, with .060" clearance, the engine is doing good. (even when I hit the rev limiter)
Yours will be good too, 'cause I know you are systematic and very meticulous. As for the extra grinding, good call, just as long as you are sure to clean up all grinding debris out of that block when you are done. I suggest if you do any grinding, you plug up every port you can with paper towels, duct tape and rags. Mask off the area that you will modify with newspaper, then make your change. Encapsulate all of your chips and grinding debris, remove all rags and tape, then when you are SURE you are done with the grinding wheels, get to work with the Sherwin Williams Sher-will-clean to scrub out all dirt & machine shop oils. Once the rags come up clean, wipe the whole block inside & out with ATF to preserve it.

Thread
Thread Starter
Forum
Replies
Last Post
dbusch22
Forced Induction
6
10-31-2016 11:09 AM