1997 Project
 11-15-2016, 01:43 PM
#1
Registered User
Thread Starter

Join Date: Sep 2003
Location: Las Vegas
Posts: 1,916
1997 Project
I promised that I would get back with status on things. Pictures are coming.
When I finally located the ignition fuse issue, burned wires, I was hoping the rest would be a quick fix. I found that in my youthful angst, that I had made a number of mistakes that I am having to fix now.
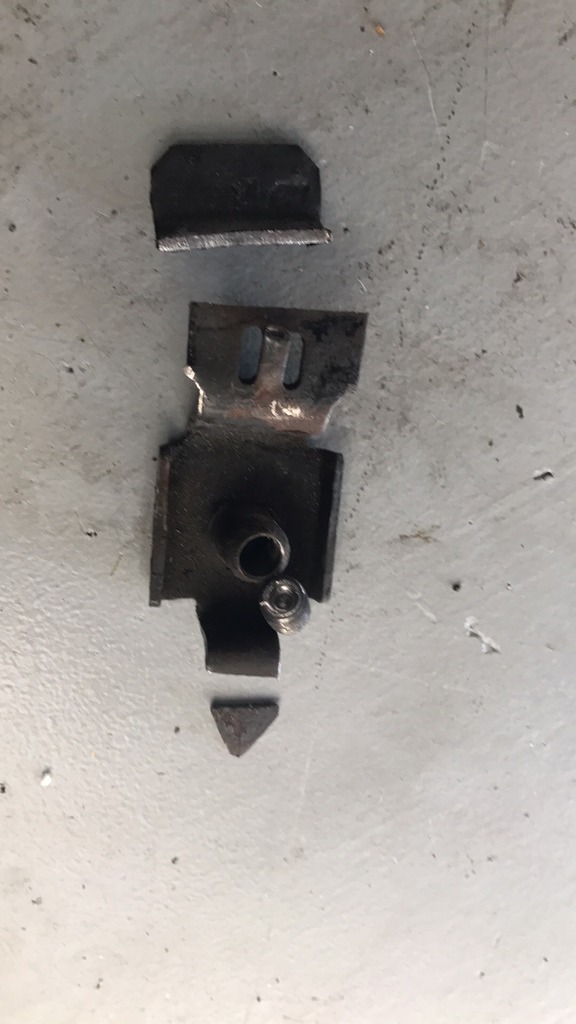
1. Ignition fuse: The passenger side wires that lead down to the starter and crank position sensor had seen better days. 4 wires in total were fried, but the CPS pink wire was the worst of them. I also discovered the wheel sensor plug to be melted together.
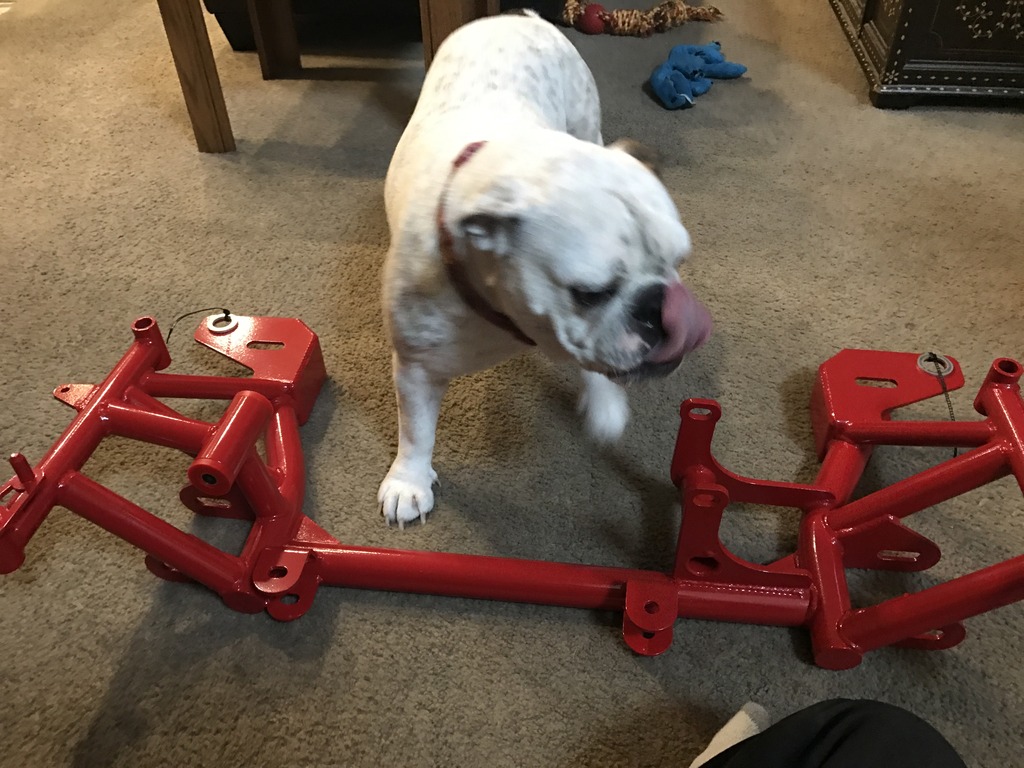
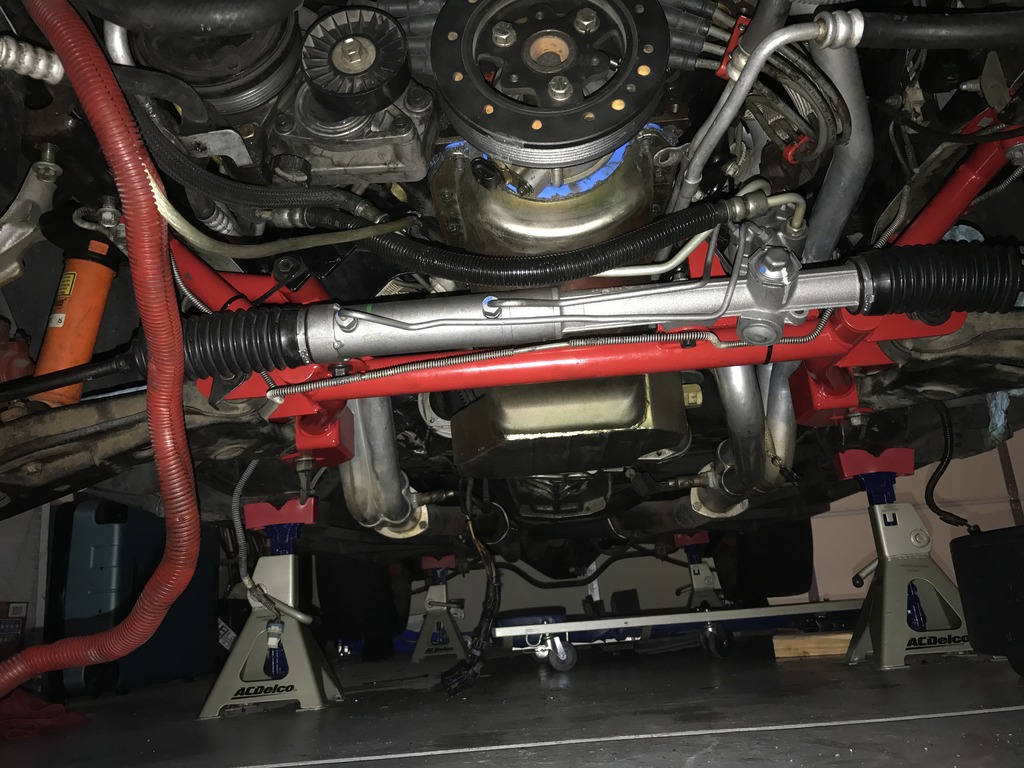
2. Wire Decisions: After fixing the melted wires, wrapping them in DEI heat wrap, and trying to reinstall them, it became clear that direct contact with the header (Jet Hot LTs) would be made if I just routed the wires back the way they came. I decided to replace the stock kmember with a BMR tubular version to give me some extra room versus re-route the wires from front to back. Our bulldog was kind enough to inspect the purchase for me.
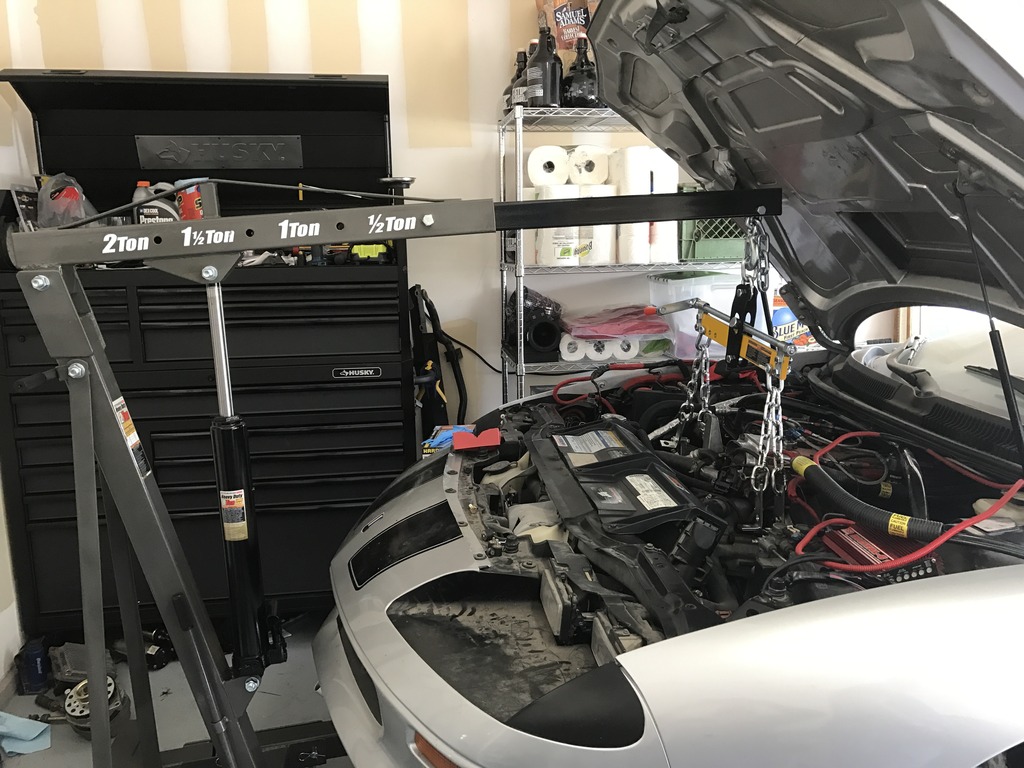
3. Installation of the kmember: For a mere 6 bolts holding it on, this was a challenging project. A friend and I went in 1/2 and 1/2 on a 1 ton hoist, which after assembling, we figured out it didn't have the throw to get over the engine. We returned the 1 ton in exchange for the 2 ton, which gave the additional 8 inches of throw needed. The day the project started, should have been pretty smooth, as I had spent random time the week before preparing by removing the steering rack, disconnecting the lower A arms, and disconnecting the hard brake lines. The stock member came out easily; maybe taking 30 minutes once we started.
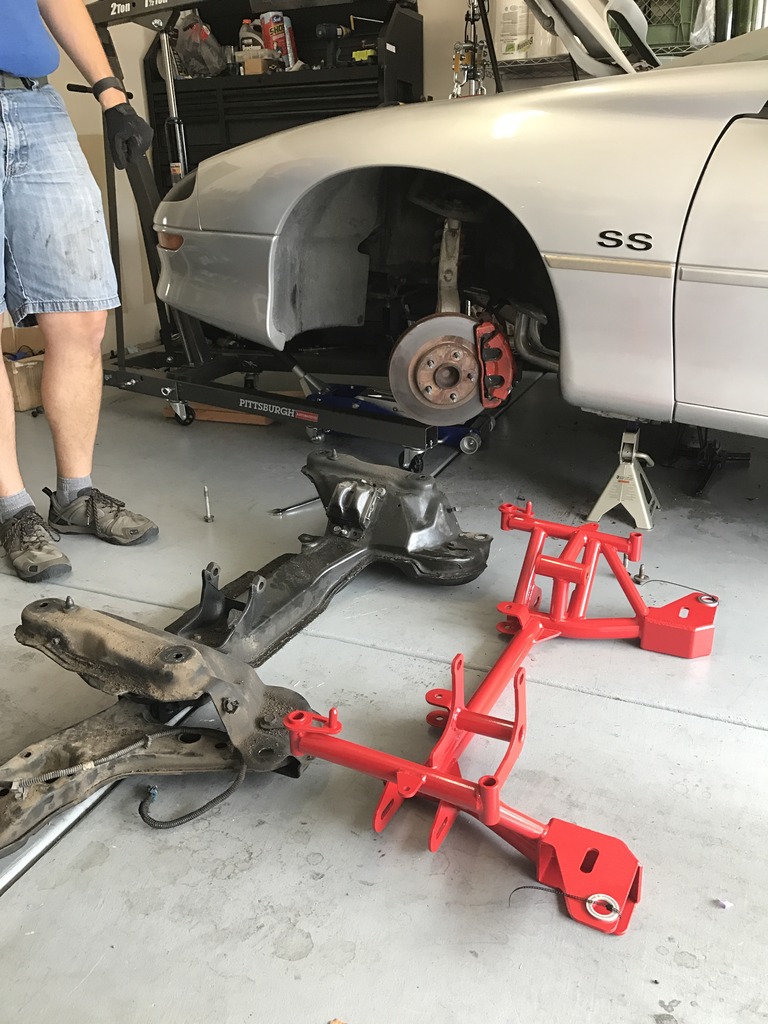
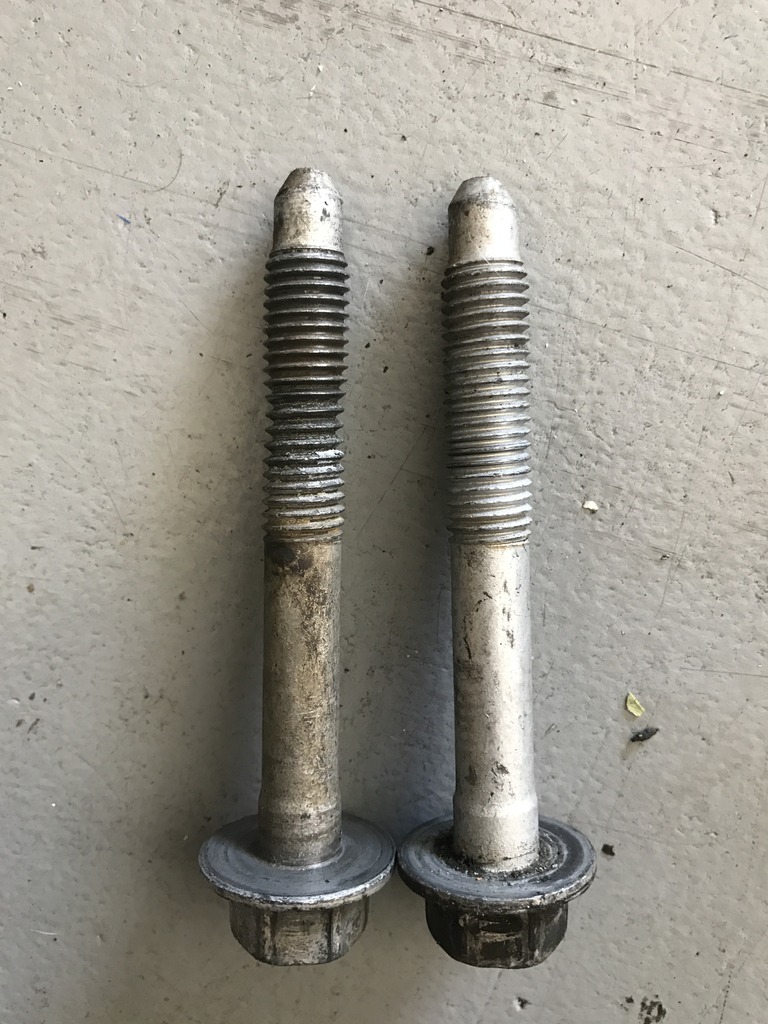
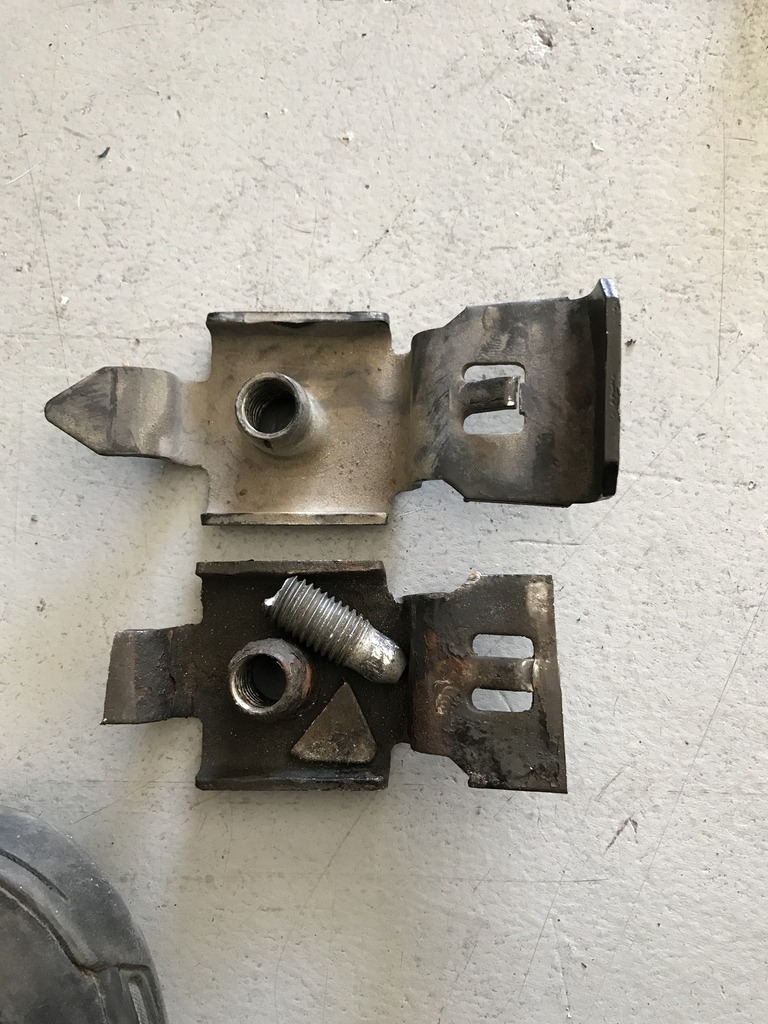
The main challenge with the kmember was with BMR's instructions of torquing to 100ftlbs on the bolts. It felt like too much, so I dialed back to 70 and the torque wrench clicked. I bumped it to 80, small turn and click. 90.... SNAP. Insert obscenities. At least it was one of the longer bolts that threaded into a removable steel plate, rather than directly to the frame. The bolt broke even with the plate, which made extraction difficult. I bought a set of easy outs, but could not get the bolt to budge. I decided to replace the plate, but because the bolt was far enough through the plate to hit the frame when trying to remove the plate, the sawzall received additional use. I was able to get the plate out by cutting the sides off the plate, which enabled me to rotate the plate inside the frame so the bolt top was sticking into the engine bay. I then threaded the bolt out with vice grips. I replaced the cut plate with a new to me one from the junk yard.
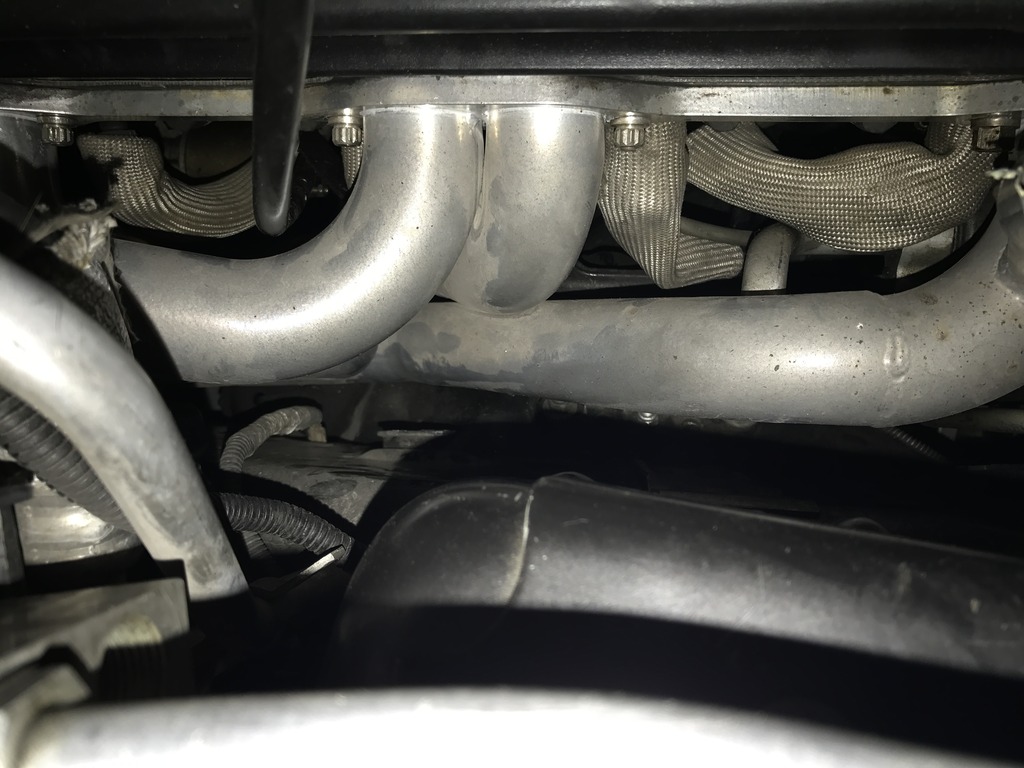
Installation from that point was mostly straight forward. The LTs did rub a bit on the passenger side lower A arm rear mount. I made a small dent in the header to allow fitment. I am on the fence about replacing the headers with a set of Hookers which fit better per BMR, but wasn't ready to lay down the cash. After research and watching an Engine Masters video testing header denting, I will leave the Jet hots.

4. Misc fixes with the stock kmember coming out: I had a few other items that needed to be addressed that were optimally done with the kmember removed: driver side motor mount, leaky oil pan and a bent inner tie rod end (newly discovered).
The motor mount was painful. The LTs ran extremely close to the bolts on the mount. Chalk that up with a mistake of where I installed a stud in the mount, and I found myself in the web of early 20's mistakes. I was able to cut through most of the stud with the sawzall, before my last blade broke. I was far enough through the stud that I was able to break off the remaining amount with vice grips. The clearance was still so tight, only a 1/4 socket and drive with a universal joint would fit. It took a 2 1/2' braker bar to get the bolt to break, and it was still a challenge (maybe the heat from cutting the stud?). The other bolts came out easily. The mount with an Energy Suspension poly mount, to match the poly mount built into the BMR kmember. I replaced the stud bolt with a standard bolt obtained via the junk yard to have everything match.
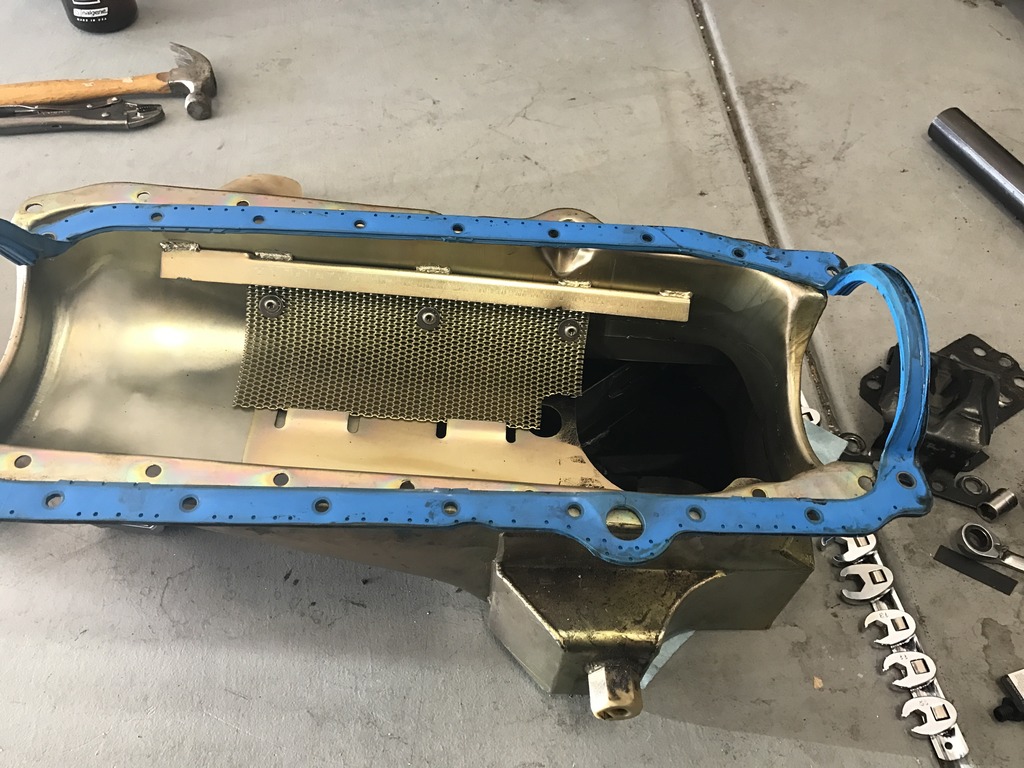
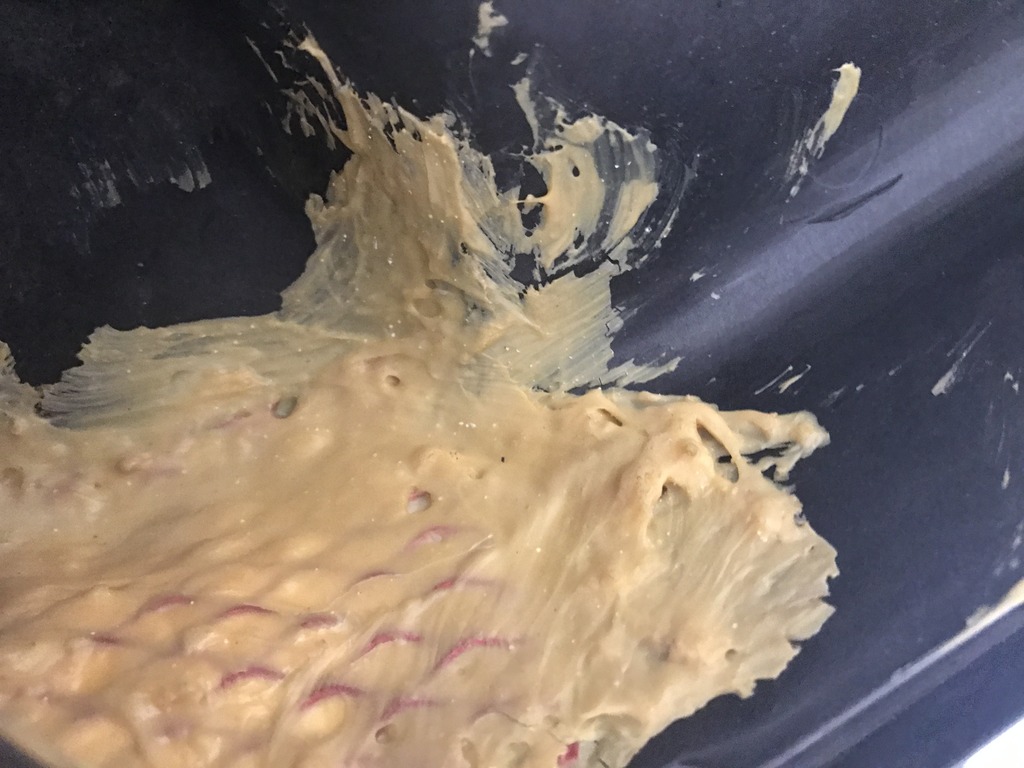
The oil pan wasn't bad. I ended up replacing the gasket (rubber Felpro), because I found a few spots with cracks. The rails were flat, but in removing the pan I found a missing bolt behind the starter. More backstory is that when I originally built the engine, the guy helping me convinced me that the higher RPM required higher oil pressure. To achieve this, we shimmed the oil pump's pressure relief valve with a washer. We had tested the modification with an air compressor and saw the valve opened at 80 PSI. When the project was complete, the first time the car turned over, a sea of oil belched from under the car about 15 second after it started. After investigation, I found the higher oil pressure was blowing out the rubber gasket on the oil filter. Another friend helped me drop the kmember to get the pump out to remove the shim. I think in the stress of getting the pan back on and the kmember reattached, the bolt was missed. In any case, new gasket, and because of the reported issues of getting Canton pans to seal with the LT1, I used a thick bead of ultra black on the whole gasket.
When I finally located the ignition fuse issue, burned wires, I was hoping the rest would be a quick fix. I found that in my youthful angst, that I had made a number of mistakes that I am having to fix now.
1. Ignition fuse: The passenger side wires that lead down to the starter and crank position sensor had seen better days. 4 wires in total were fried, but the CPS pink wire was the worst of them. I also discovered the wheel sensor plug to be melted together.


2. Wire Decisions: After fixing the melted wires, wrapping them in DEI heat wrap, and trying to reinstall them, it became clear that direct contact with the header (Jet Hot LTs) would be made if I just routed the wires back the way they came. I decided to replace the stock kmember with a BMR tubular version to give me some extra room versus re-route the wires from front to back. Our bulldog was kind enough to inspect the purchase for me.

3. Installation of the kmember: For a mere 6 bolts holding it on, this was a challenging project. A friend and I went in 1/2 and 1/2 on a 1 ton hoist, which after assembling, we figured out it didn't have the throw to get over the engine. We returned the 1 ton in exchange for the 2 ton, which gave the additional 8 inches of throw needed. The day the project started, should have been pretty smooth, as I had spent random time the week before preparing by removing the steering rack, disconnecting the lower A arms, and disconnecting the hard brake lines. The stock member came out easily; maybe taking 30 minutes once we started.


The main challenge with the kmember was with BMR's instructions of torquing to 100ftlbs on the bolts. It felt like too much, so I dialed back to 70 and the torque wrench clicked. I bumped it to 80, small turn and click. 90.... SNAP. Insert obscenities. At least it was one of the longer bolts that threaded into a removable steel plate, rather than directly to the frame. The bolt broke even with the plate, which made extraction difficult. I bought a set of easy outs, but could not get the bolt to budge. I decided to replace the plate, but because the bolt was far enough through the plate to hit the frame when trying to remove the plate, the sawzall received additional use. I was able to get the plate out by cutting the sides off the plate, which enabled me to rotate the plate inside the frame so the bolt top was sticking into the engine bay. I then threaded the bolt out with vice grips. I replaced the cut plate with a new to me one from the junk yard.


Installation from that point was mostly straight forward. The LTs did rub a bit on the passenger side lower A arm rear mount. I made a small dent in the header to allow fitment. I am on the fence about replacing the headers with a set of Hookers which fit better per BMR, but wasn't ready to lay down the cash. After research and watching an Engine Masters video testing header denting, I will leave the Jet hots.

4. Misc fixes with the stock kmember coming out: I had a few other items that needed to be addressed that were optimally done with the kmember removed: driver side motor mount, leaky oil pan and a bent inner tie rod end (newly discovered).
The motor mount was painful. The LTs ran extremely close to the bolts on the mount. Chalk that up with a mistake of where I installed a stud in the mount, and I found myself in the web of early 20's mistakes. I was able to cut through most of the stud with the sawzall, before my last blade broke. I was far enough through the stud that I was able to break off the remaining amount with vice grips. The clearance was still so tight, only a 1/4 socket and drive with a universal joint would fit. It took a 2 1/2' braker bar to get the bolt to break, and it was still a challenge (maybe the heat from cutting the stud?). The other bolts came out easily. The mount with an Energy Suspension poly mount, to match the poly mount built into the BMR kmember. I replaced the stud bolt with a standard bolt obtained via the junk yard to have everything match.
The oil pan wasn't bad. I ended up replacing the gasket (rubber Felpro), because I found a few spots with cracks. The rails were flat, but in removing the pan I found a missing bolt behind the starter. More backstory is that when I originally built the engine, the guy helping me convinced me that the higher RPM required higher oil pressure. To achieve this, we shimmed the oil pump's pressure relief valve with a washer. We had tested the modification with an air compressor and saw the valve opened at 80 PSI. When the project was complete, the first time the car turned over, a sea of oil belched from under the car about 15 second after it started. After investigation, I found the higher oil pressure was blowing out the rubber gasket on the oil filter. Another friend helped me drop the kmember to get the pump out to remove the shim. I think in the stress of getting the pan back on and the kmember reattached, the bolt was missed. In any case, new gasket, and because of the reported issues of getting Canton pans to seal with the LT1, I used a thick bead of ultra black on the whole gasket.

Last edited by DrewHMS97SS; 01-17-2018 at 10:32 AM.
 11-22-2016, 04:47 PM
#2
Registered User
Thread Starter
Join Date: Sep 2003
Location: Las Vegas
Posts: 1,916
Re: 1997 Project
Some inner eye candy, since the pan was off.
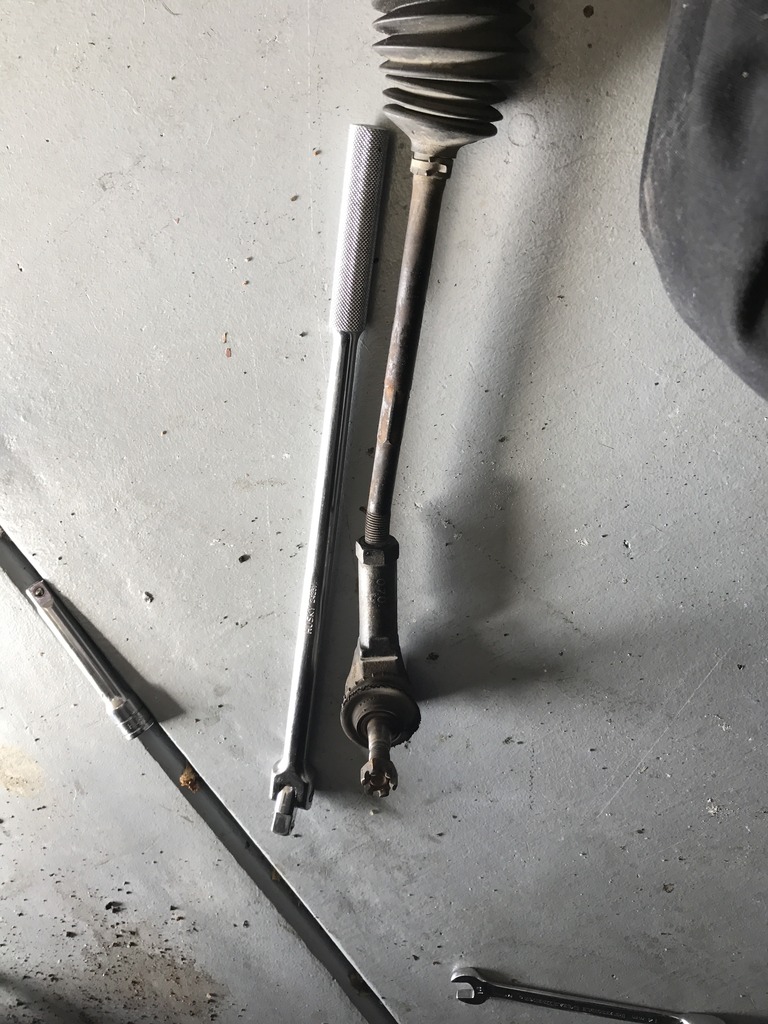
The steering rack wasn't nearly the pain I expected. I believe someone had had the rack out previously and reversed the bolts so the nuts were on the top side of the kmember. Removal and re-installation was easy, but did cost me an additional $170 for a re-manufactured rack because of a bent inner tie rod end on the passenger side. I looked at the junk yard racks and found 6 of 6 cars had the same bend as mine.
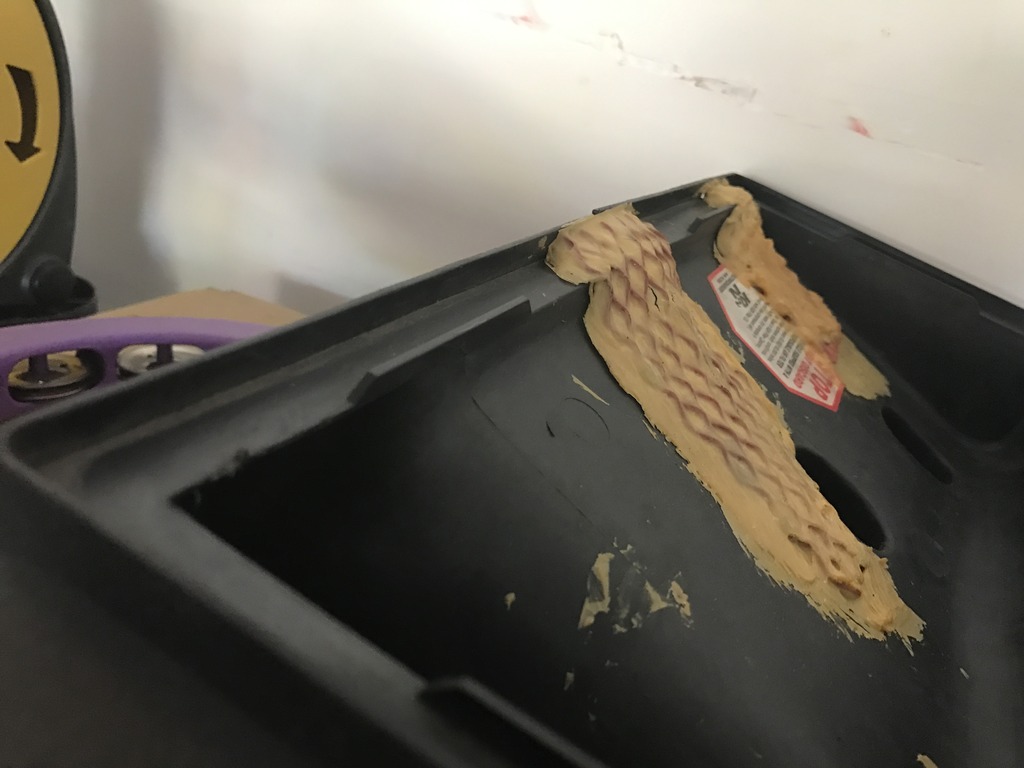
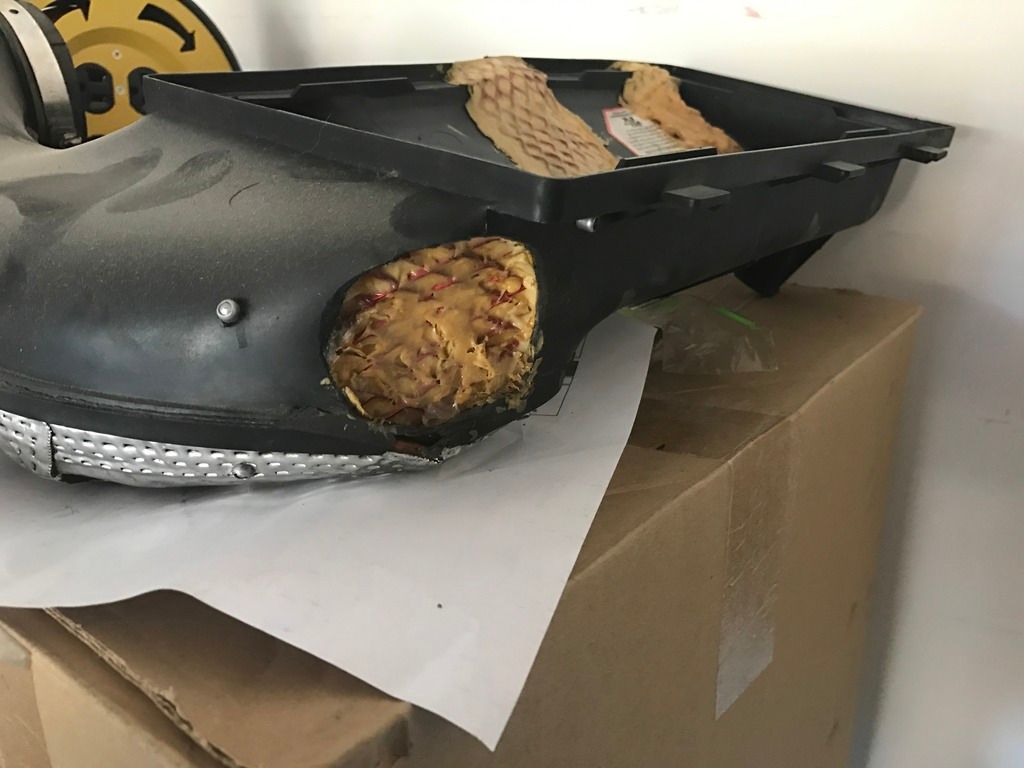
5. SS Airbox: Another poor decision of my early 20's. I purchased and installed an SLP strut tower brace (the SS model), only to find that the airbox was still in the way. I was able to make it work, but there was a lot of pressure between the bar and box. When the engine was built, I also installed a TNT nitrous kit. The lines coming from the plate's nozzles caused clearance issues with the hood. This forced me to use 90 degree angle AN fittings, which then impacted the airbox. In my wisdom, I cut notches in the box to allow the lines, and to relieve where the brace was touching. I then cut and molded a grill material to the openings, which were riveted into place. I then lined one side of the grill material with parchment paper, and painted the grill with epoxy. It worked, but it was pretty ugly. Over the last 10 years of the car sitting, the epoxy started separating from the box. I am a bit embarrassed about the box, so pictures might not show up, we will see how I feel. In any case, I replaced the SS box with the K&N CAI box. I had my MSD iginition mounted in that space however, and am now hunting a new space; TBD.


Last edited by DrewHMS97SS; 11-30-2016 at 11:17 AM.
11-22-2016, 04:49 PM
#3
Registered User
Thread Starter
Join Date: Sep 2003
Location: Las Vegas
Posts: 1,916
Re: 1997 Project
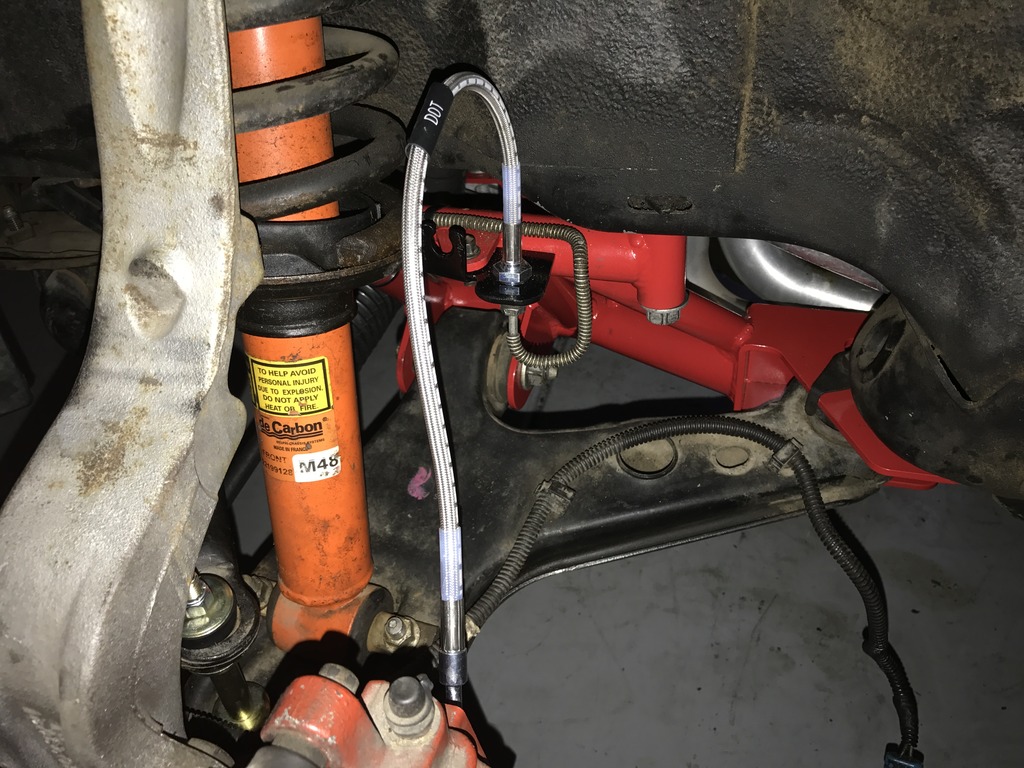
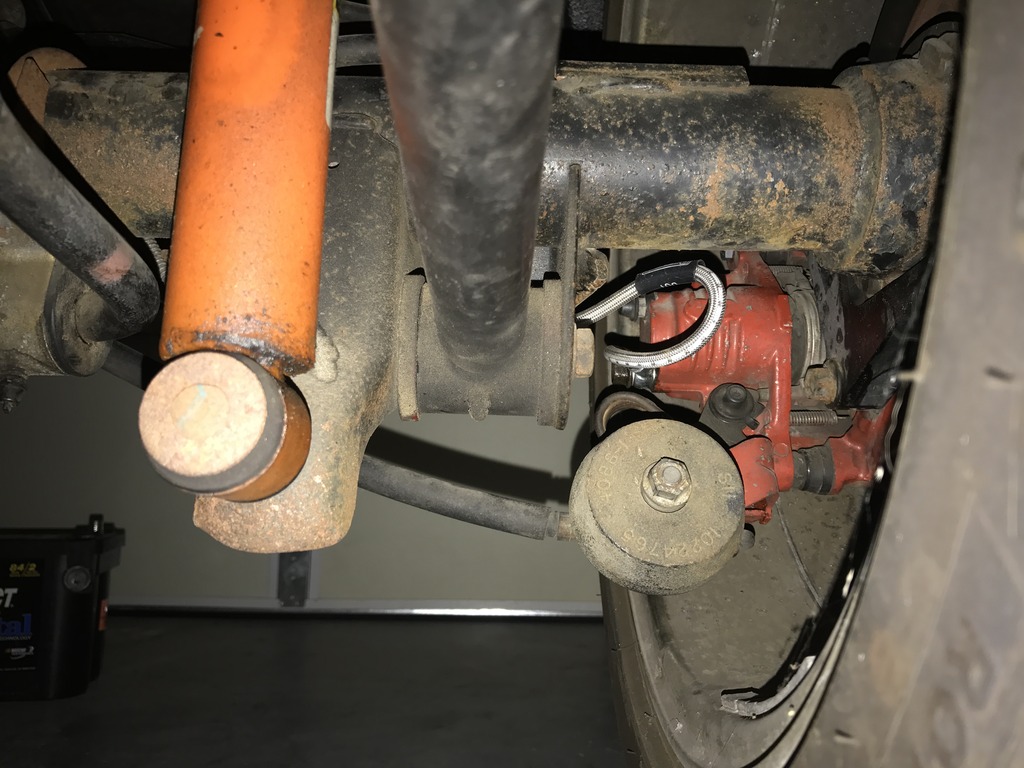
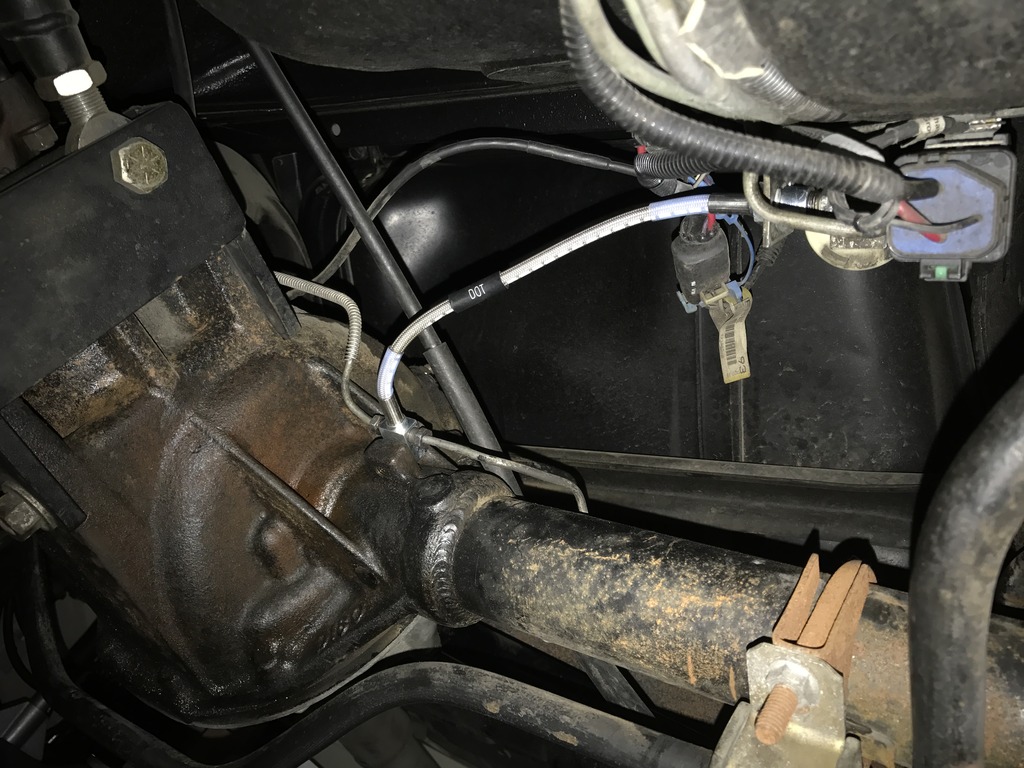
6. Brake Lines: I found the BMR kmember required significant trimming of brake line brackets. I used this as an excuse to buy braided lines. I had previously done a LS1 front brake swap, and found that hard over on the wheel, the brake lines were a bit stretched, making this an even easier justification. I need to get everything back into position, but I think the new line mounting will fit better. For anyone that stumbles upon this, C5 brake lines fit best with this application. It gives plenty of extra space with zero chance of stretching. It's frustrating that Russell doesn't sell front and rear separately.
7. Current: I am slowing getting everything back together now. I will post pictures in the next few days, but I feel like I have made huge progress. I know I will need to swap my steering column (car had been broken into) and will need some other minor things, but I hope I can get it driving in the next couple weeks. Thanks to everyone that has provided advice, my progress is largely due to help on the forum. Cheers!


7. Current: I am slowing getting everything back together now. I will post pictures in the next few days, but I feel like I have made huge progress. I know I will need to swap my steering column (car had been broken into) and will need some other minor things, but I hope I can get it driving in the next couple weeks. Thanks to everyone that has provided advice, my progress is largely due to help on the forum. Cheers!
Last edited by DrewHMS97SS; 01-17-2018 at 10:48 AM.
11-22-2016, 04:54 PM
#4
Registered User
Thread Starter
Join Date: Sep 2003
Location: Las Vegas
Posts: 1,916
Re: 1997 Project
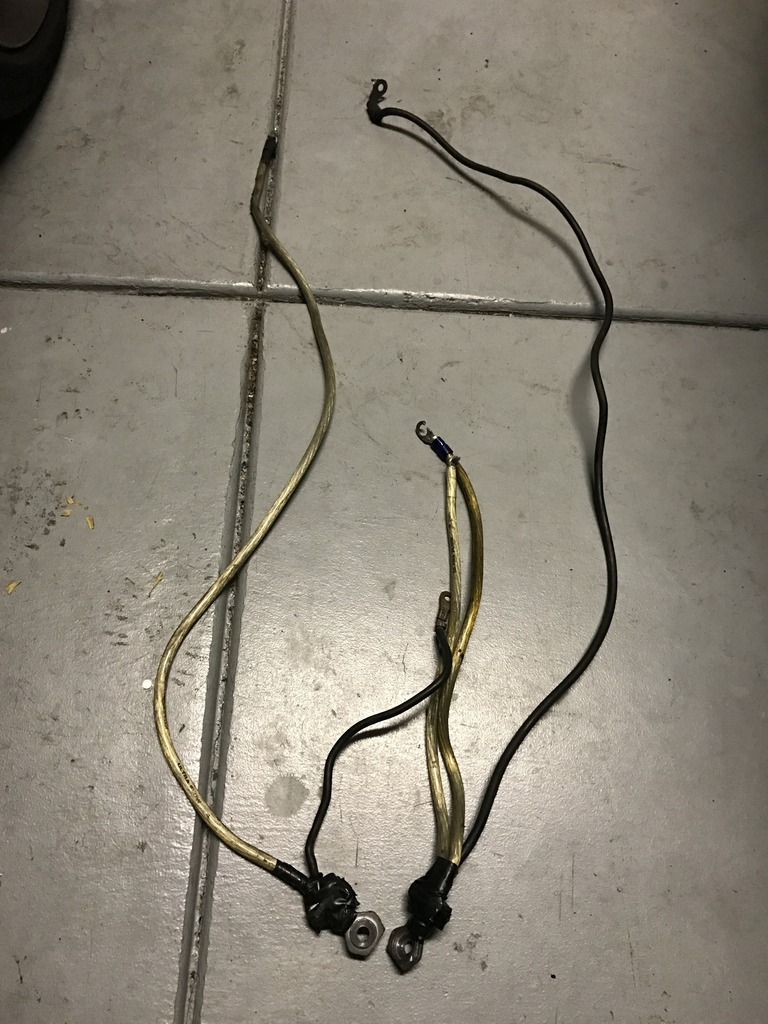
I also decided to replace the battery cables that I made (another poor decision from my youth), with a stock set. Note, be careful with cables from Ricks Camaro's, the positive cables don't fit, the starter lead is about 1 1/2' short.
I found out today from Strange that the rear end should be serviced, having all of its seals replaced (the car hasn't moved in more than 6 years, but has only been randomly driven over the last 10. I think I will replace the fluid for now, and keep an eye on the seals for any leakage.

I found out today from Strange that the rear end should be serviced, having all of its seals replaced (the car hasn't moved in more than 6 years, but has only been randomly driven over the last 10. I think I will replace the fluid for now, and keep an eye on the seals for any leakage.
 11-27-2016, 02:39 PM
#7
Registered User

Join Date: Jun 2003
Posts: 1,083
Re: 1997 Project
Drew
If you do find a need for new battery cables in the future, Gary @ Innovative Wiring makes a great product, IMHO
Camaro | Innovative Wiring LLC
If you do find a need for new battery cables in the future, Gary @ Innovative Wiring makes a great product, IMHO
Camaro | Innovative Wiring LLC
11-28-2016, 08:24 PM
#8
Registered User
Thread Starter
Join Date: Sep 2003
Location: Las Vegas
Posts: 1,916
Re: 1997 Project
Drew
If you do find a need for new battery cables in the future, Gary @ Innovative Wiring makes a great product, IMHO
Camaro | Innovative Wiring LLC
If you do find a need for new battery cables in the future, Gary @ Innovative Wiring makes a great product, IMHO
Camaro | Innovative Wiring LLC
11-28-2016, 08:27 PM
#9
Registered User
Thread Starter
Join Date: Sep 2003
Location: Las Vegas
Posts: 1,916
Re: 1997 Project
So close, yet so far. I got it fired up today, but shortly after it started spewing fuel. It seems like it's coming from the back of the fuel rail, but am unsure at this point. Its definitely favoring the drivers side gaming from the engine bay.
11-29-2016, 01:39 PM
#10
Registered User
Thread Starter
Join Date: Sep 2003
Location: Las Vegas
Posts: 1,916
Re: 1997 Project
Also noticed the wheel caster was way off yesterday before I fired it.
The adjustment was pretty close on the rear of the stock arms to being all the way back. I talked with BMR and decided to order the lower arms to get more adjustment.

The adjustment was pretty close on the rear of the stock arms to being all the way back. I talked with BMR and decided to order the lower arms to get more adjustment.
11-29-2016, 01:53 PM
#11
Registered User
Join Date: Jun 2003
Posts: 1,083
Re: 1997 Project
don't drive the car with a fuel leak...I saw a LT1 car burn to the ground because the fuel line was not attached correctly after the guy picked the car up from the shop
11-29-2016, 03:15 PM
#12
Registered User
Thread Starter
Join Date: Sep 2003
Location: Las Vegas
Posts: 1,916
Re: 1997 Project
well "new" stock (AC Delco) cables are "OK"...but IMHO just like most stock battery cable sets they are on the thin side for wire size. If the cables you bought were NIB fine...but if they are a 20 year old used set they are done.
You may not have gotten the fuel line on all the way on the FPR. Did you hear it "click" and does it stay on if you tug back on it?
don't drive the car with a fuel leak...I saw a LT1 car burn to the ground because the fuel line was not attached correctly after the guy picked the car up from the shop
The cables were new in box, but I did splice on the extra length needed to get to the starter.
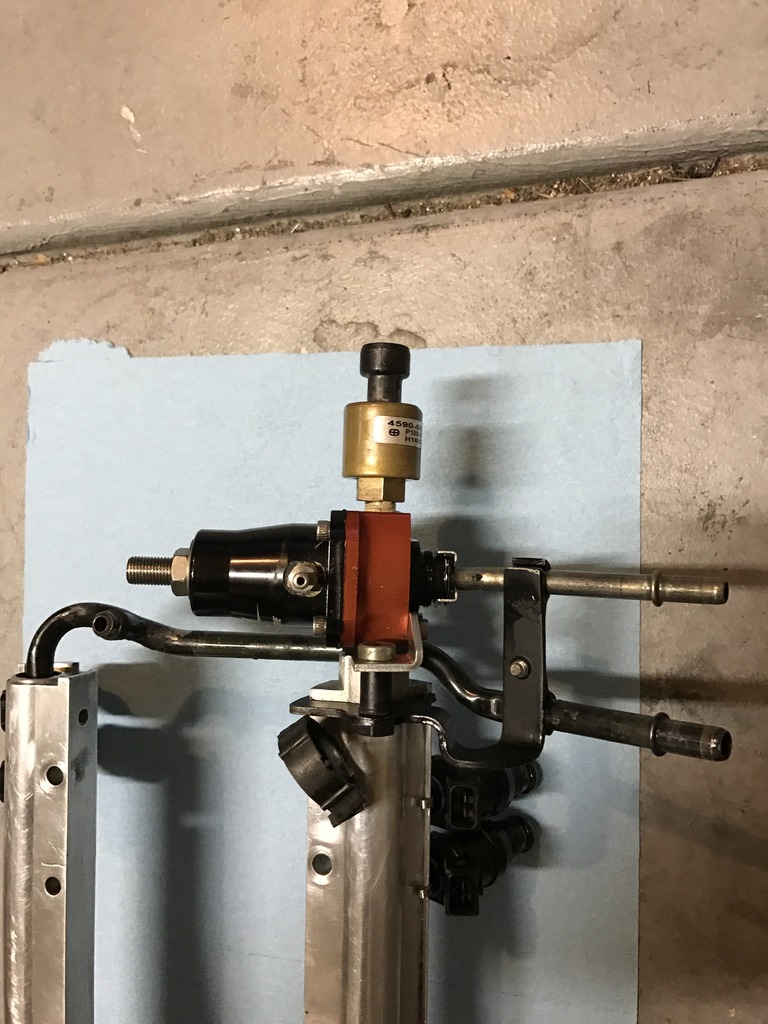
In regard to fuel, I had not taken anything on the top end apart since it had been running last. I took the rail of today and it looks like it was coming from the regulator connection to the rail. All of the o-rings look to be toast other than the injectors, but I think I will replace those too. PITA too with all the hard plastic vacuum lines; they snap when I look at them wrong. I'm headed to the store now for replacement stuff.

After replacing the o-rings on all injectors, the FPR, and the cross link I plan on reassembling the fuel rail, connecting it to the lines outside the car, then priming the pump to check for more leaks.
Last edited by DrewHMS97SS; 11-30-2016 at 11:19 AM.
11-30-2016, 11:22 AM
#13
Registered User
Thread Starter
Join Date: Sep 2003
Location: Las Vegas
Posts: 1,916
Re: 1997 Project
I got all of the o-rings replaced, and tested pressure outside the car. 42 PSI at the rail and I cannot see any leaks.

The car now will not start. It chokes like it wants to, but dies quickly after. I believe I am fighting bad fuel (between 7 - 8 years old). I mixed in 5 gallons of fresh gas hoping to be able to burn off the old stuff, but I think it's too far gone.


The car now will not start. It chokes like it wants to, but dies quickly after. I believe I am fighting bad fuel (between 7 - 8 years old). I mixed in 5 gallons of fresh gas hoping to be able to burn off the old stuff, but I think it's too far gone.
11-30-2016, 11:26 AM
#14
Registered User
Thread Starter
Join Date: Sep 2003
Location: Las Vegas
Posts: 1,916
Re: 1997 Project
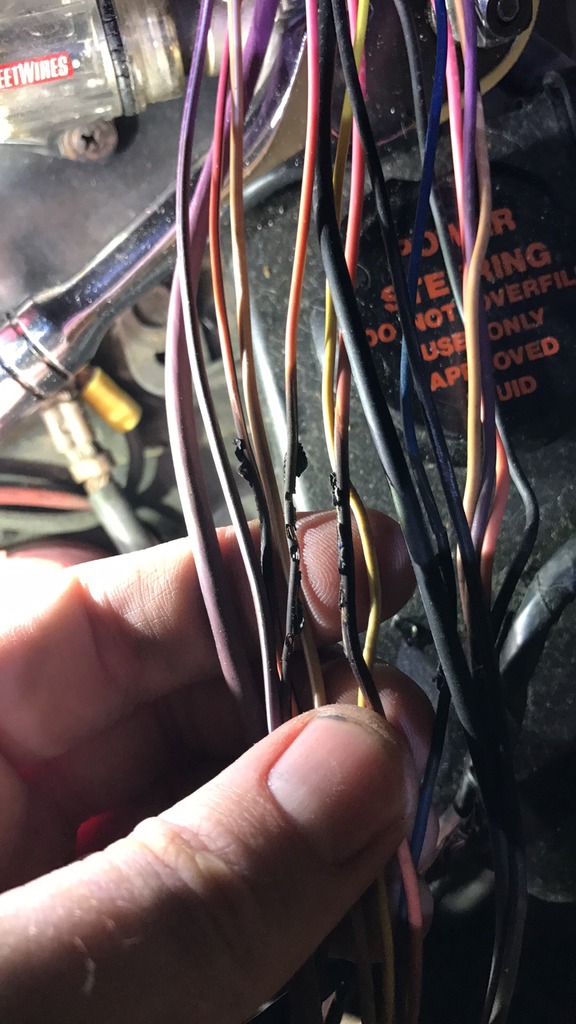
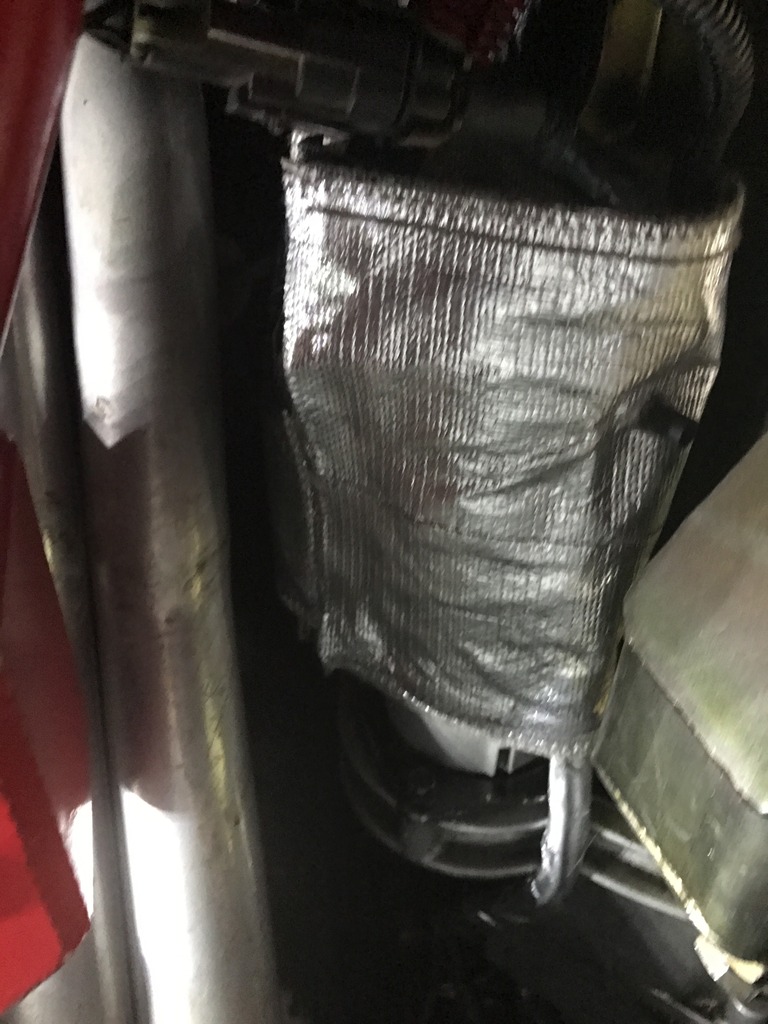
Here are a few pics of the wires that were melted in their new (and hopefully safe) home.
DEI starter blanket, I also routed the rear O2 sensor and transmission cabling through the blanket:
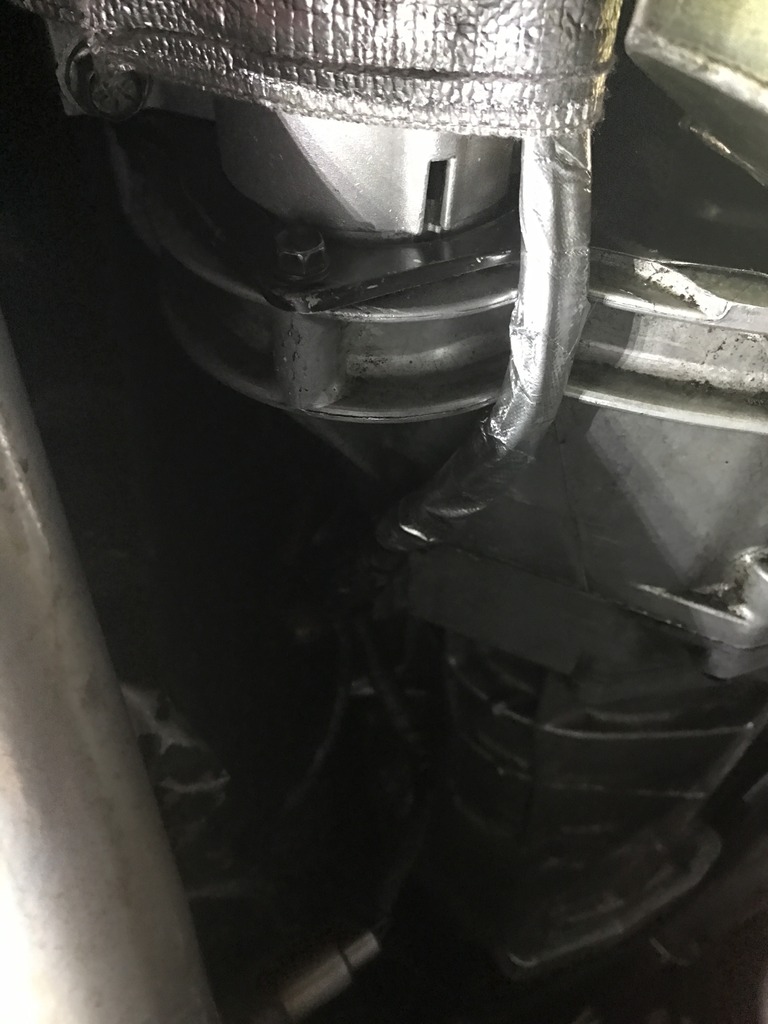
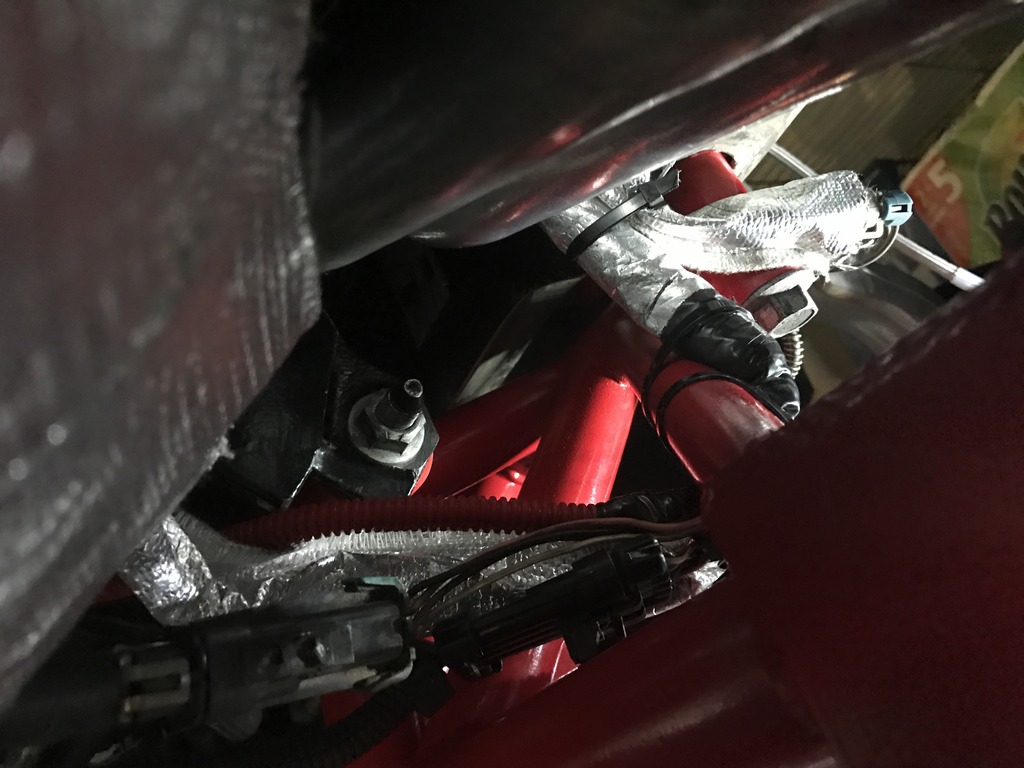
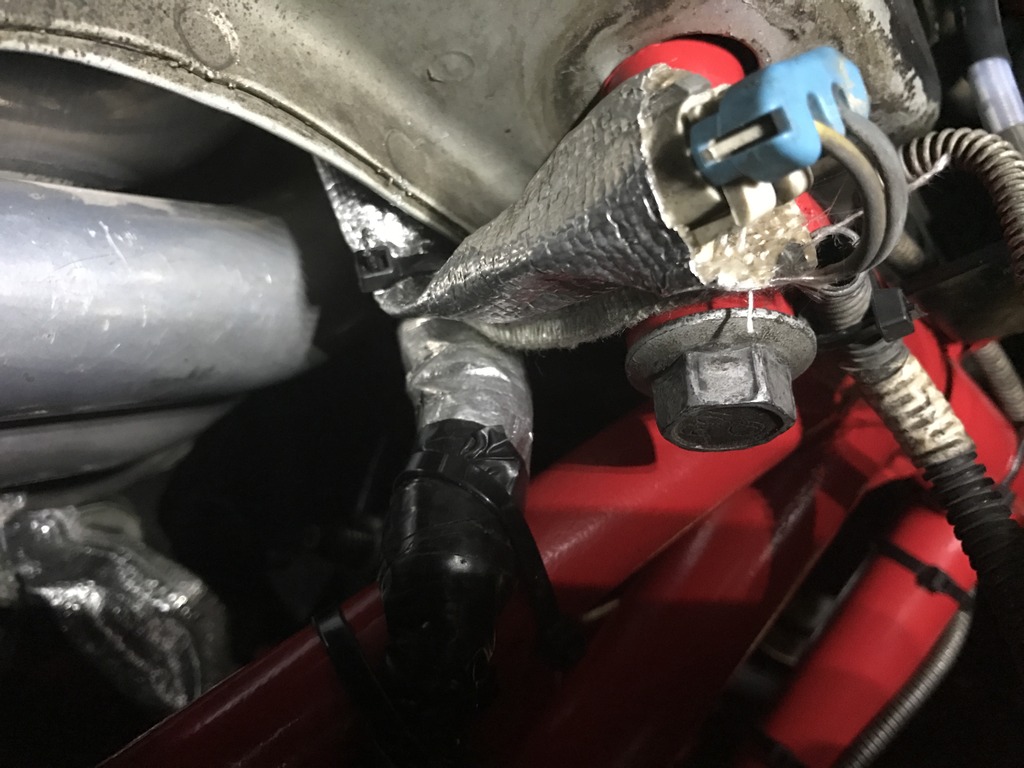
DEI starter blanket, I also routed the rear O2 sensor and transmission cabling through the blanket:


 11-30-2016, 11:57 AM
#15
Registered User
Join Date: Jun 2003
Posts: 1,083
Re: 1997 Project
Good you are taking steps to minimize heat exposure to the affected areas
Man if the gas is 7-8 years old I would use a cheap hand pump to syphon it from the tank. Adding good fuel and trying to burn through all that crap gas may likely clog up the injectors and fuel filter. I would go so far as to disconnect the fuel filter and use the fuel pump to pump out the last remaining gas after you syphon out the majority of it.
or just drop the tank and pull the fuel pump and get all the fuel out that way

