Convertible Top Replacement Step by Step (lots o pics)
 09-29-2008, 11:28 PM
#1
Registered User
Thread Starter

Join Date: Aug 2007
Location: CT
Posts: 81
Convertible Top Replacement Step by Step (lots o pics)
Let me start this with a disclaimer. I am by no means a professional, I am far from it. However after the cheapest quote for having the top installed was about 1000 dollars I decided that it couldn't possibly be that hard...besides I don't like anyone touching the car other then myself. This being said, I am not responsible should you decide to use information in this post and something goes wrong, comes out wrong etc. I also welcome anyone with their own experience to add to this thread. There is a severe lack of info out there on how to change tops on these cars, maybe if I get the ball rolling some of the professionals who must be lurking on this board will come out to correct all my amateur errors.
Last edited by deliryumtrigger; 10-12-2008 at 07:24 PM. Reason: Editing for clarity
 09-29-2008, 11:40 PM
#2
Registered User
Thread Starter
Join Date: Aug 2007
Location: CT
Posts: 81
Things You Will Need
- New Top
- Staple Gun- I used an electric stapler and it worked pretty good except for where the top overlaps the rear window section and you have 4 layers of material plus seams. In fact I will be going back sometime soon and re-stapling these areas as they are the only spots that don't look like they should. What does this mean? It means get yourself a pneumatic stapler unless you really like a challenge.
- Staples- I would suggest stainless steel or some other staple that will not rust.
- Various Knives- At a minimum I would say you need a utility knife and a medium-fine xacto knife.
- Spray adhesive- A few areas require glue. Loctite heavy duty gets my vote. You could glue a person to the ceiling with that stuff.
- Blankets or something to cover the back sides of the body around the top.
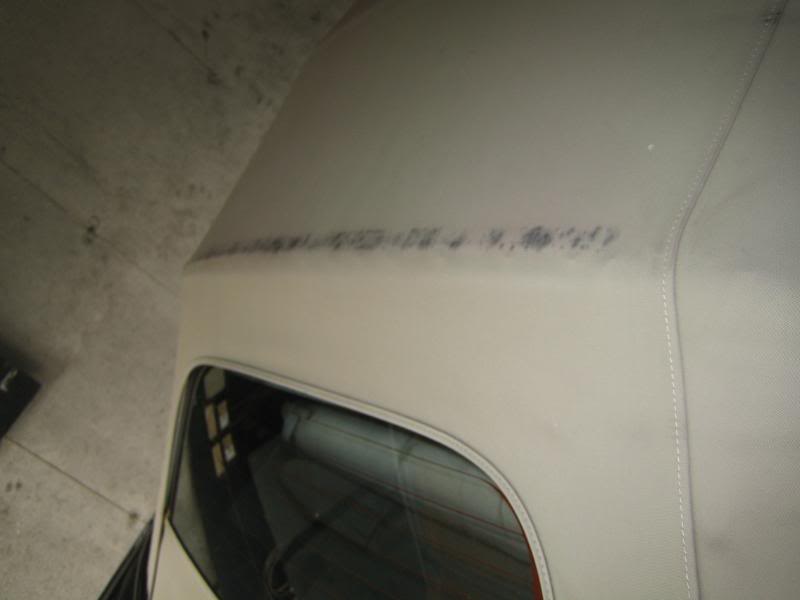
The staples that will remain in the top as you rip it out are extremely sharp and aggressive, they will tear into you paint at the slightest touch.
- Drill and bit to drill out a rivet, I believe it was either 1/8 or 1/4
- And your basic hand tool assortment, including especially, philips head, allen wrenches, and I believe a 10mm deep socket. The ability to attach all of these to a drill/driver will definitely speed you up.
- Staple Gun- I used an electric stapler and it worked pretty good except for where the top overlaps the rear window section and you have 4 layers of material plus seams. In fact I will be going back sometime soon and re-stapling these areas as they are the only spots that don't look like they should. What does this mean? It means get yourself a pneumatic stapler unless you really like a challenge.
- Staples- I would suggest stainless steel or some other staple that will not rust.
- Various Knives- At a minimum I would say you need a utility knife and a medium-fine xacto knife.
- Spray adhesive- A few areas require glue. Loctite heavy duty gets my vote. You could glue a person to the ceiling with that stuff.
- Blankets or something to cover the back sides of the body around the top.
The staples that will remain in the top as you rip it out are extremely sharp and aggressive, they will tear into you paint at the slightest touch.
- Drill and bit to drill out a rivet, I believe it was either 1/8 or 1/4
- And your basic hand tool assortment, including especially, philips head, allen wrenches, and I believe a 10mm deep socket. The ability to attach all of these to a drill/driver will definitely speed you up.
Last edited by deliryumtrigger; 10-12-2008 at 07:31 PM. Reason: Forgot the drill...
09-30-2008, 12:02 AM
#3
Registered User
Thread Starter
Join Date: Aug 2007
Location: CT
Posts: 81
Old Top Removal
So its time to replace that old top...
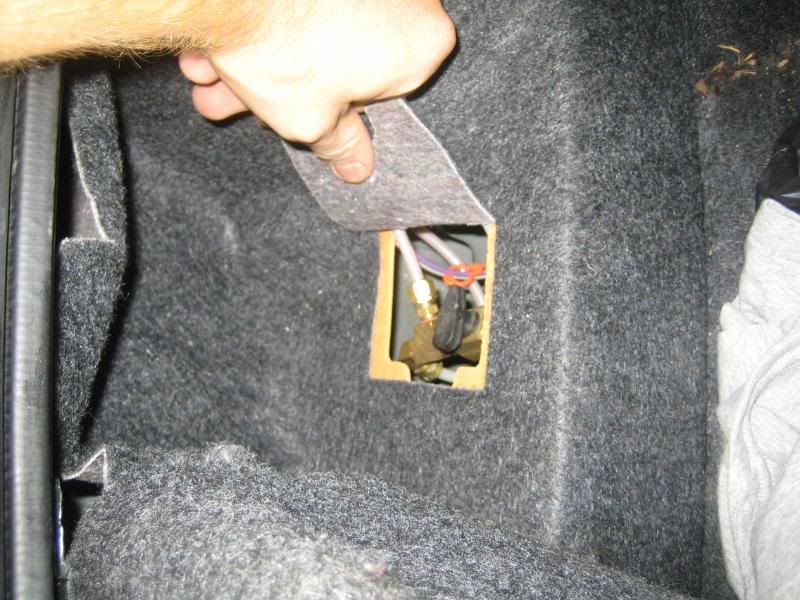
First thing to do is flip this lever to allow you to manual raise and lower the top. (Look for the flap in the carpet on the left side in the trunk)
Next I would get the easy stuff out of the way. Remove the trunk compartment separator and the black plastic trim pieces to either side. The separator just has 2 ***** you turn to remove the piece. The trim pieces have those ridiculous plastic rivet things. I destroyed all but one during removal so have some of these on hand for installation later on.

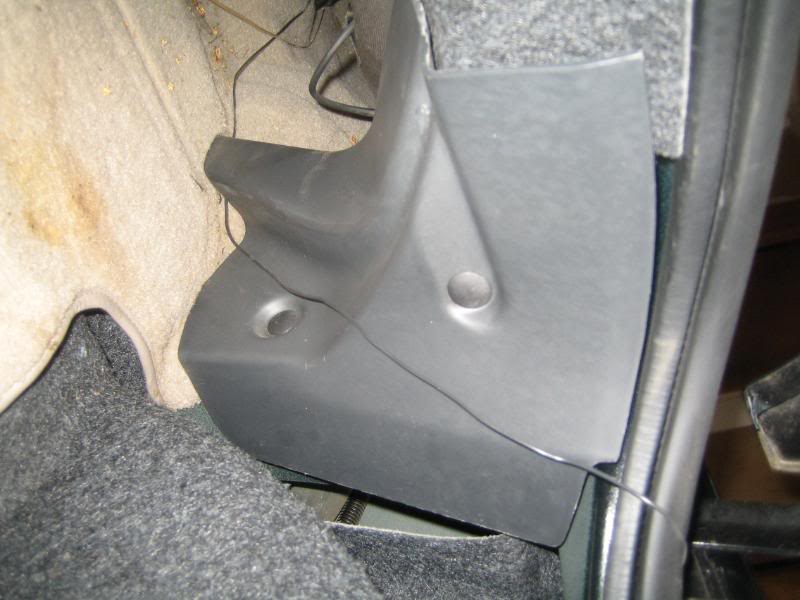
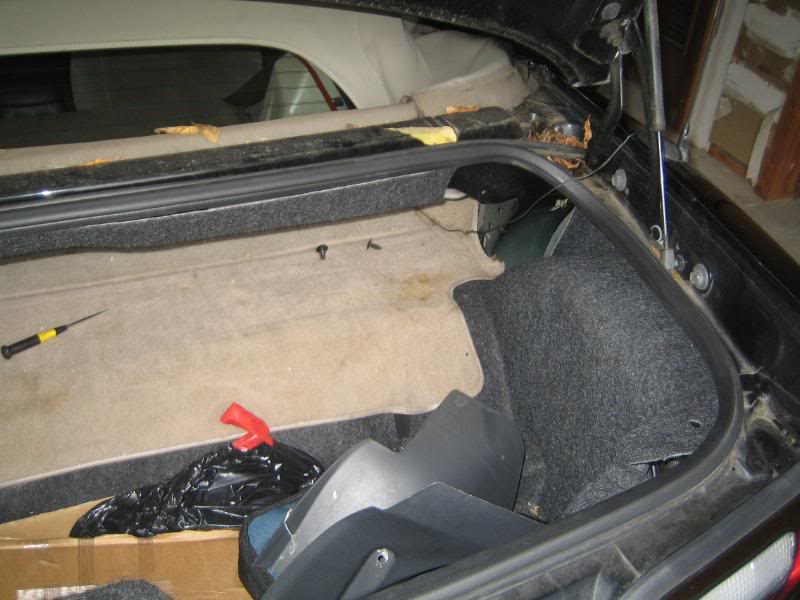
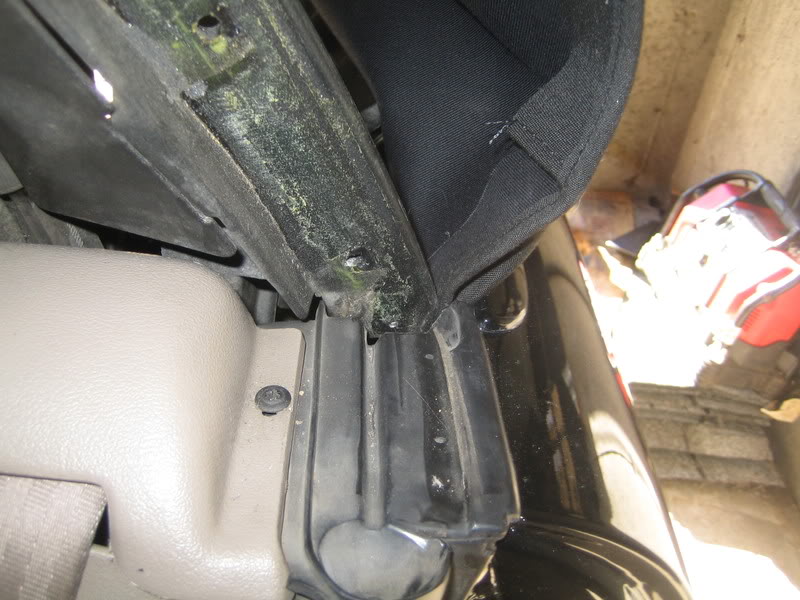
This piece of carpet/trim needs to be removed from the top of the trunk/seat divider area, should be just two plastic rivets.
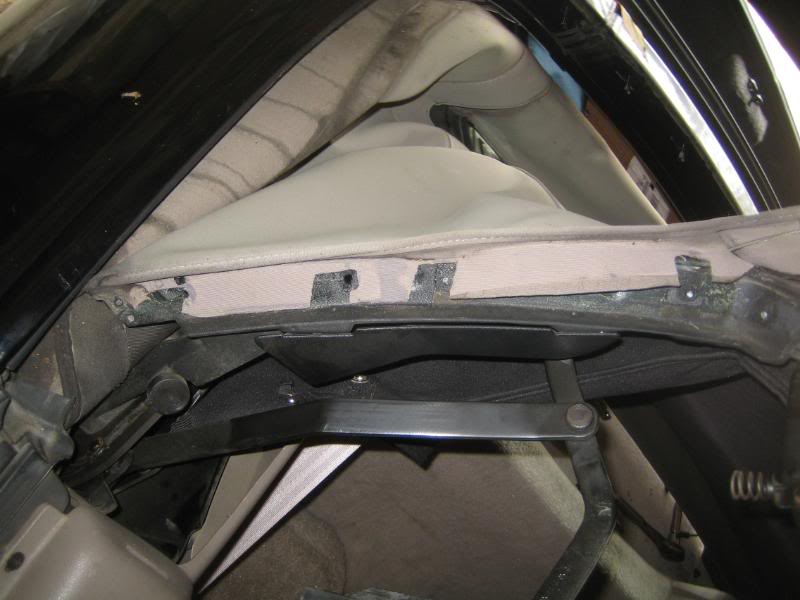
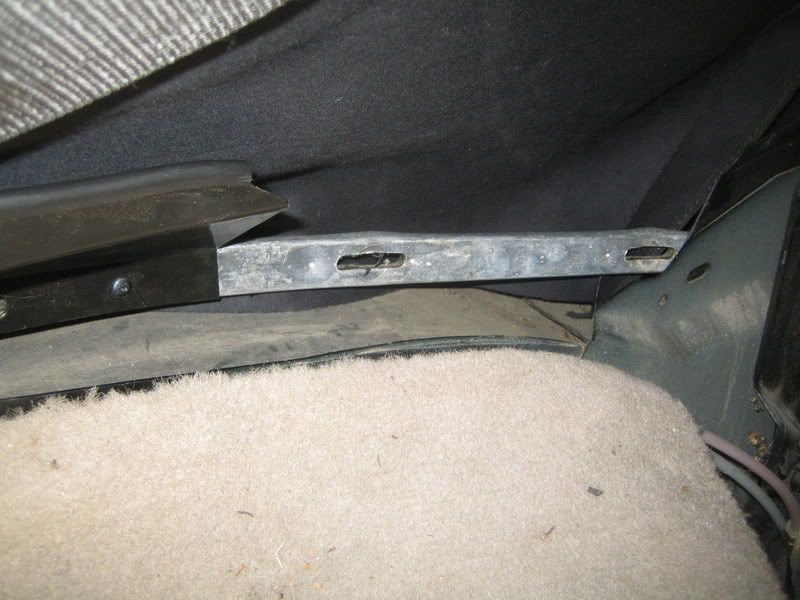
Undo the screw here and its partner on the other side of the car.
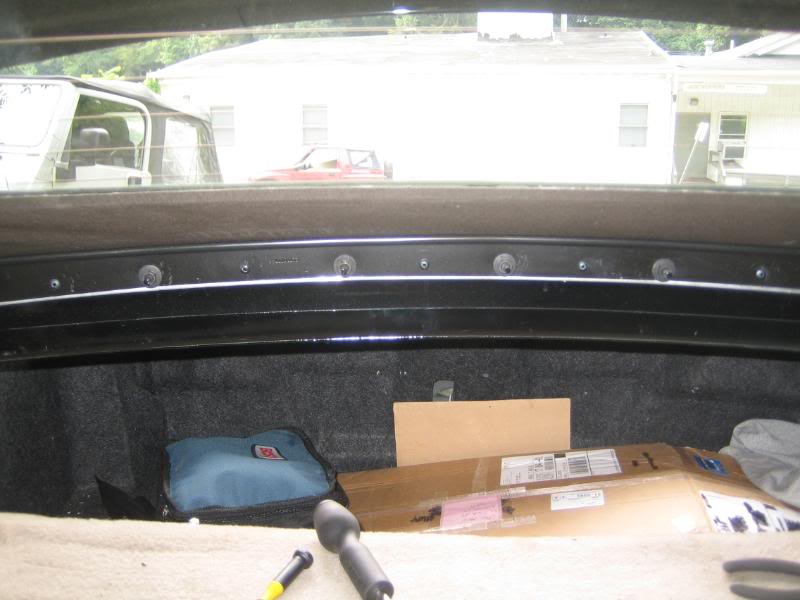
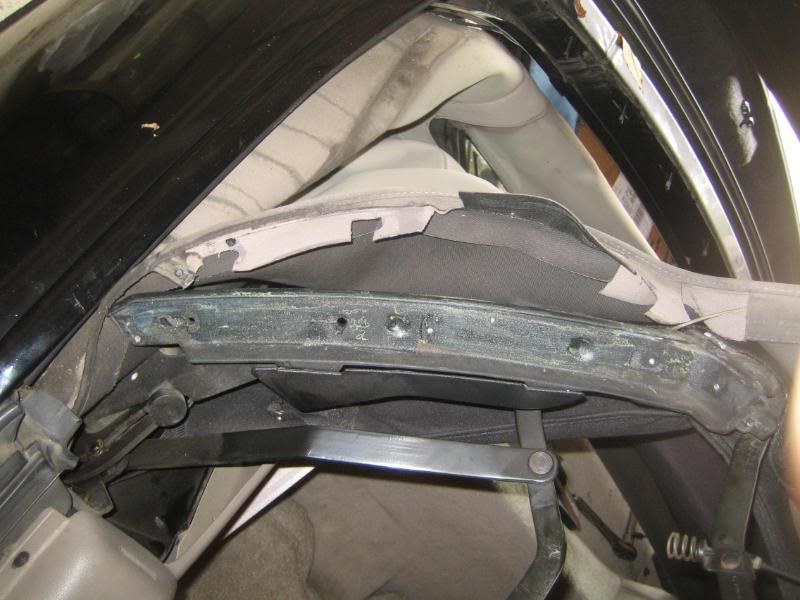
You will now have access to this bar which runs all the way around the back section of the car, holding the back of the top in place.
It is possible to remove the side headliner sections farther, reaching down in the front you will find it is just buttoned around a metal post. The center has a screw in it which can be removed if you remover the rear trim panels, the ones on either side of the rear passenger seats. Personally that seemed like too much of a hassle so I worked around it.
You can now go ahead and remove all of those bolts. You can pull off the bar now if you want, but you really don't gain anything from it at this point.
Let's go back upfront...
First thing to do is flip this lever to allow you to manual raise and lower the top. (Look for the flap in the carpet on the left side in the trunk)
Next I would get the easy stuff out of the way. Remove the trunk compartment separator and the black plastic trim pieces to either side. The separator just has 2 ***** you turn to remove the piece. The trim pieces have those ridiculous plastic rivet things. I destroyed all but one during removal so have some of these on hand for installation later on.
This piece of carpet/trim needs to be removed from the top of the trunk/seat divider area, should be just two plastic rivets.
Undo the screw here and its partner on the other side of the car.
You will now have access to this bar which runs all the way around the back section of the car, holding the back of the top in place.
It is possible to remove the side headliner sections farther, reaching down in the front you will find it is just buttoned around a metal post. The center has a screw in it which can be removed if you remover the rear trim panels, the ones on either side of the rear passenger seats. Personally that seemed like too much of a hassle so I worked around it.
You can now go ahead and remove all of those bolts. You can pull off the bar now if you want, but you really don't gain anything from it at this point.
Let's go back upfront...
Last edited by deliryumtrigger; 09-30-2008 at 08:33 PM. Reason: lots o' edit
09-30-2008, 09:16 PM
#4
Registered User
Thread Starter
Join Date: Aug 2007
Location: CT
Posts: 81
Old Top Removal 2
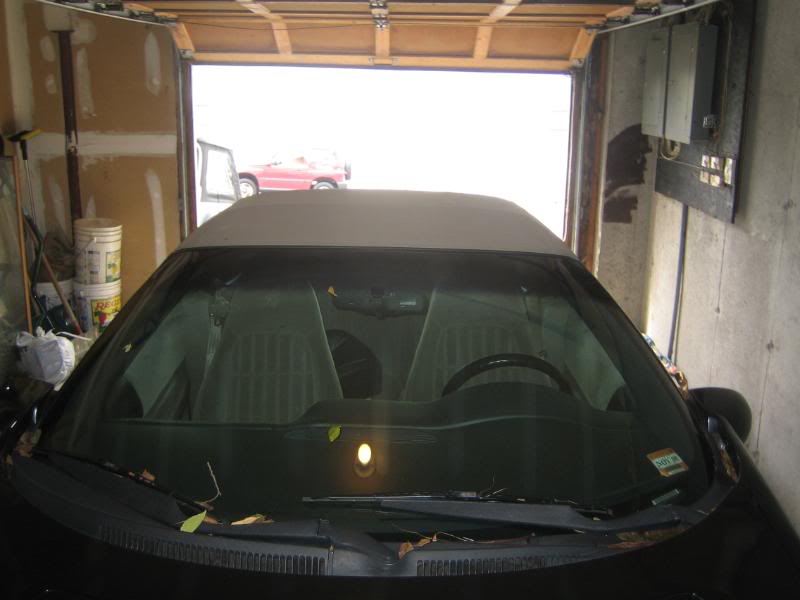
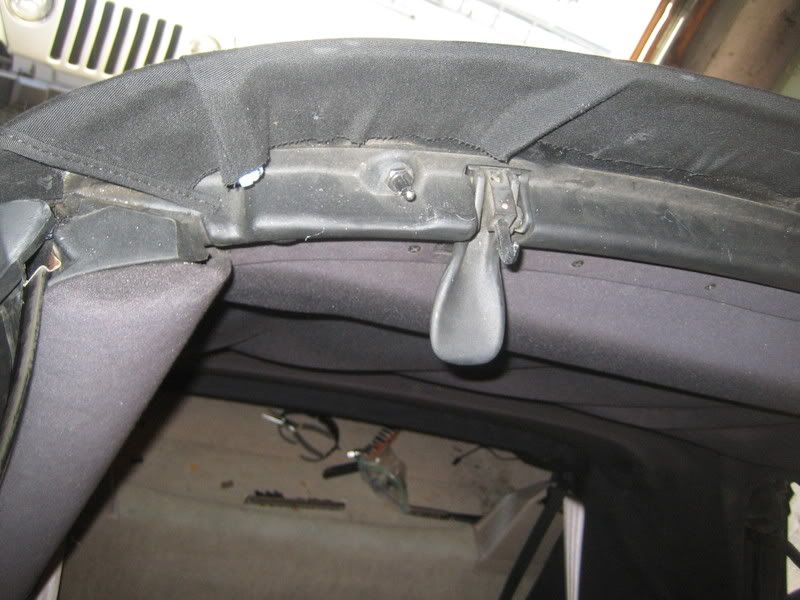
At the front, push the top to halfway open. Remove the header bar at the front(held in by the visible screws).
You should find the canvas glues, peel that off.
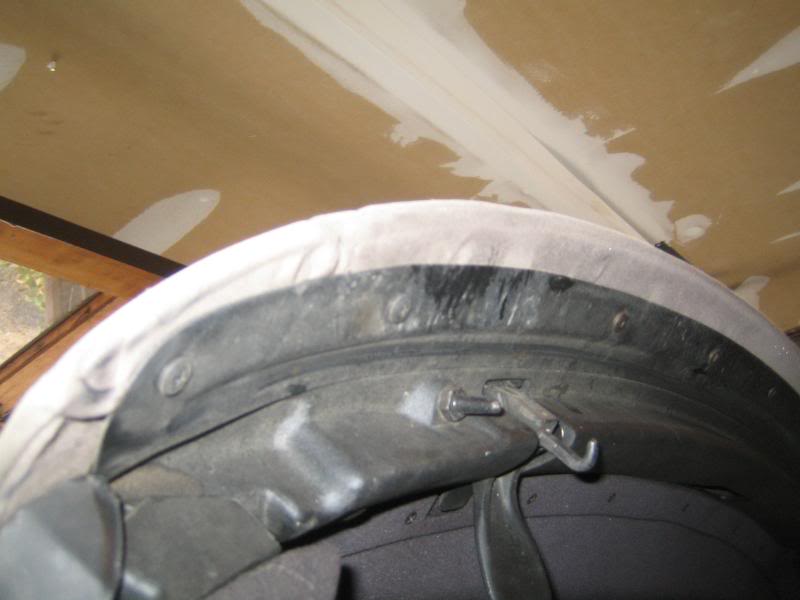
Once peeled free you will find the cables that run down either side of the top. Those will be unscrewed from the other end and pulled though shortly. Moving back to the rear you will now want to remove the rear tack bar from the car. Remove the bolts if you have not done so already (10mm deep socket) and then pull the bar out by pulling the sides in and then towards the front of the car. Now is a good time to throw some blankets or whatever you have over the area right behind and over the sides of the car in the areas you will be working so you don't gauge the hell out of you paint. Go ahead and pull all the canvas and staples free from the bar. Leave as much of the nylon material in place as possible. It will aid in keeping the proper positioning/tension later
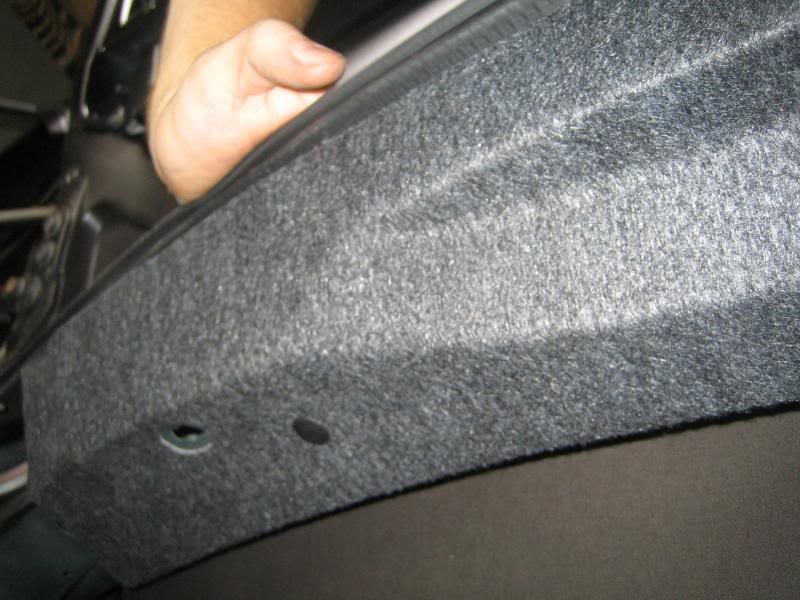
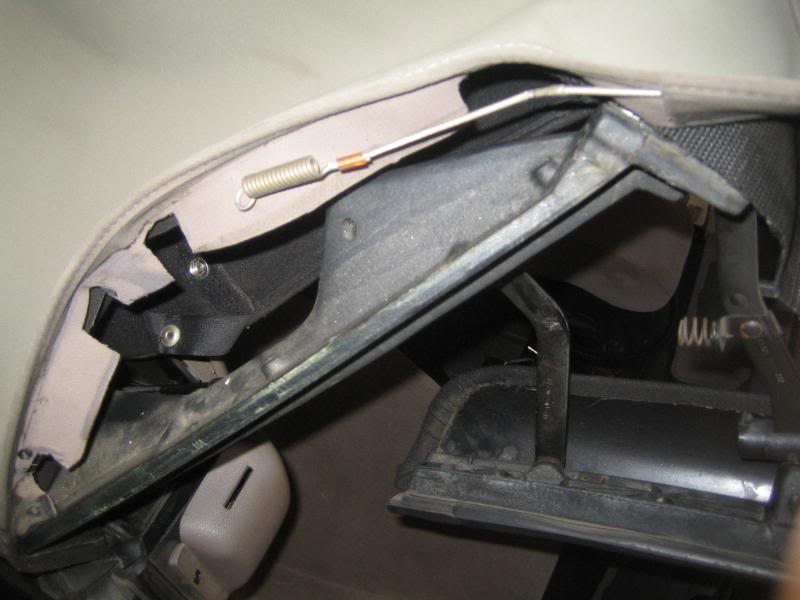
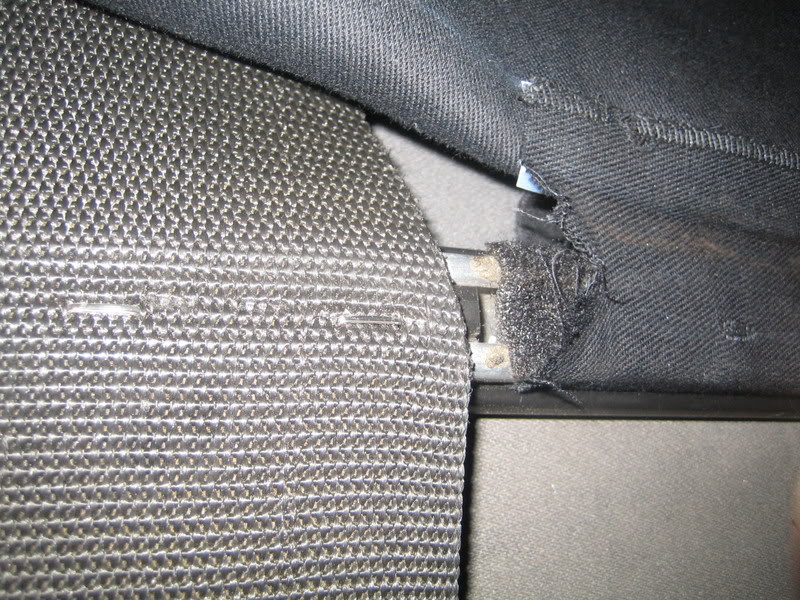
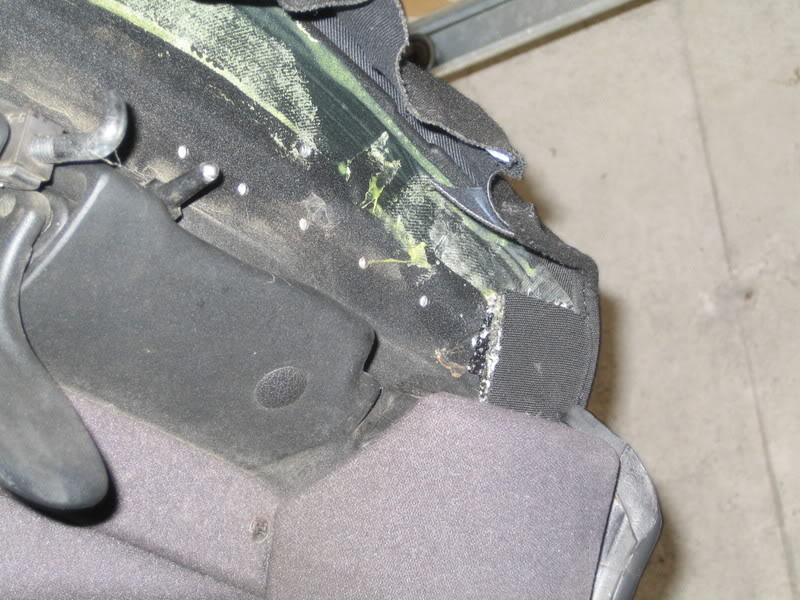
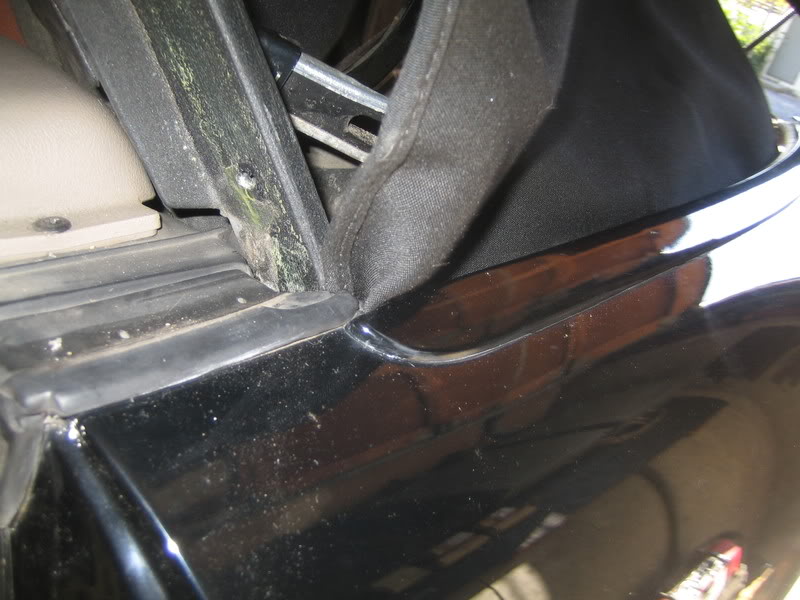
You're going to want the top open a little more then half way for this next step, removing the sail panel/weatherstripping. To do so first remove the screws in the bottom of the weatherstripping, you won't have access to these unless the top is 3/4 or so open.
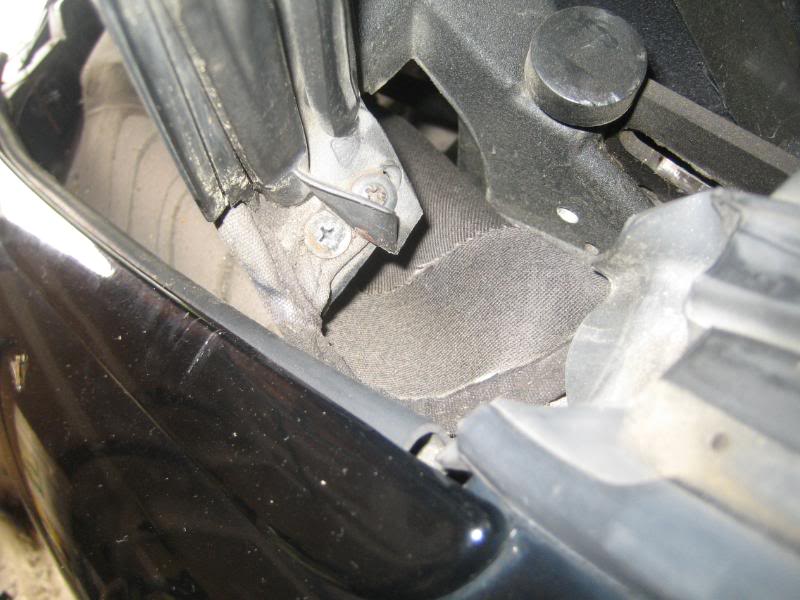
You should now be able to pull the weatherstripping right out of the metal trim piece it is pressed into.
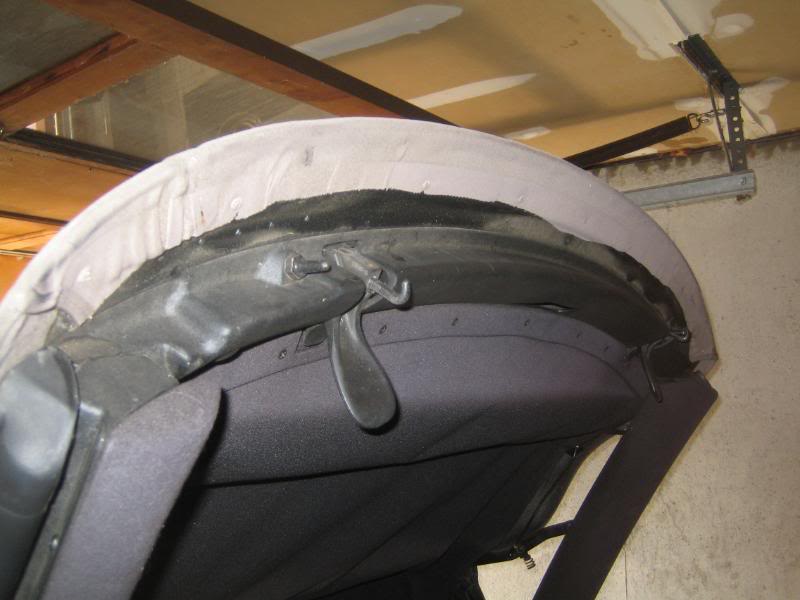
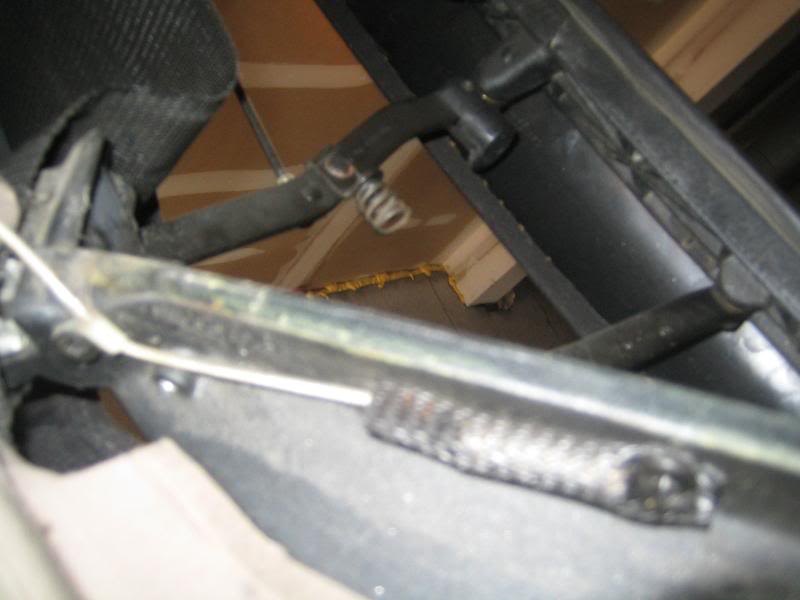
You will need to remove the top 3 screws, the bottom screw only goes into the sail panel and can be removed as an assembly. Once the screws are removed pull the top back down. Working from inside the car, on the back of the area you just removed the screws from, locate and remove the 2 allen head screws that are holding the sail panel to the metal frame.
(sorry for the bad pic, but they're there)
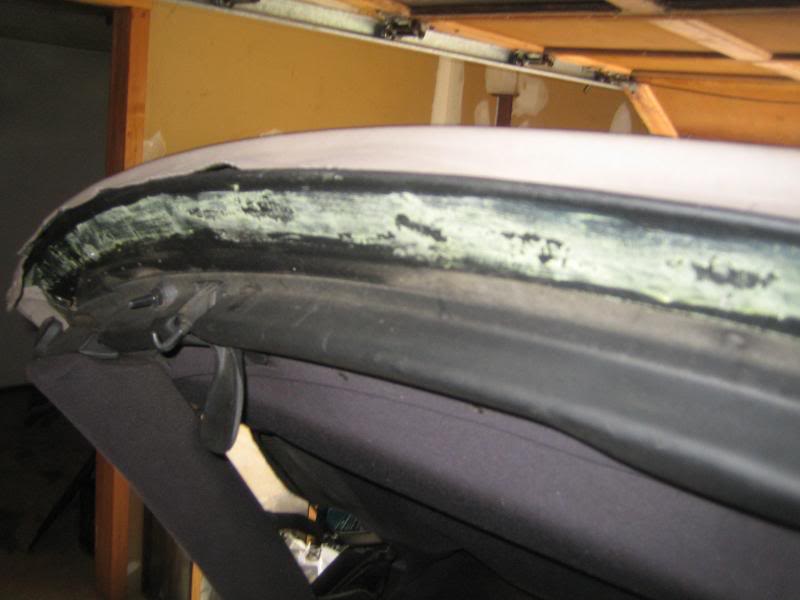
Once all of the fasteners are removed, remove the sail panel/metal trim. This may require a good yank as there is some kind of gasket/sealer on the back of these parts.
Peel the canvas up.
You should find the canvas glues, peel that off.
Once peeled free you will find the cables that run down either side of the top. Those will be unscrewed from the other end and pulled though shortly. Moving back to the rear you will now want to remove the rear tack bar from the car. Remove the bolts if you have not done so already (10mm deep socket) and then pull the bar out by pulling the sides in and then towards the front of the car. Now is a good time to throw some blankets or whatever you have over the area right behind and over the sides of the car in the areas you will be working so you don't gauge the hell out of you paint. Go ahead and pull all the canvas and staples free from the bar. Leave as much of the nylon material in place as possible. It will aid in keeping the proper positioning/tension later
You're going to want the top open a little more then half way for this next step, removing the sail panel/weatherstripping. To do so first remove the screws in the bottom of the weatherstripping, you won't have access to these unless the top is 3/4 or so open.
You should now be able to pull the weatherstripping right out of the metal trim piece it is pressed into.
You will need to remove the top 3 screws, the bottom screw only goes into the sail panel and can be removed as an assembly. Once the screws are removed pull the top back down. Working from inside the car, on the back of the area you just removed the screws from, locate and remove the 2 allen head screws that are holding the sail panel to the metal frame.
(sorry for the bad pic, but they're there)
Once all of the fasteners are removed, remove the sail panel/metal trim. This may require a good yank as there is some kind of gasket/sealer on the back of these parts.
Peel the canvas up.
09-30-2008, 09:44 PM
#5
Registered User
Thread Starter
Join Date: Aug 2007
Location: CT
Posts: 81
Part 3
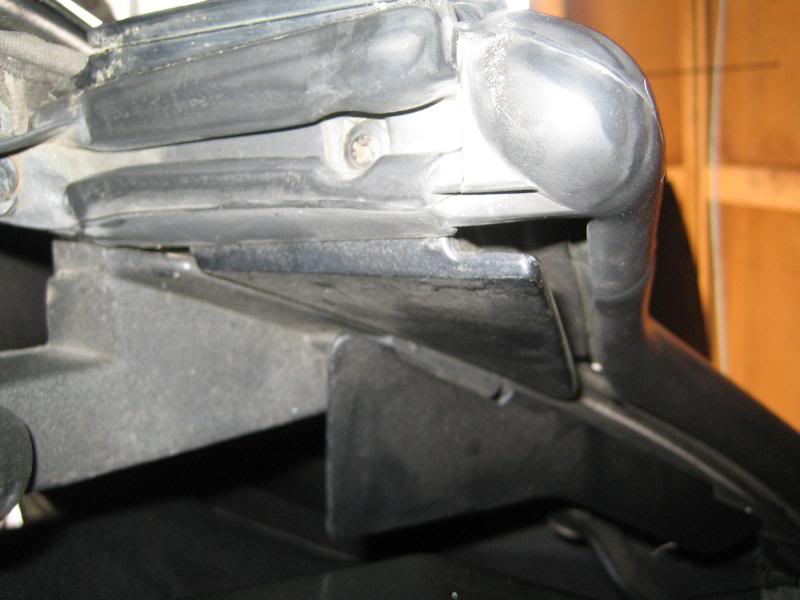
You should now be able to easily remove this guy( 2screws each side).
Pull the cable through the top and let it hang inside the car for the time being.
You can now flip the front section back.
And the back section forward. You may find an elastic strap joining the main top with the window section. The only thing I could see to do was cut it.

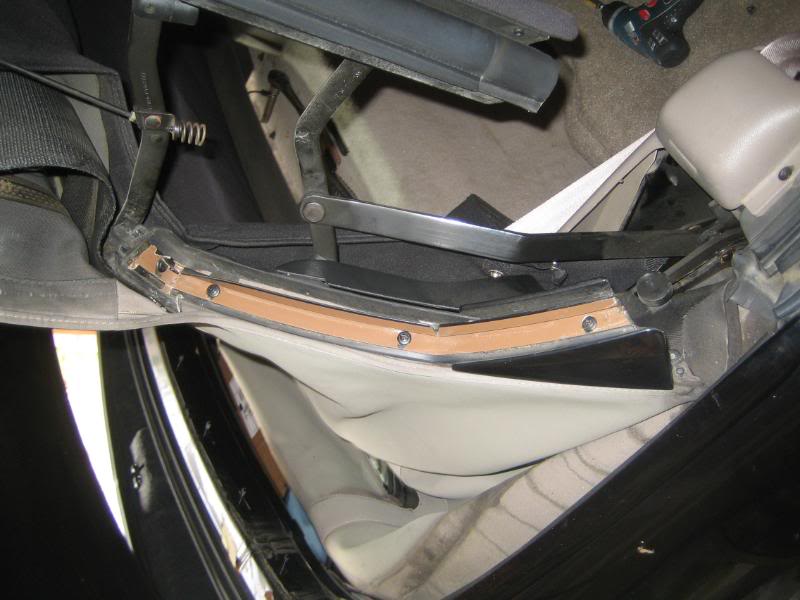
In the back pull this strip on the rear bow. Again try to leave any nylon in place, If it needs to be moved take note of where it was attached and replace as soon as possible.
Fold forward.
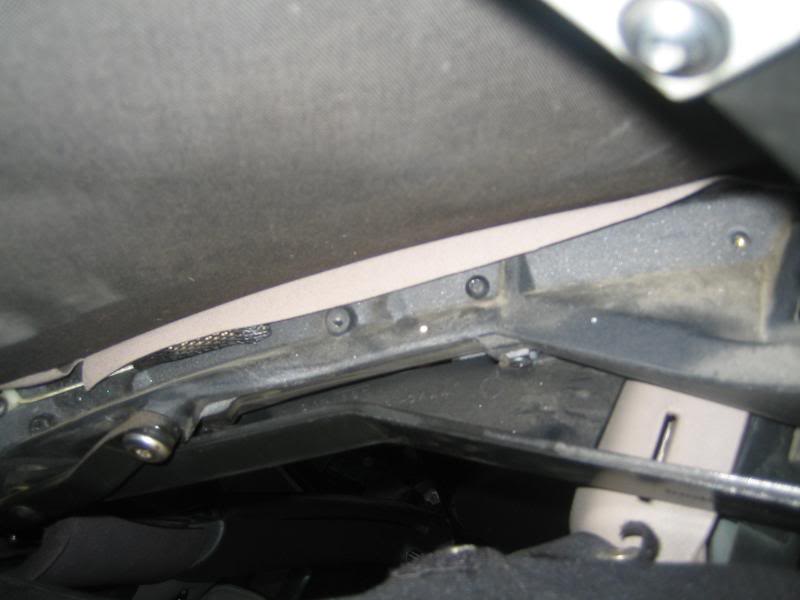
The top is not stapled on the two center bows as I had expected it to be based on every other source of instructions I read. Instead the fabric strip is wrapped around the bow, glued, and is clipped in by a plastic strip that the headliner is attached to. The first thing you will need to do is separate the plastic strip from the bow. It's a tight fit so be careful that while you are prying away at it you don't slip and bust through the headliner.
You can now just peel the fabric strip off. Do this one more time and the main top is off.
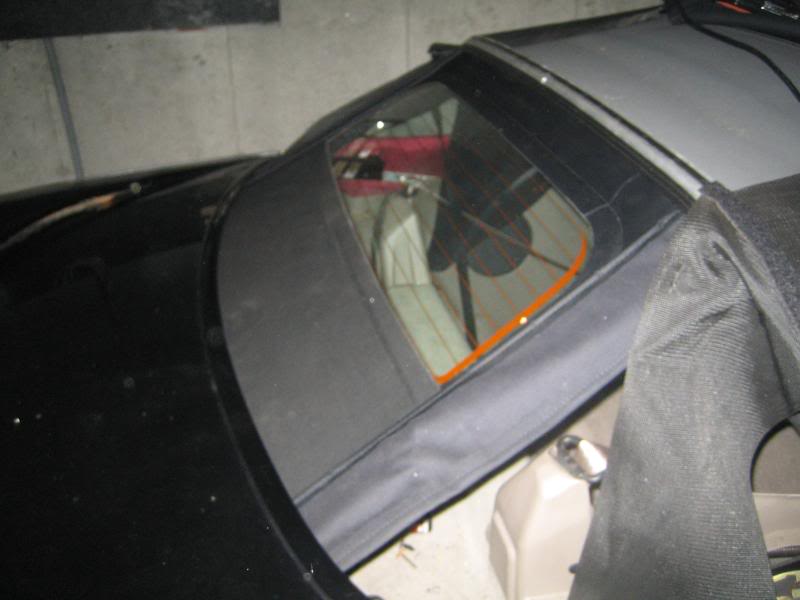
Before removing the window panel make sure you disconnect the defroster wires.(One one each side)
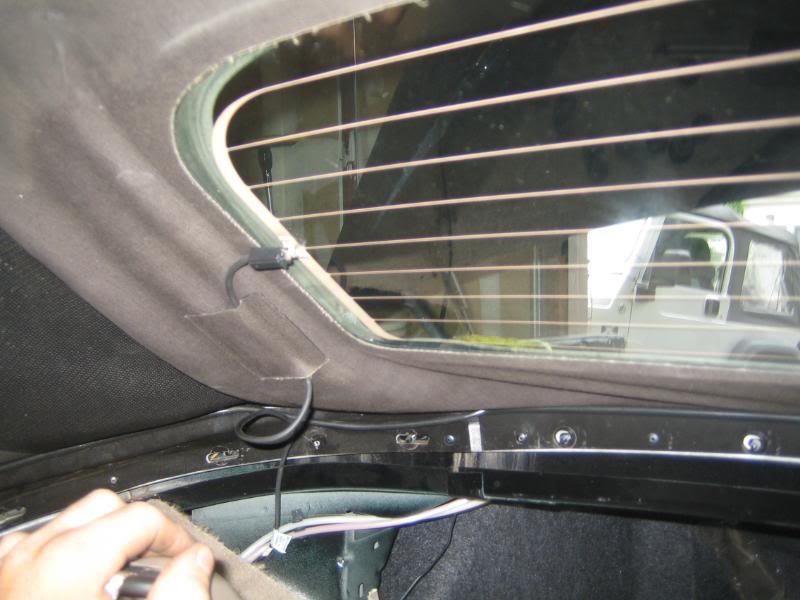
To remove the rear window panel drill out the rivet that is centered on the rear bow. Once you have the rivet completely drilled out the window section will slide out rather freely. If you have to force it chances are that you haven't cleared the rivet completely...and your going to bend your frame.

Obviously if you are only replacing the main top, don't do that last part.
Pull the cable through the top and let it hang inside the car for the time being.
You can now flip the front section back.
And the back section forward. You may find an elastic strap joining the main top with the window section. The only thing I could see to do was cut it.
In the back pull this strip on the rear bow. Again try to leave any nylon in place, If it needs to be moved take note of where it was attached and replace as soon as possible.
Fold forward.
The top is not stapled on the two center bows as I had expected it to be based on every other source of instructions I read. Instead the fabric strip is wrapped around the bow, glued, and is clipped in by a plastic strip that the headliner is attached to. The first thing you will need to do is separate the plastic strip from the bow. It's a tight fit so be careful that while you are prying away at it you don't slip and bust through the headliner.
You can now just peel the fabric strip off. Do this one more time and the main top is off.
Before removing the window panel make sure you disconnect the defroster wires.(One one each side)
To remove the rear window panel drill out the rivet that is centered on the rear bow. Once you have the rivet completely drilled out the window section will slide out rather freely. If you have to force it chances are that you haven't cleared the rivet completely...and your going to bend your frame.
Obviously if you are only replacing the main top, don't do that last part.
10-01-2008, 03:16 PM
#7
Registered User
Thread Starter
Join Date: Aug 2007
Location: CT
Posts: 81
It would be a privilege and an honor if this thread ended up stickied, but lets wait and see what people think of the finished piece. Hopefully I'll have the install up and finished by tomorrow night. It's very time consuming writing and linking and such, and I'm trying to squeeze it in between work, class, and working on 3 cars.
10-01-2008, 05:15 PM
#8
Registered User
Thread Starter
Join Date: Aug 2007
Location: CT
Posts: 81
Rear window installation
Now for the fun part...
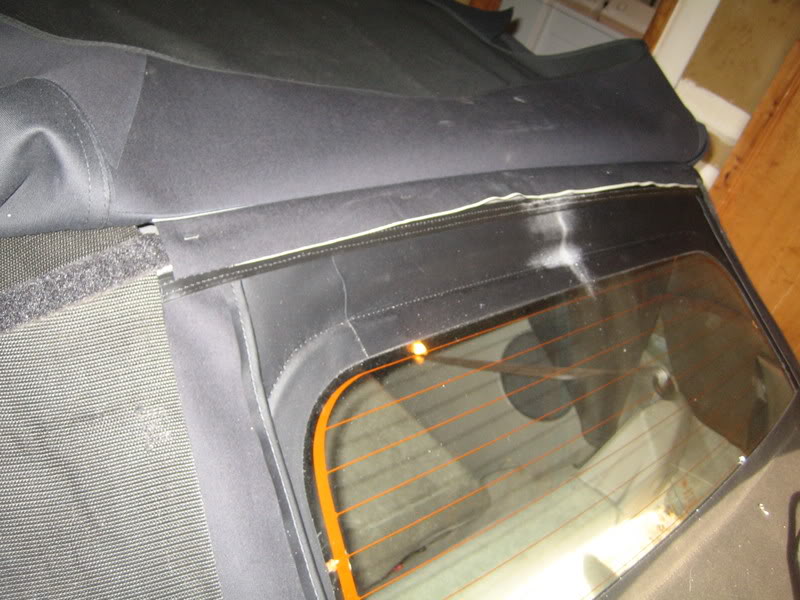
Take you new window panel and lay the old panel over it. Align the top plastic strips together. If the old and new panels are not the same width center the smaller one within the bigger one. (Mine was slightly smaller and the window itself is a little smaller and higher, I guess that is the difference between a $450 top off eBay, and a $1600 top from the dealer.)
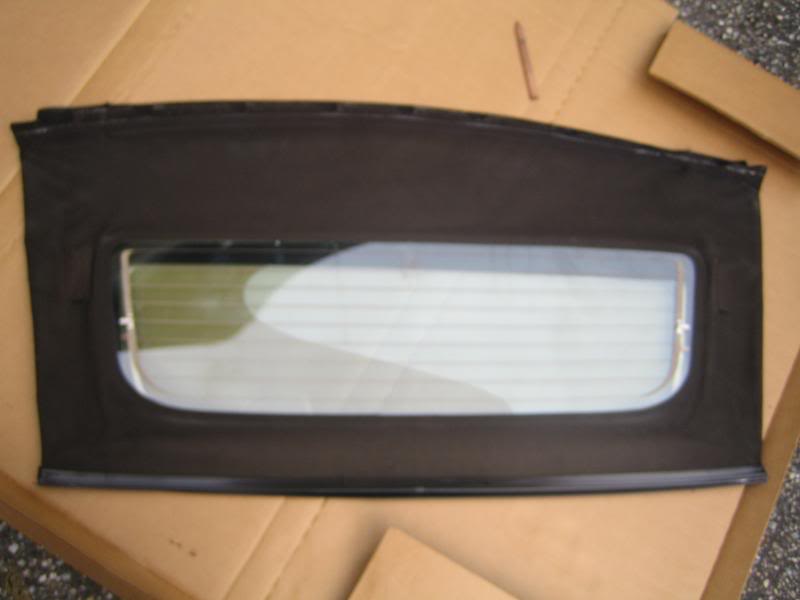
Once you are good and lined up go ahead and get to cutting. This part can be a little scary since one mistake could be disastrous....no pressure. I did not cut out whole chunks as you see in the photo, instead I cut 'X's that went from the longest point within each existing hole on the old top.
Remember this: If you cut the holes too low you can always extend them up a little, If you cut them too high you might end up with a whole/cut that is showing above the car.
Now is a good time to take a little sandpaper to the hole you have in the rear bow from drilling out the rivet. You want to make sure this area is smooth, otherwise you risk wearing through the top.
Once your holes are cut slide the strip into the top bow and center it. I just made sure I had equal distance on each side between where the top ends and the notch the plastic slides into bevels back and ends.
Put the canvas onto the studs, put the tack bar over that and tighten it down. You are just checking for fit here, that's why we skipped stapling for now. I suggest having the top down but not latched while tightening down the nuts. After all of the nuts that will secure the rear panel are secured, then go ahead and latch it. My thinking behind this is that if the top is latched, and a holes is up too high or the something else is about to lead to the panel being stretched too tightly, the fabric may rip as you but all the stress on one small area. If it is unlatched in this same situation then the stress will be displaced along the length of the entire bar which is now pinching the whole piece tightly.
If the fit is good with the bar secured and the top latched it's time to back it out and put a few staples in. I made simply took the tack bar off used the center holes to line up the piece on the bar. I lined the tops of the hole in the bar with the top of the whole in the fabric to ensure a tight fit. I only put in enough staples at this time to make sure the bar would stay securely attached during the rest of the install. It should go without saying but do not staple over the flaps that you will need to layer with the flaps on the other piece. After stapling, I again put the bar back on,tightened it down, and then latched it to check the fitment.
Sorry for the lack of pictures here but at the time it didn't occur to me that I would need a lot of pics of this part
Take you new window panel and lay the old panel over it. Align the top plastic strips together. If the old and new panels are not the same width center the smaller one within the bigger one. (Mine was slightly smaller and the window itself is a little smaller and higher, I guess that is the difference between a $450 top off eBay, and a $1600 top from the dealer.)
Once you are good and lined up go ahead and get to cutting. This part can be a little scary since one mistake could be disastrous....no pressure. I did not cut out whole chunks as you see in the photo, instead I cut 'X's that went from the longest point within each existing hole on the old top.
Remember this: If you cut the holes too low you can always extend them up a little, If you cut them too high you might end up with a whole/cut that is showing above the car.
Now is a good time to take a little sandpaper to the hole you have in the rear bow from drilling out the rivet. You want to make sure this area is smooth, otherwise you risk wearing through the top.
Once your holes are cut slide the strip into the top bow and center it. I just made sure I had equal distance on each side between where the top ends and the notch the plastic slides into bevels back and ends.
Put the canvas onto the studs, put the tack bar over that and tighten it down. You are just checking for fit here, that's why we skipped stapling for now. I suggest having the top down but not latched while tightening down the nuts. After all of the nuts that will secure the rear panel are secured, then go ahead and latch it. My thinking behind this is that if the top is latched, and a holes is up too high or the something else is about to lead to the panel being stretched too tightly, the fabric may rip as you but all the stress on one small area. If it is unlatched in this same situation then the stress will be displaced along the length of the entire bar which is now pinching the whole piece tightly.
If the fit is good with the bar secured and the top latched it's time to back it out and put a few staples in. I made simply took the tack bar off used the center holes to line up the piece on the bar. I lined the tops of the hole in the bar with the top of the whole in the fabric to ensure a tight fit. I only put in enough staples at this time to make sure the bar would stay securely attached during the rest of the install. It should go without saying but do not staple over the flaps that you will need to layer with the flaps on the other piece. After stapling, I again put the bar back on,tightened it down, and then latched it to check the fitment.
Sorry for the lack of pictures here but at the time it didn't occur to me that I would need a lot of pics of this part
10-01-2008, 10:10 PM
#9
Registered User
Thread Starter
Join Date: Aug 2007
Location: CT
Posts: 81
Main top install
You can start out the main top the same way as the window, by lining up the old piece with the new and cutting the holes. However you will need to more or less line up the fabric strip on the rear of the top...and at least one of which you can't see, not without constantly flipping the old top out of the way and then back down over and over until you think you have them lined up, since you won't be able to see both strips at the same time. Now, I suppose, if you old top and new top were exactly the same dimensions, including the fabric mounting strips on the underside of the top, then you would line up using the outer edges of the piece. This was not the situation in my case, my alternative method will be in the body of the post...
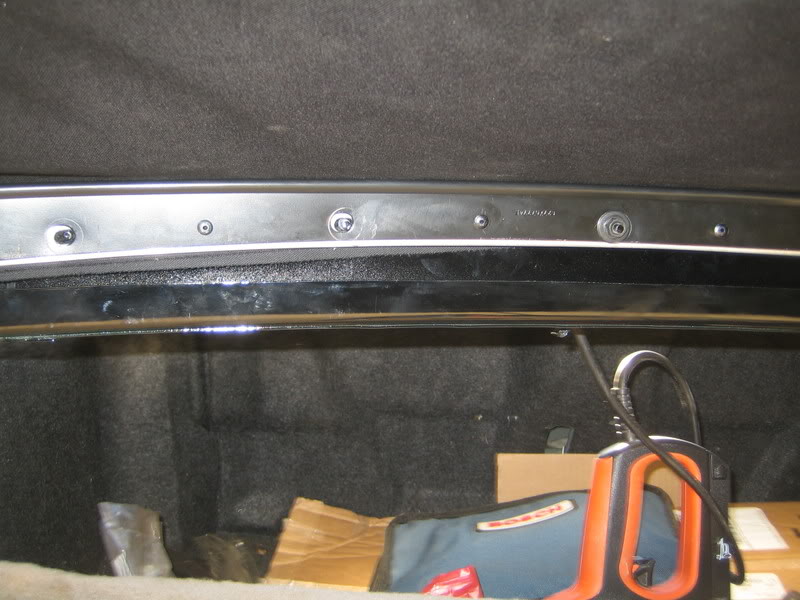
To begin, lay the top over the car. Your first move is going to be to staple the top to the rear bow like such
BUT, before you do this you want to make sure to line up the top all the way around the car. Make sure the rear side panels are long enough. At the same time make sure you will be able to wrap around the front header bar. Recall how it both folded over in the front and had extra fabric to wrap around the sides. Finally make sure the area that attach behind the sail panel and trim reaches on both sides.
Once you have lined up, AND DOUBLE CHECKED, but a staple or two right in one end of the rear bow, then the other end. Make sure the strip you are stapling is centered where you need it and pulled tight before you staple down both ends. Make sure that the fabric strip is straight in relation to the bow, if you have a 1/4 overhang on one end, you should have 1/4 overhang all the way across.
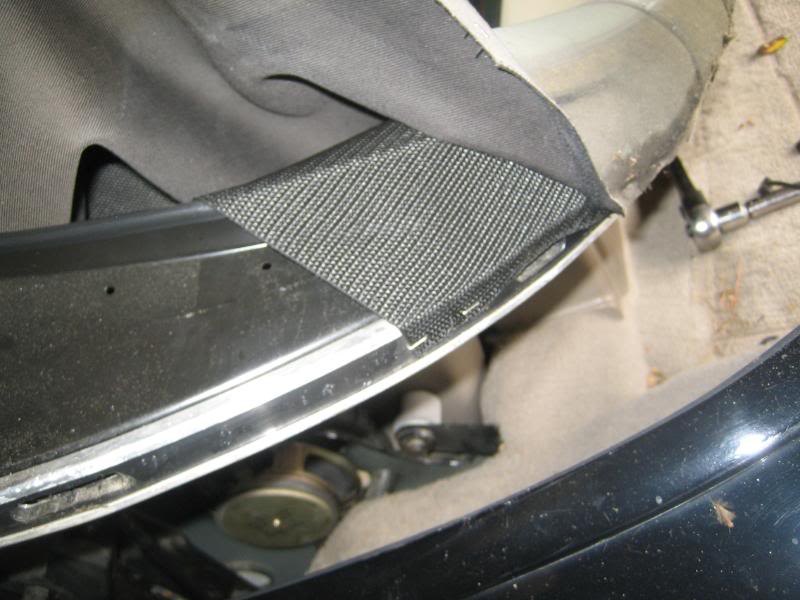
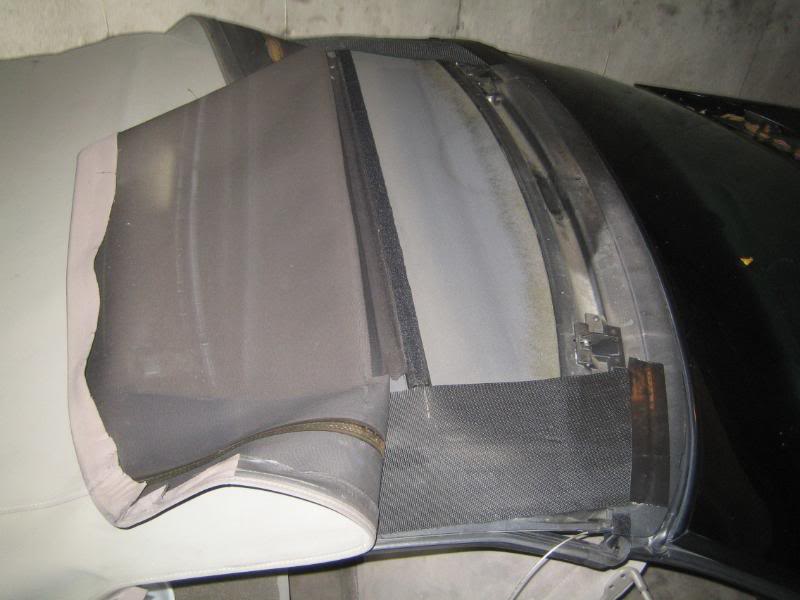
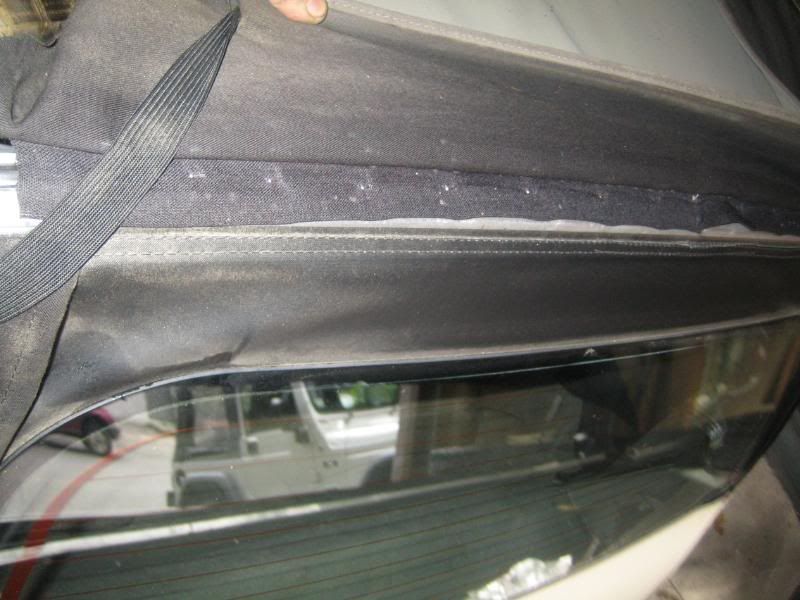
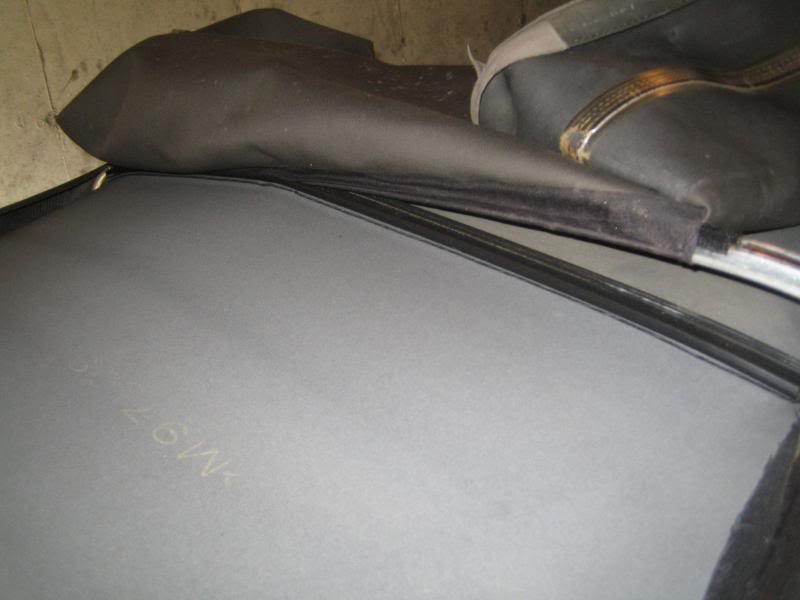
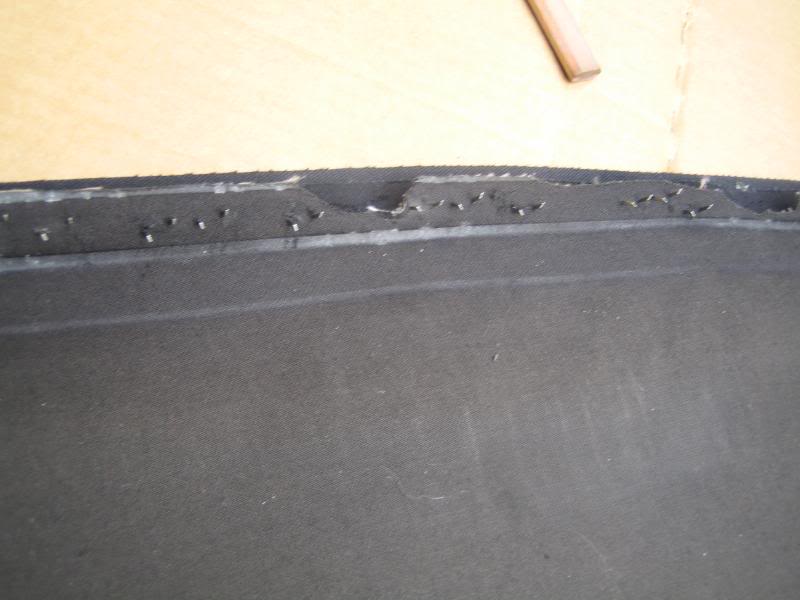
Next wrap the next strip around the 2nd bow. I did this with the top down but not latched. Make sure you keep the strip centered, that should keep the top centered. My factory top had the strips tucked under from the rear, like this:
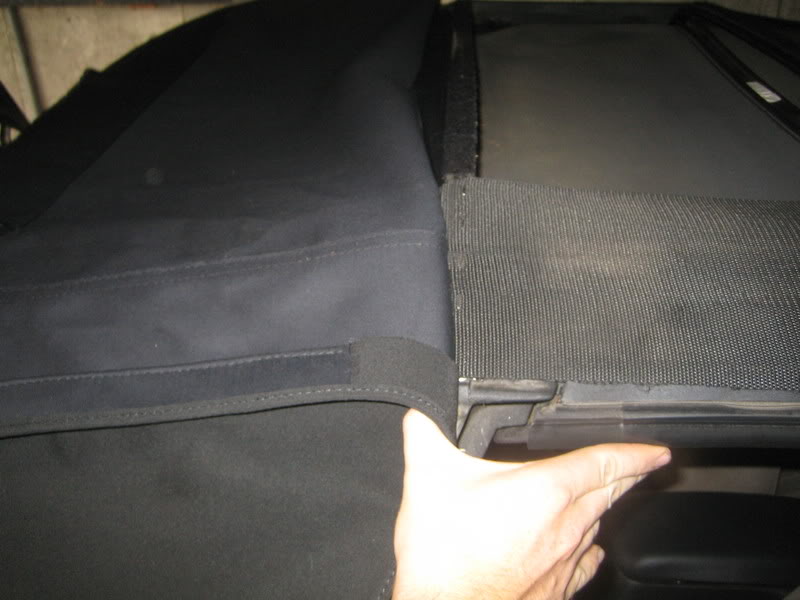
I found it easier to wrap over the top and pull back, like this:
Don't pull too hard from the very end of the strip, or you'll end up doing this:
Instead pull from further in, ideally you'll be able to get two hands on it and pull down and tuck under. Whatever adhesive was previously used on my top remained tacky enough that I was able to pull tightly and then press the fabric firmly up onto the bottom and back of the bow and it would stay. I can't imagine doing this if that adhesive didn't hold like that. Should you not be as fortunate I would recommend Loctite Heavy Duty spray adhesive. Hit the bar and the strip with a good coat and then wait until it gets tacky. I think that should give you a similar hold. The only difference is that is going to set up after a short time whereas whatever was factory just remains super tacky no matter how long it is exposed.
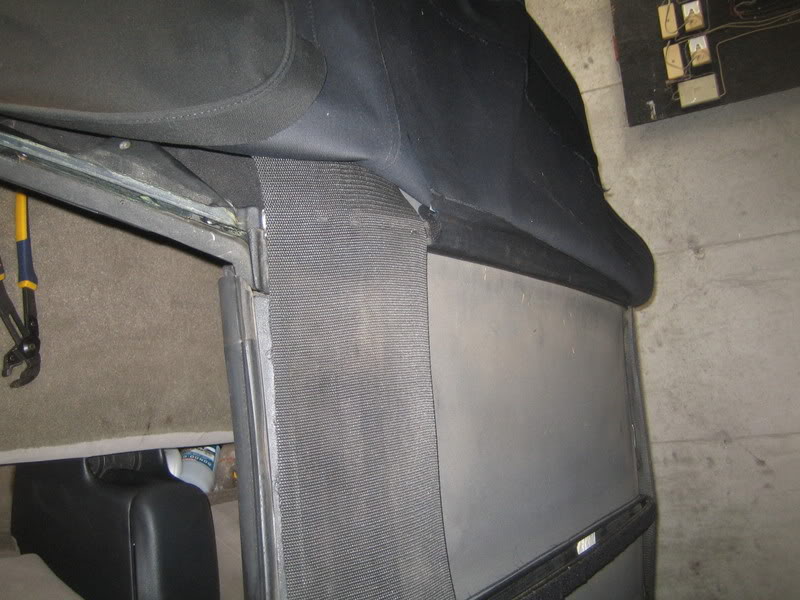
Once you tackle getting it to stay in place you need to snap the plastic strip back onto the bottom of the bow to hold the fabric. I found them to be rather difficult to get on. What worked best was to get the rear of the strip over the lip first. You should be able to work the back from the inside of the car by pushing at it through the headliner. Once that was set i took a pair of channel locks and grabbed the edge of the plastic strip and the top of the bow and rocking the channel locks up.
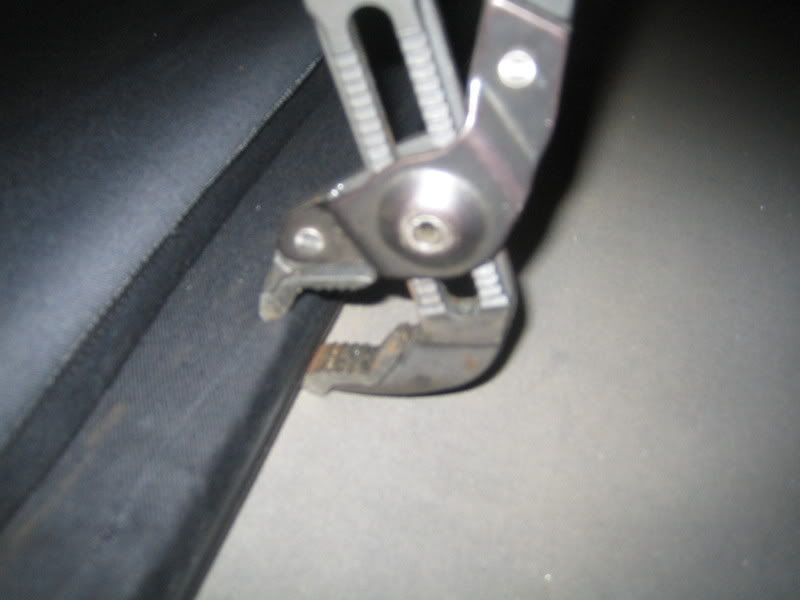
I found it was best not to squeeze so much, but grab it in such a way that the rocking motion does the work, you just keep enough pressure on your pliers to keep it from slipping. Once this is snapped in latch the top and make sure everything is lined up and nice and tight. If it's not tight enough, you need to unlatch and do it again because nothing you do to the front or rear will make this section tighter.
The same exact method gets your third bow completed as well. Remember to check for sufficient tension in the top as you did the second bow before moving on to the header panel.
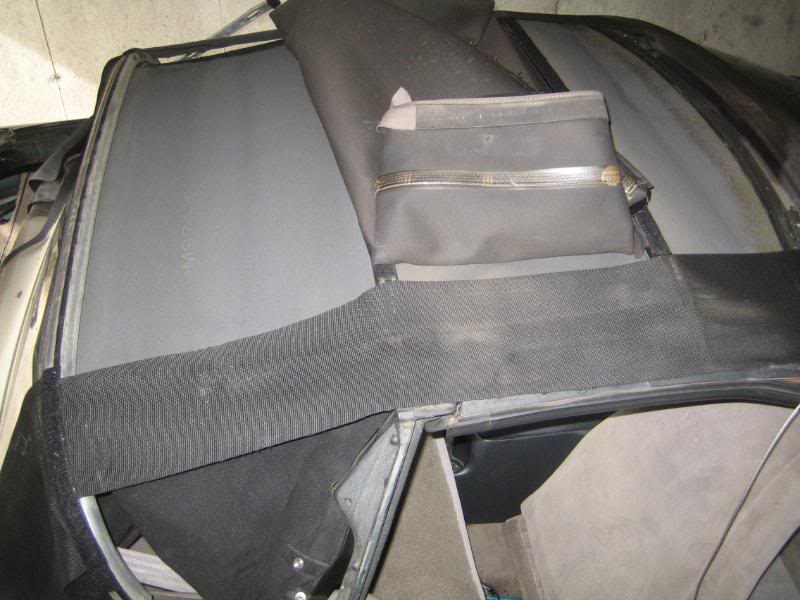
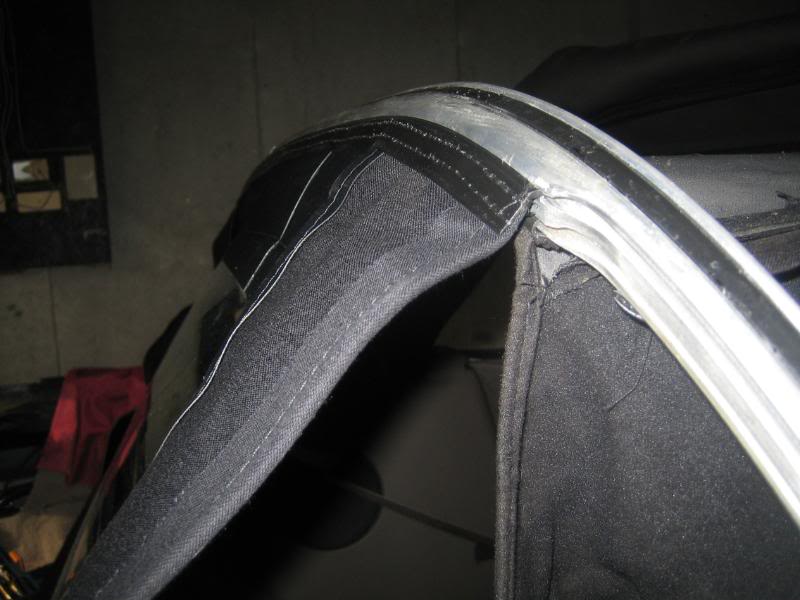
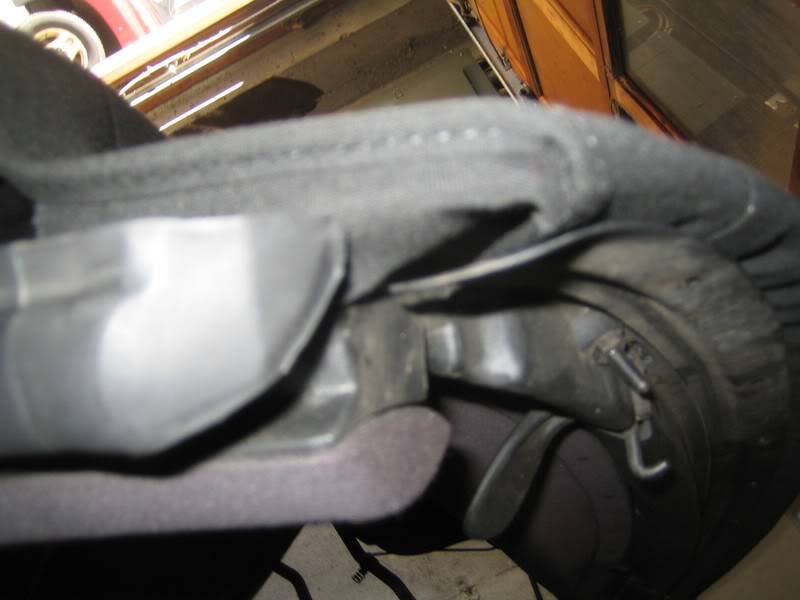
On the front panel you want to make sure that you have enough fabric to pull over the front and on the sides so that everything is wrapped. You don't want this:

This is better:
You are going to need to test fit and make the front. I was able to tuck the sides in, wrap the front, and screw in the metal retainer into the header panel to hold the top in place fairly well. It took a little playing with to get it to stay for me though. I then made a mark so when I took the metal retainer back out I would know where to pull it back to.
You want something like this...The idea is to be able to see how far forward the side strips of fabric need to be to get the top tight. Gluing those strips is the first part of getting the front done. Once you are confident in the location glue away. I went pretty heavy with the spray adhesive just to make sure nothing would move. You might want to cover your interior with some plastic or something to keep overspray away. I didn't because I'm swapping that tan for black soon.
Take a break and let that side set so that when you pull the other side tight you don't just slide the first side out of place.
Make sure when gluing these your edging/piping is sitting on the proper angle, in line with the side to side slope of the roof. If its sitting pointing up into the air that is how it is going to be when you are done.
To begin, lay the top over the car. Your first move is going to be to staple the top to the rear bow like such
BUT, before you do this you want to make sure to line up the top all the way around the car. Make sure the rear side panels are long enough. At the same time make sure you will be able to wrap around the front header bar. Recall how it both folded over in the front and had extra fabric to wrap around the sides. Finally make sure the area that attach behind the sail panel and trim reaches on both sides.
Once you have lined up, AND DOUBLE CHECKED, but a staple or two right in one end of the rear bow, then the other end. Make sure the strip you are stapling is centered where you need it and pulled tight before you staple down both ends. Make sure that the fabric strip is straight in relation to the bow, if you have a 1/4 overhang on one end, you should have 1/4 overhang all the way across.
Next wrap the next strip around the 2nd bow. I did this with the top down but not latched. Make sure you keep the strip centered, that should keep the top centered. My factory top had the strips tucked under from the rear, like this:
I found it easier to wrap over the top and pull back, like this:
Don't pull too hard from the very end of the strip, or you'll end up doing this:
Instead pull from further in, ideally you'll be able to get two hands on it and pull down and tuck under. Whatever adhesive was previously used on my top remained tacky enough that I was able to pull tightly and then press the fabric firmly up onto the bottom and back of the bow and it would stay. I can't imagine doing this if that adhesive didn't hold like that. Should you not be as fortunate I would recommend Loctite Heavy Duty spray adhesive. Hit the bar and the strip with a good coat and then wait until it gets tacky. I think that should give you a similar hold. The only difference is that is going to set up after a short time whereas whatever was factory just remains super tacky no matter how long it is exposed.
Once you tackle getting it to stay in place you need to snap the plastic strip back onto the bottom of the bow to hold the fabric. I found them to be rather difficult to get on. What worked best was to get the rear of the strip over the lip first. You should be able to work the back from the inside of the car by pushing at it through the headliner. Once that was set i took a pair of channel locks and grabbed the edge of the plastic strip and the top of the bow and rocking the channel locks up.
I found it was best not to squeeze so much, but grab it in such a way that the rocking motion does the work, you just keep enough pressure on your pliers to keep it from slipping. Once this is snapped in latch the top and make sure everything is lined up and nice and tight. If it's not tight enough, you need to unlatch and do it again because nothing you do to the front or rear will make this section tighter.
The same exact method gets your third bow completed as well. Remember to check for sufficient tension in the top as you did the second bow before moving on to the header panel.
On the front panel you want to make sure that you have enough fabric to pull over the front and on the sides so that everything is wrapped. You don't want this:
This is better:
You are going to need to test fit and make the front. I was able to tuck the sides in, wrap the front, and screw in the metal retainer into the header panel to hold the top in place fairly well. It took a little playing with to get it to stay for me though. I then made a mark so when I took the metal retainer back out I would know where to pull it back to.
You want something like this...The idea is to be able to see how far forward the side strips of fabric need to be to get the top tight. Gluing those strips is the first part of getting the front done. Once you are confident in the location glue away. I went pretty heavy with the spray adhesive just to make sure nothing would move. You might want to cover your interior with some plastic or something to keep overspray away. I didn't because I'm swapping that tan for black soon.
Take a break and let that side set so that when you pull the other side tight you don't just slide the first side out of place.
Make sure when gluing these your edging/piping is sitting on the proper angle, in line with the side to side slope of the roof. If its sitting pointing up into the air that is how it is going to be when you are done.
10-04-2008, 09:17 PM
#10
Registered User
Thread Starter
Join Date: Aug 2007
Location: CT
Posts: 81
Once the side are glued and it is somewhat set up you can go ahead and cut the rest of the holes for the header panel screws. You are going to want to glue this area so get out your spray adhesive and coat liberally. When you fold the top under you are going to get some bunching in the fabric. Try and pull excess fabric towards the seams on either side of the top. By folding the fabric under the seams it should keep the top nice and smooth.
Install the metal retainer and test fit.
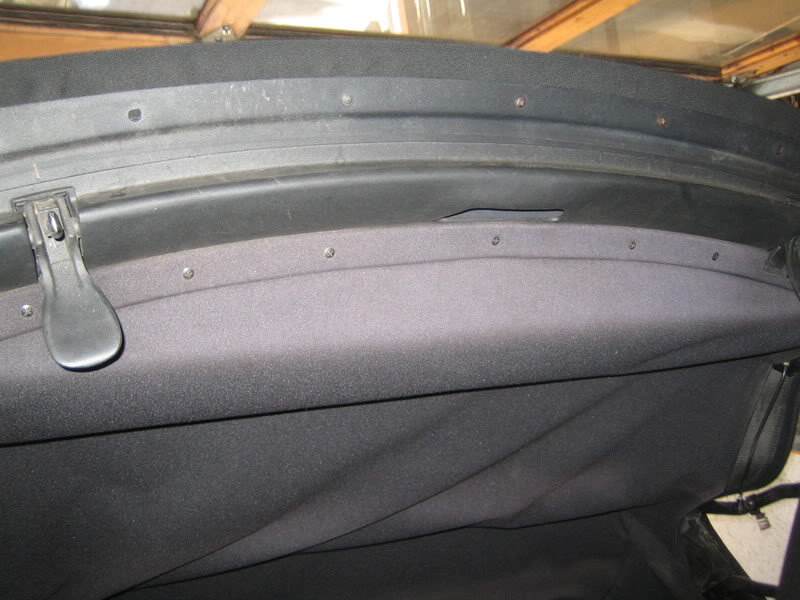
As long as your side tabs were properly positioned then you should be good. The whole idea of getting the header right is to make sure that the tabs are positioned in such a way that when you fold over the material on the front of the top, the header bow is completely covered.
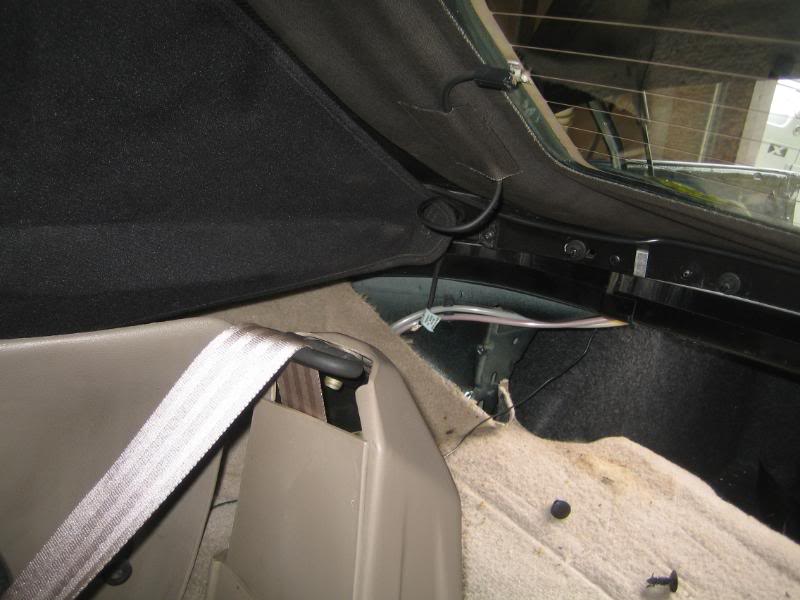
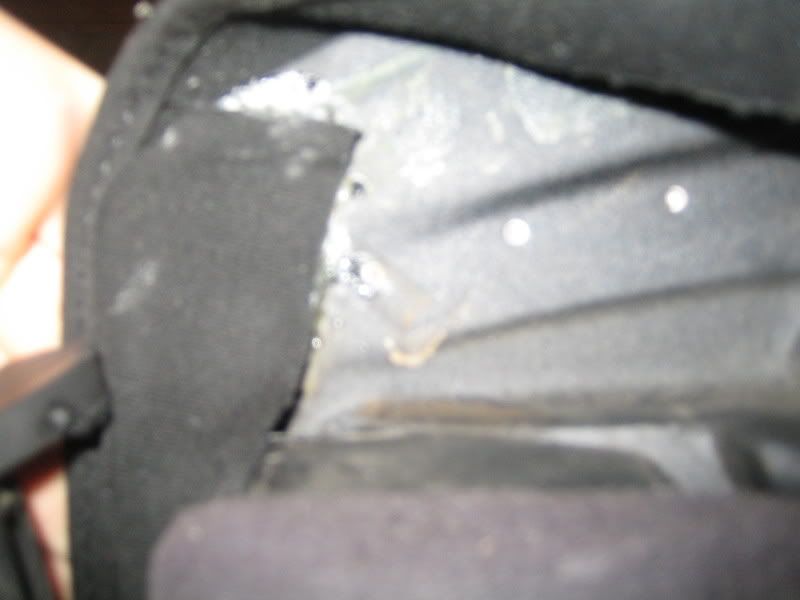
Next I would glue down the areas that sit behind the sail panel. If everything else was properly aligned these should fall right into place. Hopefully this is the case as there is not much room for adjustment in this area.
Give a good coat of spray adhesive here. This is best done with the top almost all the way up.
I say almost because you may need to sneak the edging past the weatherstripping into this area here to get the fabric to not want to bend away from the area you are trying to glue to. You will need to cut the holes here for your screws, it is probably easier to do this before gluing. Remember, in addition to the screws that hold the metal trim, you have 2 screws that are coming in from behind the metal that hold your sail panel in place. Glue, make sure your fabric is aligned, and then screw in the trim/sail panels to hold it tight while it dries.
The final and most difficult step is attaching the main top to the rear tack bar. If you were able to use your old top as a pattern I'm sure that this would be much easier, but again, I was not able to do this.
I did this with the top up but not latched. First I removed most of the bolts I currently had holding the rear bar supporting the rear window. I left a couple middle bolts in place but left them as loose as I possible could. Pull the top into place, sliding it between the car and the bar, making sure it is sitting over the studs, not bunching up around it. From the outside get either side of the main top more or less tight in all directions. The top and the window panel have sections that overlap each other.
From inside the car I slightly tightened the bolts I had left loose. This pinched the fabric tightly between the studs and the bar. I then gave the material an extra tug to make sure everything was tight and would be smooth. After double checking from the outside I cut the material through the spot in the bar. Once I was able to get the stud through I put a nut on that stud. I tightened that until there was enough pressure on the fabric over the next stud for me to slit the the fabric there. As a rule that meant the stud would be half to 3/4 of the way tight. Basically I just continued this until the top was finished. Here are a few pics that hopefully illustrate the idea.
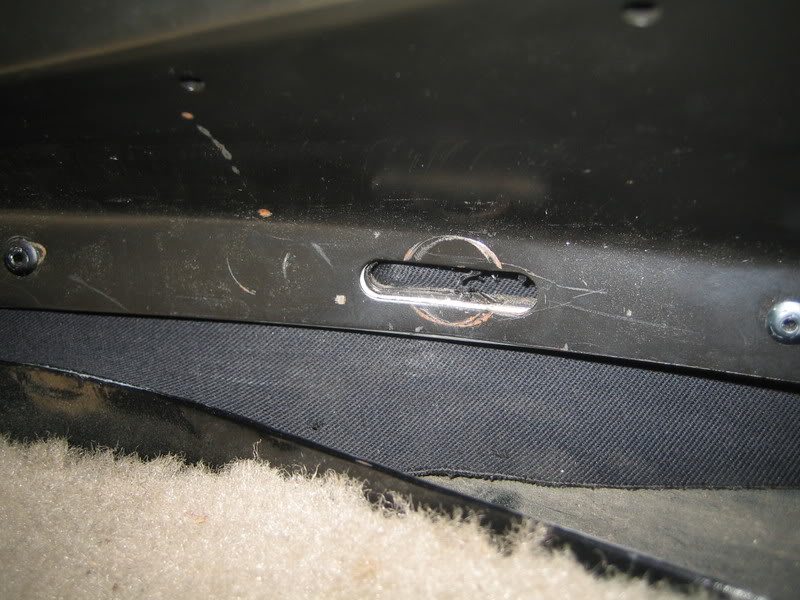
It is key here to pull the fabric tight before cutting on each stud. Also I double checked from outside the car on each stud as well. It is very time consuming but I felt it was better to check a dozen times on one stud then make a mistake that could not be fixed. Once you have all the studs on tighten them down all the way and check your fit. If you did this as I did then your top is still unlatched. If you latch it now everything should be nice and taut. If everything is good go back and take all the bolts off. I was able to slide the bar back enough to get the nose of my stapler in to get a few staples in the fabric before removing it from the studs completely. If you can't get any staples in without removing the bar completely, make a mark where the the hole on one end of the top lines up on the bar. Align the hole in the top with that mark for left/right alignment, and the top of the hole in the top with the top of the hole in the bar for up/down alignment. From here alignment while stapling should be fairly easy. Staple both sides and then re-bolt the bar.
All that is left is to reinstall your trim pieces, hook up your defroster, if you didn't cheap out and go plastic window and admire you work
I just realize I have no finished pics of my work, I think my camera battery went dead. I'll have some pics soon, I am currently redoing my entire interior so I'll get some of the top next time it is down.
I plan on cleaning these posts up, doing this over a weeks time I know that my formatting and language may change. It's still better then some of the half-drunk posts people make on here but I'll make some improvements so people trying to use this post thread will find it easier to follow. I welcome any comments or questions. Again I am not a professional so anything anyone has to add, I would be glad to know and I'm sure it would help others.
Install the metal retainer and test fit.
As long as your side tabs were properly positioned then you should be good. The whole idea of getting the header right is to make sure that the tabs are positioned in such a way that when you fold over the material on the front of the top, the header bow is completely covered.
Next I would glue down the areas that sit behind the sail panel. If everything else was properly aligned these should fall right into place. Hopefully this is the case as there is not much room for adjustment in this area.
Give a good coat of spray adhesive here. This is best done with the top almost all the way up.
I say almost because you may need to sneak the edging past the weatherstripping into this area here to get the fabric to not want to bend away from the area you are trying to glue to. You will need to cut the holes here for your screws, it is probably easier to do this before gluing. Remember, in addition to the screws that hold the metal trim, you have 2 screws that are coming in from behind the metal that hold your sail panel in place. Glue, make sure your fabric is aligned, and then screw in the trim/sail panels to hold it tight while it dries.
The final and most difficult step is attaching the main top to the rear tack bar. If you were able to use your old top as a pattern I'm sure that this would be much easier, but again, I was not able to do this.
I did this with the top up but not latched. First I removed most of the bolts I currently had holding the rear bar supporting the rear window. I left a couple middle bolts in place but left them as loose as I possible could. Pull the top into place, sliding it between the car and the bar, making sure it is sitting over the studs, not bunching up around it. From the outside get either side of the main top more or less tight in all directions. The top and the window panel have sections that overlap each other.
From inside the car I slightly tightened the bolts I had left loose. This pinched the fabric tightly between the studs and the bar. I then gave the material an extra tug to make sure everything was tight and would be smooth. After double checking from the outside I cut the material through the spot in the bar. Once I was able to get the stud through I put a nut on that stud. I tightened that until there was enough pressure on the fabric over the next stud for me to slit the the fabric there. As a rule that meant the stud would be half to 3/4 of the way tight. Basically I just continued this until the top was finished. Here are a few pics that hopefully illustrate the idea.
It is key here to pull the fabric tight before cutting on each stud. Also I double checked from outside the car on each stud as well. It is very time consuming but I felt it was better to check a dozen times on one stud then make a mistake that could not be fixed. Once you have all the studs on tighten them down all the way and check your fit. If you did this as I did then your top is still unlatched. If you latch it now everything should be nice and taut. If everything is good go back and take all the bolts off. I was able to slide the bar back enough to get the nose of my stapler in to get a few staples in the fabric before removing it from the studs completely. If you can't get any staples in without removing the bar completely, make a mark where the the hole on one end of the top lines up on the bar. Align the hole in the top with that mark for left/right alignment, and the top of the hole in the top with the top of the hole in the bar for up/down alignment. From here alignment while stapling should be fairly easy. Staple both sides and then re-bolt the bar.
All that is left is to reinstall your trim pieces, hook up your defroster, if you didn't cheap out and go plastic window
and admire you workI just realize I have no finished pics of my work, I think my camera battery went dead. I'll have some pics soon, I am currently redoing my entire interior so I'll get some of the top next time it is down.
I plan on cleaning these posts up, doing this over a weeks time I know that my formatting and language may change. It's still better then some of the half-drunk posts people make on here
but I'll make some improvements so people trying to use this post thread will find it easier to follow. I welcome any comments or questions. Again I am not a professional so anything anyone has to add, I would be glad to know and I'm sure it would help others.
10-17-2008, 10:35 PM
#11
Registered User
Thread Starter
Join Date: Aug 2007
Location: CT
Posts: 81
I was clearing my bookmarks and found this link http://www.diynetwork.com/diy/ab_ext...042504,00.html . Most of the relevant info there is in my write-up but the more you read and learn the better off you will be.
10-17-2008, 10:52 PM
#12
Registered User

Join Date: May 2002
Location: Dallas, Texas
Posts: 5,556
I don't know why there haven't been many responses to this topic, I think you went through a lot of effort to show us this. Maybe it's because we don't have many convertible owners here? I don't have one either.
10-18-2008, 11:01 AM
#13
Registered User
Thread Starter
Join Date: Aug 2007
Location: CT
Posts: 81
I just don't think there are a lot of people here replacing their tops at any given time. But know at least one someone decides it's time and searches for some help they will actually find some. That and this is in the appearance forum which certainly is not as high traffic as some of the other sub-forums.
 09-15-2009, 08:52 PM
#15
Registered User

Join Date: Jul 2005
Location: In the Sunny South
Posts: 1
WOW this is what i need. I have a 01 SS Sunset Orange. last week my window almost fell out and my top is just shot. i have a great mechanic in my nieghborhood we are great friends, (we have had a few beers together). He is one of the best mech's in my area. He said he would help me. if i buy the top. I had someone quote me a 1000.00 to install. I just dont have the money so this post is gonna help me and my bud a ton.
Oh and no beers until we are done
Oh and no beers until we are done