
How To: Change bulbs in '93-'97 headlamps


Thread Starter
Registered User
Joined: May 2002
Posts: 5,557
From: Dallas, Texas
How To: Change bulbs in '93-'97 headlamps
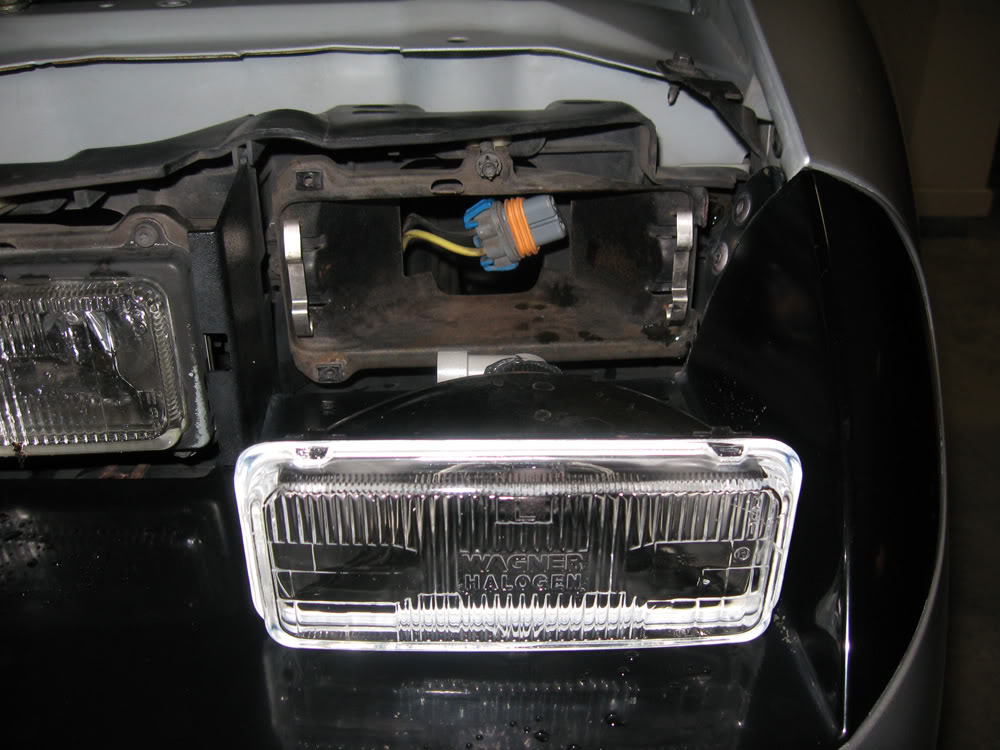
Here's instructions on how to change just the bulbs inside Sylvania and Wagner headlamps for '93-'97 Camaros. This is for those who want a stock appearance without having to purchase individual headlamps each time a bulb goes out--which is both expensive AND hard to do anymore given these headlamps are special order from many local retailers now.
First thing's first, you need to have the correct materials.
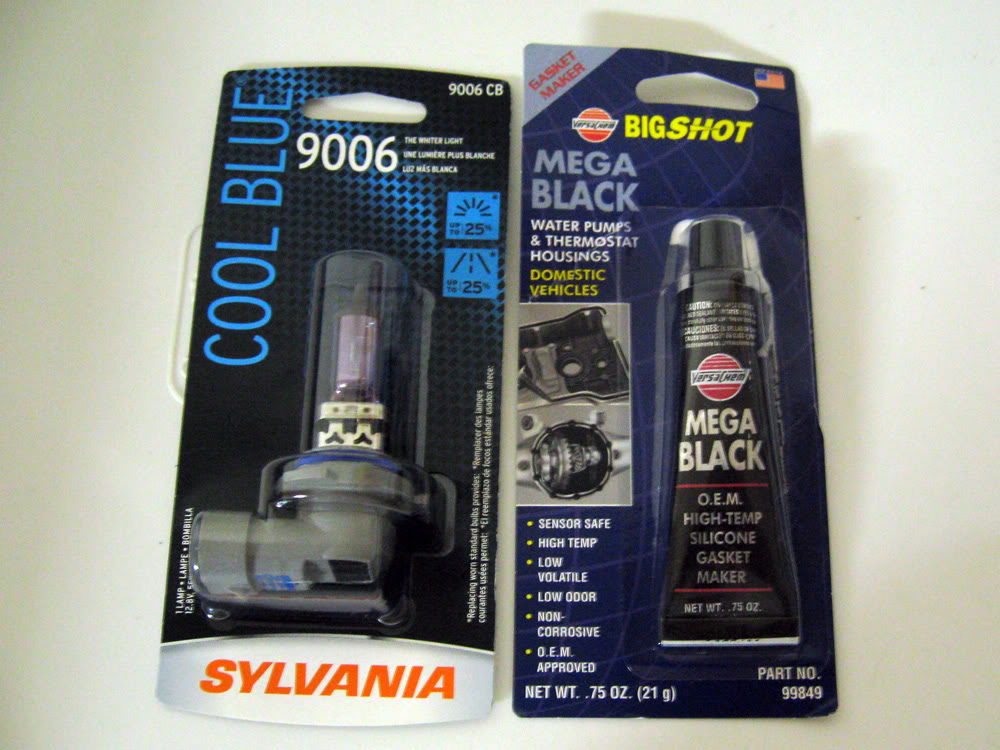
As far as bulbs go, you can choose whatever intensity you want. I chose Cool Blue just because they were the mid-priced selection and said the light output was better than halogen. Plus, I was ignorant, and didn't know what I should pick. I just knew I didn't want to pay $21 a bulb for Silver Stars.
In retrospect, I didn't look at the original packaging for the Sylvania replacement headlamps before buying the bulbs, so I didn't know what type of bulb was in them. O'Reily Auto Parts didn't have lamps in the store--they had them for special order only, so I couldn't compare them in the store before purchasing.
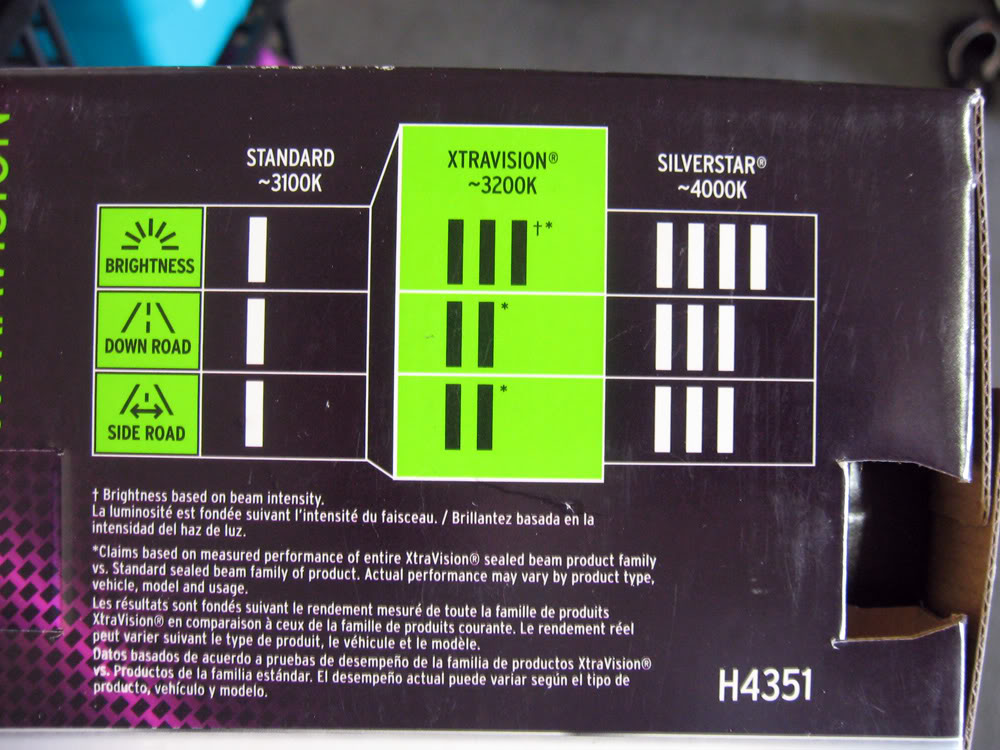
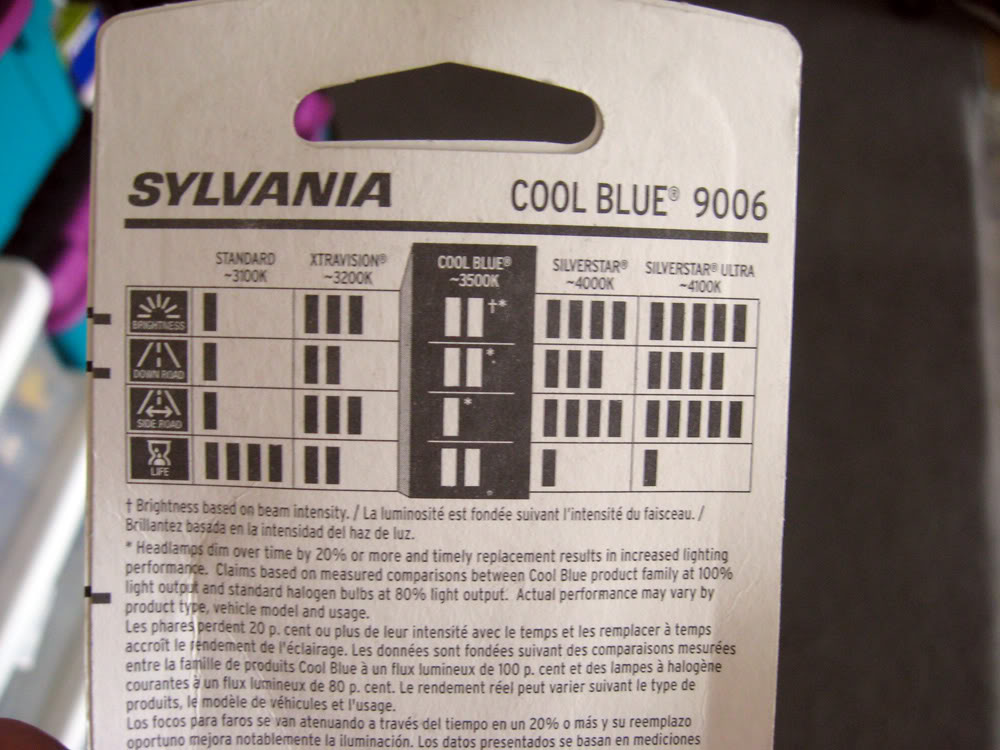
I had an old box at home, and looking at it, it seems the Cool Blue bulbs may not have been the best choice. I probably should have gone with the more expensive Silver Stars. The packaging says the light output for 3200 is better than 3500. Oh well, we'll see.
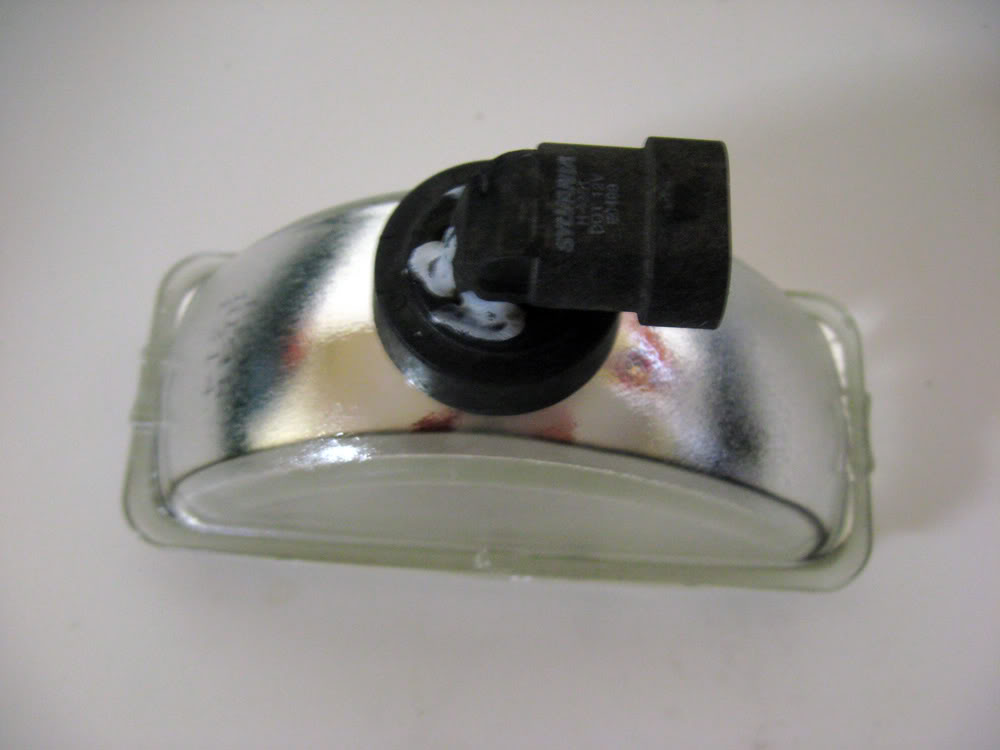
Anyway, you can do this project with the OEM Guide headlamps, but they are much harder to take apart. I actually couldn't even unscrew the Guide one, so I gave up on it. Plus, since they are made of glass, both front and back, they weigh a ton. It's better and easier to use the Wagner or Sylvania headlamps, which are absolutely identical except for the text on the front of the lens.
Comparison:
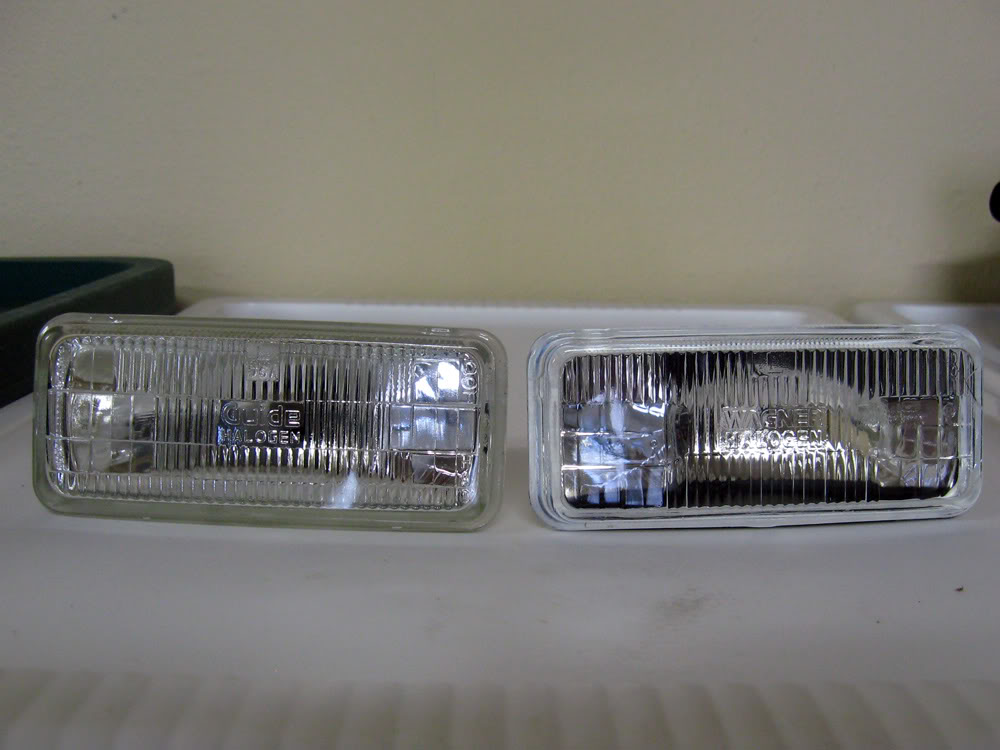
Guide:
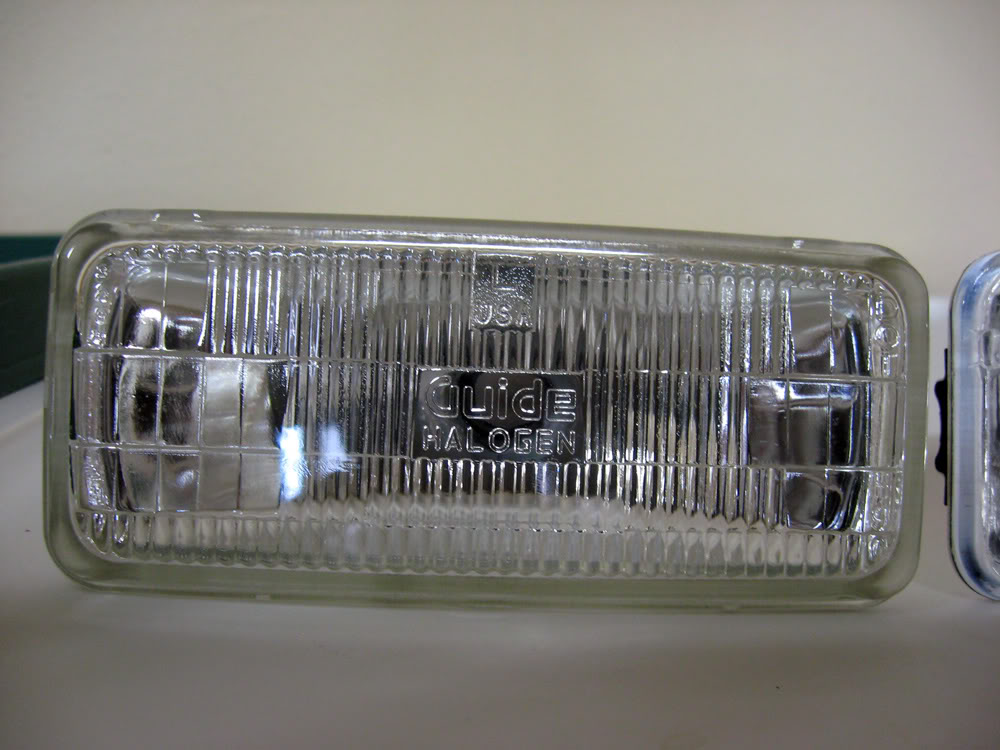
Guide:
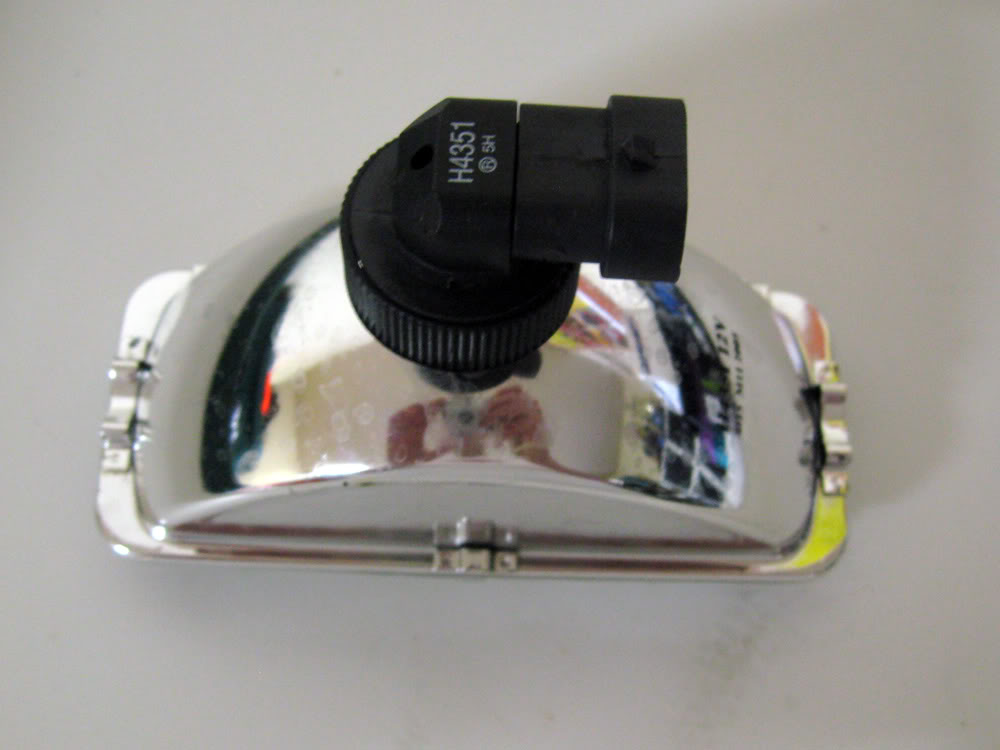
Wagner/Sylvania:
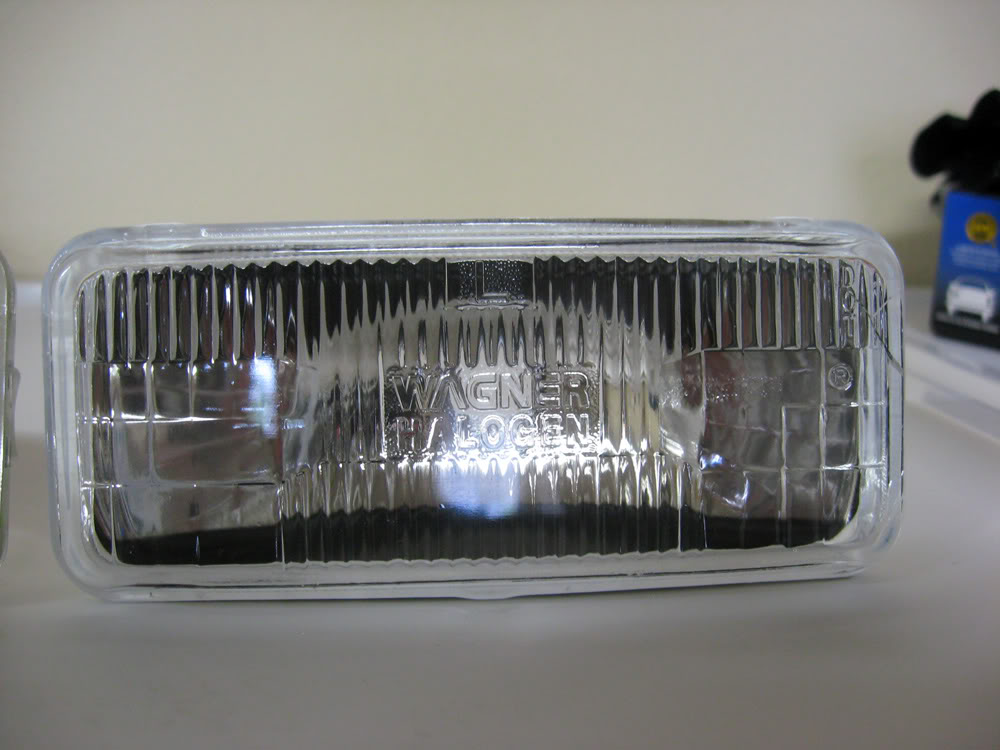
Wagner/Sylvania:
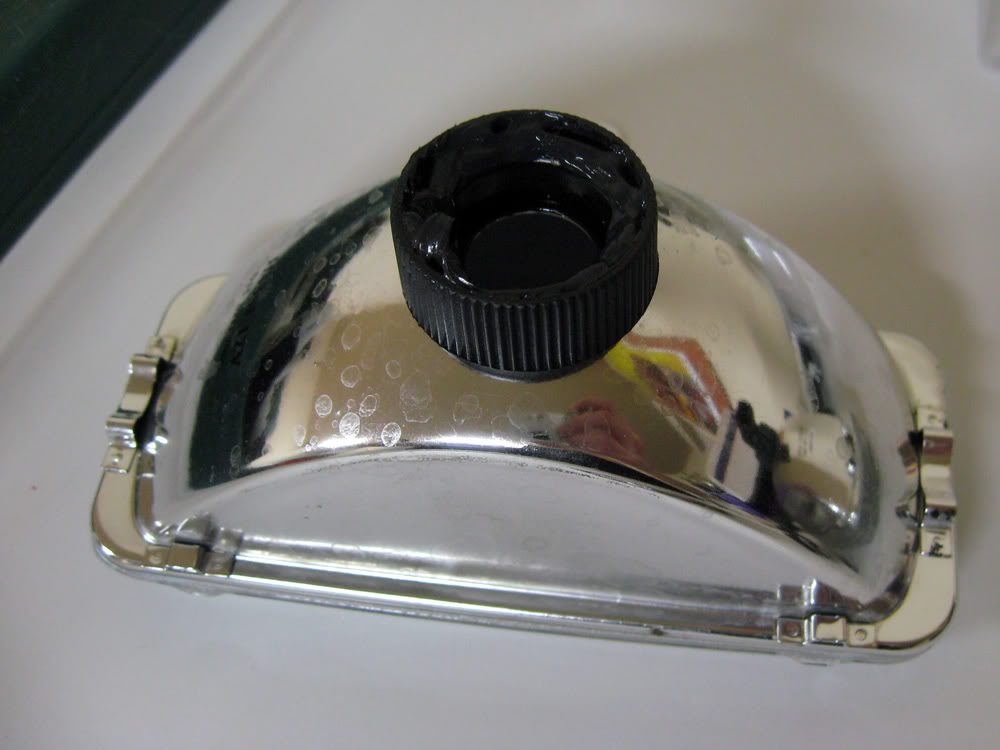
The first thing you should do is clean the old lamp with a wet paper towel. Then put your gloves on and turn the plug counter-clockwise. You'll have to use a bit of muscle, because you have to break the old silicone. Then you need to start working it off the lamp. There's no elegant way of doing it, you just turn and consistently pull at the same time. Try pulling a bit crooked and it'll come off easily. Don't worry, you shouldn't break anything. Just don't do something dumb like grab a screwdriver and start prying, because that's unnecessary.
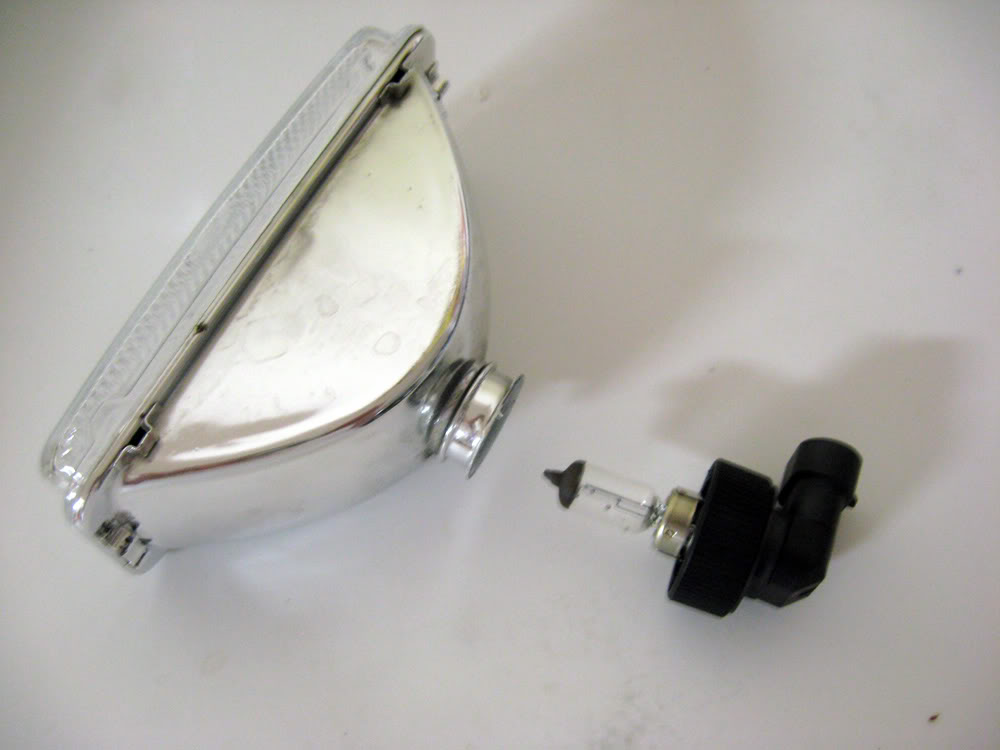
First thing's first, you need to have the correct materials.
- replacement bulbs -- 9006 for low beam, 9005 for high beam
- headlamps with burnt out bulbs
- black high temperature silicone
- x-acto knife
- mechanic/hardware gloves
- safety glasses
As far as bulbs go, you can choose whatever intensity you want. I chose Cool Blue just because they were the mid-priced selection and said the light output was better than halogen. Plus, I was ignorant, and didn't know what I should pick. I just knew I didn't want to pay $21 a bulb for Silver Stars.
In retrospect, I didn't look at the original packaging for the Sylvania replacement headlamps before buying the bulbs, so I didn't know what type of bulb was in them. O'Reily Auto Parts didn't have lamps in the store--they had them for special order only, so I couldn't compare them in the store before purchasing.
I had an old box at home, and looking at it, it seems the Cool Blue bulbs may not have been the best choice. I probably should have gone with the more expensive Silver Stars. The packaging says the light output for 3200 is better than 3500. Oh well, we'll see.
Anyway, you can do this project with the OEM Guide headlamps, but they are much harder to take apart. I actually couldn't even unscrew the Guide one, so I gave up on it. Plus, since they are made of glass, both front and back, they weigh a ton. It's better and easier to use the Wagner or Sylvania headlamps, which are absolutely identical except for the text on the front of the lens.
Comparison:
Guide:
Guide:
Wagner/Sylvania:
Wagner/Sylvania:
The first thing you should do is clean the old lamp with a wet paper towel. Then put your gloves on and turn the plug counter-clockwise. You'll have to use a bit of muscle, because you have to break the old silicone. Then you need to start working it off the lamp. There's no elegant way of doing it, you just turn and consistently pull at the same time. Try pulling a bit crooked and it'll come off easily. Don't worry, you shouldn't break anything. Just don't do something dumb like grab a screwdriver and start prying, because that's unnecessary.
Thread Starter
Registered User
Joined: May 2002
Posts: 5,557
From: Dallas, Texas
You're going to spend about the next 10 to 15 minutes of your life scraping the old silicone off the lamp. I used my fingernails. I don't recommend using anything else but your fingernails.
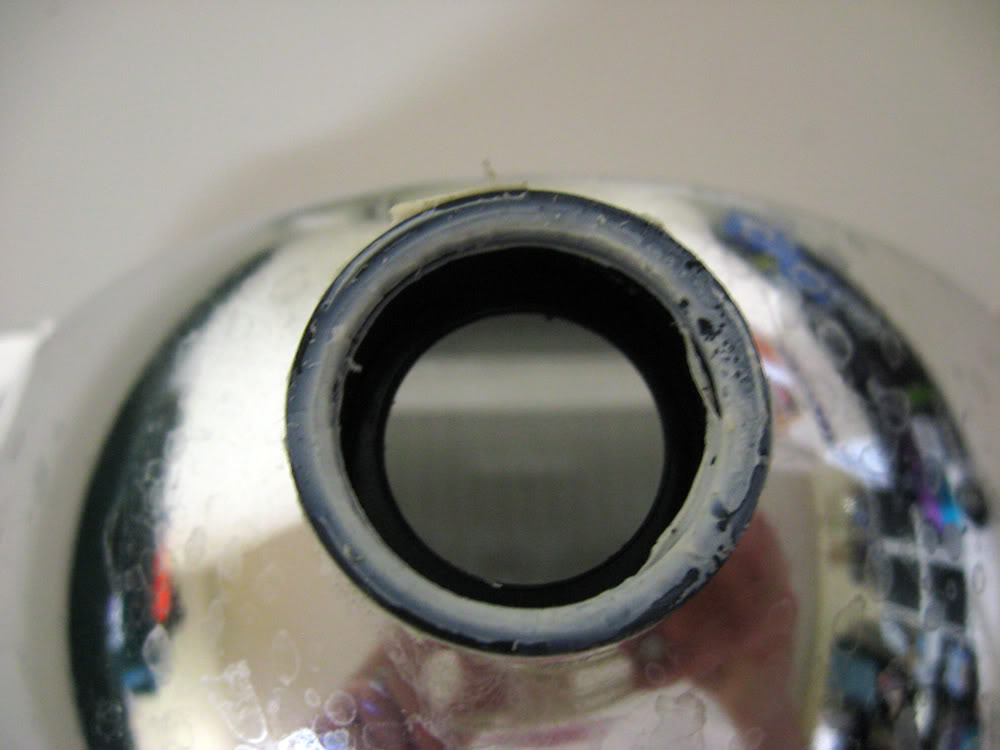
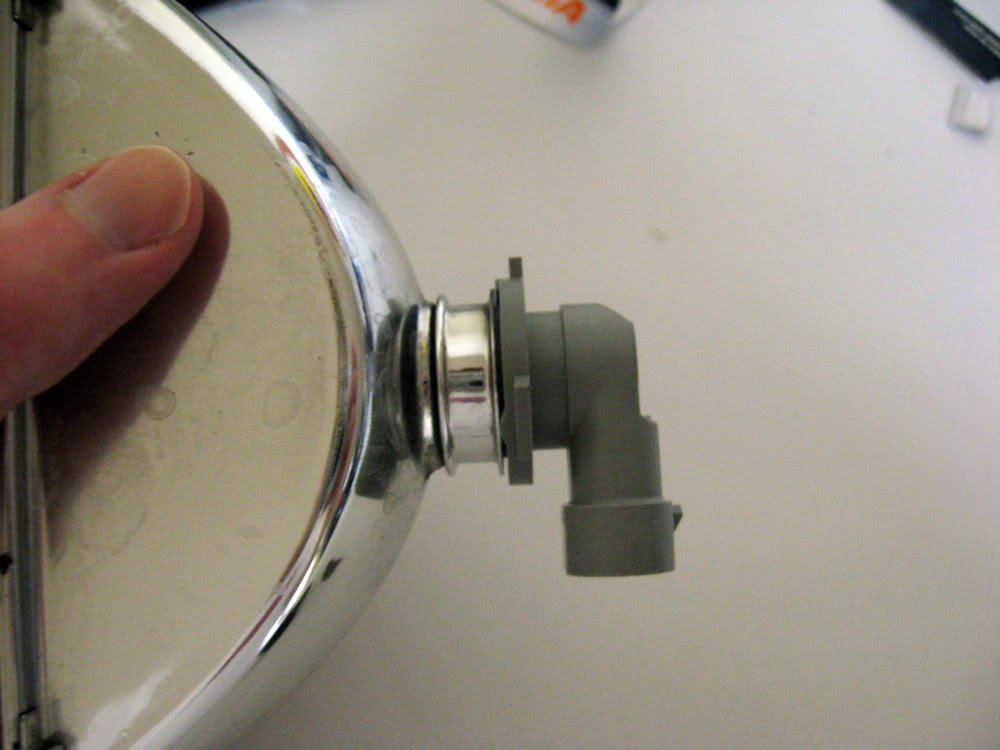
You need a pretty clean surface, so stuff a paper towel in the hole and spin it around.
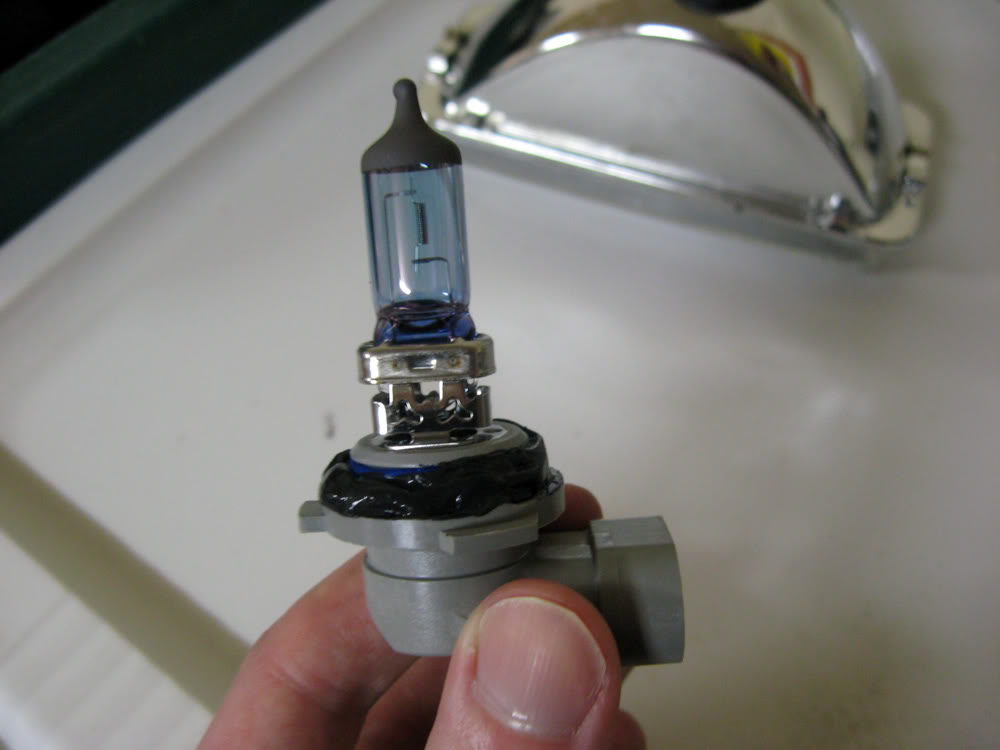
Here's a comparison of the old original bulb with what I'm replacing it with.
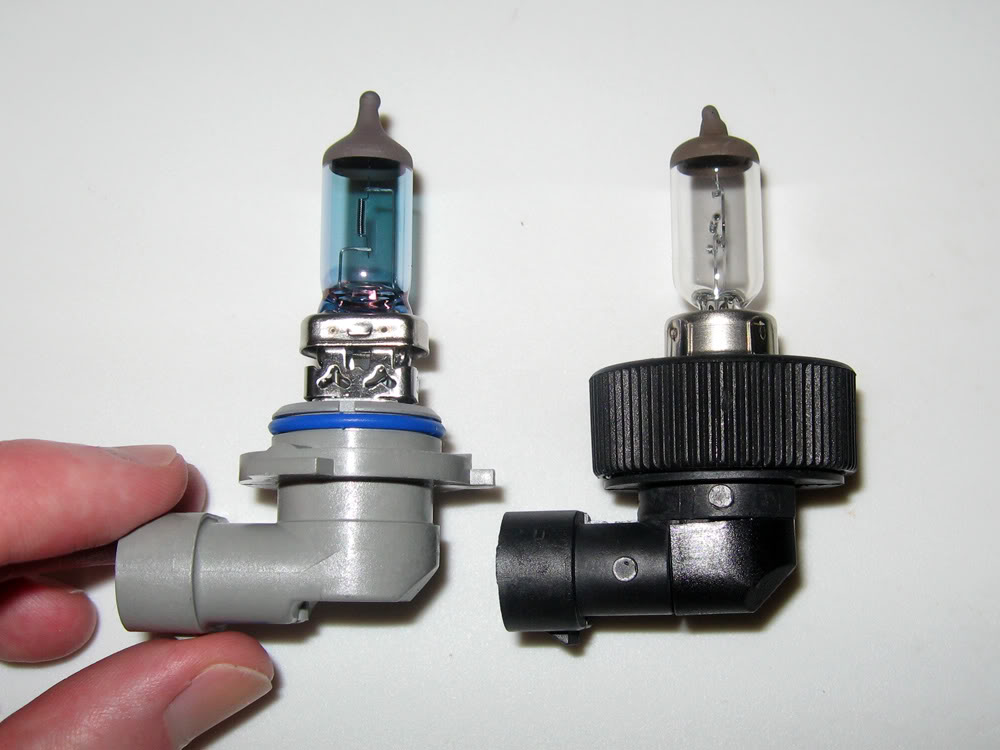
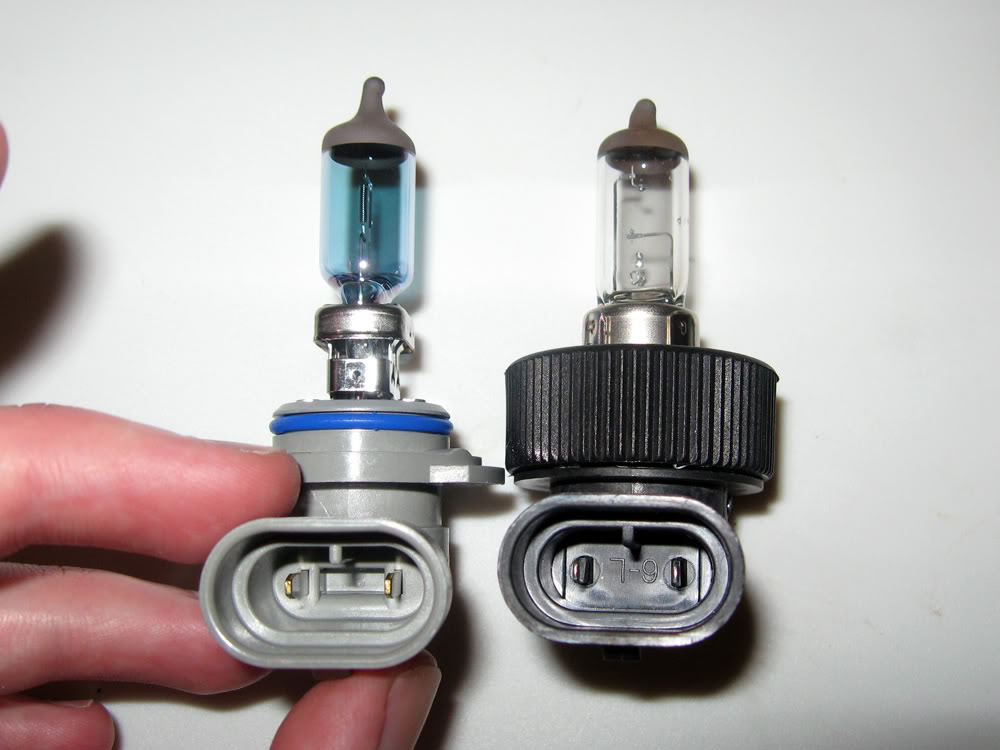
The Cool Blue bulb sticks out more (it's longer in other words), which doesn't affect a single thing. The bulb plugs right in snugly and doesn't come anywhere close to touching the end of the lamp.
I wanted to reuse the original screw on grippy part to retain a somewhat factory appearance to the lights. Plus, I figure the piece will help prevent dirt and moisture. If nothing else, it looks better than just a bulb and bunch of silicone. You can remove it from the old bulb by putting your gloves back on and turning the bulb counter-clockwise while holding the grippy part. Again, you're breaking silicone, so it takes a bit of muscle.

You're now left with a grippy part full of old silicone.
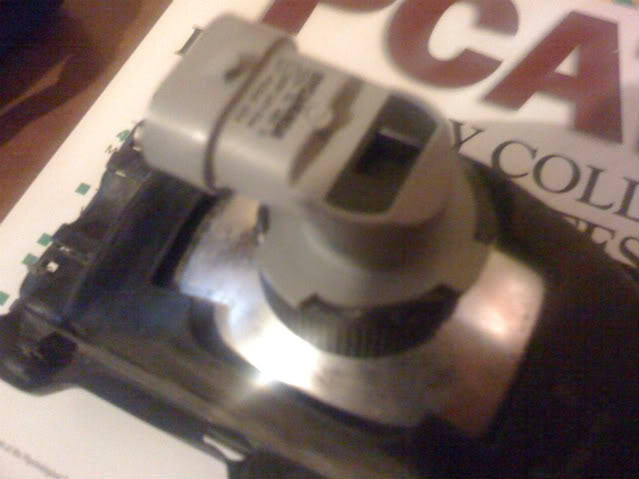
You can now see how similar the old bulb and new bulb are. The new bulb I am using has a slightly thicker base, however the base is smaller in diameter than the old bulb. The new base also has tabs on it that are slightly thicker than the old bulb's base. This isn't going to cause a problem fortunately.
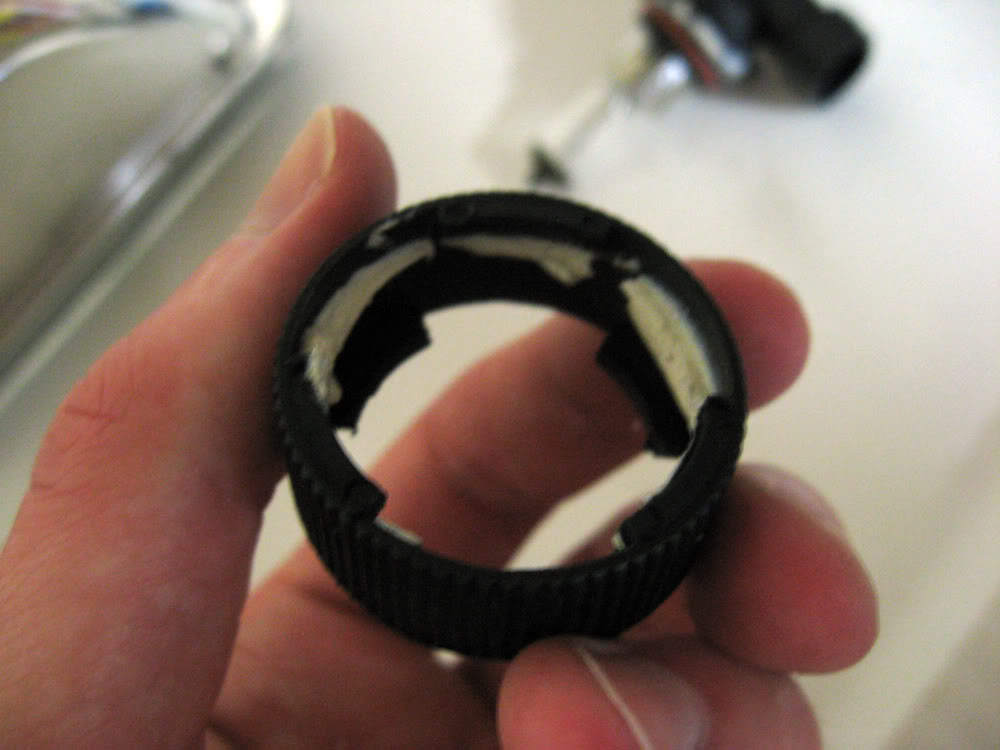
Here's what the old grippy part looks like. We're going to have to modify it to be reusable.
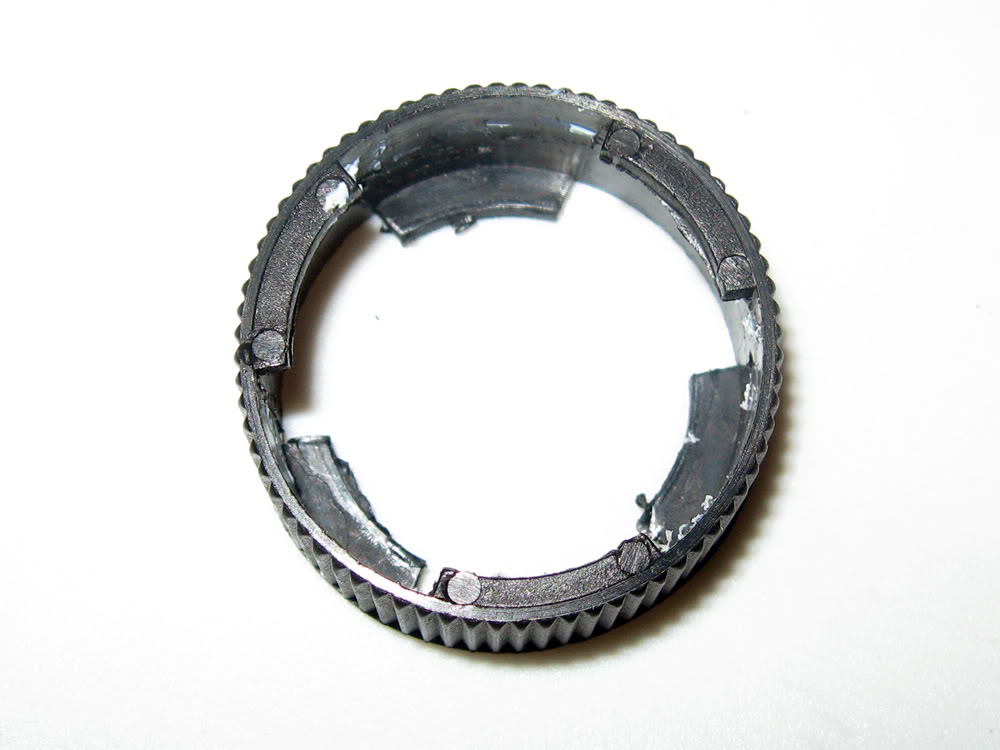
First, we're going to completely shave these small tabs off the inside with an x-acto knife (wearing your gloves and safety glasses now) and remove the majority of the gunk in the process with the knife.
You need a pretty clean surface, so stuff a paper towel in the hole and spin it around.
Here's a comparison of the old original bulb with what I'm replacing it with.
The Cool Blue bulb sticks out more (it's longer in other words), which doesn't affect a single thing. The bulb plugs right in snugly and doesn't come anywhere close to touching the end of the lamp.
I wanted to reuse the original screw on grippy part to retain a somewhat factory appearance to the lights. Plus, I figure the piece will help prevent dirt and moisture. If nothing else, it looks better than just a bulb and bunch of silicone. You can remove it from the old bulb by putting your gloves back on and turning the bulb counter-clockwise while holding the grippy part. Again, you're breaking silicone, so it takes a bit of muscle.
You're now left with a grippy part full of old silicone.
You can now see how similar the old bulb and new bulb are. The new bulb I am using has a slightly thicker base, however the base is smaller in diameter than the old bulb. The new base also has tabs on it that are slightly thicker than the old bulb's base. This isn't going to cause a problem fortunately.
Here's what the old grippy part looks like. We're going to have to modify it to be reusable.
First, we're going to completely shave these small tabs off the inside with an x-acto knife (wearing your gloves and safety glasses now) and remove the majority of the gunk in the process with the knife.
Last edited by Brangeta; Jul 9, 2010 at 02:14 PM.
Thread Starter
Registered User
Joined: May 2002
Posts: 5,557
From: Dallas, Texas
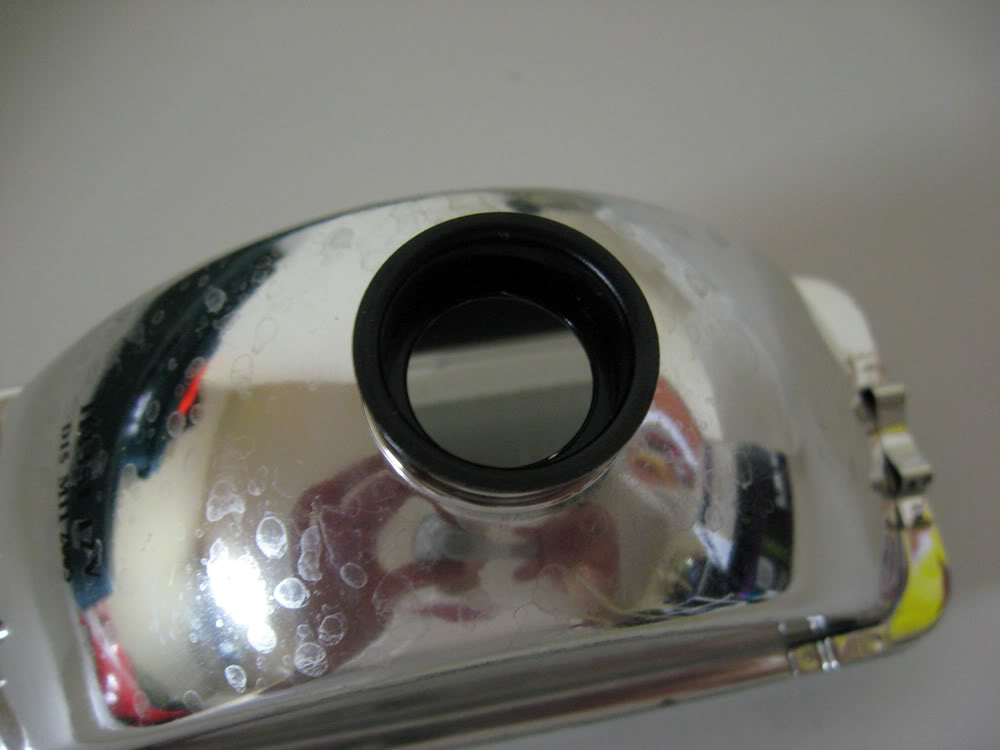
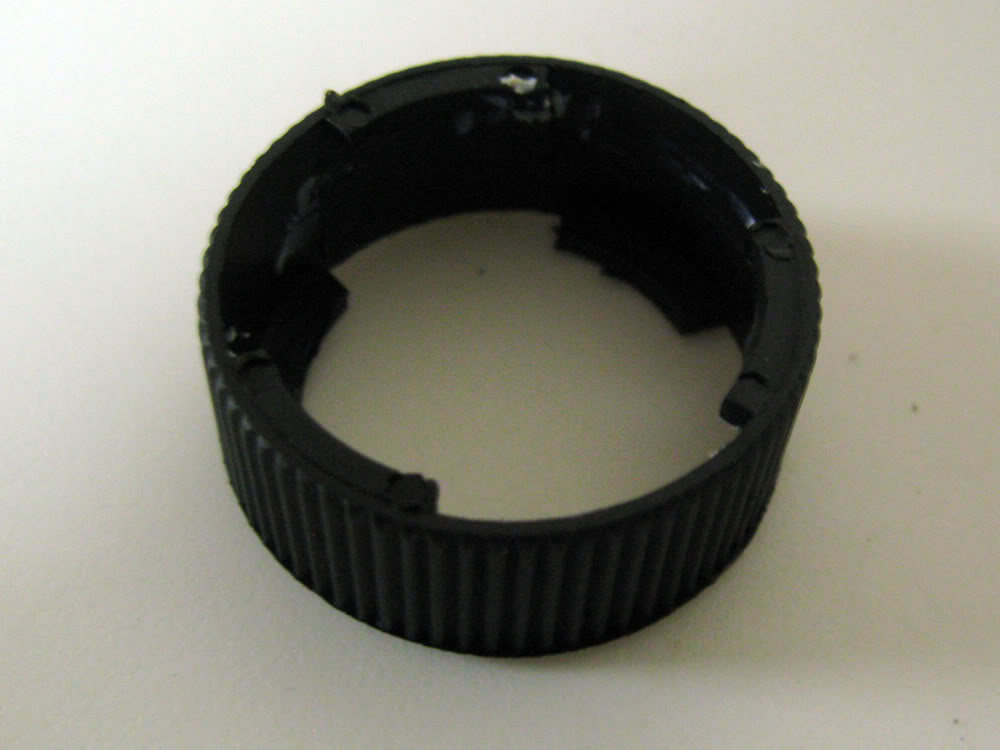
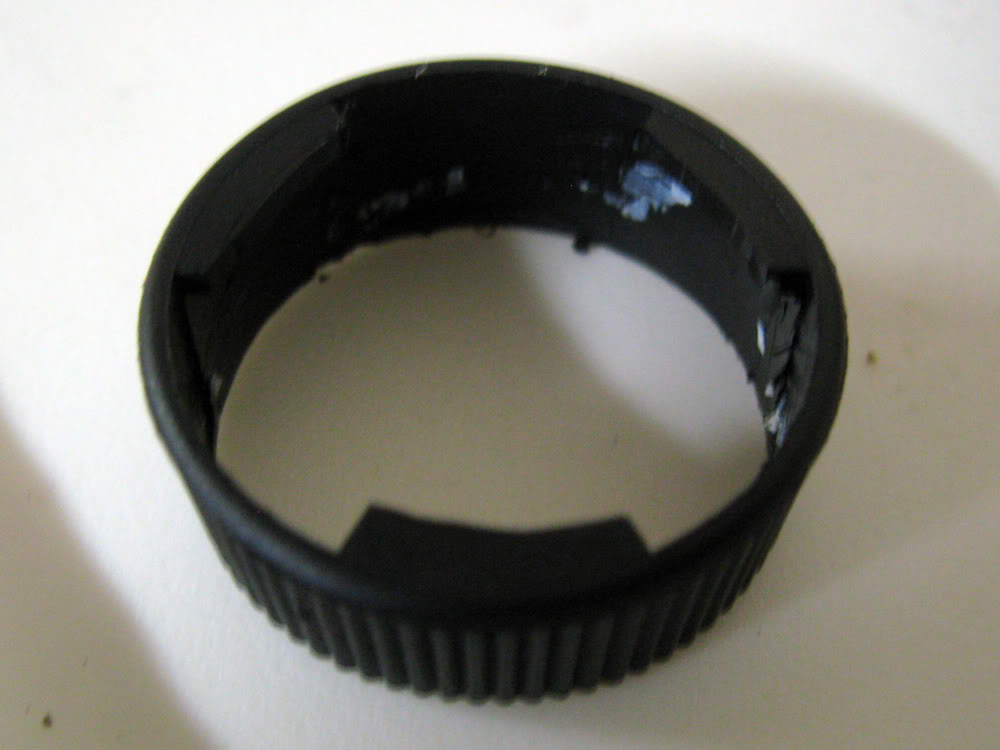
You'll end up with something like this:

You don't need to remove every trace of old silicone gunk.
Next, to make removing the grippy part in the future an easier task, shave off 1/3 of each of the tabs that made removing it so difficult. You don't have to do this, but if you don't the only way to remove the grippy part from the lamp is to use a screwdriver. Ask me how I know...
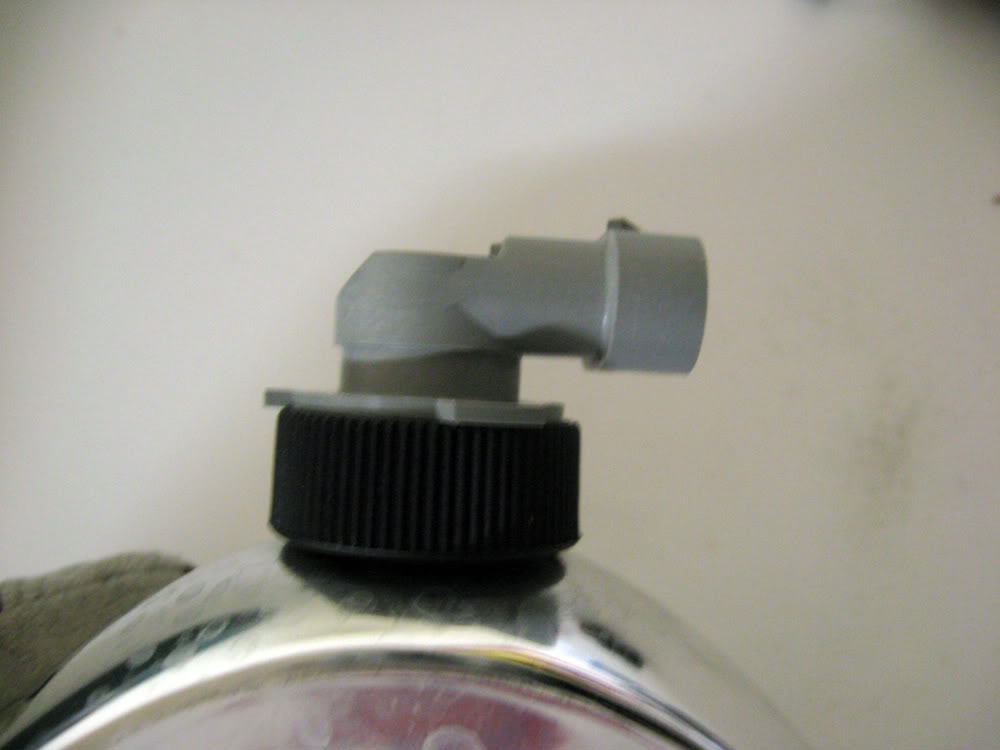
It now fits right on without any issues whatsoever.
Put a bead of silicone around the edges of the grippy part. You don't need to be especially neat, and you don't need to use a ton, just enough that it will gush out the sides a bit when you put the bulb in. Make sure to avoid leaving a silicone spider-web on the interior part. You don't want any silicone on the actual bulb. For that matter, don't touch the glass bulb with your fingers, or the grease on your hands can cause it to burn out sooner.
Put a very thick bead of silicone around the edges of the bulb. It needs to be even and not have any bubbles. My instructions on the silicone said to wait 10 minutes for the silicone to get tacky before using it. Well... those instructions are for when you use it as a gasket. I just waited 5 minutes and smushed the parts together and it seemed fine to me. Make sure you are putting the bulb in and the plug is facing the correct direction for your car's wiring!
Here is what your finished headlamp will look like. If, like me, you didn't use enough silicone for it to gush out in certain areas, add some more to the exterior and use your x-acto knife as a paint brush. Wait 12 to 24 hours for the silicone to fully cure before installing the lamp on the car.
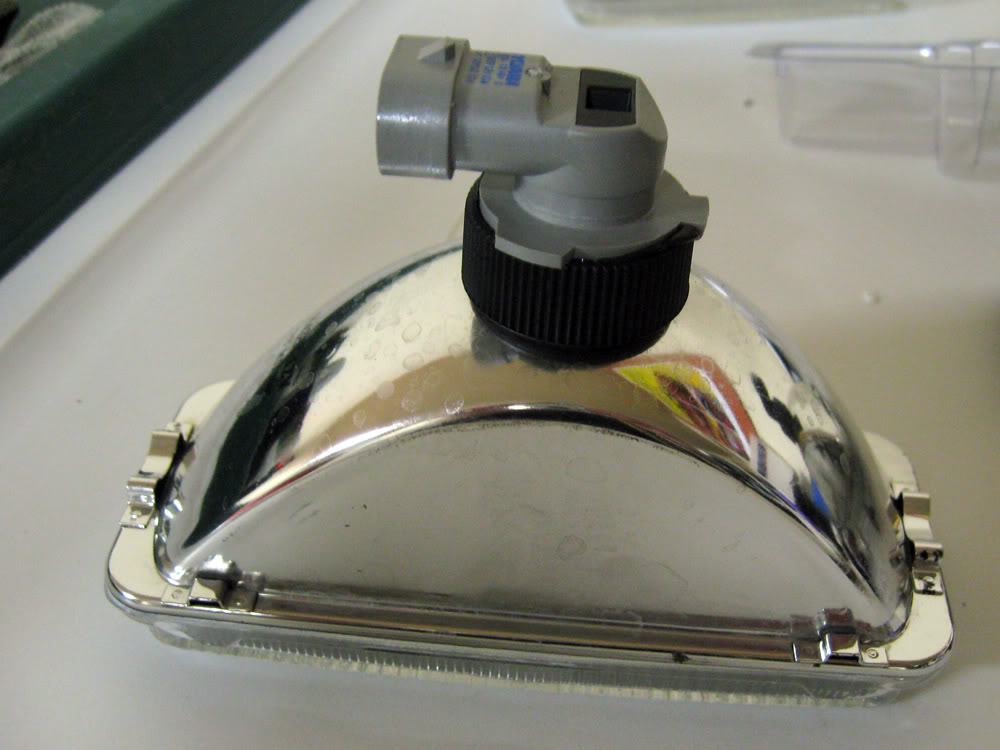
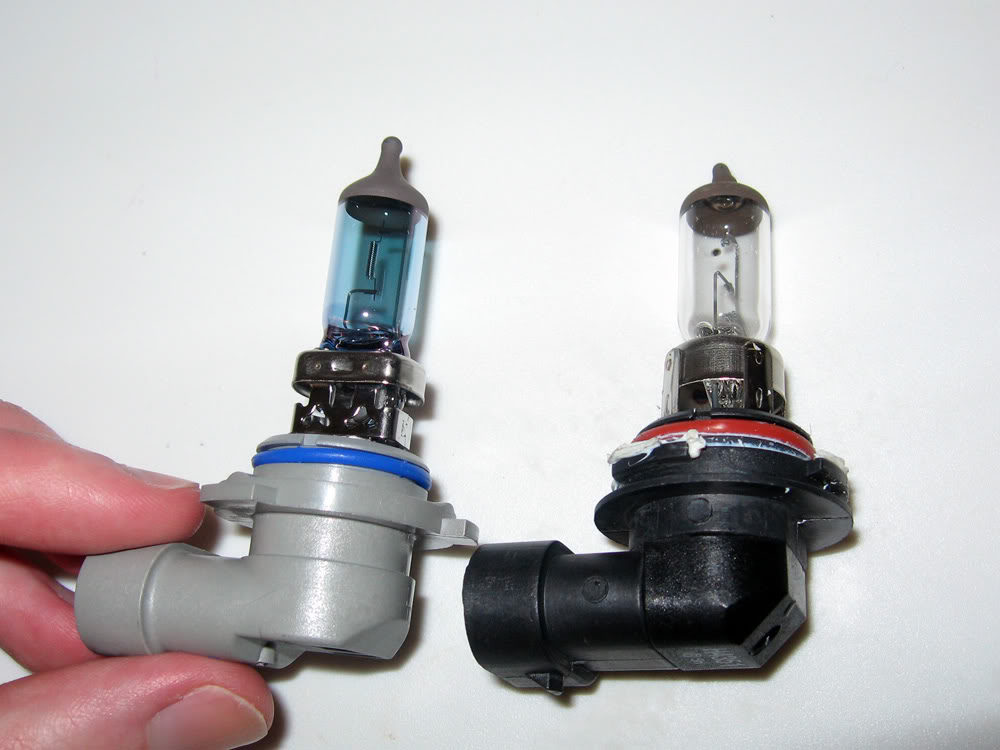
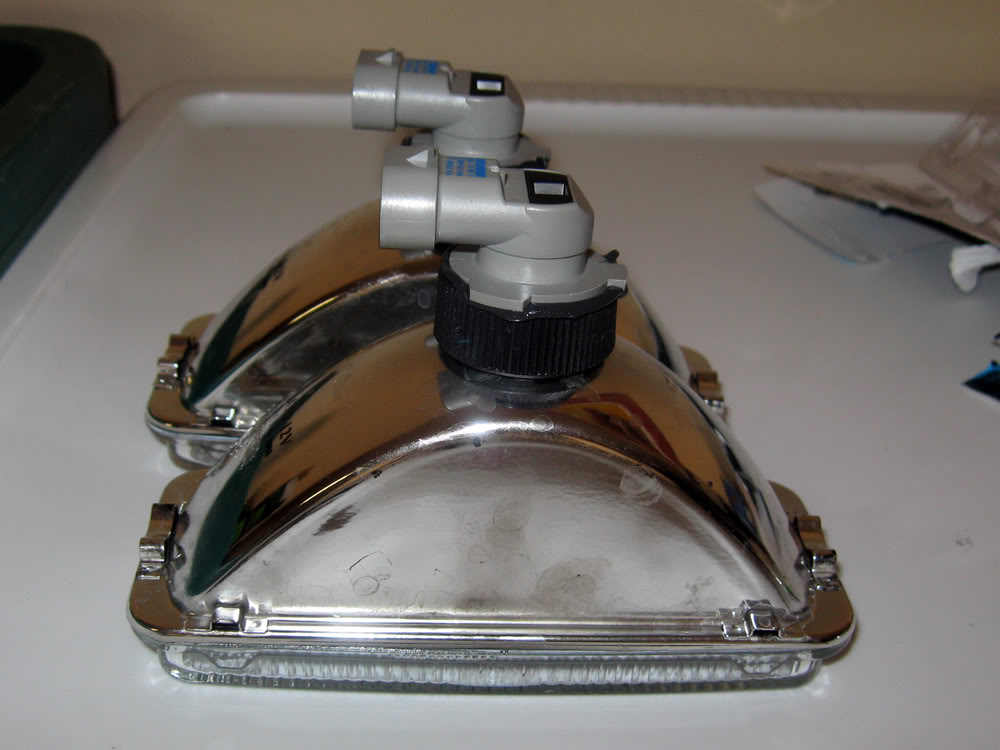
Here's what both finished lamps look like. They look identical don't they? Well, one is a Wagner and the other is a Sylvania. They are exactly the same thing.
I'll post pics in the next few days of what they look like installed and whether or not I'm happy with my ignorant bulb choice. Since only one lamp on the car is burnt out, I'll take a comparison shot of what a new bulb looks like with a fairly old Wagner one before replacing both. Hopefully the light output is decent on these new bulbs.
Also, I was told to use bulb grease (AKA dielectric grease) on the metal contacts of the plug when installing these lights back on the car. O'Reily has that stuff in little packets for super cheap, so might as well get it. I've never used it on the headlamps before... just blinkers and tail lamps... which could be the reason we've gone through 3 driver's side low beams in the past 8 years, but still have a passenger side low beam from 10 years ago I believe... We'll see how long these will last when greased.
Update:
Installed one of the lamps last night to take some comparison shots.
Just for clarification, the standard way these bulbs should face (at least for both low beams) is to the left. So when you are siliconing the bulb onto the lamp, the socket should face the left or you may have to install the bulb upside down.
I applied a little bit of bulb grease the best I could haphazardly do with a piece of paper towel I rotated around inside the bulb's socket. I honestly don't know how to use this stuff and the instruction just say "apply a small amount to the base of the bulb"... well what about if the bulb is a male style plug...? O_o
You'll notice that this is the messy one I applied extra silicone to the outside of.
You'll have to scroll down to my next reply to see the rest of the pics.
You don't need to remove every trace of old silicone gunk.
Next, to make removing the grippy part in the future an easier task, shave off 1/3 of each of the tabs that made removing it so difficult. You don't have to do this, but if you don't the only way to remove the grippy part from the lamp is to use a screwdriver. Ask me how I know...
It now fits right on without any issues whatsoever.
Put a bead of silicone around the edges of the grippy part. You don't need to be especially neat, and you don't need to use a ton, just enough that it will gush out the sides a bit when you put the bulb in. Make sure to avoid leaving a silicone spider-web on the interior part. You don't want any silicone on the actual bulb. For that matter, don't touch the glass bulb with your fingers, or the grease on your hands can cause it to burn out sooner.
Put a very thick bead of silicone around the edges of the bulb. It needs to be even and not have any bubbles. My instructions on the silicone said to wait 10 minutes for the silicone to get tacky before using it. Well... those instructions are for when you use it as a gasket. I just waited 5 minutes and smushed the parts together and it seemed fine to me. Make sure you are putting the bulb in and the plug is facing the correct direction for your car's wiring!
Here is what your finished headlamp will look like. If, like me, you didn't use enough silicone for it to gush out in certain areas, add some more to the exterior and use your x-acto knife as a paint brush. Wait 12 to 24 hours for the silicone to fully cure before installing the lamp on the car.
Here's what both finished lamps look like. They look identical don't they? Well, one is a Wagner and the other is a Sylvania. They are exactly the same thing.
I'll post pics in the next few days of what they look like installed and whether or not I'm happy with my ignorant bulb choice. Since only one lamp on the car is burnt out, I'll take a comparison shot of what a new bulb looks like with a fairly old Wagner one before replacing both. Hopefully the light output is decent on these new bulbs.
Also, I was told to use bulb grease (AKA dielectric grease) on the metal contacts of the plug when installing these lights back on the car. O'Reily has that stuff in little packets for super cheap, so might as well get it. I've never used it on the headlamps before... just blinkers and tail lamps... which could be the reason we've gone through 3 driver's side low beams in the past 8 years, but still have a passenger side low beam from 10 years ago I believe... We'll see how long these will last when greased.
Update:
Installed one of the lamps last night to take some comparison shots.
Just for clarification, the standard way these bulbs should face (at least for both low beams) is to the left. So when you are siliconing the bulb onto the lamp, the socket should face the left or you may have to install the bulb upside down.
I applied a little bit of bulb grease the best I could haphazardly do with a piece of paper towel I rotated around inside the bulb's socket. I honestly don't know how to use this stuff and the instruction just say "apply a small amount to the base of the bulb"... well what about if the bulb is a male style plug...? O_o
You'll notice that this is the messy one I applied extra silicone to the outside of.
You'll have to scroll down to my next reply to see the rest of the pics.
Last edited by Brangeta; Jul 10, 2010 at 01:28 PM.

Thread Starter
Registered User
Joined: May 2002
Posts: 5,557
From: Dallas, Texas
Edit: Continuation of the posts above:
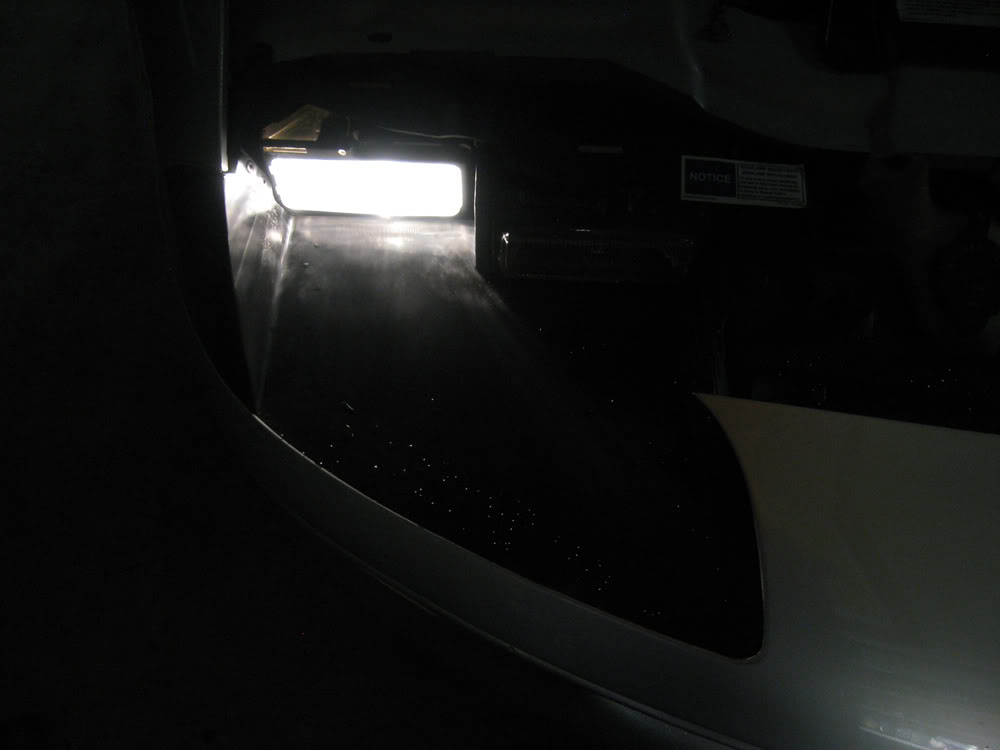
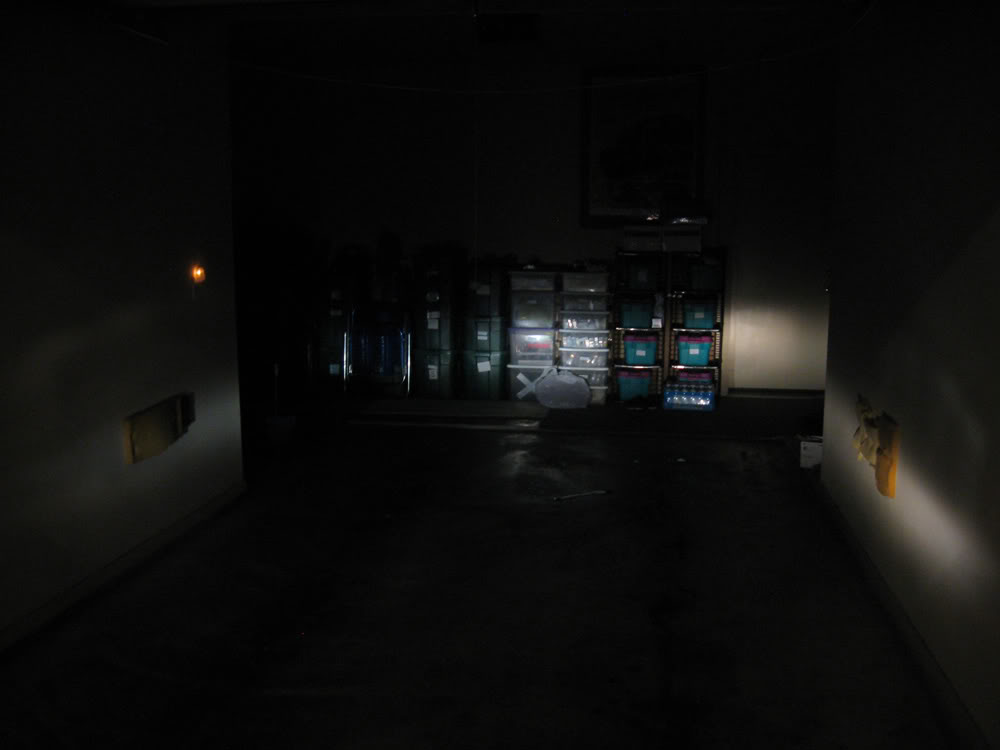
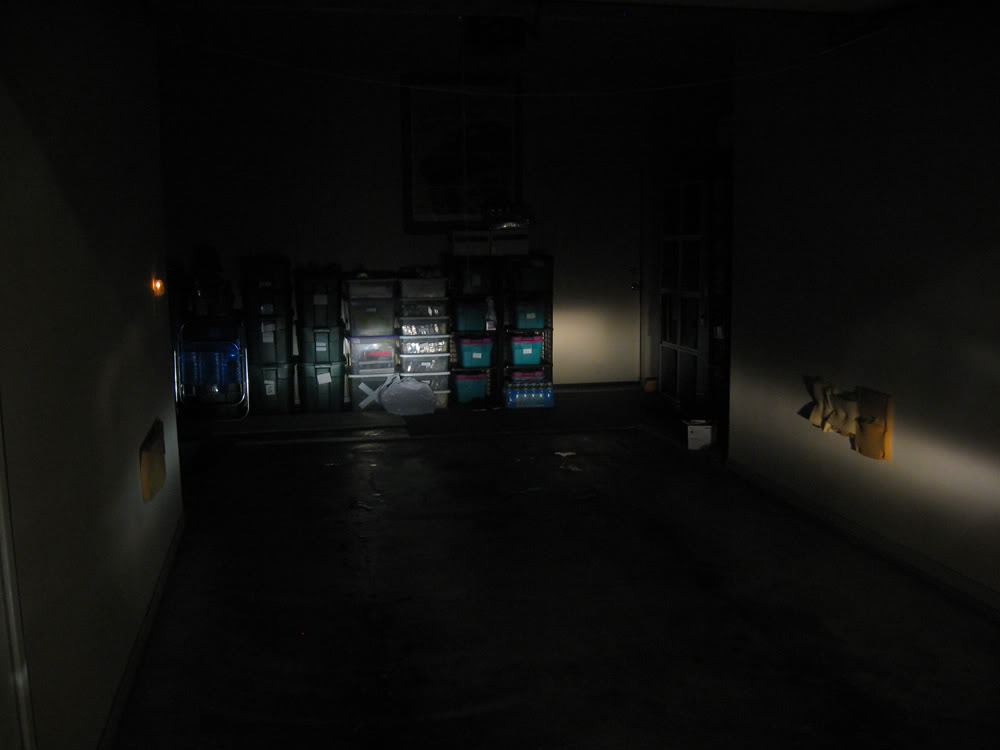
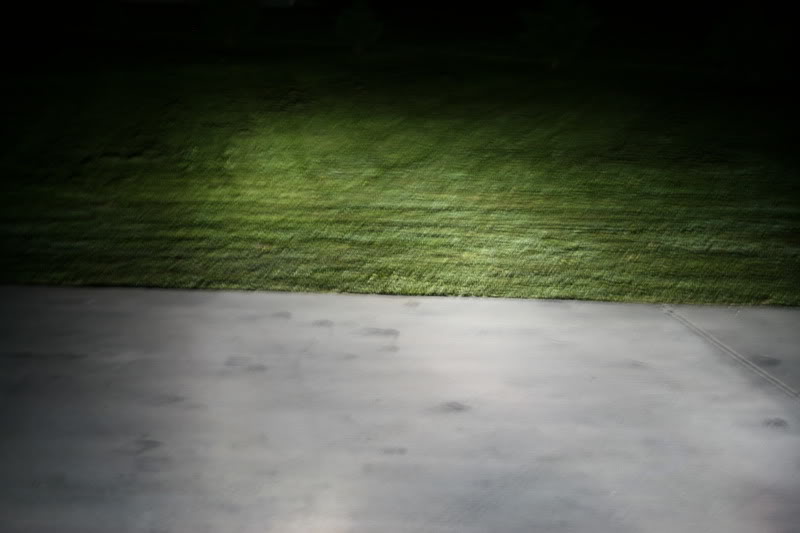
I took the rest of these pictures in manual mode on my camera. I don't know if the exposure changed at all between shots because I'm not THAT camera-geeky, but this is hopefully a good representation of how they compare. The manual settings I used were 1/30, ISO 200, and F2.6. These two photos below haven't had anything done to them besides resizing.
This is an old Wagner bulb apparently with a 3200 whatever bulb in it. The lamp and bulb are probably 5 years old.
This is the new 3500 whatever bulb inside a Wagner lamp.
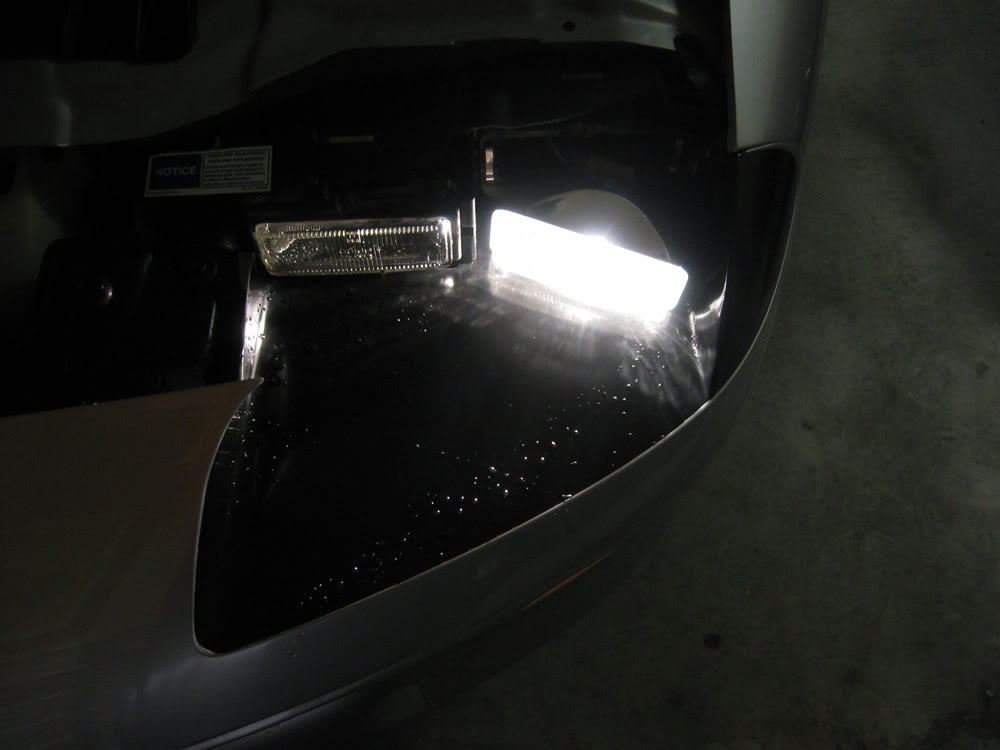
From my real life perspective, the Cool Blue 3500 whatever bulb I used is just barely more blue than the yellow/white 3200 bulb that is the standard one in the old Wagner lamp. I'm extremely pleased it isn't REALLY blue. If I remember correctly, the OEM Guide lamps are very yellow.

As far as brightness, I don't honestly notice a difference. The old lamp is a little less bright, but that's likely just due to age for the most part.
So far, appearance wise, I like the Cool Blue bulb just fine.
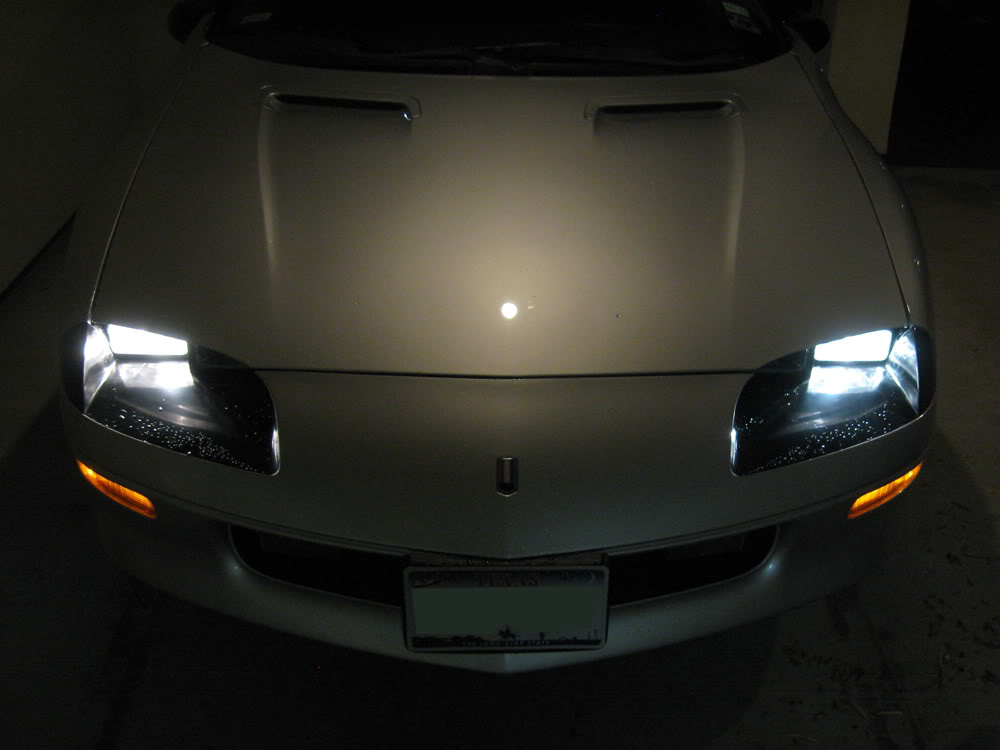
The old bulb appears to slightly flood light a bit more than the blue bulb, which seems like it might be more of a spotlight in comparison. BUT, it's very hard to tell, because you have to keep in mind that the driver's side bulb is by default aimed towards the right to avoid blinding other drivers. I think since this is my sister's daily driver, we'll just have to see her opinion of the Cool Blue bulbs after a few weeks of driving.
Could one of the moderators maybe make this topic a sticky? I don't have any plans of ever deleting the pics, so this topic should stand the test of time.
I took the rest of these pictures in manual mode on my camera. I don't know if the exposure changed at all between shots because I'm not THAT camera-geeky, but this is hopefully a good representation of how they compare. The manual settings I used were 1/30, ISO 200, and F2.6. These two photos below haven't had anything done to them besides resizing.
This is an old Wagner bulb apparently with a 3200 whatever bulb in it. The lamp and bulb are probably 5 years old.
This is the new 3500 whatever bulb inside a Wagner lamp.
From my real life perspective, the Cool Blue 3500 whatever bulb I used is just barely more blue than the yellow/white 3200 bulb that is the standard one in the old Wagner lamp. I'm extremely pleased it isn't REALLY blue. If I remember correctly, the OEM Guide lamps are very yellow.
As far as brightness, I don't honestly notice a difference. The old lamp is a little less bright, but that's likely just due to age for the most part.
So far, appearance wise, I like the Cool Blue bulb just fine.
The old bulb appears to slightly flood light a bit more than the blue bulb, which seems like it might be more of a spotlight in comparison. BUT, it's very hard to tell, because you have to keep in mind that the driver's side bulb is by default aimed towards the right to avoid blinding other drivers. I think since this is my sister's daily driver, we'll just have to see her opinion of the Cool Blue bulbs after a few weeks of driving.
Could one of the moderators maybe make this topic a sticky? I don't have any plans of ever deleting the pics, so this topic should stand the test of time.
Last edited by Brangeta; Jul 10, 2010 at 01:29 PM.
Thread Starter
Registered User
Joined: May 2002
Posts: 5,557
From: Dallas, Texas
Also, for those of you (who are like me) and like to keep things as factory original as possible... don't be too concerned about using the Guide headlamps. They look like a real pain to take apart, and they weigh at least 2 or 3 times more than the Sylvania/Wagner aftermarket replacements. I'm usually not a fan of aftermarket parts, but in this case, I am. These Syl/Wag lamps fit just as well as the Guide ones and look just as good or better.
If you still have the Guide headlamps and they went dead, go buy yourself a set of the Sylvania ones. Autozone still carries them (they did last year at least) and then you can store your factory original ones in the boxes the new lamps came in. I don't know if the Syl/Wags are brighter than the Guides or not. In my opinion, driving at night through a neighborhood without street lamps is about like driving with candles with the Syl/Wags. I imagine the same is true of the Guides.
Anyway... when your Syl/Wags go dead, you can follow my instructions here, and hopefully my bulb choice doesn't completely suck.
Last edited by Brangeta; Jul 9, 2010 at 02:32 PM.
Thread Starter
Registered User
Joined: May 2002
Posts: 5,557
From: Dallas, Texas
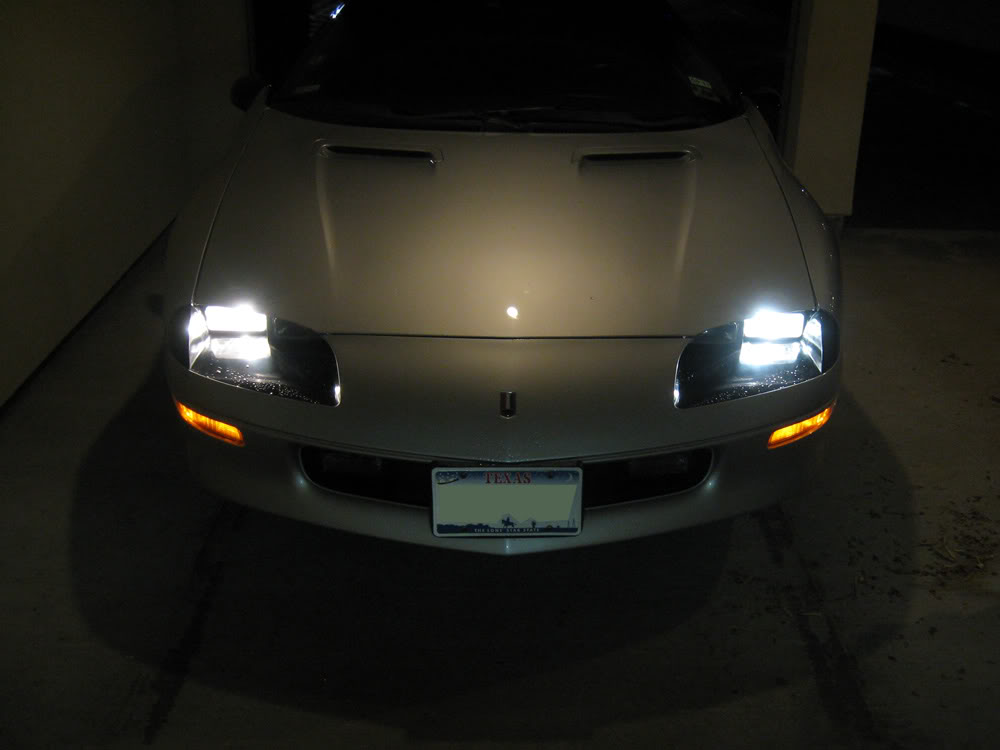
I added new pics of one of the lamps installed and comparison shots to my 3rd and 4th posts in this topic.
I didn't take the car out for a spin, and since I drive it so rarely (especially at night) we'll have to wait for my sister to tell me what she thinks about having two new headlamps with Cool Blue bulbs in them.
To me, it looks like an upgrade over the 3200 bulbs. Every time I drive the car at night, I use the high beams in neighborhoods without street lamps so... hopefully I won't have to do that anymore.
Thread Starter
Registered User
Joined: May 2002
Posts: 5,557
From: Dallas, Texas
I asked my sister what she thought of the new Cool Blue lights after a night of driving with them. She said "they're okay, but they aren't as bright as my old ones."
So I suppose I wouldn't recommend the Cool Blue bulbs for this purpose.
So I suppose I wouldn't recommend the Cool Blue bulbs for this purpose.

Registered User
Joined: Sep 2007
Posts: 125
From: NW Arkansas
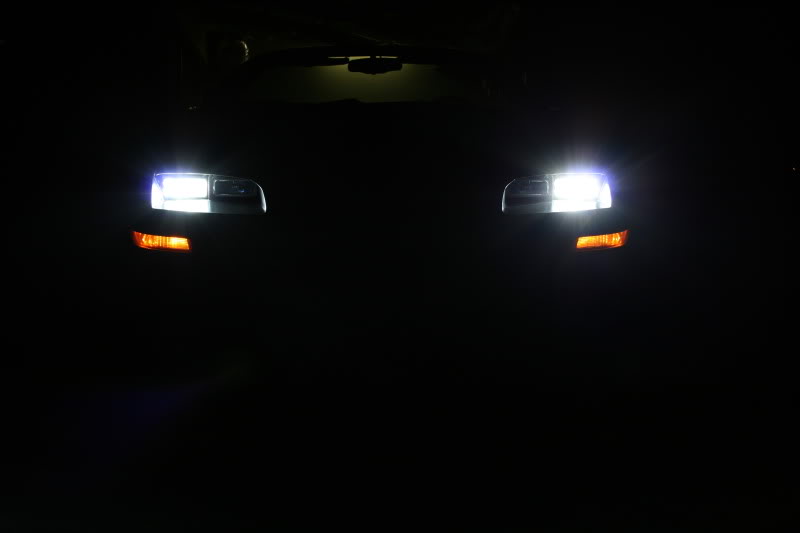
Forgot to take a pic of it out til I already had one back in. Here's the new Sylvania in the old Wagner housing.
Apparently the Iphone doesnt take very good pics of lights on haha. You can tell the difference in color though. The old headlights were the same color as those fog lights
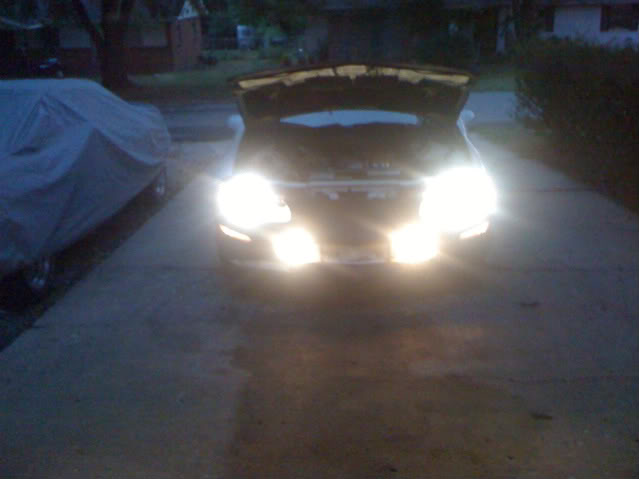
Apparently the Iphone doesnt take very good pics of lights on haha. You can tell the difference in color though. The old headlights were the same color as those fog lights

Registered User
Joined: Aug 2010
Posts: 100
From: New York
Great step by step. I just finished my high beams and will be starting my low beams tomorrow. A world of difference (both the light and the overall look). One thing though is that i had "Guide" brand light enclosures, and the "grippy" part and old bulb are one piece, so the grippy part could not be used to re-seal. I just used a couple extra layers of the high temperature silicone.