My 97 Z4C project...A Work in Progress
 09-22-2012, 09:24 AM
#1
Registered User
Thread Starter
Join Date: Dec 2011
Location: Tollesboro, KY
Posts: 178
My 97 Z4C project...A Work in Progress
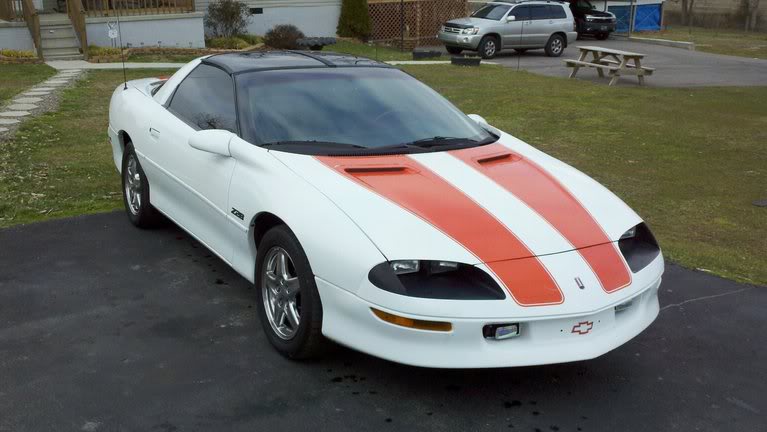
Well here is a pic of the car as it was when I first obtained it. Not the best photos...but. Many other mods not seen or described but will be in due time. Stock motor, when comes time to do rebuild plan to stroke it out to a 383. Trans is 4L60E, which I plan to swap out to a built 4L80E when I stroke to 383, has shift kit and aftermarket stall. Moser 12 bolt rear end with 3.73 gears. Have a set of ZR1 style deep dish 17 X 9.5s for fronts and 17 X 11s for rears with Nittos all around to go on when she is ready to roll again. These are going to be painted artic white as well to match the car! Pacesetter LT headers ceramic coated with O2 bungs, with Off road Y pipe, deleting cats, aftermarket cat back with stock tips. I am maintaining the EGR system however as I feel LT1s tend to run better with EGR in tact although I know you can tune it out, but removing EGR doesn't accomplish anything in my view and can create more issues than its worth. I have deleted the Air pump system though. POLY bushings all around, motor mounts, tranny, end links, sway bars, torque arm. Aftermarket Panhard rod, LCA's, Torque Arm in as far as suspension mods this far. Have many other things in the process of doing as well. And eventually plan to repaint car, taking doors, hatch, hood, and everything else off so it can be done right and paint the stripes on versus decals. It IS a work in progress!
Pic of what engine bay looked like when I first got the car. Pic doesn't show it but dirty, rusty...ah doesn't cut it in my book lol! Plus I'm not into stickers in an engine bay not my cup of tea ha ha ;-) to each his/her own.
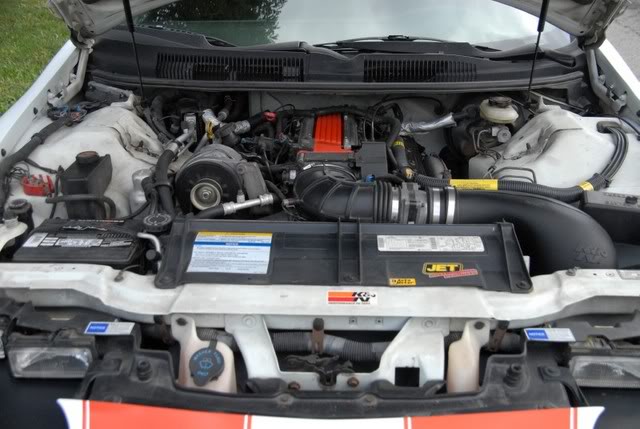
Here is what it looked like once engine bay was repainted. Also, notice hood with liner removed...this nasty thing will be getting repainted as well ha ha! The engine bay was in much need of some help, dirt, rust and such, so I ripped everything out and off and in the process of replacing every bolt, nut, hose (AC lines and radiator/heat hoses), clamps (stainless polished), complete stainless polished hex head bolt kit, all new accessories (everything), completely stripped, sanded, primed and repainted the entire engine bay. ALL hoses, accessories, and other parts are original AC Delco parts. Powdercoated intake orange, accessory bracket black, all mount brackets black, oil pan, POR-15 the block orange, new valve covers, completely redone wiring harness re-tapped and new wire loom, OTVC wires/brackets. So you get the picture of what I am doing.
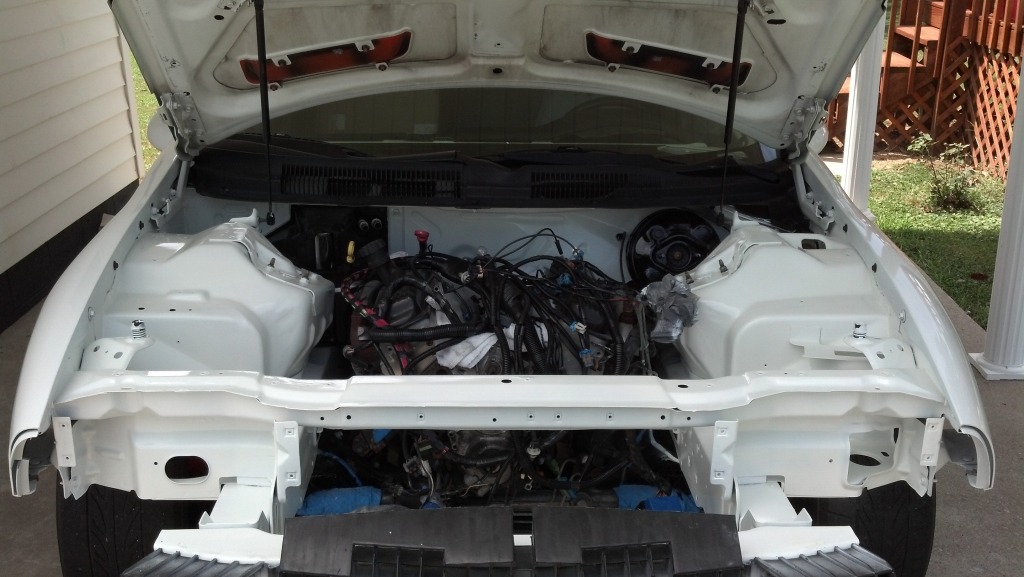
A few pics of once block was painted Chevy orange, and firewall and frame rails were finished painted artic white, of course K member semi gloss black. I am almost ready to put it all back together and will begin doing so this week as matter of fact. Should get it done and to the tuner in time to drive it a few times before putting away for the winter as it is NOT a daily driver.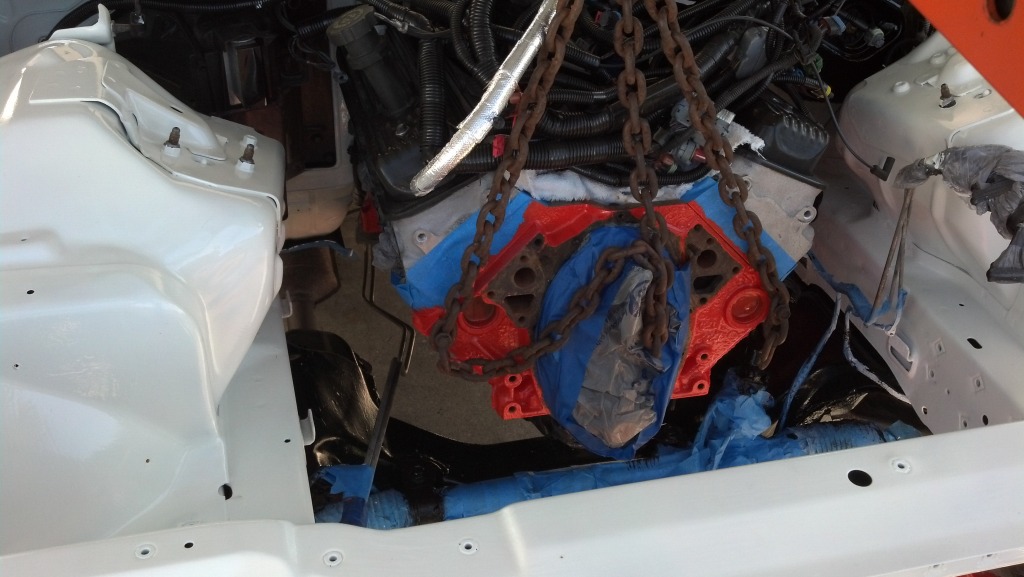

More updates and pics to come as I progress slowly but surely ;-)

Pic of what engine bay looked like when I first got the car. Pic doesn't show it but dirty, rusty...ah doesn't cut it in my book lol! Plus I'm not into stickers in an engine bay not my cup of tea ha ha ;-) to each his/her own.

Here is what it looked like once engine bay was repainted. Also, notice hood with liner removed...this nasty thing will be getting repainted as well ha ha! The engine bay was in much need of some help, dirt, rust and such, so I ripped everything out and off and in the process of replacing every bolt, nut, hose (AC lines and radiator/heat hoses), clamps (stainless polished), complete stainless polished hex head bolt kit, all new accessories (everything), completely stripped, sanded, primed and repainted the entire engine bay. ALL hoses, accessories, and other parts are original AC Delco parts. Powdercoated intake orange, accessory bracket black, all mount brackets black, oil pan, POR-15 the block orange, new valve covers, completely redone wiring harness re-tapped and new wire loom, OTVC wires/brackets. So you get the picture of what I am doing.

A few pics of once block was painted Chevy orange, and firewall and frame rails were finished painted artic white, of course K member semi gloss black. I am almost ready to put it all back together and will begin doing so this week as matter of fact. Should get it done and to the tuner in time to drive it a few times before putting away for the winter as it is NOT a daily driver.


More updates and pics to come as I progress slowly but surely ;-)
Last edited by 97Z4CZ28; 06-13-2013 at 12:34 PM.

 10-17-2012, 09:17 PM
#6
Registered User
Thread Starter
Join Date: Dec 2011
Location: Tollesboro, KY
Posts: 178
Re: My 97 Z4C project...A Work in Progress
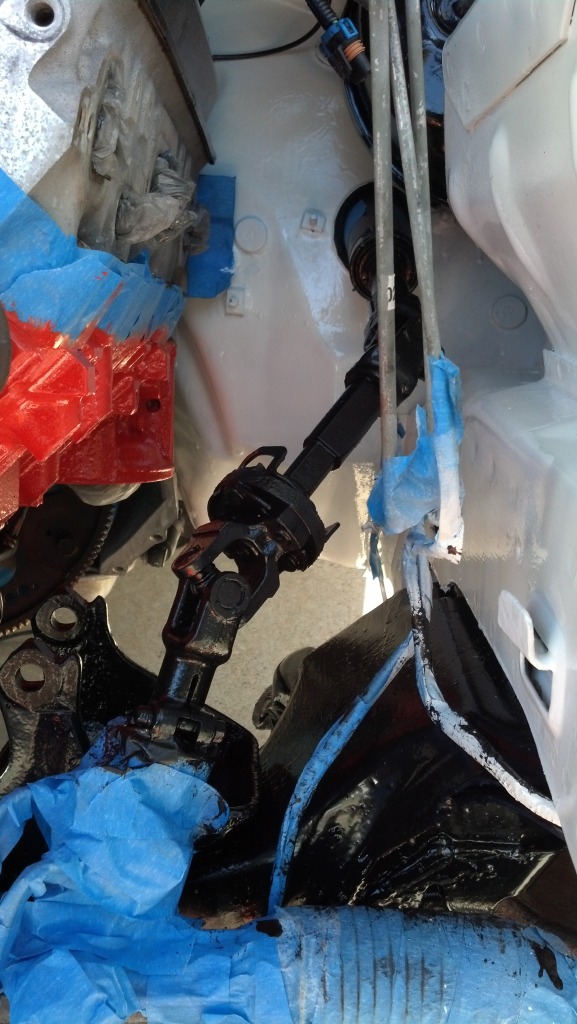
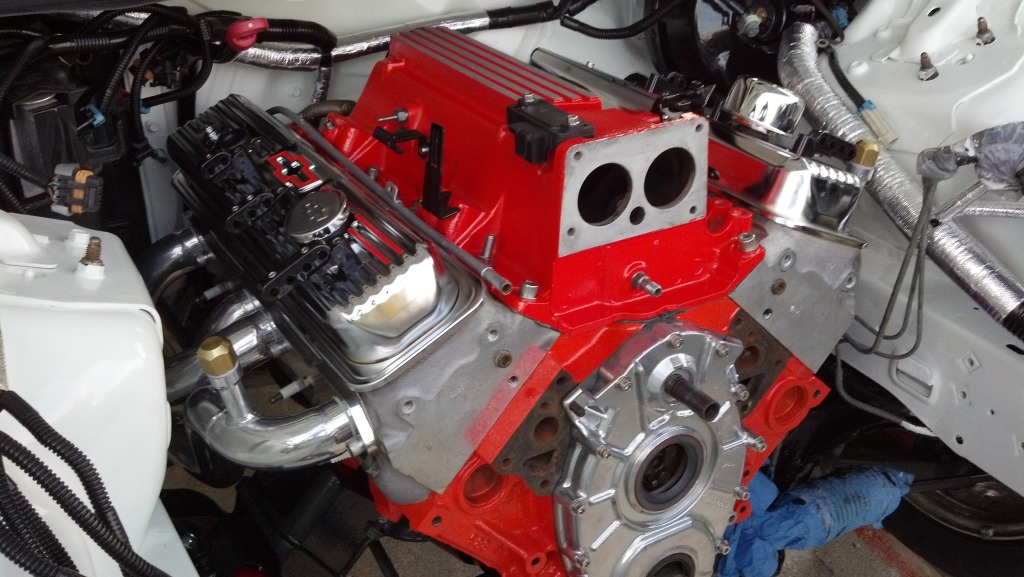
A few updated pictures of where I am at now. Headers are installed, new Energy Suspension Poly Motor Mount Bushings (what a pain in the *ss), NGK TR55 Spark Plugs installed, Oil Pan Installed, and Timing Cover installed. Pics of a few other items as well.

I ruined a waterpump shaft seal in the timing cover while installing it, knew it was gonna happen as the WP coupler is attached to the shaft...I gotta figure out how to get it off and install new seal. Powdercoated the Timing Cover. Polished Stainless Hex Heads.
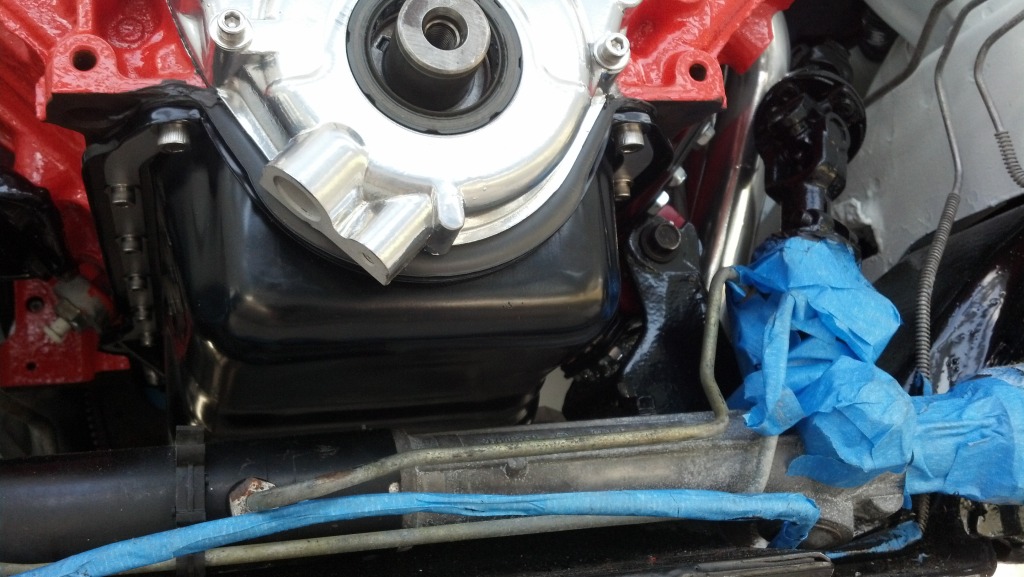
Powdercoated the oil pan, installed with Polished Stainless Hex Heads.
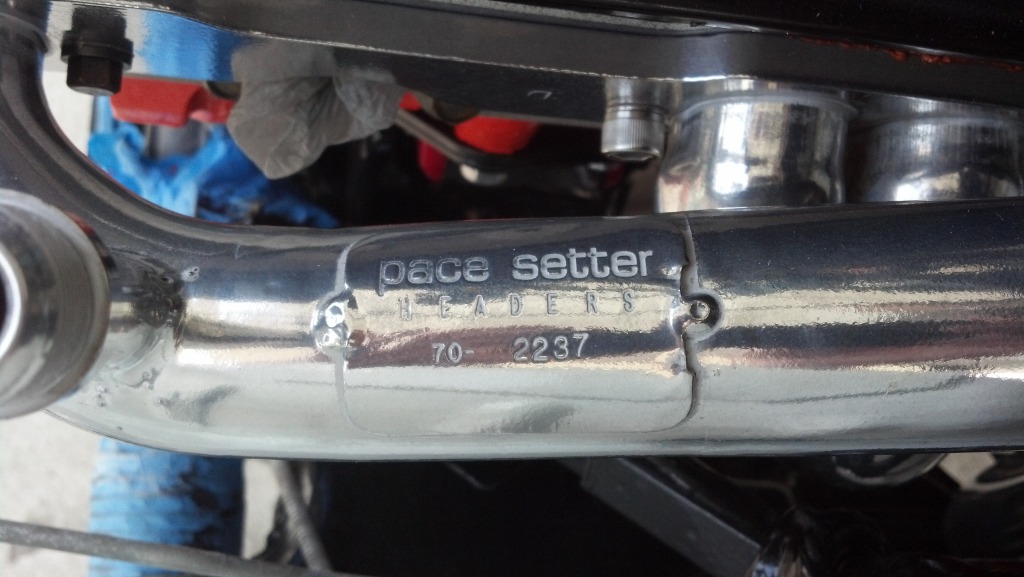
I got the Pacesetter Headers with Air Injection tubes and EGR pipe connection, although I have deleted the air injection system. I need to find caps to fit the Air Injection tubes to seal them off...anybody have any suggestions???
Energy Suspension Poly Motor Mounts Passenger Side
Energy Suspension Poly Motor Mounts Drivers Side
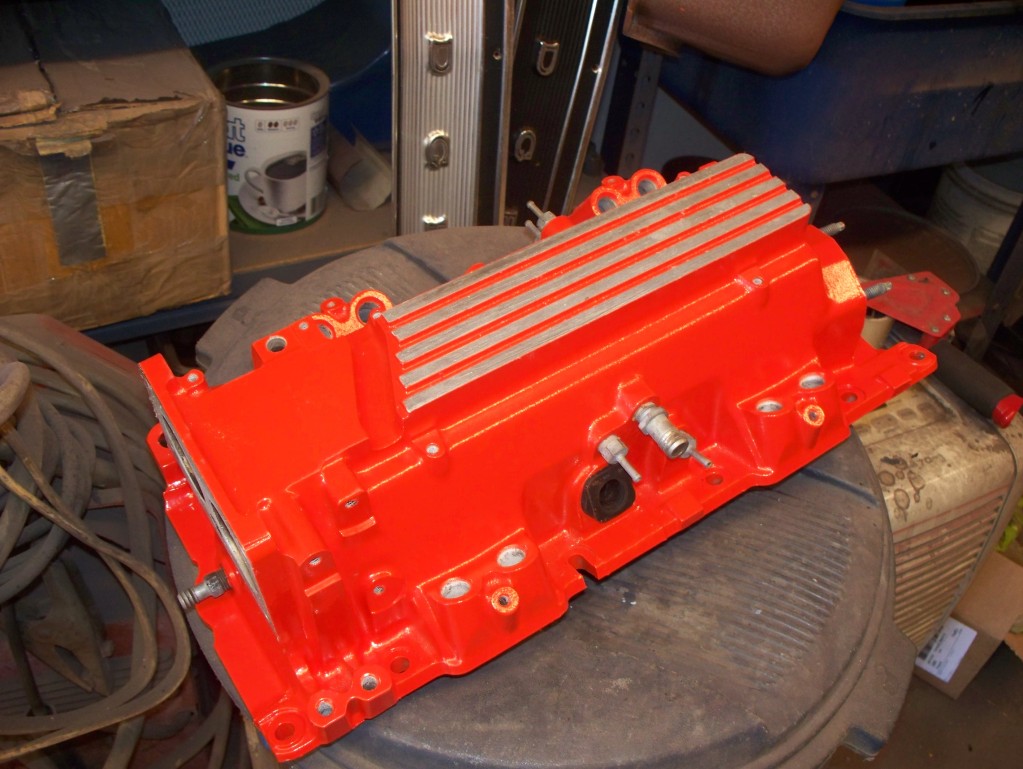
Powdercoated the Intake manifold Orange. Have full set of Polished Stainless Hex Head Bolts for it as well.
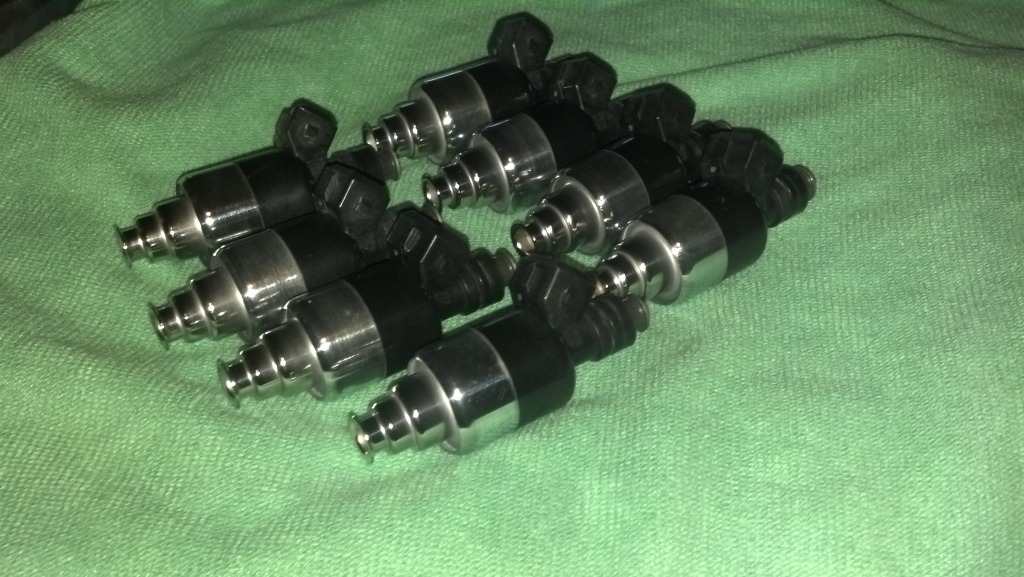
I polished the Fuel Injectors by hand and sent them off to InjectorRX and had them cleaned and flow matched.
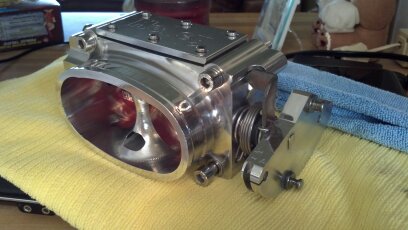
Holley 52mm Throttle body polished by hand.
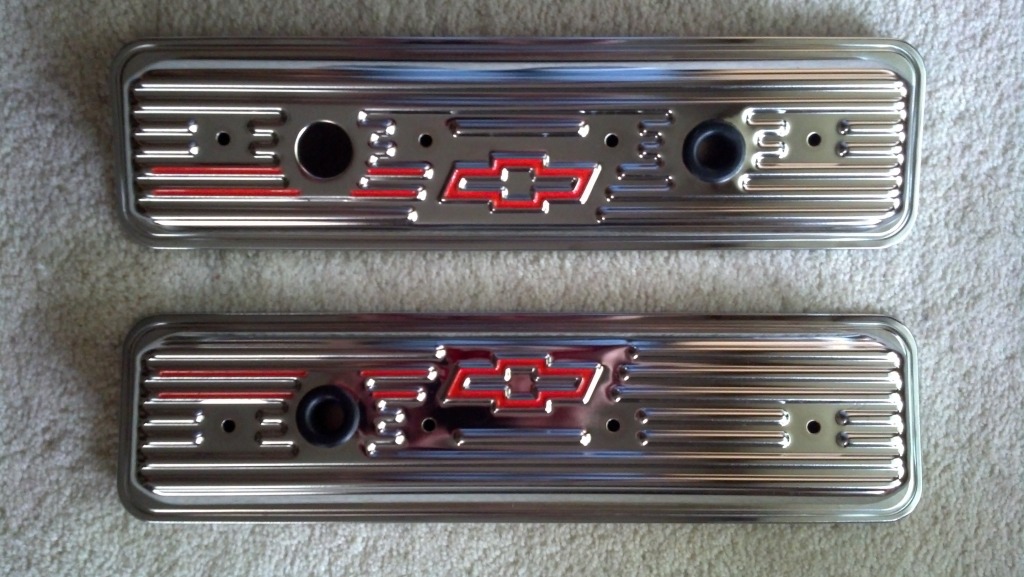
Proform Valve Covers tapped off red painted areas and painted Orange to match scheme of car.
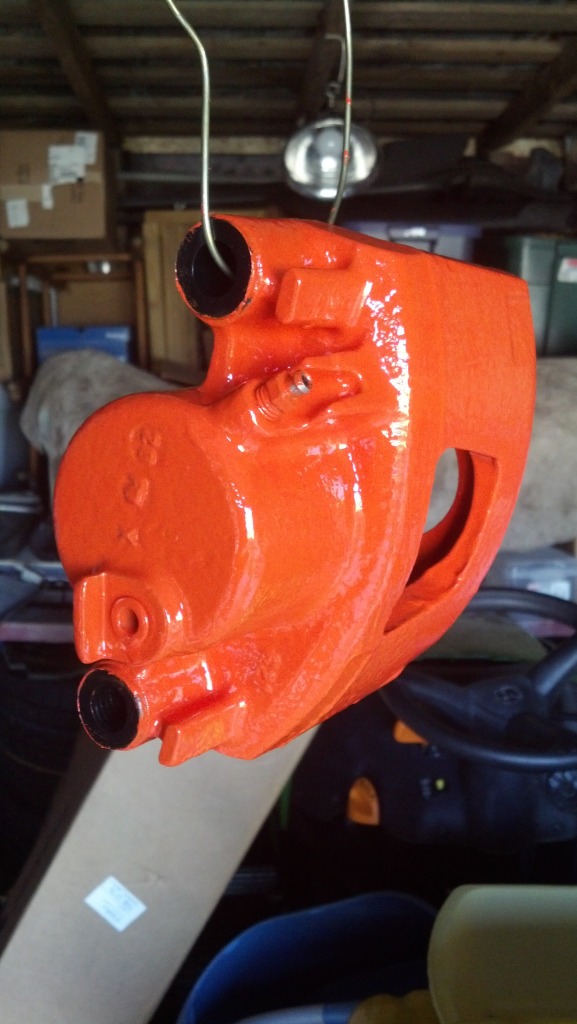
High Temp POR-15 orange on new Front Calipers.
Dave

I ruined a waterpump shaft seal in the timing cover while installing it, knew it was gonna happen as the WP coupler is attached to the shaft...I gotta figure out how to get it off and install new seal. Powdercoated the Timing Cover. Polished Stainless Hex Heads.

Powdercoated the oil pan, installed with Polished Stainless Hex Heads.

I got the Pacesetter Headers with Air Injection tubes and EGR pipe connection, although I have deleted the air injection system. I need to find caps to fit the Air Injection tubes to seal them off...anybody have any suggestions???

Energy Suspension Poly Motor Mounts Passenger Side

Energy Suspension Poly Motor Mounts Drivers Side

Powdercoated the Intake manifold Orange. Have full set of Polished Stainless Hex Head Bolts for it as well.

I polished the Fuel Injectors by hand and sent them off to InjectorRX and had them cleaned and flow matched.

Holley 52mm Throttle body polished by hand.

Proform Valve Covers tapped off red painted areas and painted Orange to match scheme of car.

High Temp POR-15 orange on new Front Calipers.
Dave
Last edited by 97Z4CZ28; 06-13-2013 at 12:45 PM.
10-18-2012, 06:34 PM
#7
Registered User

Join Date: Oct 2012
Posts: 12
Re: My 97 Z4C project...A Work in Progress
Im extremely jealous. I hope to see some videos of this bad boy.
I like that your painting everything. Saves you from rust! I honestly dont understand why this isnt done at the factory.
I like that your painting everything. Saves you from rust! I honestly dont understand why this isnt done at the factory.
10-23-2012, 08:31 PM
#8
Registered User
Thread Starter
Join Date: Dec 2011
Location: Tollesboro, KY
Posts: 178
Re: My 97 Z4C project...A Work in Progress
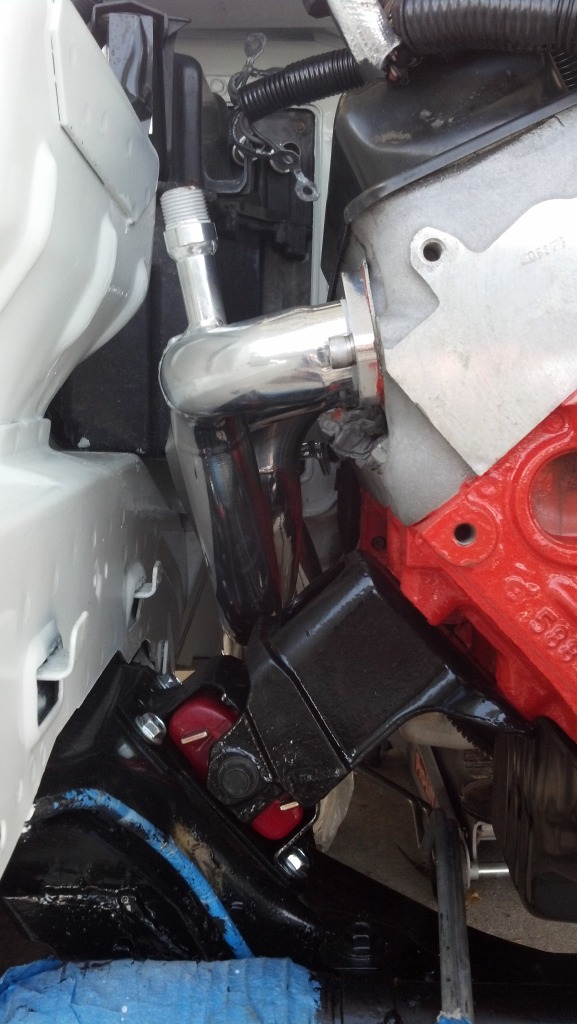
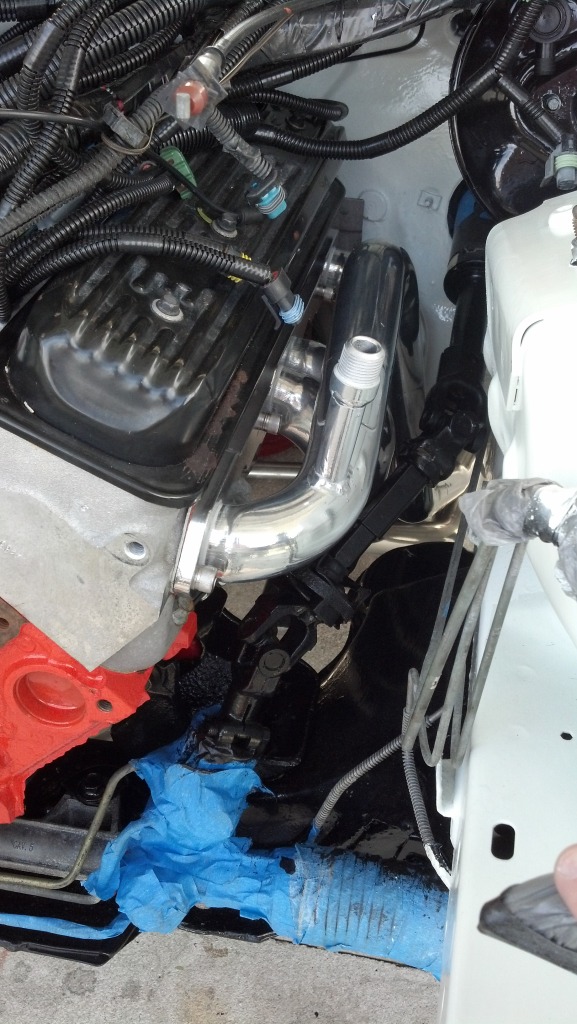
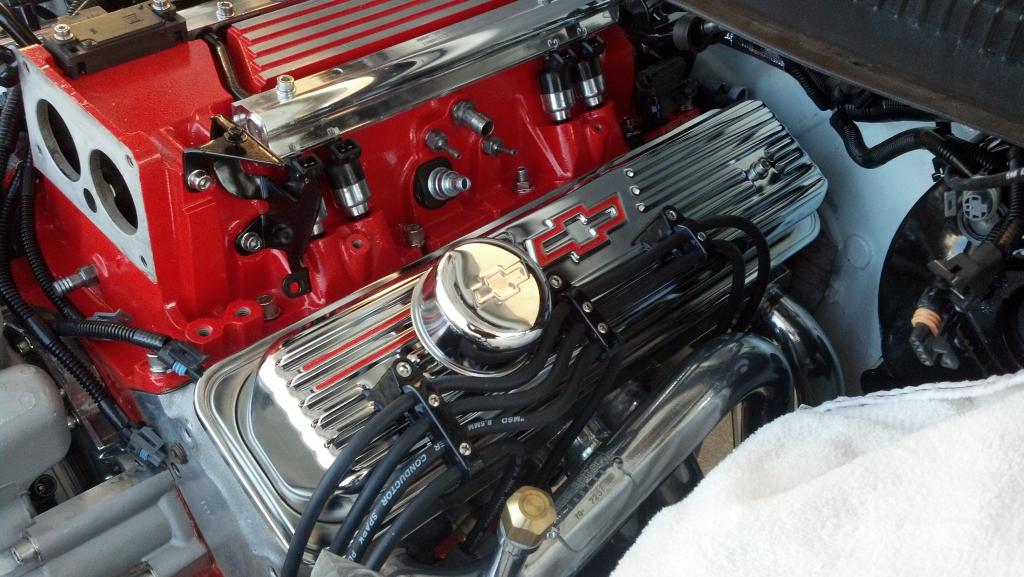
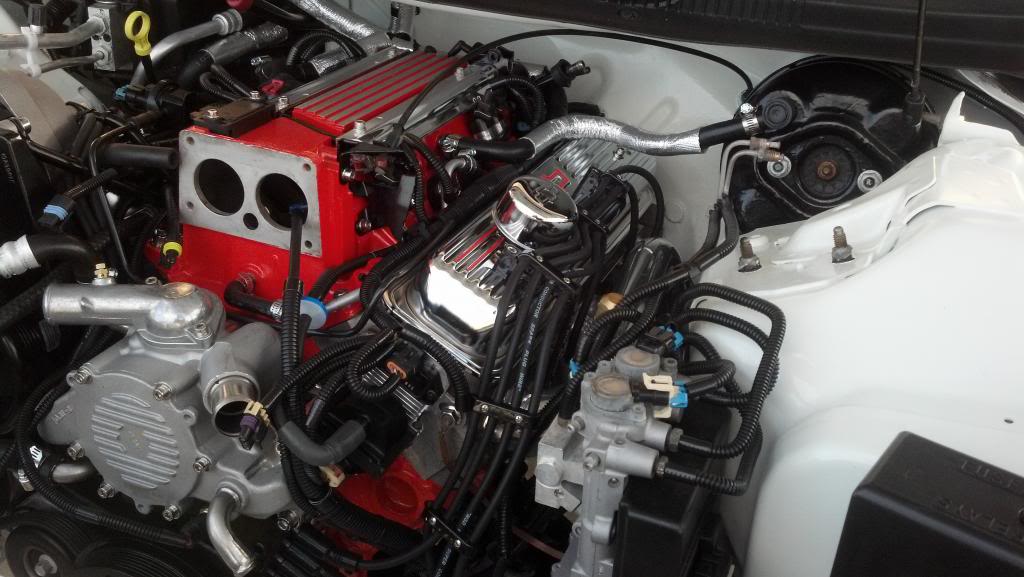
Well she is beginning to look like an Engine again! Found some brass caps to cap off Air Injection pipes on headers, don't think they look to bad and they should hold up pretty good I think. Installed EGR pipe to pass side header...another royal pain in the A$$. Hooking up to the Intake was no issue at all. bent pipe out and away from back side of intake as well. Installed Intake, and new Valve Covers with OVTC brackets (have pre-cut and assembled 8mm MSD black Super Conductor wires to go on once I mount New Delphi Optispark). Also no pics yet but installed the Y pipe as well, have everything snugged up at the moment, got to get another band clamp for where I cut Exhaust. Ordered new heated O2 sensors to mount in headers as well. Gonna make a heat shield for drivers side to help protect fuel lines. I am installing braided stainless fuel lines with stock style disconnects, rerouting fuel lines in behind brake booster. Will be routing the wiring harness soon as well. Hope to get some more stuff done tomorrow before going to work since weather has been awesome last few days. Few Pics of how its beginning to look. More as I get more stuff done...just need time now!
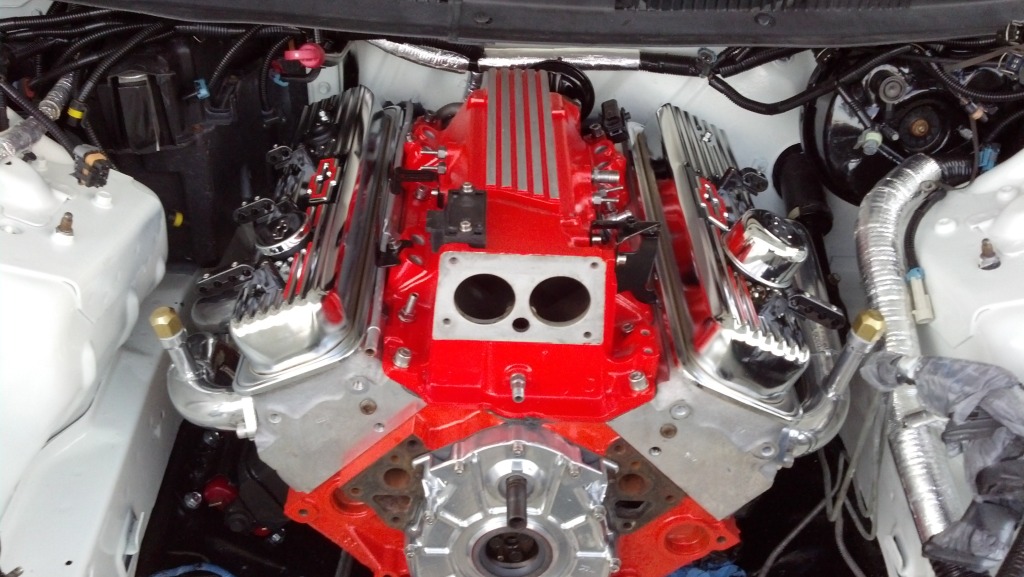
Intake looks red in some pics but it IS Chevy Orange!
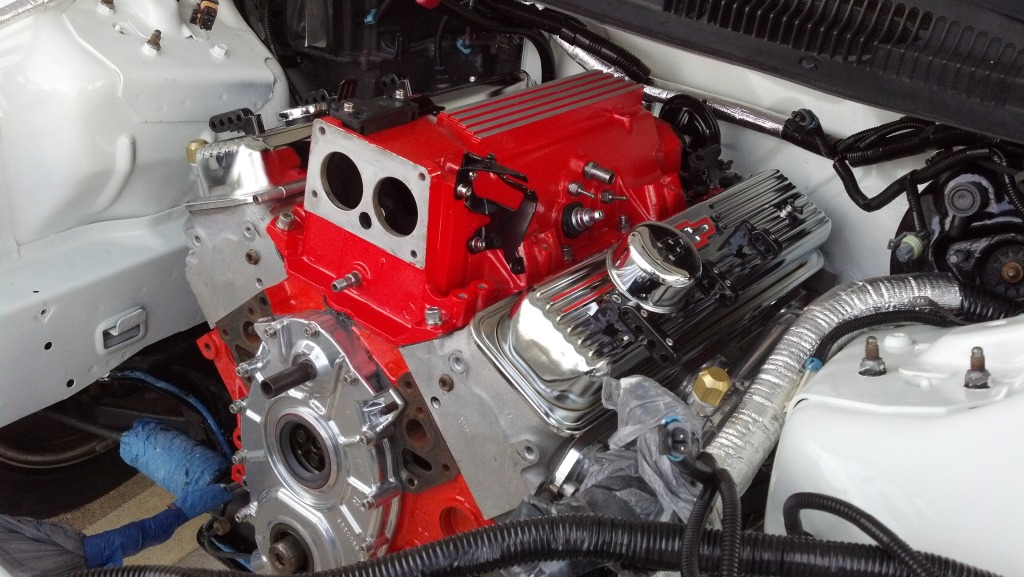
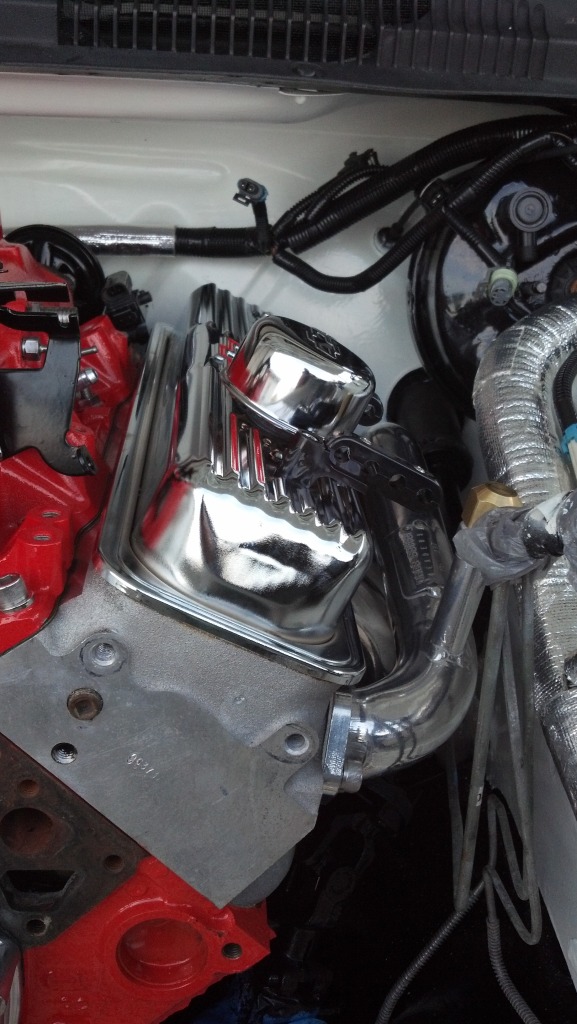
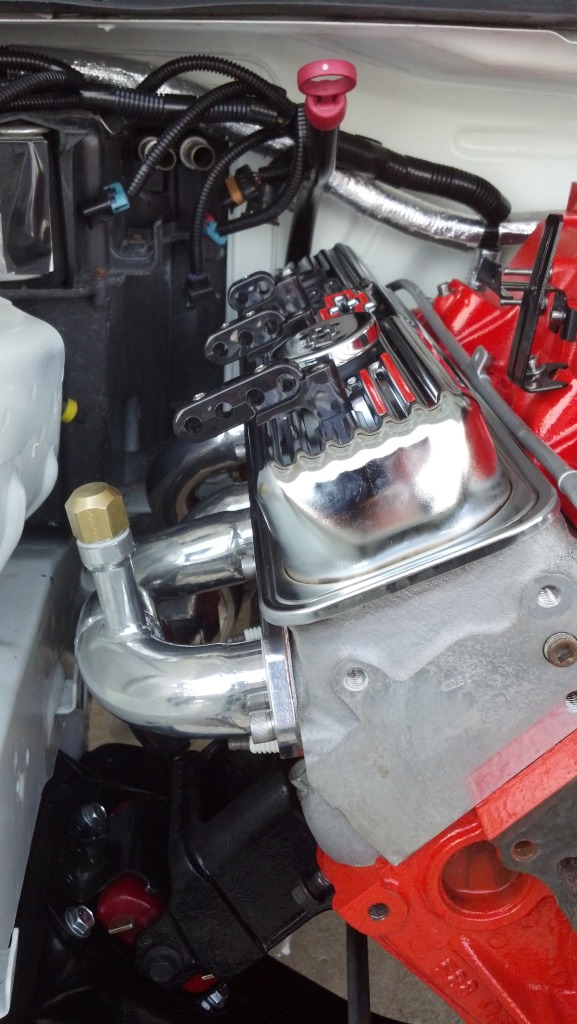
Note the Brass Caps installed on Air Injection pipe on header. Also not the OVTC brackets by Smoothie, these things are great!
Dave

Intake looks red in some pics but it IS Chevy Orange!


Note the Brass Caps installed on Air Injection pipe on header. Also not the OVTC brackets by Smoothie, these things are great!
Dave
Last edited by 97Z4CZ28; 06-13-2013 at 12:51 PM.
11-11-2012, 09:33 AM
#9
Registered User
Thread Starter
Join Date: Dec 2011
Location: Tollesboro, KY
Posts: 178
New update
Finally got a day to do some more work on the engine bay done. Just need a few good days and I will be close to being ready to fire her up!
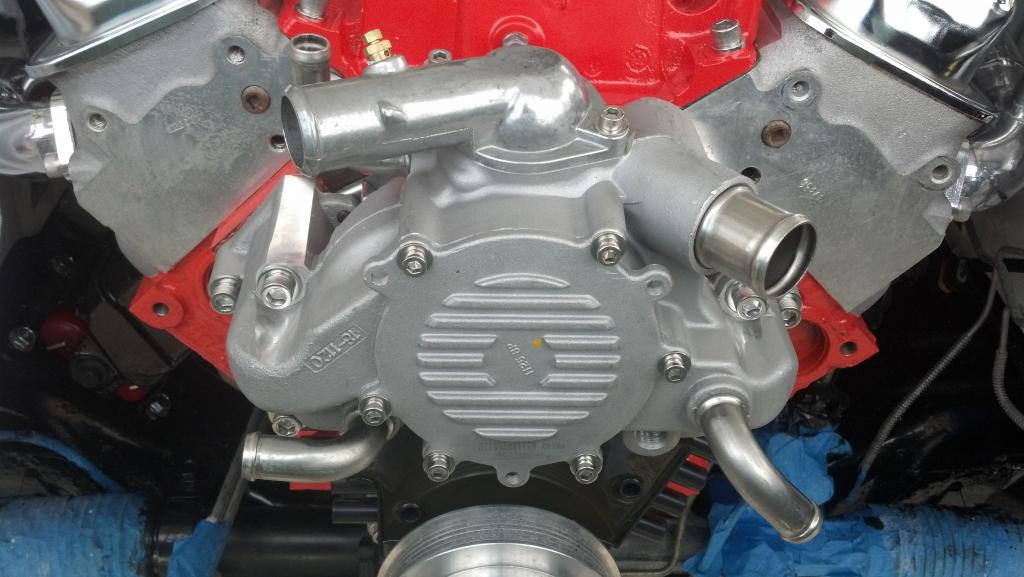
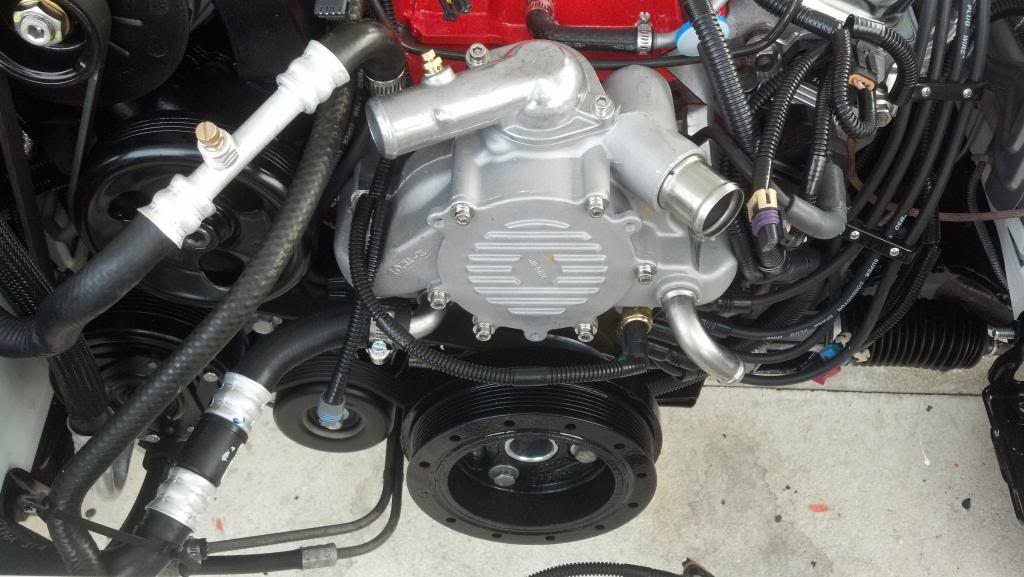
New AC Delco Waterpump with 160 degree Thermostat
Hub and Underdrive pulley installed, not bolted down yet.

Passenger Side MSD 8.5mm Superconductor Over the Valve Cover Spark Plug Wires with Smoothie brackets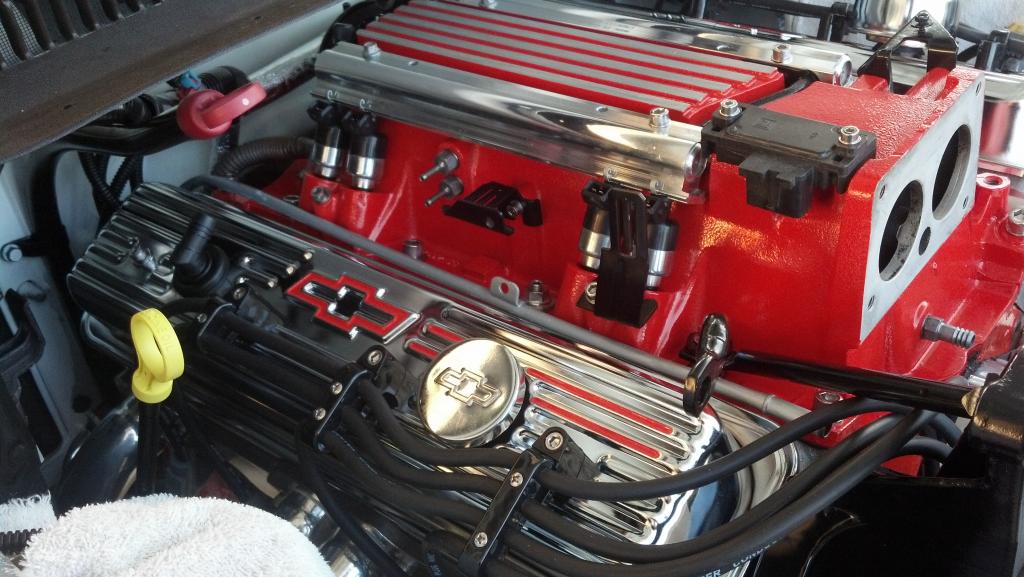
Drivers Side MSD 8.5mm Superconductor Over the Valve Cover Spark Plug Wires with Smoothie brackets
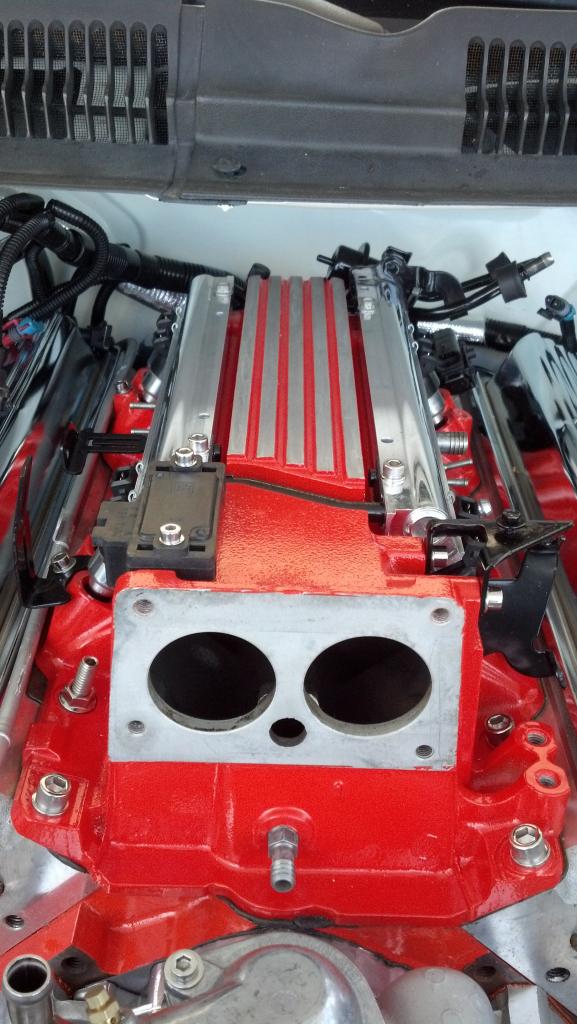
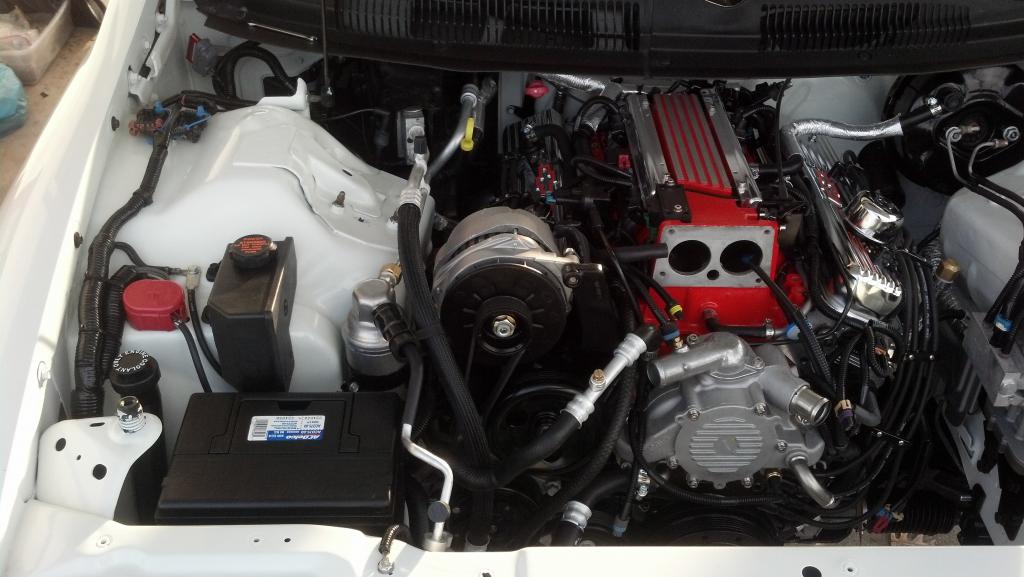
View of Engine prior to installing Altenator
Powdercoated Accessory Bracket with new AC Delco Belt Tensioner
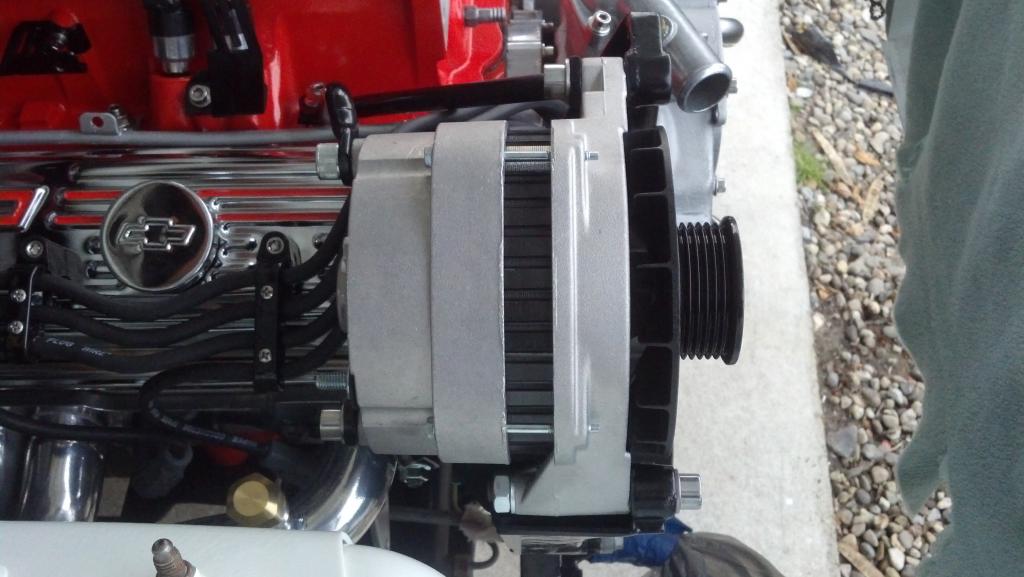
New AC Delco 140 Amp Alternator installed
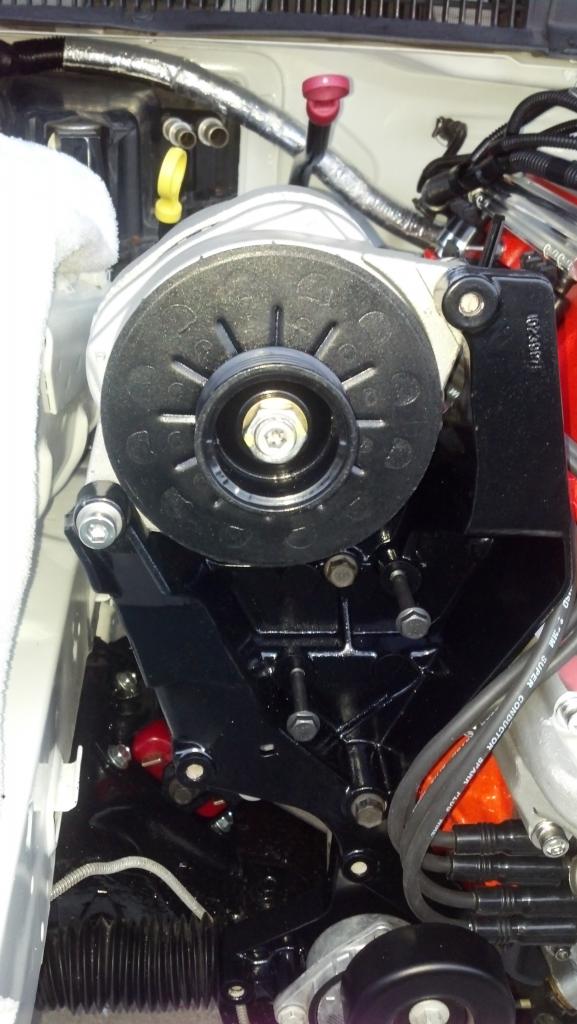
View of Altenator with powdercoated brackets
Fuel rails polished and lines painted black with New AC Delco Schrader Valve and cap installed
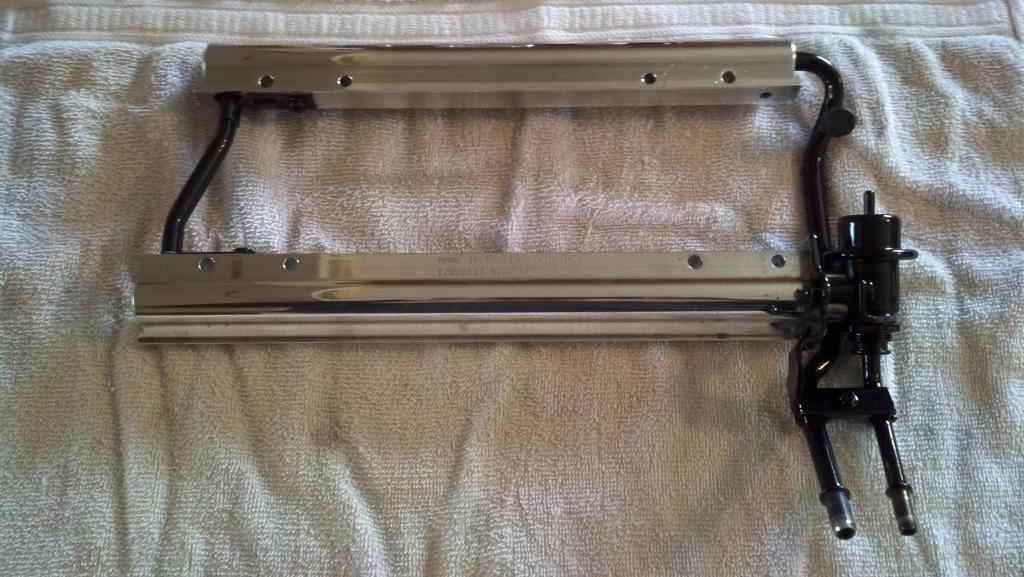
Fuel Rails installed on intake. Fuel Injectors were ultrasonically cleaned, new filter baskets, O-Rings and collars, and flow matched.
Stay tuned hope to have more accomplished weather and time permitting!
Dave
New AC Delco Waterpump with 160 degree Thermostat

Hub and Underdrive pulley installed, not bolted down yet.

Passenger Side MSD 8.5mm Superconductor Over the Valve Cover Spark Plug Wires with Smoothie brackets

Drivers Side MSD 8.5mm Superconductor Over the Valve Cover Spark Plug Wires with Smoothie brackets

View of Engine prior to installing Altenator

Powdercoated Accessory Bracket with new AC Delco Belt Tensioner

New AC Delco 140 Amp Alternator installed

View of Altenator with powdercoated brackets

Fuel rails polished and lines painted black with New AC Delco Schrader Valve and cap installed

Fuel Rails installed on intake. Fuel Injectors were ultrasonically cleaned, new filter baskets, O-Rings and collars, and flow matched.

Stay tuned hope to have more accomplished weather and time permitting!
Dave
Last edited by 97Z4CZ28; 06-13-2013 at 12:58 PM.
 11-17-2012, 08:28 AM
#13
Registered User
Thread Starter
Join Date: Dec 2011
Location: Tollesboro, KY
Posts: 178
12-21-2012, 09:44 AM
#14
Registered User
Thread Starter
Join Date: Dec 2011
Location: Tollesboro, KY
Posts: 178
As of Early December...
Ok got a lot more accomplished now and am close to having her ready to fire up soon I hope! With weather holidays and work no time to play. Was able to route wiring harness so that it did not have to interfere with intake manifold or valve covers, I think it looks cleaner this way. ALL I lack as of now is to finish installing shrouds, condensor, radiator, all applicable hoses, install Master Cylinder, fluids (steering, brake, and radiator), install stainless braided fuel lines, drain old fuel, install new fuel filter, install PCM, hook up Positive cable and see what happens! Doesn't sound like a lot but no time means nothing done, which in turn leaves me frustrated to the max., not to mention I am closing on a house next week as well, so more fun begins! The good thing IS I will finally have her garaged and will be able to work and not have to worry about putting everything away! And NO elements to detour me from working on her!!! So a few pics of where she was at this time. Hope everyone has a very Merry Christmas!
Dave
ABS Module Installed only lacking Master Cylinder installed. Coil installed as well.
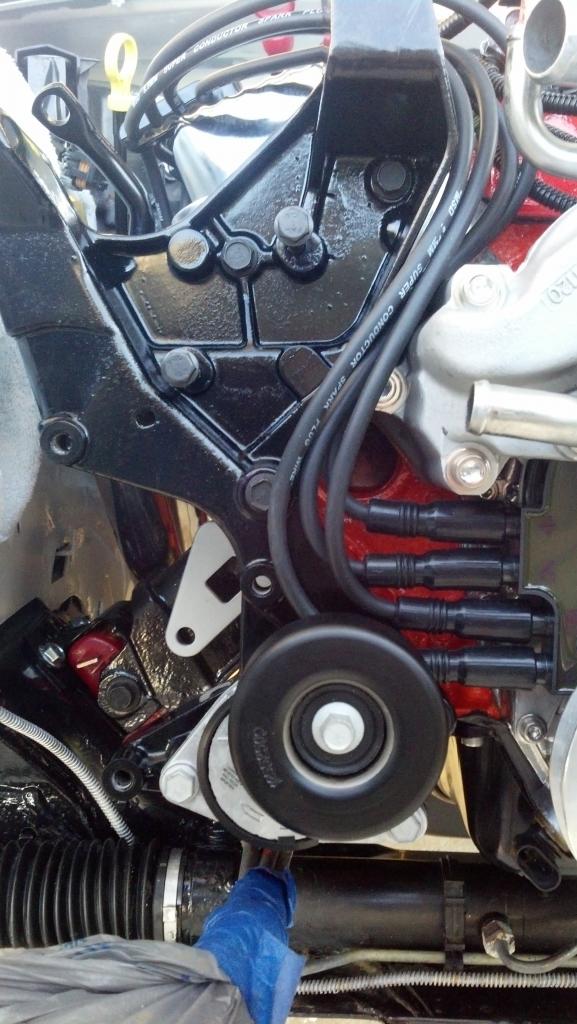
LT4 Damper installed onto UD pulley. All Accessories mounted as well including new AC Delco Starter.
Wiring harness completely ran on drivers side of engine bay.
Wiring harness completely ran on Passenger side except to PCM which is not installed yet. All new AC Delco AC lines, dryer installed. New AC Delco Battery installed new AC Delco cables run, POS cable not hooked up yet and battery is hooked up to a battery tender to keep charged.
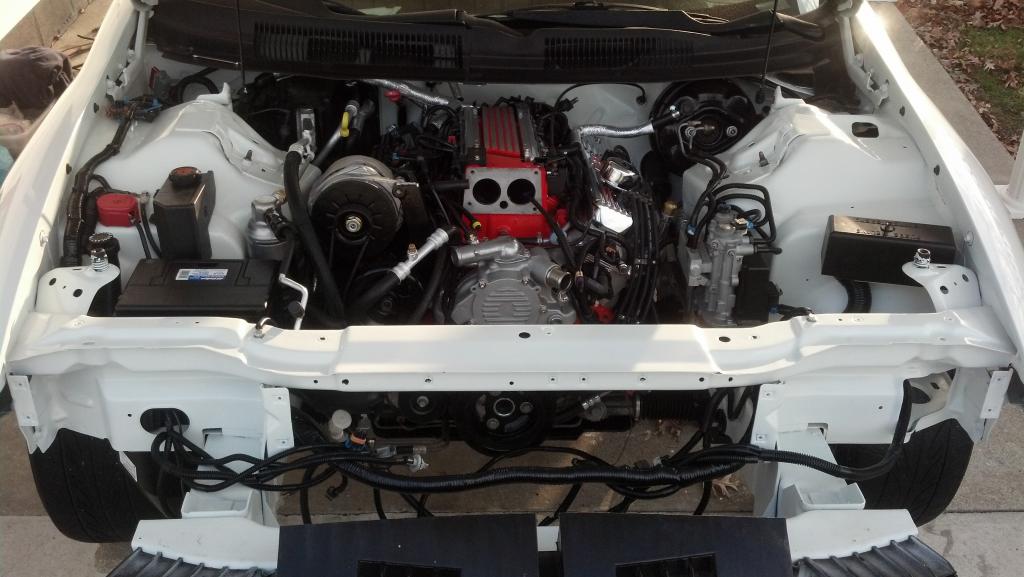
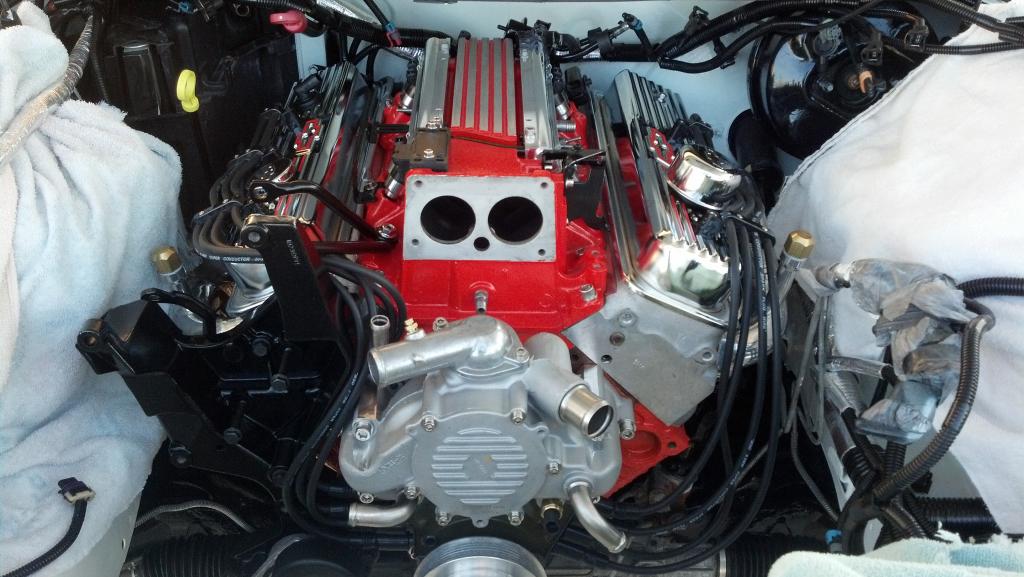
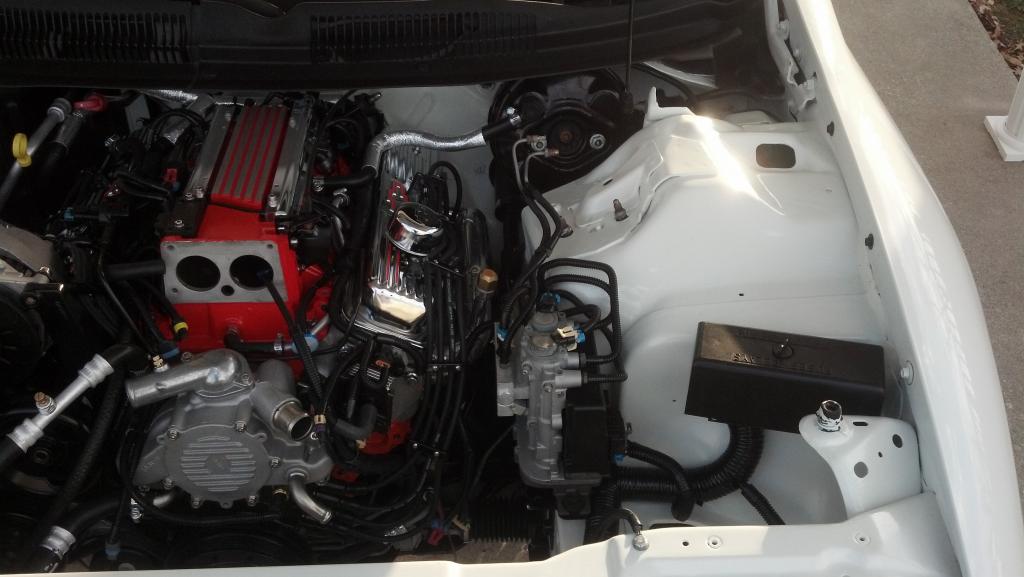
Front view of how it looked at this point.
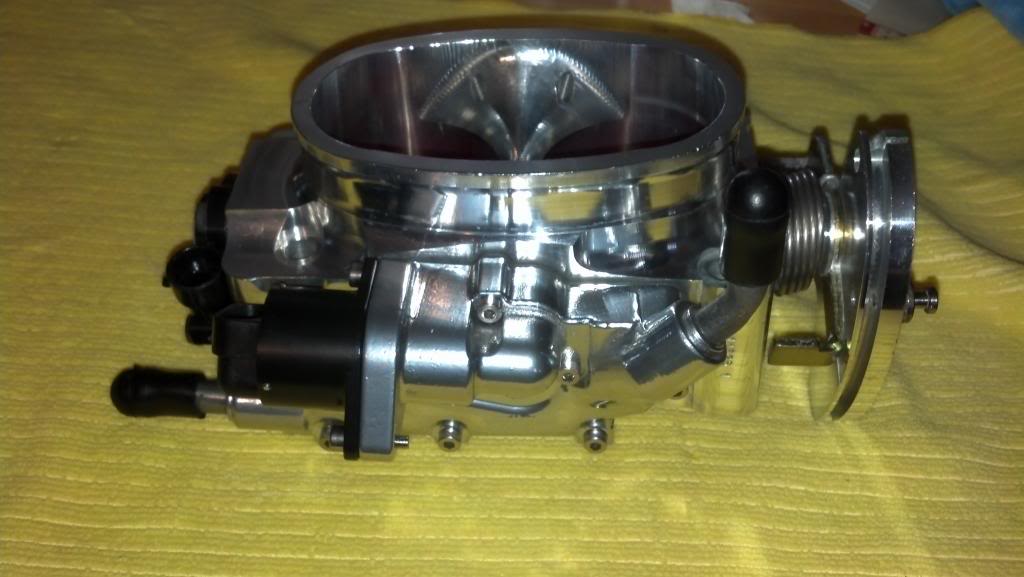
Bottom view of Holley 52mm Throttle Body with bottom powdercoated and new AC Delco sensors installed.
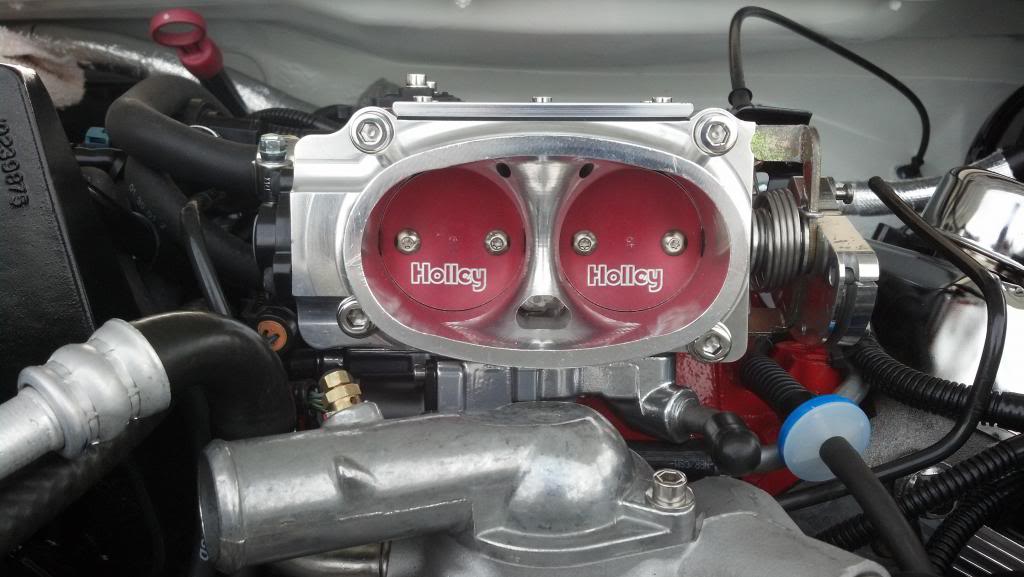
Holley 52mm Throttle Body installed front view.
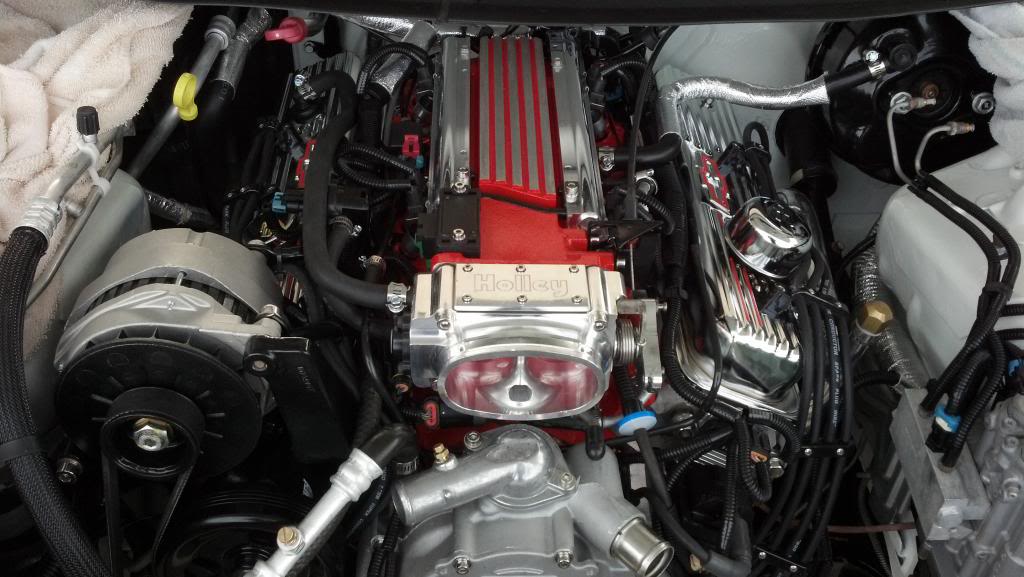
View from above of engine with TB mounted. All sensors are plugged in and wiring routed. All accessories mounted as well and new Serpentine belt is also installed.
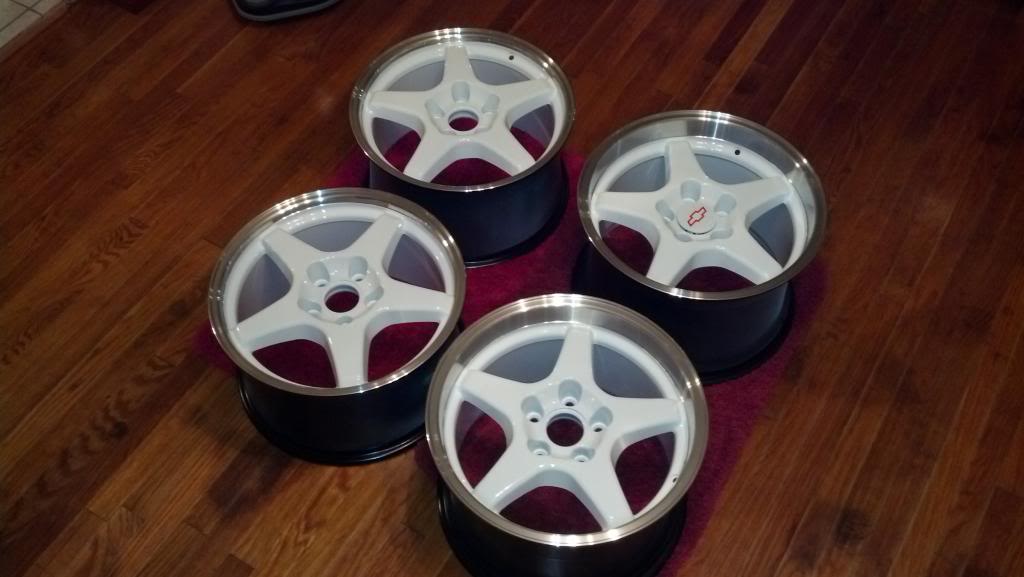
Deep dish OE ZR1 style wheels painted Artic White to match the car. 17 X 11 rears and 17 X 9.5 fronts. Nitto 555s to be mounted soon. I had the inside of the rims painted completely to the rear of the wheels as well, well worth what I paid to have them done!
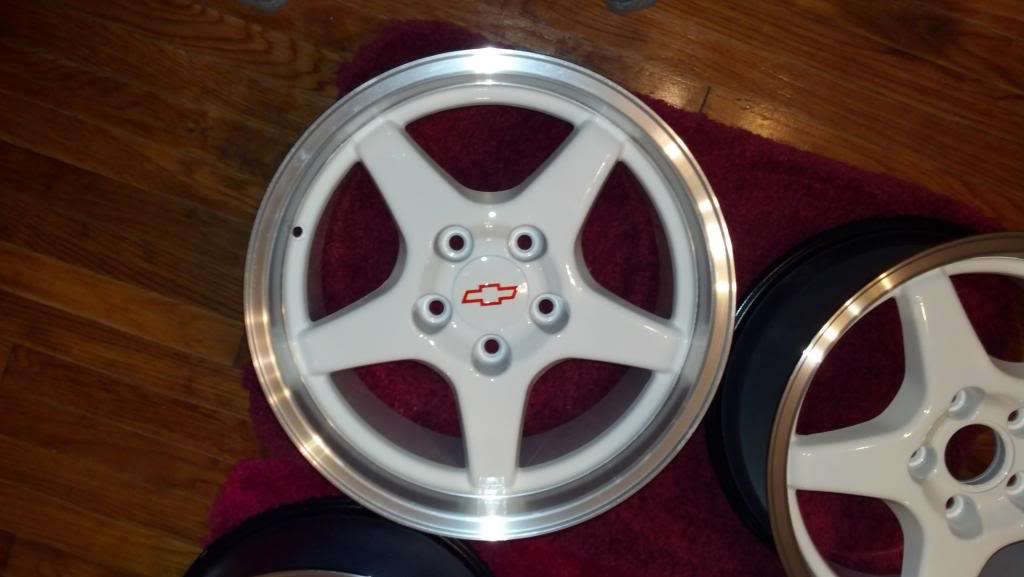
Smooth Center Caps painted at same time with vinyl Chevy bowtie I had made to fit clearcoated on. These are gonna look great with Orange rotors, Zinc chromate drilled slotted rotors.
Dave

ABS Module Installed only lacking Master Cylinder installed. Coil installed as well.

LT4 Damper installed onto UD pulley. All Accessories mounted as well including new AC Delco Starter.

Wiring harness completely ran on drivers side of engine bay.

Wiring harness completely ran on Passenger side except to PCM which is not installed yet. All new AC Delco AC lines, dryer installed. New AC Delco Battery installed new AC Delco cables run, POS cable not hooked up yet and battery is hooked up to a battery tender to keep charged.

Front view of how it looked at this point.

Bottom view of Holley 52mm Throttle Body with bottom powdercoated and new AC Delco sensors installed.

Holley 52mm Throttle Body installed front view.

View from above of engine with TB mounted. All sensors are plugged in and wiring routed. All accessories mounted as well and new Serpentine belt is also installed.

Deep dish OE ZR1 style wheels painted Artic White to match the car. 17 X 11 rears and 17 X 9.5 fronts. Nitto 555s to be mounted soon. I had the inside of the rims painted completely to the rear of the wheels as well, well worth what I paid to have them done!

Smooth Center Caps painted at same time with vinyl Chevy bowtie I had made to fit clearcoated on. These are gonna look great with Orange rotors, Zinc chromate drilled slotted rotors.
Last edited by 97Z4CZ28; 06-13-2013 at 01:16 PM.